Dusty Rose Babydoll Crochet Dress Free Pattern
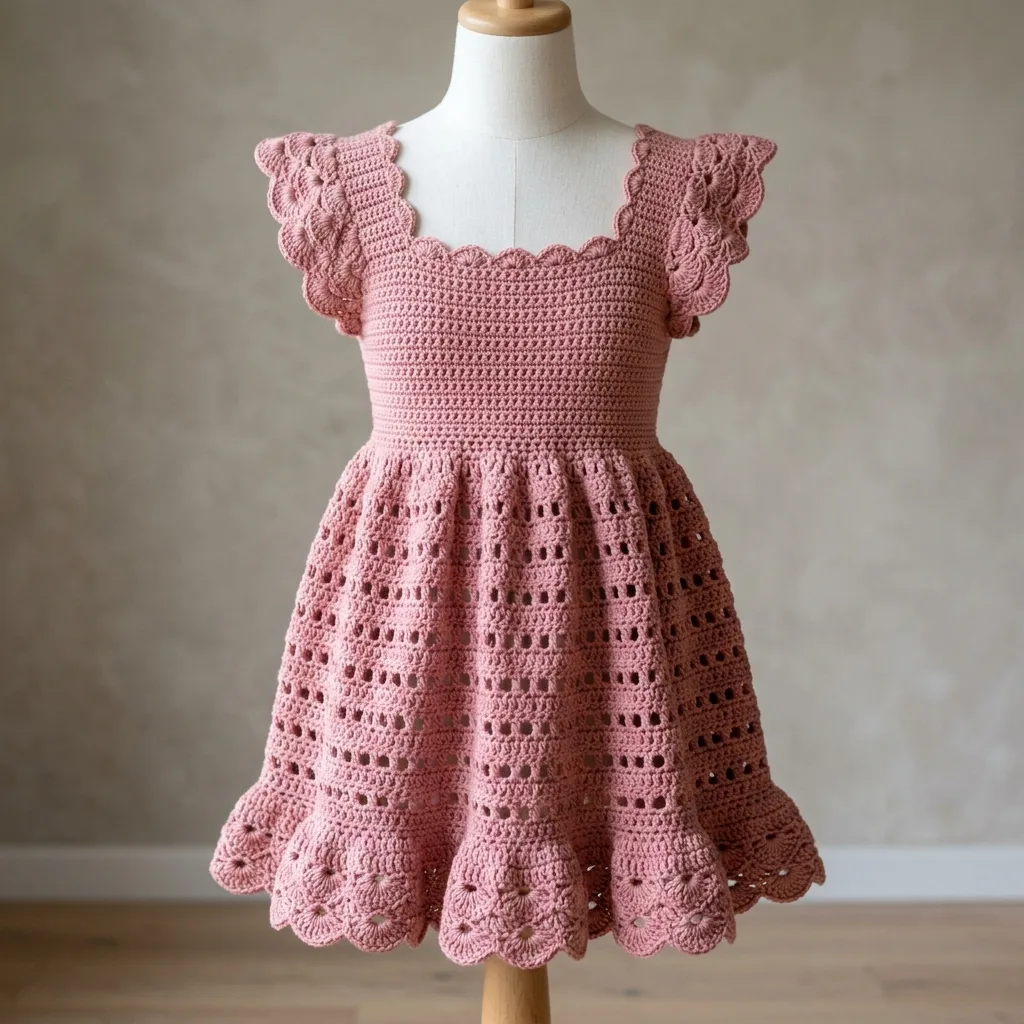
This is a top-down girls dress with a fitted bodice, flutter sleeves, and a lace skirt. It uses single crochet for the bodice and a grid-and-eyelet pattern for the skirt. The scalloped edges and fan-shell hem give it that vintage handmade look without requiring advanced skills.
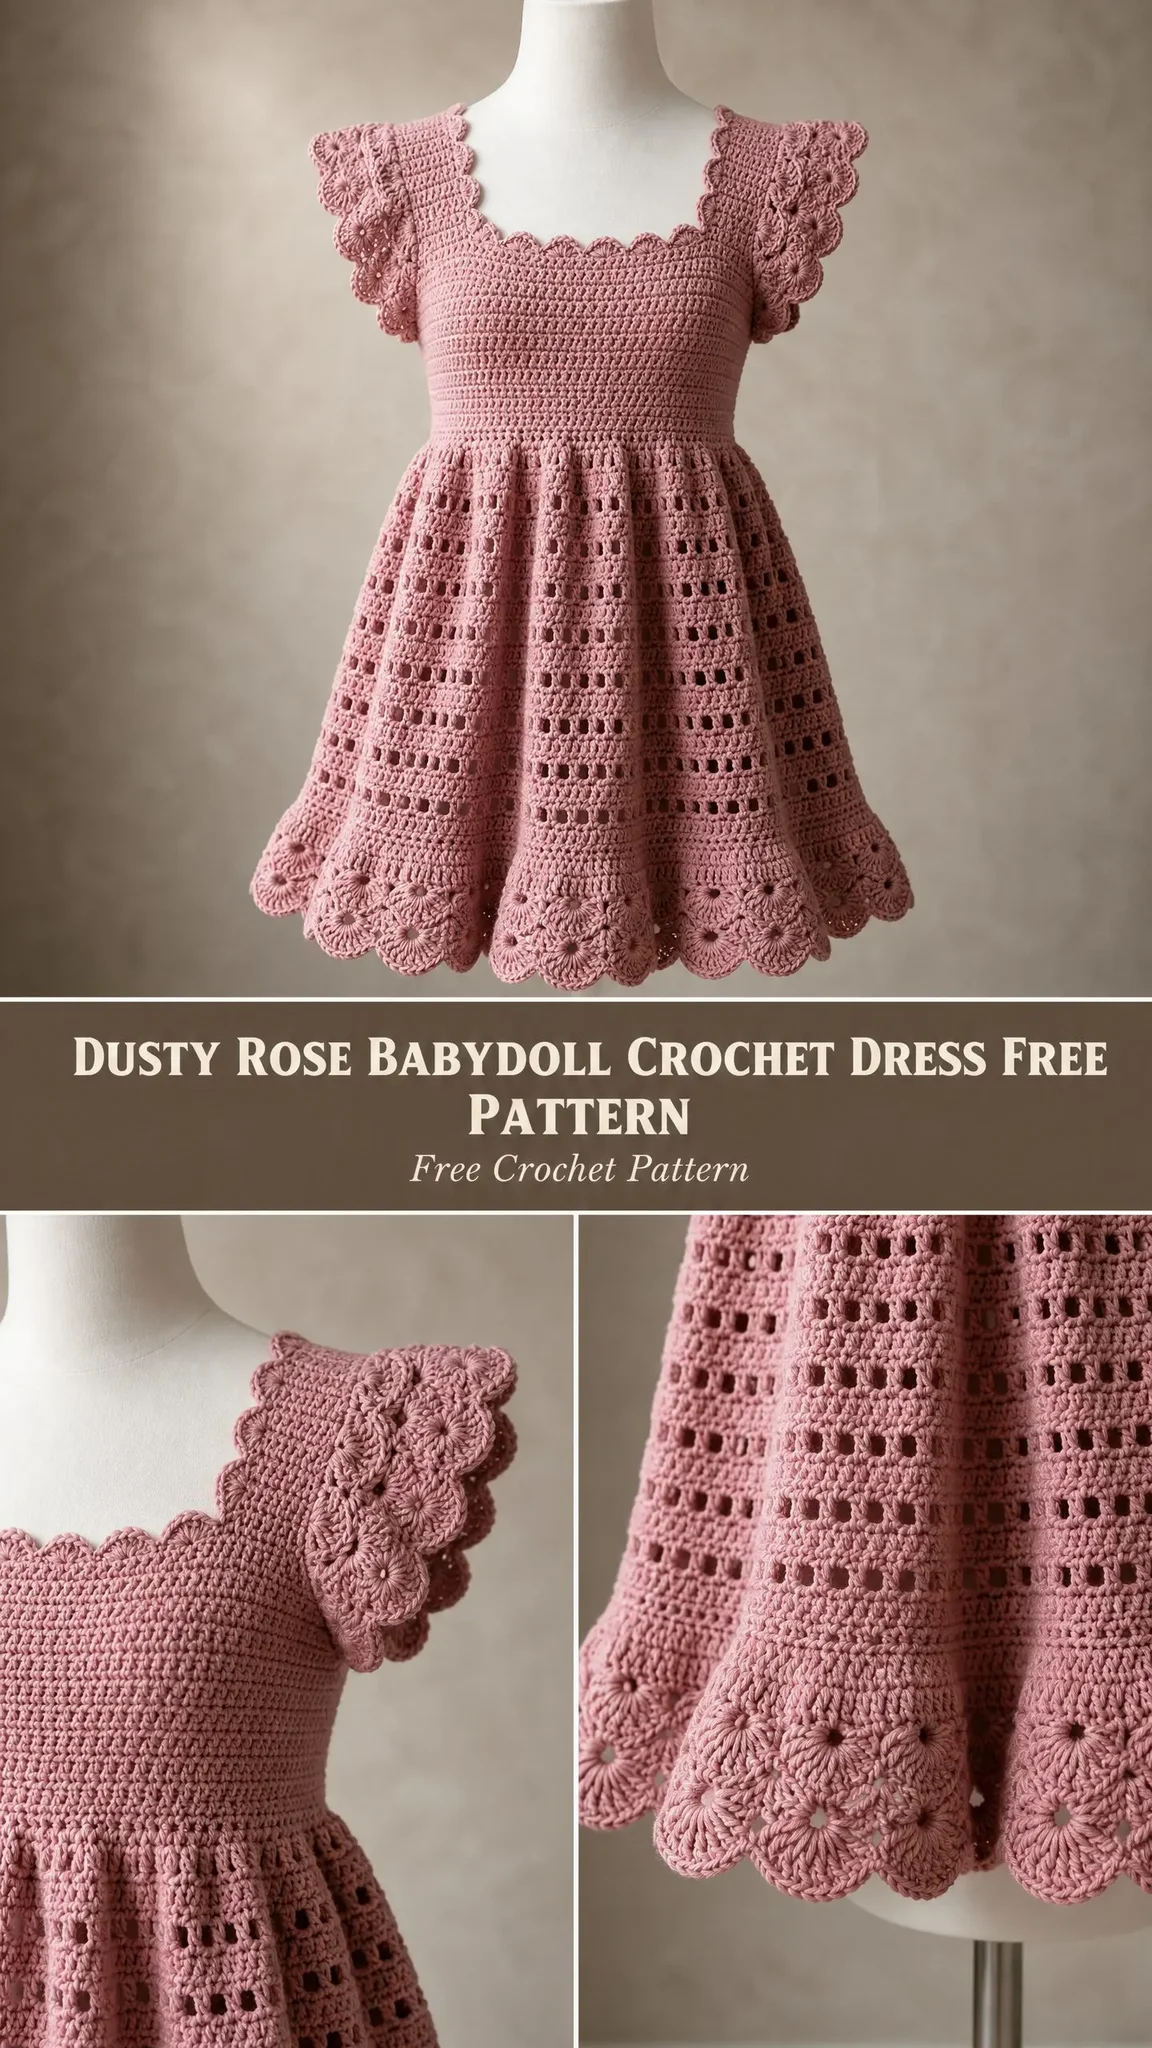
I sized this pattern for ages 2 through 8, so you can make it for toddlers or bigger kids. The construction is straightforward once you get the hang of working in the round after joining the bodice panels.
If you can single crochet, double crochet, and count your stitches carefully, you can make this dress. The lace portion looks intricate but it is really just a simple repeat of chains and skipped stitches.
Why This Dress Works So Well
The dusty rose color hits that sweet spot between pink and mauve. It photographs beautifully for special occasions but also works for everyday wear. The cotton yarn keeps the dress breathable and comfortable even in warmer weather.
What I love most about this construction is how the bodice provides structure while the skirt flows freely. The waist shaping creates a flattering silhouette without any elastic or gathering at the top. Everything is worked in one piece from the neckline down, so you have minimal seaming to worry about.
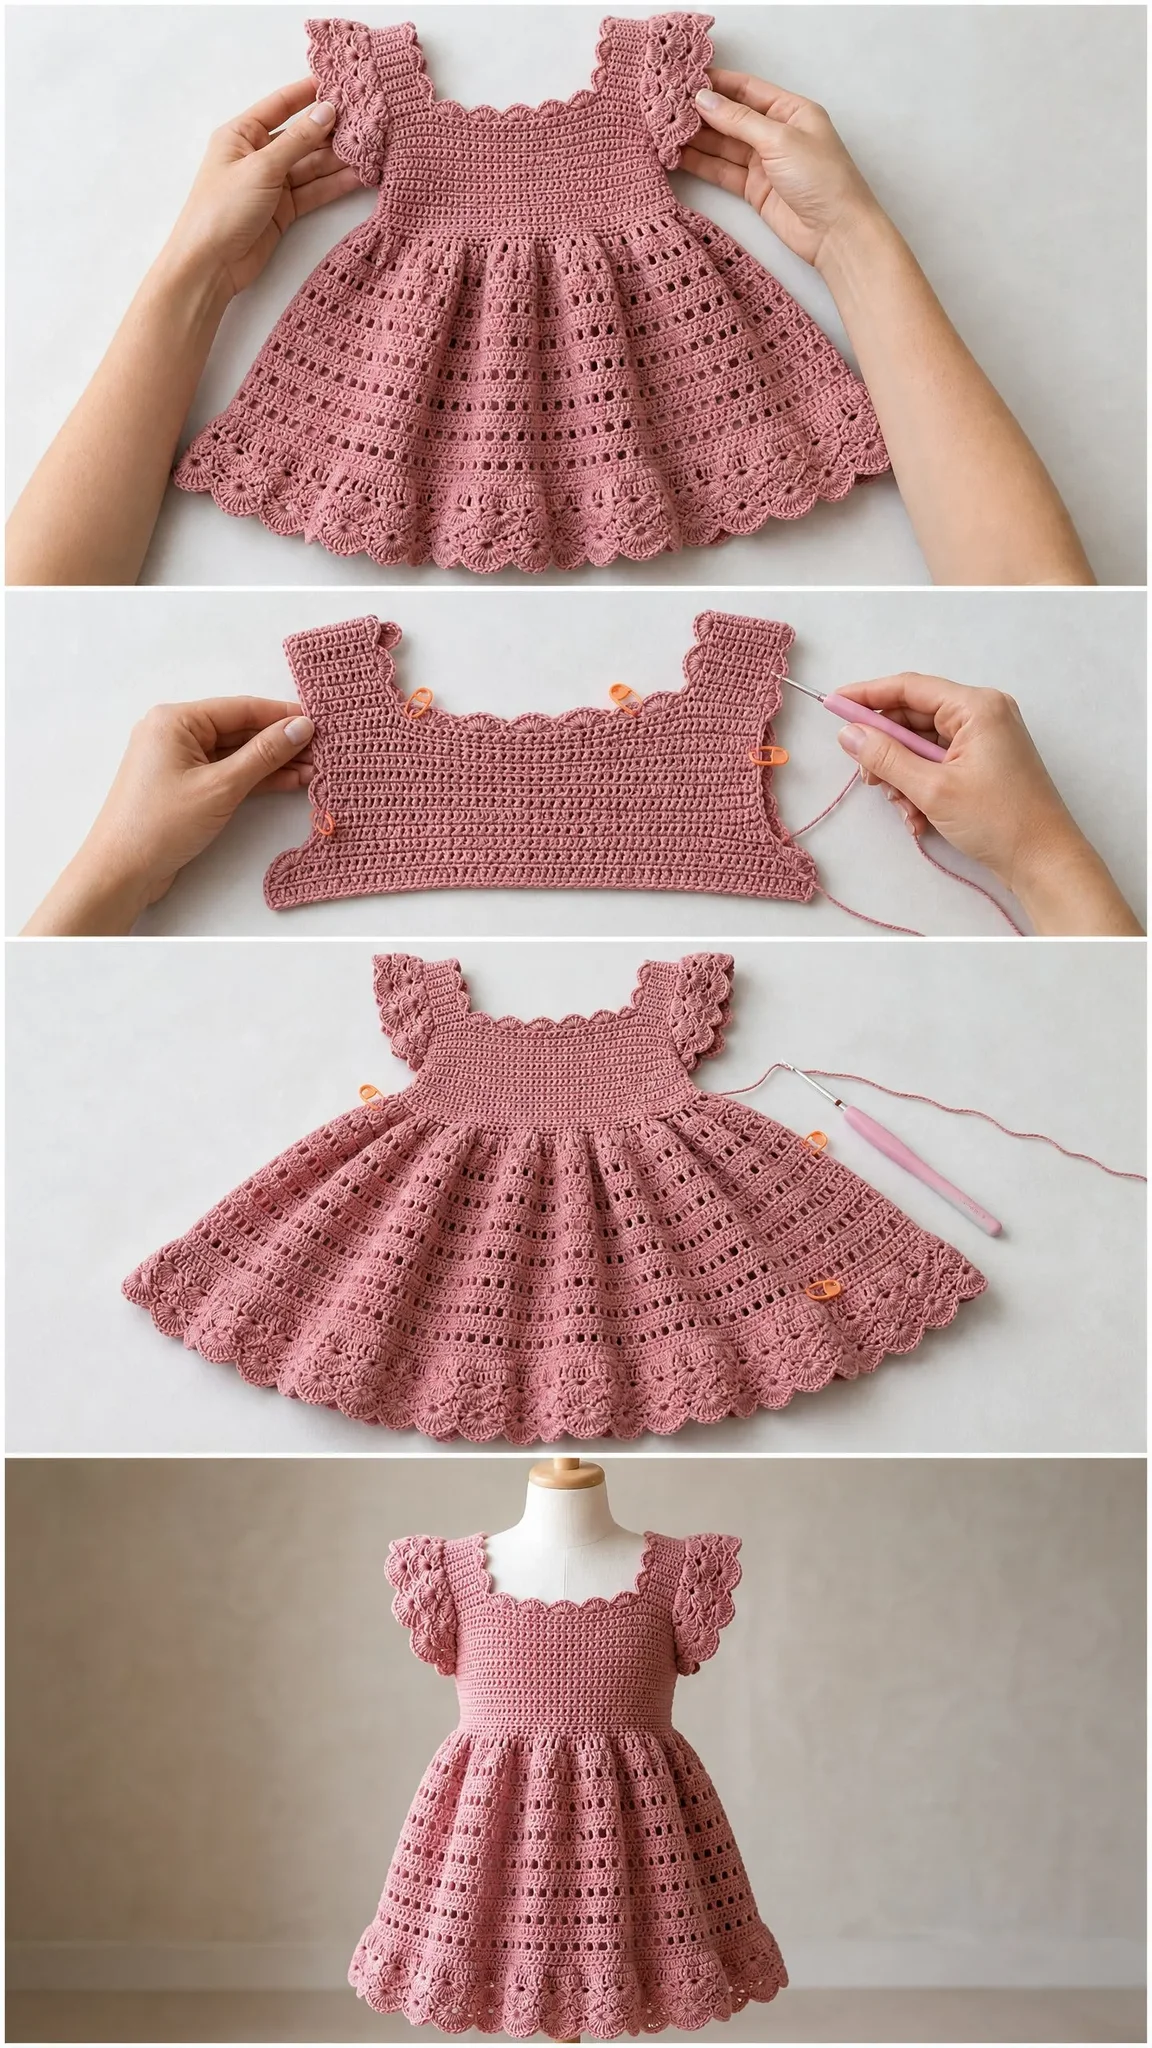
The flutter sleeves are the only separate pieces. You work them flat, gather them up, and sew them on. They add that feminine touch without being fussy or restrictive for active little ones.
Skill Level
This pattern is rated intermediate. You need to be comfortable working in the round, tracking stitch counts across shaping rows, and executing a fan-shell edging. No advanced techniques are required, but precision in stitch counts is critical throughout the lace skirt section.
If you have made a few hats or simple garments, you are ready for this project. Take your time with the counting and you will be fine.
Time to Complete
Plan for approximately 12 to 18 hours depending on which size you choose and your experience level. The bodice works up quickly in dense single crochet. The skirt takes longer because of the repeated panels and the detailed hem border.
Finished Measurements
Size Small fits ages 2 to 3, chest 20 to 21 inches (51 to 53 cm), dress length approximately 14 inches (35.5 cm).
Size Medium fits ages 4 to 5, chest 22 to 23 inches (56 to 58 cm), dress length approximately 16 inches (40.5 cm).
Size Large fits ages 6 to 8, chest 24 to 26 inches (61 to 66 cm), dress length approximately 18 inches (45.5 cm).
All instructions are written for Size Small with Size Medium and Size Large adjustments in parentheses where they differ, in the order Small, Medium, Large.
Materials You Will Need
Yarn: Worsted weight cotton or cotton-blend yarn, approximately 400 (500, 620) yards / 366 (457, 567) meters total. One color throughout.
Hook: US size G-6 / 4.0 mm crochet hook, or size needed to achieve gauge.
Notions: Stitch markers (at least 8), yarn needle for weaving ends, scissors, blocking mat and pins, measuring tape.
Yarn Recommendations
Lion Brand 24/7 Cotton in Dusty Pink is my top choice. This worsted weight, 100% cotton yarn has excellent stitch definition, minimal stretch, and a soft drape ideal for the lace skirt panels. You will need 3 (3, 4) skeins at 186 yards per 100 g skein.
We Are Knitters The Cotton in Rose is another great option. This worsted weight, 100% Egyptian cotton has a slightly heavier hand with a rustic texture that gives the bodice extra body. You will need 3 (4, 4) balls at 153 yards per 200 g ball.
Paintbox Yarns Cotton DK held double works well if you want a softer hand. Use two strands together to achieve worsted gauge. You will need 6 (7, 9) balls at 137 yards per 50 g ball.
Choose a yarn with low elasticity and high stitch definition. Acrylic or acrylic blends will work but may cause the lace skirt openings to close up slightly. Avoid loosely plied yarns that split easily during the dense bodice single crochet rows. Always swatch and wash your swatch before beginning.
Gauge
18 single crochet (sc) x 20 rows = 4 inches / 10 cm in single crochet, blocked.
One 6-stitch fan shell in the hem border = approximately 1.25 inches / 3.2 cm wide.
Gauge is critical for correct fit. If your swatch is too big, go down a hook size. If it is too small, go up a hook size. Do not skip this step for a garment.
Abbreviations
ch = chain (wrap yarn over hook and pull through the loop on your hook to create one chain stitch)
sl st = slip stitch (insert hook, yarn over, pull through both the stitch and the loop on your hook in one motion)
sc = single crochet (insert hook, yarn over, pull up a loop, yarn over, pull through both loops)
hdc = half double crochet (yarn over, insert hook, yarn over, pull up a loop, yarn over, pull through all three loops)
dc = double crochet (yarn over, insert hook, yarn over, pull up a loop, yarn over, pull through two loops, yarn over, pull through remaining two loops)
tr = treble crochet (yarn over twice, insert hook, yarn over, pull up a loop, then yarn over and pull through two loops three times)
sp = space
ch-sp = chain space
sk = skip
st = stitch
sts = stitches
rep = repeat
pm = place marker
yo = yarn over
beg = beginning
rem = remaining
RS = right side
WS = wrong side
rnd = round
tog = together
sc2tog = single crochet two together, which is a decrease (insert hook in first stitch, yarn over, pull up a loop, insert hook in next stitch, yarn over, pull up a loop, yarn over, pull through all three loops on hook)
inc = increase, meaning 2 sc in one stitch
[ ] = work instructions within brackets the number of times stated
Special Stitches
Shell Stitch
Work 5 double crochet (dc) all into the same stitch or space. This creates one shell unit. You will use this in the hem border and neckline edging.
Fan Shell
Work 1 sc in the designated stitch, ch 2, work 5 dc in the same stitch or in a chain space as directed, ch 2, 1 sc in the same stitch or next stitch as directed. The fan shell spans one complete motif unit of the hem.
Scallop Edge
This edging is used along the neckline and armhole edges.
Step 1: Join yarn to edge. Work 1 sc in first stitch.
Step 2: Skip 1 stitch.
Step 3: Work 5 dc in the next stitch.
Step 4: Skip 1 stitch.
Step 5: Work 1 sc in the next stitch.
Step 6: Repeat steps 2 through 5 across or around the edge.
Each scallop unit uses 4 stitches and produces one shell between two sc anchors.
Grid-and-Eyelet Stitch
This stitch creates the open lace pattern visible in the skirt. It is worked in the round. Your stitch count must be a multiple of 4.
Round A (solid): Sc in each st around.
Round B (eyelet): [Sc in next st, ch 1, sk 1 st] repeat around.
Round C (solid): Sc in each sc and each ch-1 sp around.
Round D (cross-grid): [Ch 1, sk 1 st, sc in next st] repeat around.
Round E (solid): Sc in each sc and each ch-1 sp around.
These five rounds form one complete grid-and-eyelet panel. You will repeat panels as directed.
Pattern Notes Before You Begin
The dress is worked top-down. The neckline is established with a foundation chain that forms the square neckline opening.
The bodice is worked flat (back and forth in rows) first to allow for the square neckline shaping, then joined to work in the round at the underarm.
Flutter sleeves are worked separately as flat panels and then gathered and seamed at the armhole edges.
The skirt begins at the bodice-to-skirt join and is worked in the round downward. Place a stitch marker at the beginning of each round throughout the skirt.
When changing from rows to rounds, join with sl st unless otherwise specified.
All stitch counts appear in parentheses at the end of each row or round.
The neckline scallop edging and armhole scallop edging are worked last, after all blocking is complete.
Read through all instructions before beginning.
Crochet Dress Pattern Instructions
Bodice Front Panel
The bodice front is worked flat.
Foundation: Ch 46 (50, 54).
Row 1 (RS): Sc in 2nd ch from hook and in each ch across. Turn. (45, 49, 53 sc)
Row 2: Ch 1, sc in each st across. Turn. (45, 49, 53 sc)
Row 3: Ch 1, sc in each st across. Turn. (45, 49, 53 sc)
Rows 4 through 14 (4 through 16, 4 through 18): Repeat Row 2. Turn after each row.
After Row 14 (16, 18), the front panel should measure approximately 3 inches (3.5 inches, 4 inches) / 7.5 cm (9 cm, 10 cm) tall. (45, 49, 53 sc)
Do not fasten off. Set aside.
Bodice Back Panel
Work exactly as the Bodice Front Panel, working the same number of rows. Fasten off after completing the final row. Set aside.
Joining Bodice into the Round
With RS facing, hold the Front Panel with the working yarn still attached. You will now join the Front and Back panels at the sides and establish the armhole openings.
Join Rnd 1: Ch 1, sc across all 45 (49, 53) sts of the Front Panel, ch 6 (6, 8) for underarm, sc across all 45 (49, 53) sts of the Back Panel starting at its right edge, ch 6 (6, 8) for underarm, sl st to first sc of Front Panel to join. (102, 110, 122 sts total counting underarm chains as sts)
Place stitch marker at the first stitch of the round.
Bodice Waist Section
This section is worked in the round.
Rnd 1: Ch 1, sc in each st and each ch around. (102, 110, 122 sc)
Rnd 2: Ch 1, sc in each st around. (102, 110, 122 sc)
Rnd 3: Ch 1, sc in each st around. (102, 110, 122 sc)
Rnd 4: Ch 1, sc in each st around. (102, 110, 122 sc)
Rnd 5 (Waist shaping decrease rnd) for Small: [Sc in next 9 sts, sc2tog] 9 times, sc in rem 3 sts. (93 sc)
Rnd 5 for Medium: [Sc in next 10 sts, sc2tog] 8 times, sc in next 9 sts, sc2tog. (100 sc)
Rnd 5 for Large: [Sc in next 11 sts, sc2tog] 7 times, [sc in next 10 sts, sc2tog] 2 times, sc in next 5 sts. (111 sc)
Rnd 5b for Large only: Sc in next 54 sts, sc2tog, sc in rem 55 sts. (110 sc)
Working stitch counts entering the skirt: Small 93 sc, Medium 100 sc, Large 110 sc.
Rnd 6: Ch 1, sc in each st around. (93, 100, 110 sc)
Rnd 7: Ch 1, sc in each st around. (93, 100, 110 sc)
Rnd 8: Ch 1, sc in each st around. (93, 100, 110 sc)
Checkpoint: After Rnd 8, the entire bodice from neckline edge to here should measure approximately 6 inches (7 inches, 7.5 inches) / 15 cm (18 cm, 19 cm) tall. The circumference at the waist should measure approximately 20.5 inches (22 inches, 24.5 inches) / 52 cm (56 cm, 62 cm).
Skirt
The skirt is worked in the round from the waist down. It begins with an increase round to add fullness, then works through three grid-and-eyelet panels with increases between panels, ending with a fan-shell hem border.
Increase Round 1 (Skirt Start) for Small: [Sc in next st, inc in next st] 46 times, inc in each of next 1 st. (140 sc)
Increase Round 1 for Medium: [Inc in next st] 52 times, [sc in next st] 48 times. (152 sc)
Increase Round 1 for Large: [Sc in next st, inc in next st] 54 times, sc in rem 2 sts. (164 sc)
Final working counts entering skirt panels: Small 140 sc, Medium 152 sc, Large 164 sc.
Grid-and-Eyelet Panel 1
Rnd 1 (Solid): Sc in each st around. (140, 152, 164 sc)
Rnd 2 (Eyelet A): [Sc in next st, ch 1, sk 1 st] repeat around. Sl st to first sc. (70, 76, 82 sc and 70, 76, 82 ch-1 sps)
Rnd 3 (Solid): Sc in each sc and each ch-1 sp around. (140, 152, 164 sc)
Rnd 4 (Eyelet B): [Ch 1, sk 1 st, sc in next st] repeat around. Sl st to first sc. (70, 76, 82 sc and 70, 76, 82 ch-1 sps)
Rnd 5 (Solid): Sc in each sc and each ch-1 sp around. (140, 152, 164 sc)
This completes Grid-and-Eyelet Panel 1.
Increase Round 2 for Small: [Sc in next 7 sts, inc in next st] 16 times, sc in rem 12 sts. (156 sc)
Increase Round 2 for Medium: [Sc in next 8 sts, inc in next st] 16 times, sc in rem 8 sts. (168 sc)
Increase Round 2 for Large: [Sc in next 9 sts, inc in next st] 16 times, sc in rem 4 sts. (180 sc)
Grid-and-Eyelet Panel 2
Rnd 1 (Solid): Sc in each st around. (156, 168, 180 sc)
Rnd 2 (Eyelet A): [Sc in next st, ch 1, sk 1 st] repeat around. Sl st to first sc. (78, 84, 90 sc + 78, 84, 90 ch-1 sps)
Rnd 3 (Solid): Sc in each sc and each ch-1 sp around. (156, 168, 180 sc)
Rnd 4 (Eyelet B): [Ch 1, sk 1 st, sc in next st] repeat around. Sl st to first sc. (78, 84, 90 sc + 78, 84, 90 ch-1 sps)
Rnd 5 (Solid): Sc in each sc and each ch-1 sp around. (156, 168, 180 sc)
This completes Grid-and-Eyelet Panel 2.
Increase Round 3 for Small: [Sc in next 8 sts, inc in next st] 16 times, sc in rem 12 sts. (172 sc)
Increase Round 3 for Medium: [Sc in next 9 sts, inc in next st] 16 times, sc in rem 8 sts. (184 sc)
Increase Round 3 for Large: [Sc in next 10 sts, inc in next st] 16 times, sc in rem 4 sts. (196 sc)
Grid-and-Eyelet Panel 3
Rnd 1 (Solid): Sc in each st around. (172, 184, 196 sc)
Rnd 2 (Eyelet A): [Sc in next st, ch 1, sk 1 st] repeat around. Sl st to first sc. (86, 92, 98 sc + 86, 92, 98 ch-1 sps)
Rnd 3 (Solid): Sc in each sc and each ch-1 sp around. (172, 184, 196 sc)
Rnd 4 (Eyelet B): [Ch 1, sk 1 st, sc in next st] repeat around. Sl st to first sc. (86, 92, 98 sc + 86, 92, 98 ch-1 sps)
Rnd 5 (Solid): Sc in each sc and each ch-1 sp around. (172, 184, 196 sc)
This completes Grid-and-Eyelet Panel 3.
Checkpoint: After completing Panel 3, the skirt section (below the waist join) should measure approximately 6 inches (7 inches, 8 inches) / 15 cm (18 cm, 20 cm).
Transition Round
The fan-shell hem border requires the stitch count to be a multiple of 6.
Small: Current 172. Work sc around, placing 2 inc evenly at approximately st 43 and st 130. (174 sc)
Medium: Current 184. Work sc around, placing 2 inc evenly. (186 sc)
Large: Current 196. Work sc around, placing 2 inc evenly. (198 sc)
Fan-Shell Hem Border
Rnd 1 (Setup): Ch 3 (counts as first dc), 2 dc in same st, sk 2 sts, sc in next st, sk 2 sts, [5 dc in next st, sk 2 sts, sc in next st, sk 2 sts] repeat around to last 3 sts, 2 dc in last 3 sts worked to complete the beg shell, sl st to top of beg ch-3 to join. (29, 31, 33 shells)
Rnd 2: Sl st to center dc of first shell, ch 1, sc in same st, ch 3, [sc in center dc of next shell, ch 3] repeat around. Sl st to first sc. (29, 31, 33 sc and 29, 31, 33 ch-3 sps)
Rnd 3: Sl st into first ch-3 sp, ch 3 (counts as first dc), 4 more dc in same ch-3 sp, sc between the two sc anchors of the previous round, [5 dc in next ch-3 sp, sc in sp between next two sc] repeat around. Sl st to top of beg ch-3. (29, 31, 33 shells)
Rnd 4: Sl st to center dc, ch 1, sc in same st, ch 3, [sc in center dc of next shell, ch 3] repeat around. Sl st to first sc. (29, 31, 33 sc and 29, 31, 33 ch-3 sps)
Rnd 5 (Final Fan Rnd): Sl st into first ch-3 sp, ch 1, sc in same sp, ch 2, 5 dc in same sp, ch 2, [sc in next ch-3 sp, ch 2, 5 dc in same sp, ch 2] repeat around. Sl st to first sc. Fasten off. (29, 31, 33 fan units)
This creates the deep layered fan-shell border with the scalloped points visible at the hem.
Flutter Sleeves (Make 2)
The flutter sleeves are worked flat and then gathered and sewn to the armhole openings.
Foundation: Ch 26 (28, 30).
Row 1: Sc in 2nd ch from hook and in each ch across. Turn. (25, 27, 29 sc)
Row 2: Ch 3 (counts as dc), dc in next st, [2 dc in next st, dc in next 2 sts] repeat to last 1 st, dc in last st. Turn. (33, 35, 38 dc)
Row 3 (Scallop edge): Do not turn. Rotate work 90 degrees to work along the long bottom edge of the sleeve. Work scallop edge along the bottom edge: sc in first row-end st, sk 1 row, 5 dc in next row-end st, sk 1 row, [sc in next row-end st, sk 1 row, 5 dc in next row-end st, sk 1 row] repeat across bottom edge. Work 3 sc across the starting chain edge to close the curve at the top of the sleeve.
Fasten off, leaving a 12-inch / 30 cm tail for sewing.
Sleeve assembly: Fold the sleeve so the short straight edge forms the attachment edge. Gather this edge by running the yarn needle through each stitch and pulling slightly to reduce the width to approximately 3 inches / 7.5 cm. Pin to the armhole opening. Sew in place using the long tail, distributing gathers evenly. Repeat for second sleeve on opposite side. Weave in ends.
Neckline Scallop Edging
With RS facing, join yarn at any corner of the square neckline.
Rnd 1 (Sc foundation): Work 1 sc evenly across each edge of the neckline square, placing 3 sc at each corner to turn. Work to a total divisible by 4 by adding or omitting up to 2 sts at the back edge as needed. Join with sl st. (108, 116, 124 sc)
Rnd 2 (Scallop): Sc in first st, sk 1 st, 5 dc in next st, sk 1 st, [sc in next st, sk 1 st, 5 dc in next st, sk 1 st] repeat around. Sl st to first sc. Fasten off.
Finishing Your Crochet Dress
Weave in all ends securely on the WS, weaving each tail in at least two directions for security.
Blocking: Wet block the finished dress by submerging in cool water for 10 minutes, gently pressing out excess water in a towel (do not wring), then pinning flat to a blocking mat to the finished dimensions. Shape the skirt panels so the eyelets are open and even. Allow to dry completely before unpinning, approximately 24 hours.
Seaming: Check all sleeve seams are secure after blocking, as blocking relaxes the fibers and may require reinforcing a stitch or two.
Size Customization Tips
To size up or down beyond the sizes given, measure the child’s chest circumference and divide by 4 to find the width of each bodice panel. Multiply by 4.5 (stitches per inch at gauge) to find the stitch count for each panel. Round to the nearest odd number so the square neckline has a visually centered stitch.
Adjust the bodice length (number of rows) to match the child’s torso length from shoulder to natural waist. For skirt length, each complete Grid-and-Eyelet Panel adds approximately 1 inch / 2.5 cm of length. Add or subtract panels before the hem border to achieve the desired dress length.
For a wider skirt, increase the multiplier on each Increase Round from adding 16 sts to adding 20 or 24 sts, keeping all working counts multiples of 4 (and multiples of 6 at the hem transition).
Final Thoughts on This Crochet Dress Pattern
This dusty rose babydoll dress is one of those projects that looks far more complicated than it actually is. The lace panels are straightforward repeats, the bodice is simple single crochet, and the flutter sleeves come together quickly. The finished result is a keepsake quality handmade dress perfect for birthdays, holidays, or photo sessions.
Take your time with the stitch counts, especially in the skirt section where the math needs to work out for the eyelet pattern. Trust the process and check your numbers at each checkpoint.
Thank you so much for choosing this pattern. I hope you love making it as much as I loved designing it. If you make this dress, I would absolutely love to see it. Tag me on Instagram or share a photo in our Facebook group.
If you found this crochet tutorial helpful, go ahead and save it to your Pinterest boards so you can find it when you are ready to start. And please drop a comment below if you make this dress. I read every single one and your photos make my day!
You Might Also Like
- Soft Pink Bear Ear Hooded Baby Coat Free Crochet Pattern
- Blush Pink Bunny Ear Hooded Coat Free Crochet Pattern
- Bunny Pinafore Toddler Dress Free Crochet Pattern
- Ivory Cream Lace Baby Dress Free Crochet Pattern