Ocean Friends Bucket Hats Set Free Crochet Pattern
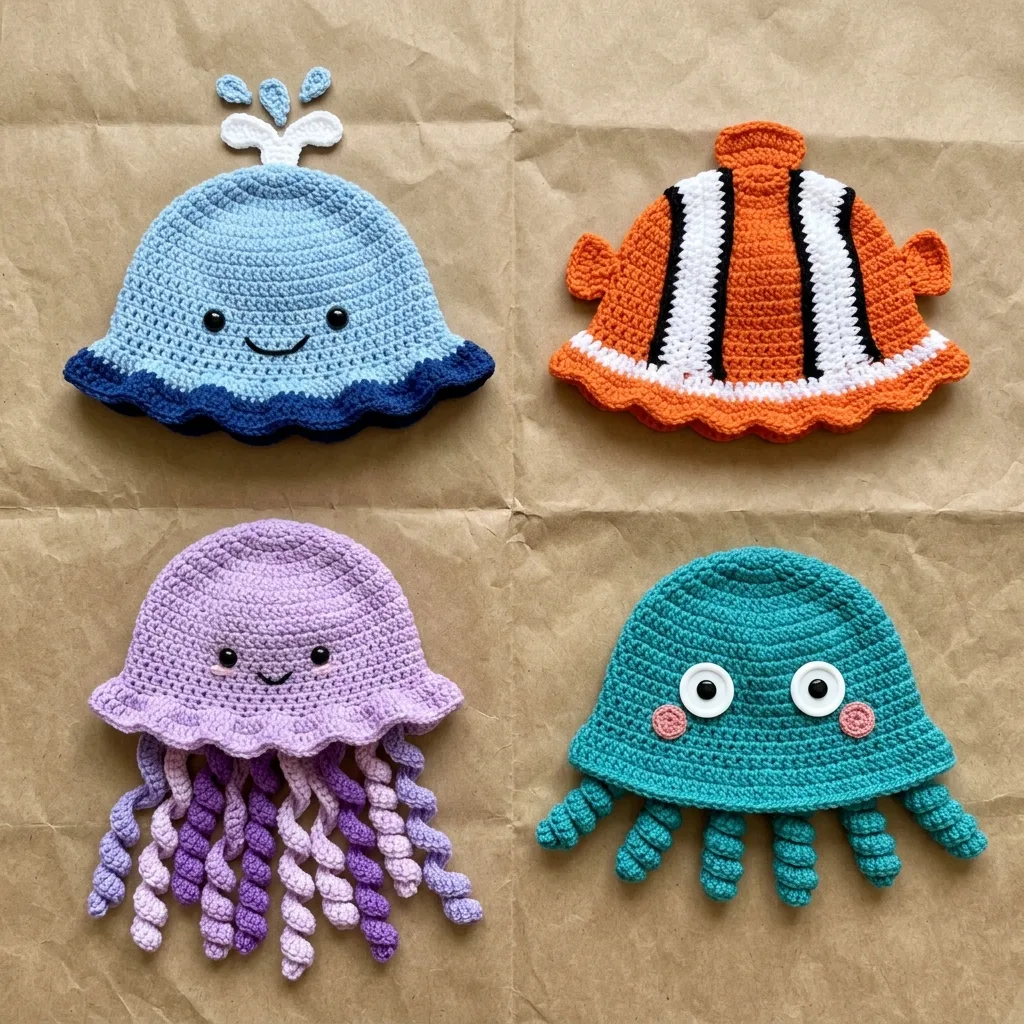
I don’t know about you, but I have a soft spot for kids’ accessories that actually make them excited to get dressed. Nothing beats the look on a little one’s face when they get to wear a hat shaped like their favorite sea creature.
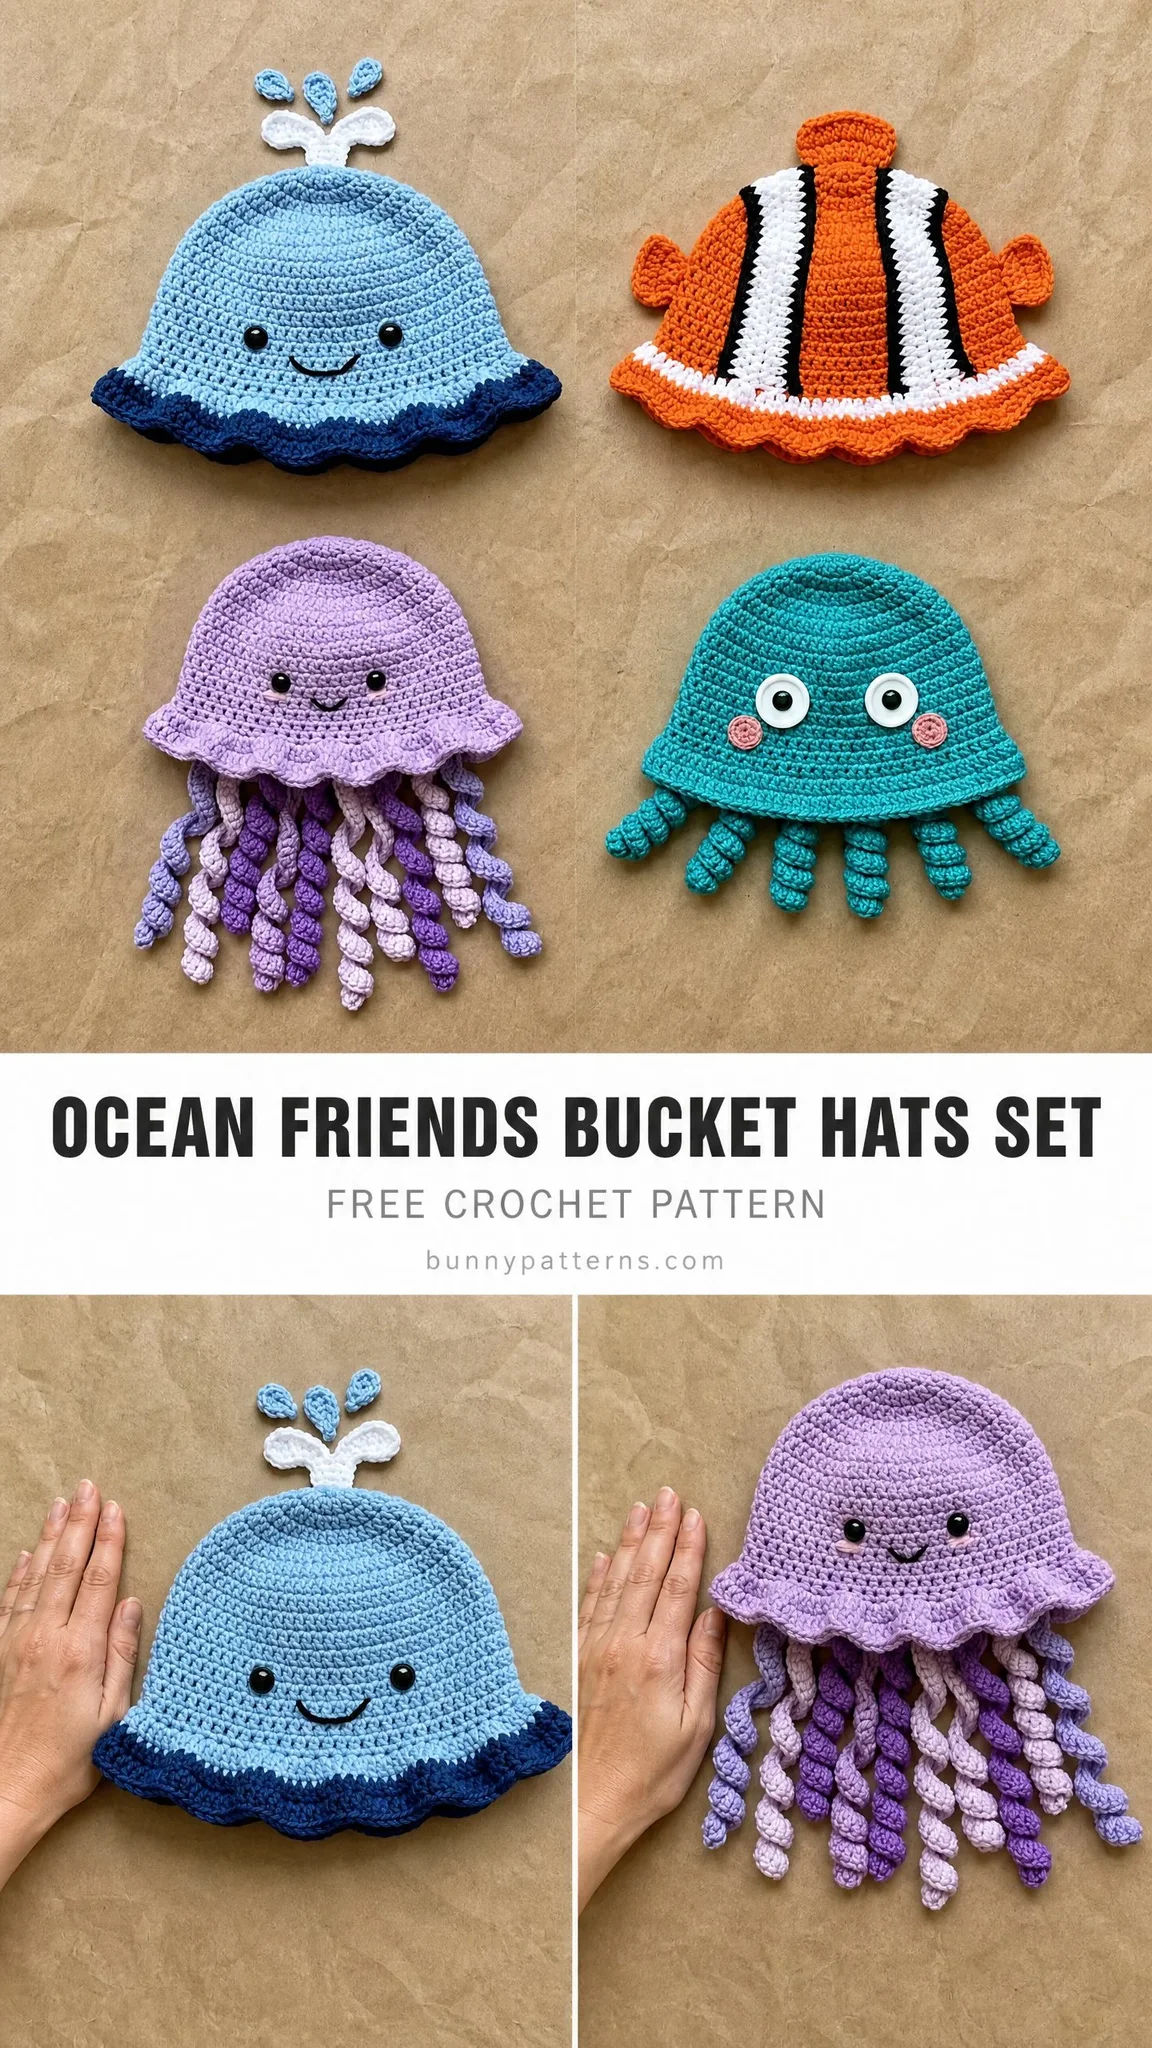
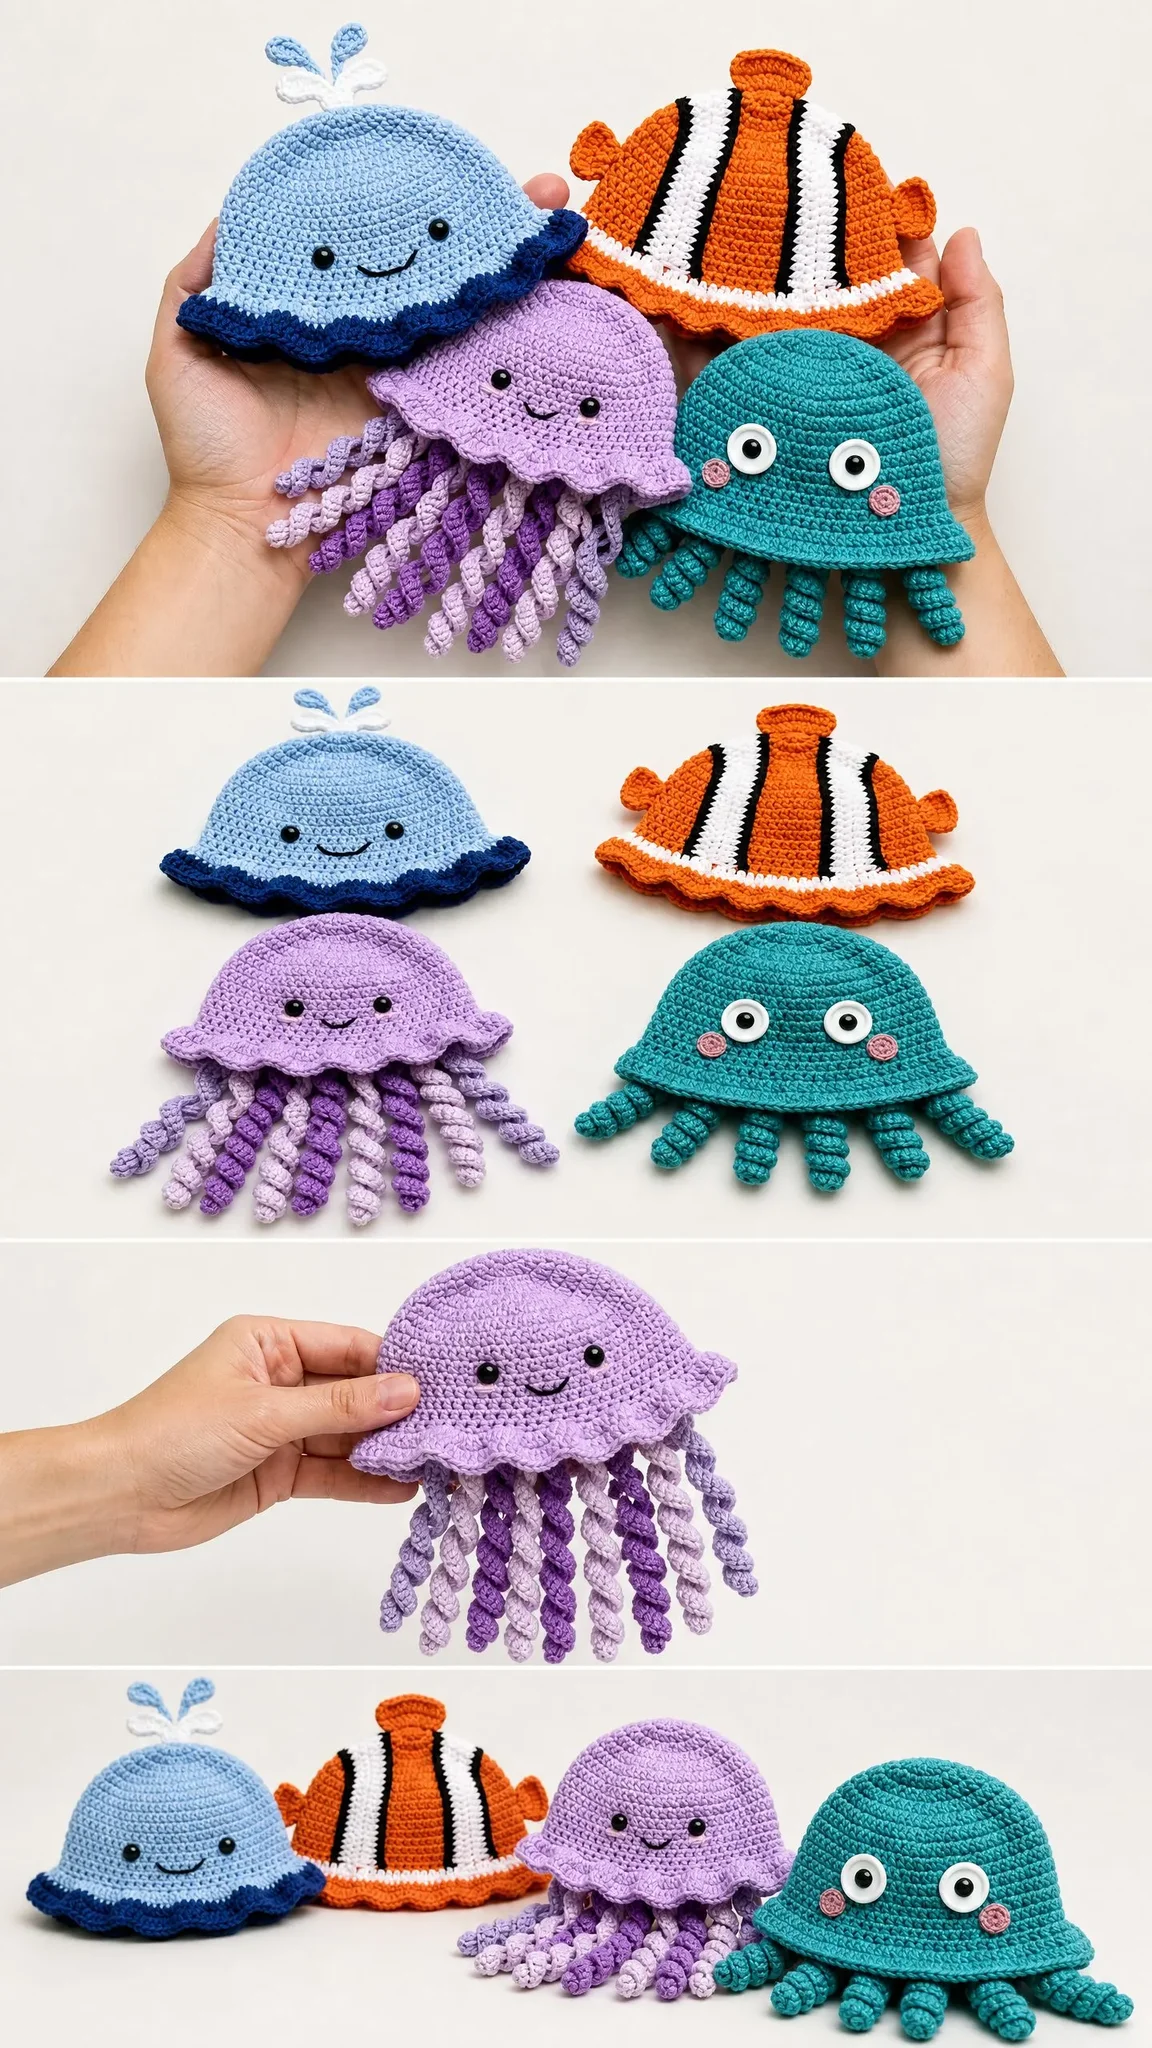
This set of four ocean-themed bucket hats delivers all the whimsy with a surprisingly straightforward construction. You get a smiling whale with a spouting top, a bright clownfish with classic stripes, a lavender jellyfish trailing twirly tentacles, and a teal octopus with adorable rosy cheeks. Each one starts with the exact same base hat pattern, then gets its own personality through embellishments and color choices.
Whether you are making these for a birthday gift, a beach vacation, or just because your yarn stash needs using, this crochet pattern gives you four projects in one. The base hat is beginner friendly. The finishing details bump it up to intermediate territory, but I will walk you through every step.
About This Crochet Pattern
These bucket hats are worked from the top down in continuous rounds of single crochet (sc). You start at the crown, increase outward to create a flat circle, then work straight down to build the sides. A ruffled brim finishes off the shape. After that, each hat gets its own creature features: faces, tentacles, fins, or a whale spout.
The pattern fits a child with approximately 19 to 20 inches of head circumference. I have included size customization notes if you need to go smaller for a toddler or larger for an adult.
Skill level: Intermediate. If you can work in the round, manage simple color changes, and attach embellishments, you can make these hats. The base construction is honestly quite easy. The tentacles and finishing details require more patience than skill.
Time estimate per hat: 4 to 7 hours depending on which design you choose. The jellyfish takes longest because of all those twirly tentacles. The octopus is quicker with shorter, fewer tentacles.
Materials You Will Need
Yarn:
Color breakdown by hat:
Hook:
Notions:
Yarn Suggestions
Lion Brand Pound of Love works beautifully here. It is 100% acrylic, machine washable, affordable, and comes in all the colors you need. Great for beginners and for items that will see heavy wear.
Paintbox Yarns Simply DK held double gives you worsted weight with a softer drape. The jewel-tone palette matches the photographed hats closely.
Cascade 220 Superwash is perfect if you want something a bit more special. It is machine washable wool with gorgeous color depth.
Avoid fuzzy or heavily textured yarns. You want clean stitch definition for that structured bucket hat look.
Gauge
14 sc x 16 rounds = 4 inches (10 cm) in single crochet worked in continuous rounds, after blocking.
Gauge matters here. Even one stitch per inch off can make the hat too tight or too loose to wear comfortably. Swatch first, adjust your hook size if needed, and save yourself frustration later.
Abbreviations and Stitch Definitions
Let me walk you through every stitch abbreviation used in this pattern. If you are newer to crochet, read this section carefully.
Special Techniques
Invisible Decrease
This creates a nearly invisible decrease in single crochet fabric. Here is how:
1. Insert hook into front loop only of next stitch
2. Insert hook into front loop only of following stitch (do not complete the stitch yet)
3. Yarn over and pull through both front loops (2 loops on hook)
4. Yarn over and pull through both loops
This counts as one stitch and looks much cleaner than a standard decrease.
Twisted Tentacle
This technique creates the spiraling tentacles for the jellyfish and octopus.
1. Chain the specified number (40 for jellyfish, 20 for octopus)
2. Work 3 sc in the second chain from hook
3. Work 3 sc in every chain across
4. Fasten off leaving a 10 to 12 inch tail
5. Let go and watch it twist into a natural spiral
The extra stitches in each chain space force the fabric to curl on itself. It is like magic.
Base Hat Pattern (All Four Designs)
All four hats start with this same base construction. Work in your main color unless otherwise noted.
Crown
Rnd 1: Start with MR, work 6 sc into ring, pull ring closed. (6 sc)
Rnd 2: Inc in each st around. (12 sc)
Rnd 3: (Sc in next st, inc in next st) 6 times. (18 sc)
Rnd 4: (Sc in next 2 sts, inc in next st) 6 times. (24 sc)
Rnd 5: (Sc in next 3 sts, inc in next st) 6 times. (30 sc)
Rnd 6: (Sc in next 4 sts, inc in next st) 6 times. (36 sc)
Rnd 7: (Sc in next 5 sts, inc in next st) 6 times. (42 sc)
Rnd 8: (Sc in next 6 sts, inc in next st) 6 times. (48 sc)
Rnd 9: (Sc in next 7 sts, inc in next st) 6 times. (54 sc)
Rnd 10: (Sc in next 8 sts, inc in next st) 6 times. (60 sc)
Rnd 11: (Sc in next 9 sts, inc in next st) 6 times. (66 sc)
Rnd 12: (Sc in next 10 sts, inc in next st) 6 times. (72 sc)
Checkpoint: Your crown circle should measure approximately 6.5 inches in diameter when laid flat.
Sides
Rnds 13 to 26: Sc in each st around. (72 sc each round)
Work 14 rounds with no increases or decreases. This creates the straight bucket shape.
Checkpoint: The hat should measure approximately 6 inches from crown to working edge.
Brim Band
Rnd 27: Working in BLO, sc in each st around. (72 sc)
This back loop only round creates a visible ridge that marks where the brim begins.
Ruffled Brim
Rnd 28: 2 dc in each st around. (144 dc)
Rnd 29: Sc in each st around. (144 sc)
Rnd 30: Sl st in each st around to finish edge. (144 sl st)
Fasten off and weave in ends.
Checkpoint: The brim should flare outward naturally. The ruffle comes from doubling your stitch count in Rnd 28.
Jellyfish Hat Instructions
Work the base hat in medium lavender (MC) following all rounds above.
Face
Using black yarn or thread, embroider a small curved smile centered on the front, approximately 2.5 inches up from the brim ridge.
Insert 12 mm black safety eyes approximately 1 inch apart, centered about 3.5 inches up from the brim ridge. Lock the backs in place on the inside before continuing.
Tentacles (Make 12)
Alternate between MC (lavender) and CC1 (deep purple) for a variegated look. Make 6 in each color.
Each tentacle:
1. Chain 41
2. Work 3 sc in second chain from hook
3. Work 3 sc in each remaining chain across (120 sc total)
4. Fasten off leaving 12 inch tail
5. Let it twist naturally into a spiral
Attaching Tentacles
Space 12 tentacles evenly around the inside of the brim. With 72 stitches, attach one tentacle every 6 stitches. Thread the tail through the underside of the brim near Rnd 27, pull snug, and knot twice. Weave tails in multiple directions before trimming.
Octopus Hat Instructions
Work the base hat in teal (MC) following all rounds above.
Eyes and Cheeks
Sew or attach two large white button eyes (approximately 20 mm) to the front, about 1 inch apart and 3.5 inches up from the brim ridge.
Sew small pink buttons or crocheted circles below each eye, slightly outward, about 0.75 inches below eye center. These are the adorable rosy cheeks.
Tentacles (Make 8)
Each tentacle:
1. Chain 21
2. Work 3 sc in second chain from hook
3. Work 3 sc in each remaining chain across (60 sc total)
4. Fasten off leaving 10 inch tail
5. Let it spiral
Attach 8 tentacles evenly around the brim, every 9 stitches.
Whale Hat Instructions
Work the base hat in sky blue (MC) through Rnd 26 only.
Modified Brim
Rnd 27 (BLO): Sc in each st around. (72 sc)
Rnd 28: Switch to CC1 (navy). 2 dc in each st around. (144 dc)
Rnd 29: Sc in each st around. (144 sc)
Rnd 30: Sl st in each st around. (144 sl st)
Fasten off CC1.
Tail Fluke Panel
With CC1 (navy), ch 13.
Row 1: Sc in second ch from hook and across. (12 sc) Ch 1, turn.
Row 2: Inc in first st, sc across to last st, inc in last st. (14 sc) Ch 1, turn.
Row 3: Sc across. (14 sc) Ch 1, turn.
Row 4: Inc in first st, sc across to last st, inc in last st. (16 sc) Ch 1, turn.
Row 5: Sc across. (16 sc) Ch 1, turn.
Row 6: Sc in first 7 sts, ch 3, sk 2 sts, sc in rem 7 sts. (14 sc plus 3 ch) Ch 1, turn.
Row 7: Sc across, working 3 sc in ch-3 sp. (17 sc) Ch 1, turn.
Row 8: Dec over first 2 sts, sc to last 2 sts, dec. (15 sc) Ch 1, turn.
Row 9: Dec, sc to last 2, dec. (13 sc) Ch 1, turn.
Row 10: Dec, sc to last 2, dec. (11 sc) Ch 1, turn.
Fasten off leaving 18 inch tail. Whipstitch to back lower edge of hat.
Spout
With CC2 (white), MR, work 6 sc in ring. (6 sc)
Rnd 1: Inc in each st. (12 sc)
Rnd 2: (Sc, inc) 6 times. (18 sc)
Rnds 3 to 5: Sc in each st around. (18 sc)
Stuff lightly with fiberfill.
Rnd 6: (Sc, dec) 6 times. (12 sc)
Rnd 7: Dec 6 times. (6 sc)
Sl st to close. Fasten off, attach to crown center.
Water Droplets (Make 2)
With CC2, ch 4, sl st in first ch to form ring, work 6 sc in ring, sl st to join. Fasten off. Attach to each side of spout top.
Face
Attach 12 mm safety eyes about 1 inch apart, 3.5 inches up from brim. Embroider curved smile below.
Clownfish Hat Instructions
This hat uses vertical stripe colorwork throughout the sides.
Work crown (Rnds 1 through 12) entirely in MC (orange). (72 sc)
Stripe Colorwork (Rnds 13 to 26)
Work this sequence every round: (sc 18 MC, sc 2 CC2, sc 4 CC1, sc 2 CC2) 3 times. (72 sc)
Carry yarns loosely along the inside, twisting at each color change to prevent holes.
Rnd 27 (BLO): Using MC, sc in each st around. (72 sc)
Work standard brim (Rnds 28 to 30) in MC.
Dorsal Fin
With MC, ch 9.
Row 1: Sc in second ch from hook and across. (8 sc) Ch 1, turn.
Row 2: Dec, sc 4, dec. (6 sc) Ch 1, turn.
Row 3: Dec, sc 2, dec. (4 sc) Ch 1, turn.
Row 4: Dec, dec. (2 sc) Ch 1, turn.
Row 5: Dec. (1 sc) Fasten off.
Attach to top center-back of crown.
Side Fins (Make 2)
With MC, ch 7.
Row 1: Sc in second ch from hook and across. (6 sc) Ch 1, turn.
Row 2: Dec, sc 2, dec. (4 sc) Ch 1, turn.
Row 3: Dec, dec. (2 sc) Ch 1, turn.
Row 4: Dec. (1 sc) Fasten off.
Attach one to each side at approximately Rnd 18 to 20 level.
Size Customization
Toddler (18 inch head): Stop crown increases after Rnd 11 (66 sc). Work 13 side rounds. Adjust brim to 132 stitches.
Adult (22 to 23 inch head): Add two extra increase rounds after Rnd 12. Work (sc 11, inc) 6 times for 78 sc, then (sc 12, inc) 6 times for 84 sc. Work 16 side rounds.
Larger child or tween (21 inch head): Add one increase round: (sc 11, inc) 6 times for 78 sc. Work 15 side rounds.
Finishing and Care
Weave in all ends thoroughly. Block by misting with water and placing over a round form to dry. Check all safety eyes and buttons are secure before giving to a child.
Machine wash cold on gentle in a mesh bag. Tumble dry low or lay flat. Do not bleach. Store flat or hanging to preserve the brim shape.
Thank you so much for choosing this pattern for your next crochet project. I hope these little ocean friends bring as much joy to make as they do to wear. If you try any of these hats, I would absolutely love to see them. Tag me on Instagram or share a photo on Facebook.
If you want to come back to this pattern later, go ahead and save it to your Pinterest boards. And please drop a comment below if you make one of these cuties. I always love hearing which design you picked and how it turned out.
You Might Also Like
- Dusty Rose Cable Cuff Slipper Boots Free Crochet Pattern
- Cream Boho Tassel Fringe Clutch Free Crochet Pattern
- Pastel Bunny Spring Skirt Free Crochet Pattern
- Strawberry Summer Tote Free Crochet Pattern