Strawberry Baby Bonnet and Romper Free Crochet Pattern
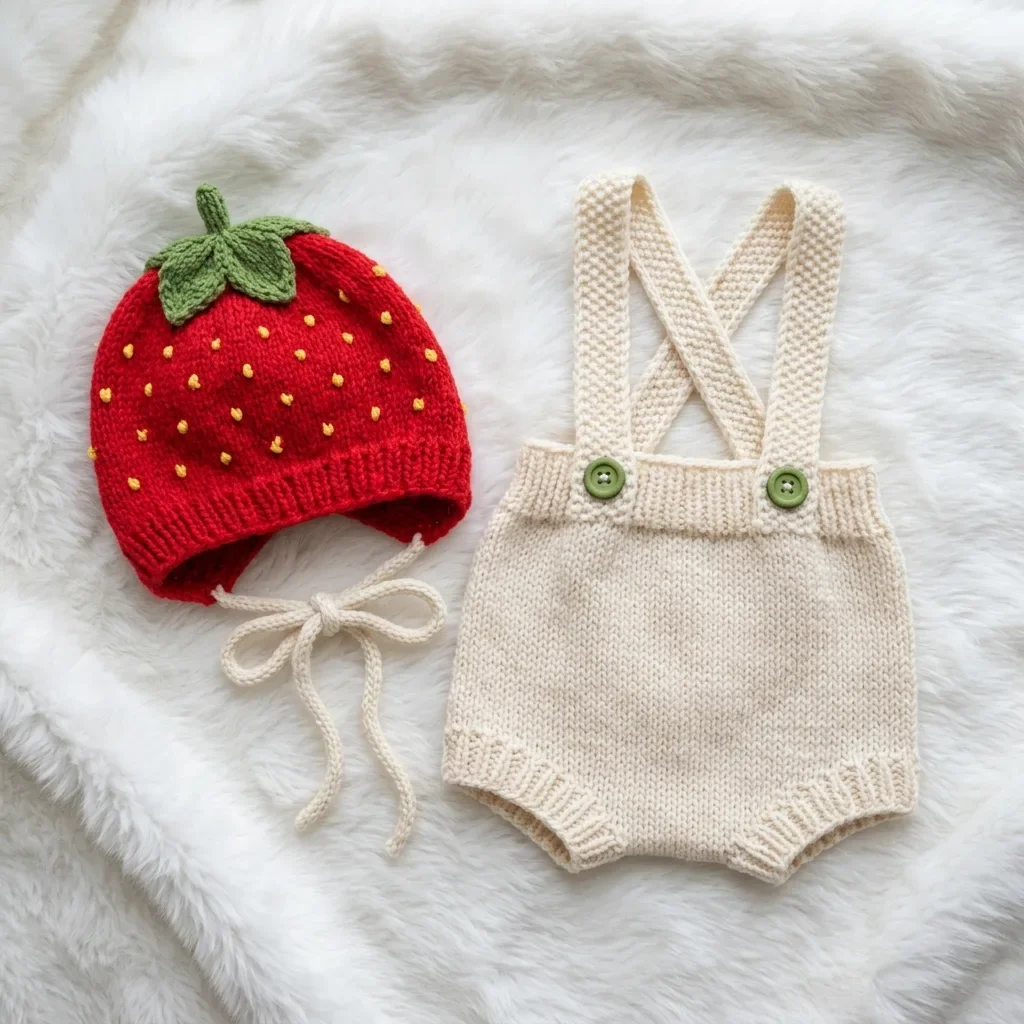
I’ve been looking for the perfect newborn photo prop set for months, and this strawberry baby bonnet and romper combination is my absolute favourite. The bonnet mimics a ripe strawberry with embroidered seeds and crocheted leaves, while the cream romper features those adorable crossed back straps that photographers love.
This pattern creates two coordinating pieces that work up in about 8 to 12 hours total. The textured stitches look incredibly similar to knitting, which gives the finished set that heirloom quality you see in boutique baby shops.
Whether you’re making this for a summer newborn session or gifting it to an expectant parent, the combination of the bright red bonnet against the neutral romper is simply stunning. Let me walk you through everything you need to create this sweet set.
What You’re Making
This crochet pattern includes two pieces designed for newborns up to three months old. The strawberry bonnet is worked in the round from the crown down, featuring a domed shape that perfectly captures that strawberry silhouette. Yellow French knot embroidery creates the seeds, and separately crocheted green leaves attach at the top for an authentic berry look.
The romper uses a clever technique called half double crochet through the back loop only (hdc-blo), which creates horizontal ridges that mimic stockinette knitting. The result is a sophisticated texture that elevates this from a typical crochet project to something truly special.
Both pieces are sized for a 14-inch head circumference and a 14-inch waist, fitting most newborns comfortably with room for a little growing.
Skill Level
This is an intermediate pattern. You should feel comfortable working in the round, shaping with increases and decreases, and working back and forth in rows. The embroidery for the strawberry seeds is simple French knots, which I’ll explain step by step.
If you’ve completed several beginner projects and want to level up, this is a great next challenge. The techniques aren’t complicated individually. They just come together in a more complex way than a simple blanket or scarf.
Materials You’ll Need
Yarn
Yarn A (Red): Approximately 120 yards of worsted weight yarn, Category 4. This is for the bonnet body.
Yarn B (Cream/Natural): Approximately 200 yards of worsted weight yarn, Category 4. This is for the romper and bonnet ties.
Yarn C (Green): Approximately 30 yards of worsted weight yarn, Category 4. This is for the leaves and stem.
Yarn D (Yellow): Approximately 10 yards of worsted or fingering weight yarn. This is for the embroidered seed dots.
I recommend 100% wool or a wool blend for excellent stitch definition. Lion Brand Fishermen’s Wool or Cascade 220 both work beautifully for this project.
Tools
Gauge
Getting gauge right matters here. Baby items need to fit properly for comfort and safety.
With J / 6.0 mm hook in hdc-blo:
14 stitches = 4 inches
10 rows = 4 inches
With G / 4.0 mm hook in ribbing:
16 stitches = 4 inches
Work a 5 x 5 inch swatch before starting. Block it lightly, then measure. If your swatch is too big, go down a hook size. Too small? Go up a hook size.
Abbreviations and Special Stitches
blo = back loop only (the loop farthest from you when the right side faces you)
ch = chain
hdc = half double crochet (yarn over, insert hook, pull up loop, yarn over, pull through all three loops)
hdc-blo = half double crochet through the back loop only. This creates the knit-look texture that makes this pattern special.
hdc2tog = half double crochet two together, a decrease. Yarn over, insert hook in first stitch, pull up a loop. Yarn over, insert hook in next stitch, pull up a loop. Yarn over, pull through all five loops on hook.
inc = increase, meaning two hdc in the same stitch
inv-dec = invisible decrease in single crochet
MR = magic ring, an adjustable starting loop
pm = place marker
rnd = round
RS = right side
sc = single crochet
sl st = slip stitch
st(s) = stitch(es)
WS = wrong side
French Knot Embroidery
This is how you’ll create the strawberry seeds. Thread your tapestry needle with yellow yarn. Bring the needle up from the wrong side to the right side where you want a seed. Wrap the yarn around the needle twice, close to the fabric. Reinsert the needle just beside (not into) the same hole. Pull through slowly while holding the wraps with your thumb. Secure on the wrong side with a small knot. If French knots frustrate you, a surface slip stitch creates a smaller, flatter dot that works just fine.
Pattern Instructions: Strawberry Bonnet
Crown Shaping
Using Yarn A (Red) and J hook.
Rnd 1: Make a magic ring. Ch 2 (does not count as a stitch). Work 6 hdc into the ring. Pull ring closed. Join with sl st to first hdc. (6 hdc)
Rnd 2: Ch 2. Work 2 hdc in each st around. Join with sl st. (12 hdc)
Rnd 3: Ch 2. 2 hdc in first st, 1 hdc in next st. Repeat around. Join with sl st. (18 hdc)
Rnd 4: Ch 2. 2 hdc in first st, 1 hdc in each of next 2 sts. Repeat around. Join with sl st. (24 hdc)
Rnd 5: Ch 2. 2 hdc in first st, 1 hdc in each of next 3 sts. Repeat around. Join with sl st. (30 hdc)
Rnd 6: Ch 2. 2 hdc in first st, 1 hdc in each of next 4 sts. Repeat around. Join with sl st. (36 hdc)
Rnd 7: Ch 2. 2 hdc in first st, 1 hdc in each of next 5 sts. Repeat around. Join with sl st. (42 hdc)
Rnd 8: Ch 2. 2 hdc in first st, 1 hdc in each of next 6 sts. Repeat around. Join with sl st. (48 hdc)
Checkpoint: Your flat crown disk should measure approximately 4.5 inches across.
Bonnet Body
Switch to hdc-blo for all rounds in this section.
Rnds 9-14: Ch 2. Work 1 hdc-blo in each st around. Join with sl st. (48 hdc each round)
Checkpoint: From crown to edge should measure approximately 4.25 inches.
Face Opening Shaping
Now you’ll work back and forth in rows to create the face opening. Place a marker at stitch 1 and stitch 25 to divide the round into front and back halves.
Row 15 (RS): Ch 2, turn. Hdc-blo across the first 24 sts. Do not work the remaining 24 sts. (24 hdc)
Row 16 (WS): Ch 2, turn. Hdc-blo across. (24 hdc)
Row 17 (RS): Ch 2, turn. Hdc2tog, hdc-blo to last 2 sts, hdc2tog. (22 hdc)
Row 18 (WS): Ch 2, turn. Hdc-blo across. (22 hdc)
Row 19 (RS): Ch 2, turn. Hdc2tog, hdc-blo to last 2 sts, hdc2tog. (20 hdc)
Row 20 (WS): Ch 2, turn. Hdc-blo across. (20 hdc)
Do not fasten off.
Brim Ribbing
Switch to G / 4.0 mm hook.
Rows 21-24: Ch 2, turn. Hdc-blo across. (20 hdc each row)
Fasten off, leaving a long tail.
Tie Strings
With Yarn B (Cream) and J hook, attach yarn at the bottom right corner of the brim with a sl st. Chain 60. Fasten off. Repeat on the left corner.
Back of Head Edging
With Yarn A and J hook, join yarn at the right edge of the unworked 24 back stitches. Work 1 row of sc across those 24 stitches, then sc evenly down the row ends along the right side of the face opening (approximately 6 sc), across the brim rows (approximately 8 sc), and up the left side back to the back stitches (approximately 6 sc). Join and fasten off.
Seam the back by whipstitching the top of the back stitches to the row ends of the shaped front section.
Strawberry Seed Embroidery
Using Yarn D and your tapestry needle, embroider approximately 30 to 35 French knots randomly across the red body. Space them roughly 0.5 inches apart for a natural look. Avoid placing seeds on the brim.
Leaves (Make 3)
Large Center Leaf:
Using Yarn C and J hook.
Row 1: Ch 9. Starting in second ch from hook, sc in each ch across. (8 sc) Ch 1, turn.
Row 2: Sc in first 3 sts, hdc in next 2 sts, sc in last 3 sts. Ch 1, turn. (8 sts)
Row 3: Inv-dec, sc in next 4 sts, inv-dec. (6 sts) Ch 1, turn.
Row 4: Inv-dec, sc in next 2 sts, inv-dec. (4 sts) Ch 1, turn.
Row 5: Inv-dec twice. (2 sts) Ch 1, turn.
Row 6: Inv-dec. (1 st) Fasten off.
Work sc edging around entire leaf perimeter.
Smaller Side Leaves (Make 2):
Row 1: Ch 7. Starting in second ch from hook, sc in each ch across. (6 sc) Ch 1, turn.
Row 2: Sc in each st across. (6 sc) Ch 1, turn.
Row 3: Inv-dec, sc in next 2 sts, inv-dec. (4 sts) Ch 1, turn.
Row 4: Inv-dec twice. (2 sts) Ch 1, turn.
Row 5: Inv-dec. (1 st) Fasten off.
Work sc edging around perimeter.
Stem
Using Yarn C and G hook, ch 8. Sl st in second ch from hook and in each ch across. Fasten off, leaving a 6-inch tail.
Assembly
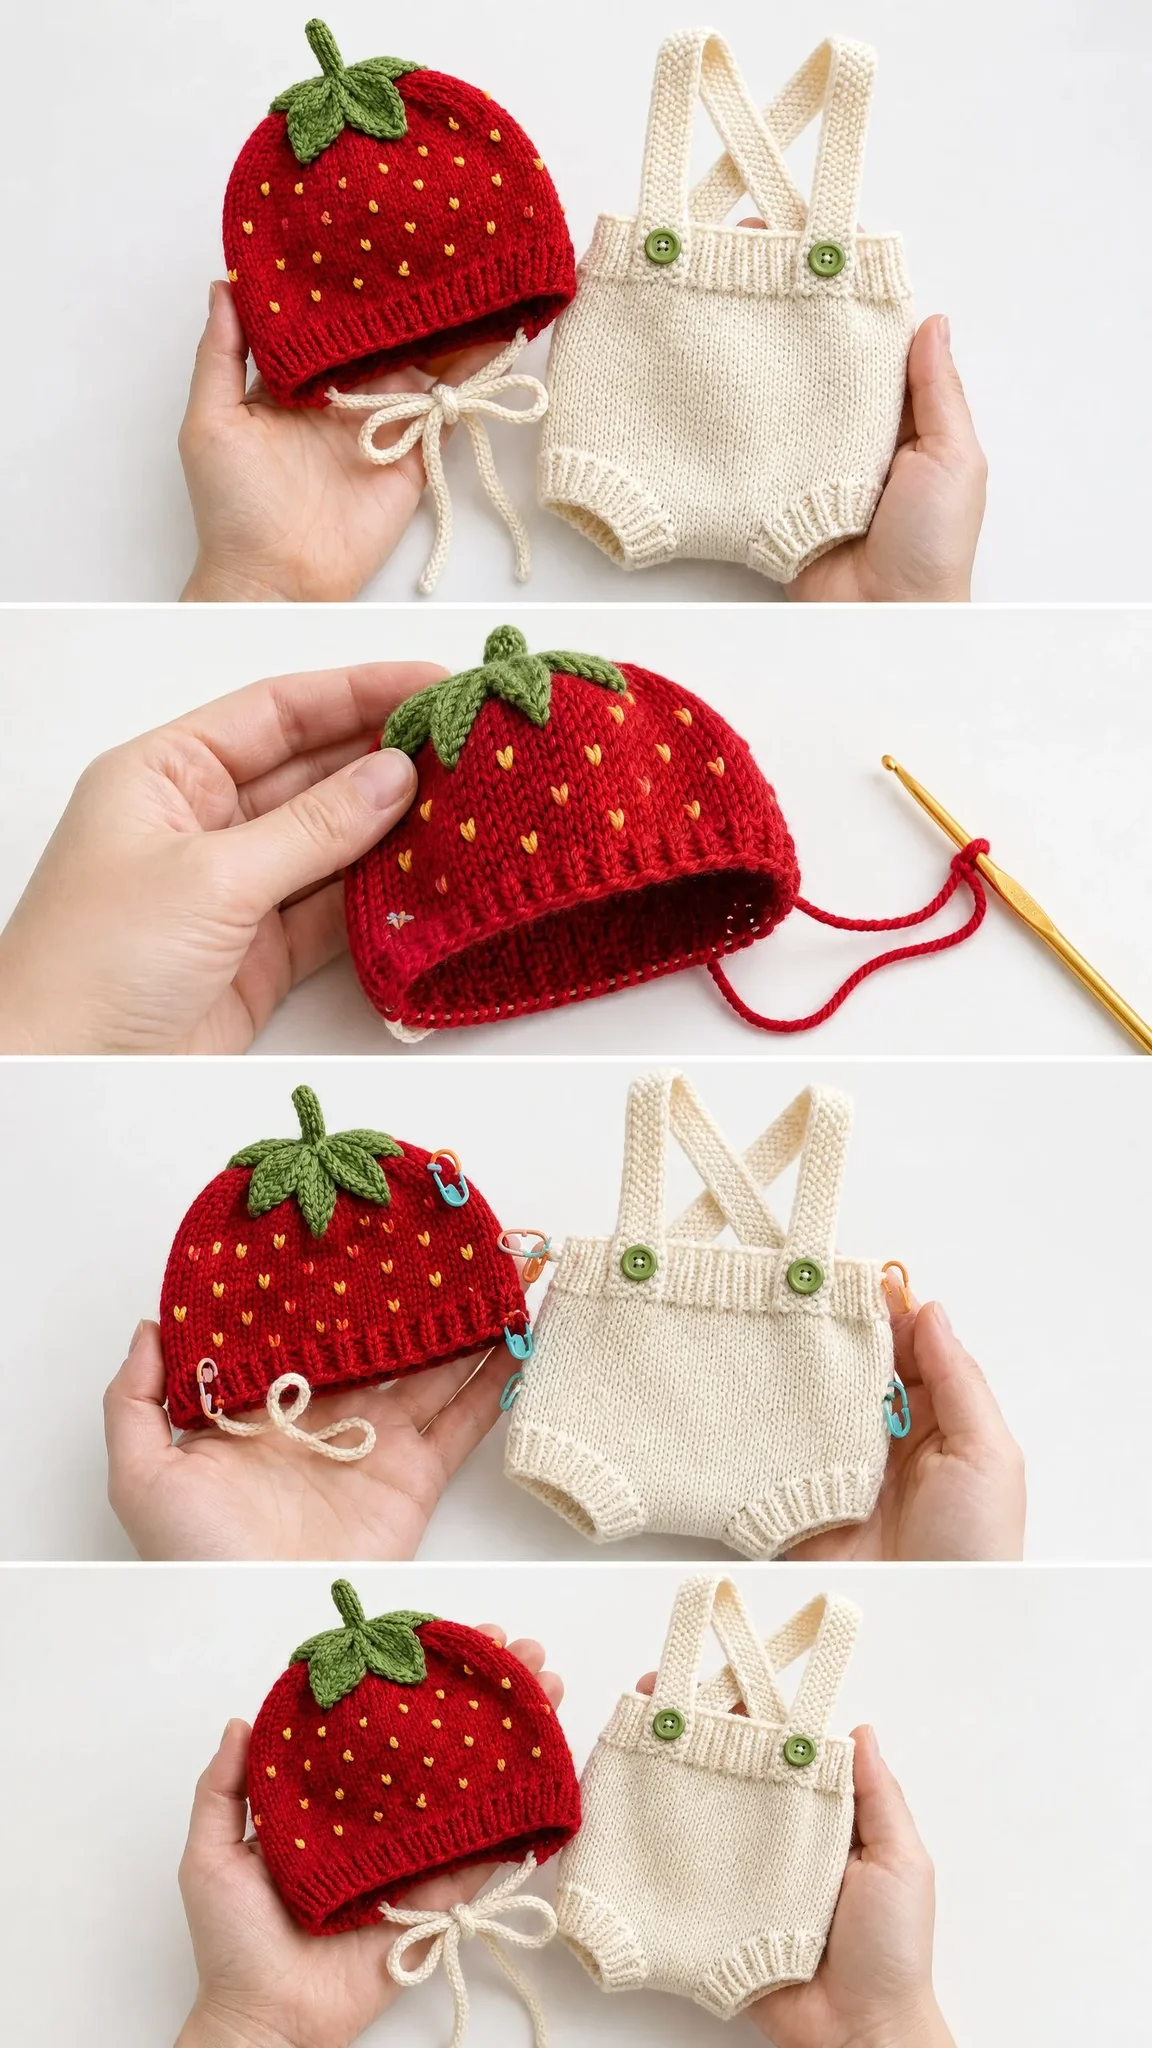
Arrange the three leaves at the crown, fanning outward like a real strawberry calyx. The large leaf faces forward. Stitch securely. Poke the stem through the center of the magic ring and stitch down.
Pattern Instructions: Cream Suspender Romper
Front Panel Leg Ribbing (Make 2)
With G hook and Yarn B.
Foundation: Ch 7.
Row 1: Hdc in second ch from hook and each ch across. (6 hdc) Ch 2, turn.
Rows 2-14: Hdc-blo across. (6 hdc) Ch 2, turn.
Rotate 90 degrees and pick up 14 sc along the long edge.
Front Leg Body (Each Leg)
Switch to J hook.
Row 1 (RS): Hdc-blo in each of 14 sc. (14 hdc) Ch 2, turn.
Row 2: Hdc-blo across. (14 hdc) Ch 2, turn.
Row 3: Inc in first st, hdc-blo to last st, inc. (16 hdc) Ch 2, turn.
Row 4: Hdc-blo across. (16 hdc) Ch 2, turn.
Row 5: Inc in first st, hdc-blo to last st, inc. (18 hdc) Ch 2, turn.
Row 6: Hdc-blo across. (18 hdc)
Set aside with marker. Repeat for second leg.
Join Front Crotch
Join Row: Hdc-blo across right leg (18 sts), ch 2, hdc-blo across left leg (18 sts). (38 hdc total including bridge chains)
Front Body
Rows 1-4: Ch 2, turn. Hdc-blo across. (38 hdc)
Row 5: Ch 2, turn. Hdc2tog, hdc-blo to last 2 sts, hdc2tog. (36 hdc)
Row 6: Ch 2, turn. Hdc-blo across. (36 hdc)
Row 7: Ch 2, turn. Hdc2tog, hdc-blo to last 2 sts, hdc2tog. (34 hdc)
Row 8: Ch 2, turn. Hdc-blo across. (34 hdc)
Front Waistband
Switch to G hook.
Rows 9-12: Ch 2, turn. Hdc-blo across. (34 hdc)
Fasten off.
Back Panel
Work identically to the front panel.
Assembly
Whipstitch front and back panels along side edges from waistband to crotch. Leave leg openings open. Whipstitch crotch seams together at center bottom.
Leg Opening Finishing
Join Yarn B at inner leg seam. Work approximately 28 to 30 sc around the opening. Join.
Rnds 2-3: Ch 2. Hdc-blo around. Join. (28-30 hdc)
Repeat for second leg.
Straps (Make 2)
With Yarn B and J hook.
Foundation: Ch 5.
Row 1: Hdc in second ch from hook and each ch across. (4 hdc) Ch 2, turn.
Repeat hdc-blo rows until strap measures 12 inches (approximately 30 rows). Fasten off.
Strap Attachment
Attach Strap 1 to upper right corner of back waistband. Bring diagonally to upper left shoulder. Attach Strap 2 to upper left corner of back waistband. Cross over Strap 1 at center back, forming an X. Tack crossing point. Bring both straps over shoulders to front. Create buttonholes at strap ends and sew buttons at front waistband.
Finishing and Care
Weave in all ends thoroughly. Block both pieces by soaking in cool water with wool wash, then laying flat to dry. Pin the bonnet over an inflated balloon to set the dome shape.
Hand wash in cool water with gentle detergent. Lay flat to dry. Never tumble dry. Store folded to preserve strap shape.
For safety, ensure all yarn tails are completely woven in and buttons are attached with multiple passes of thread.
Size Adjustments
For 3 to 6 months: Add one more increase round to the bonnet crown (Round 9 with 54 hdc). Add 4 stitches to each romper leg section.
For premature/early newborn: Stop crown shaping at Round 7 (42 hdc). Reduce leg sections by 2 stitches each.
This strawberry baby bonnet and romper crochet pattern creates such a sweet keepsake set. I hope you enjoy making it as much as I enjoyed designing it. Thank you for trusting me with your crafting time.
If this pattern is calling to you, save it to your Pinterest boards so you can find it when you’re ready to start. And please leave a comment below when you finish yours. I would absolutely love to see your little strawberry sweetie!
You Might Also Like
- Ocean Breeze Granny Square Tote Free Crochet Pattern
- Blush Pink Lace Baby Dress Free Crochet Pattern
- Spring Garden Granny Square Bag Free Crochet Pattern
- Lavender Daisy Granny Square Backpack Free Crochet Pattern