Pastel Rainbow Granny Square Toddler Set Free Crochet Pattern
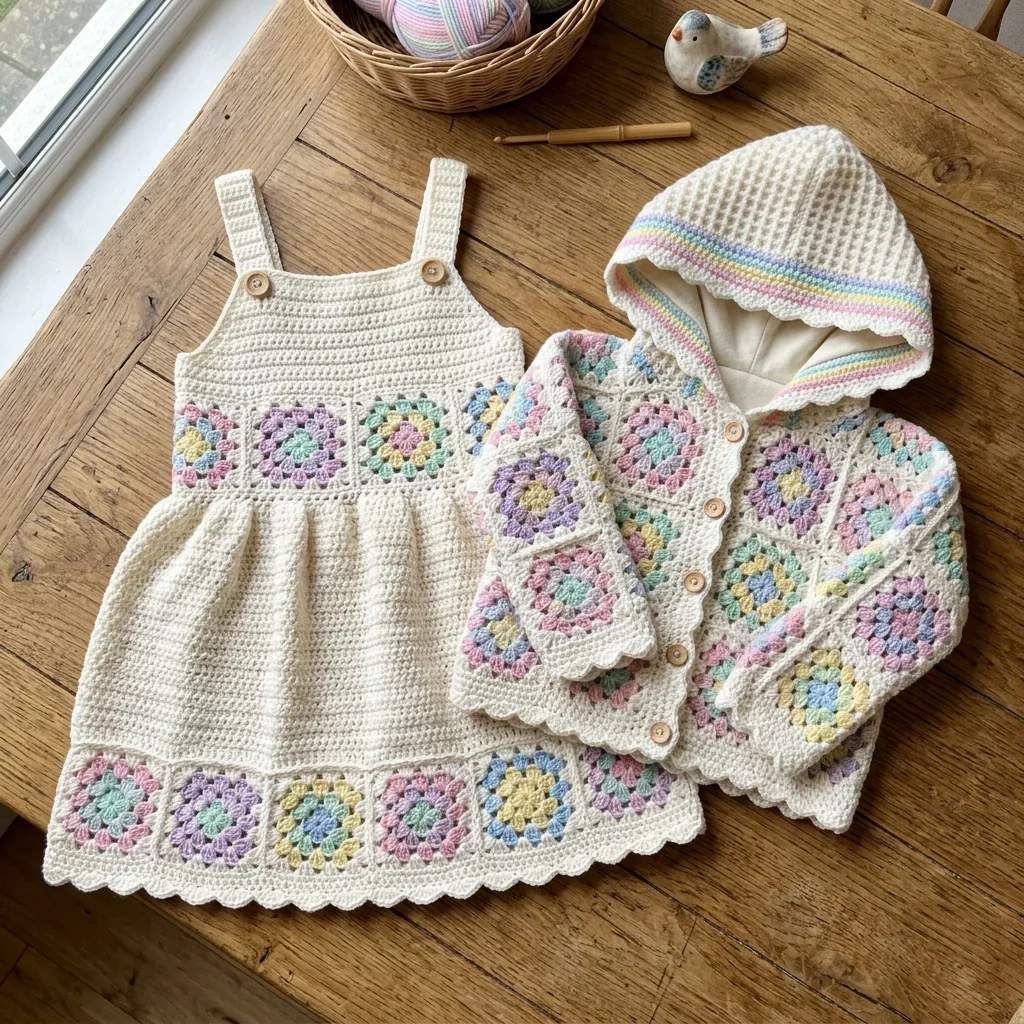
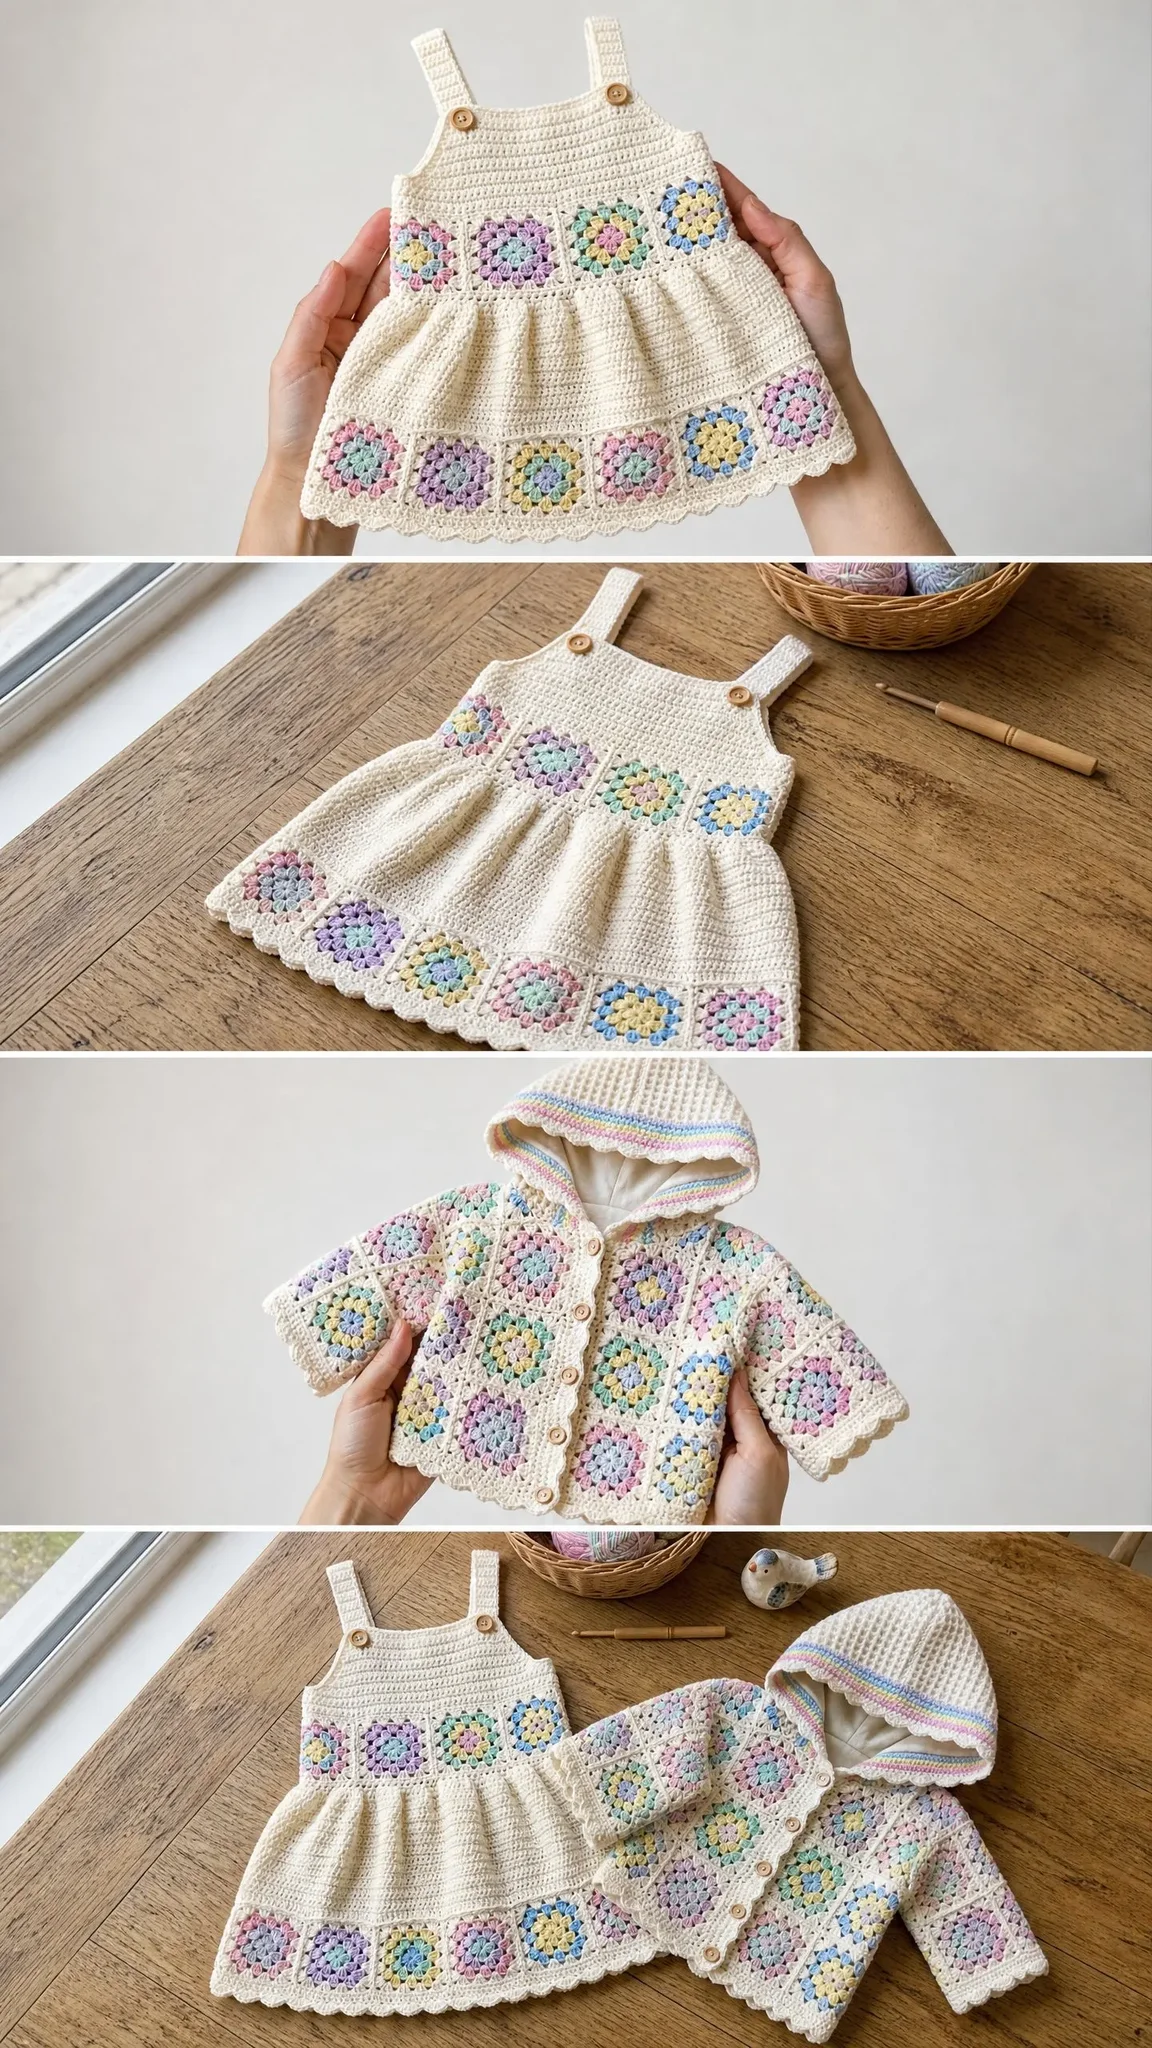
This is a matching pinafore dress and hooded cardigan set for toddlers. The pieces are worked in cream with pastel granny square accents in pink, lavender, mint, yellow, and blue.
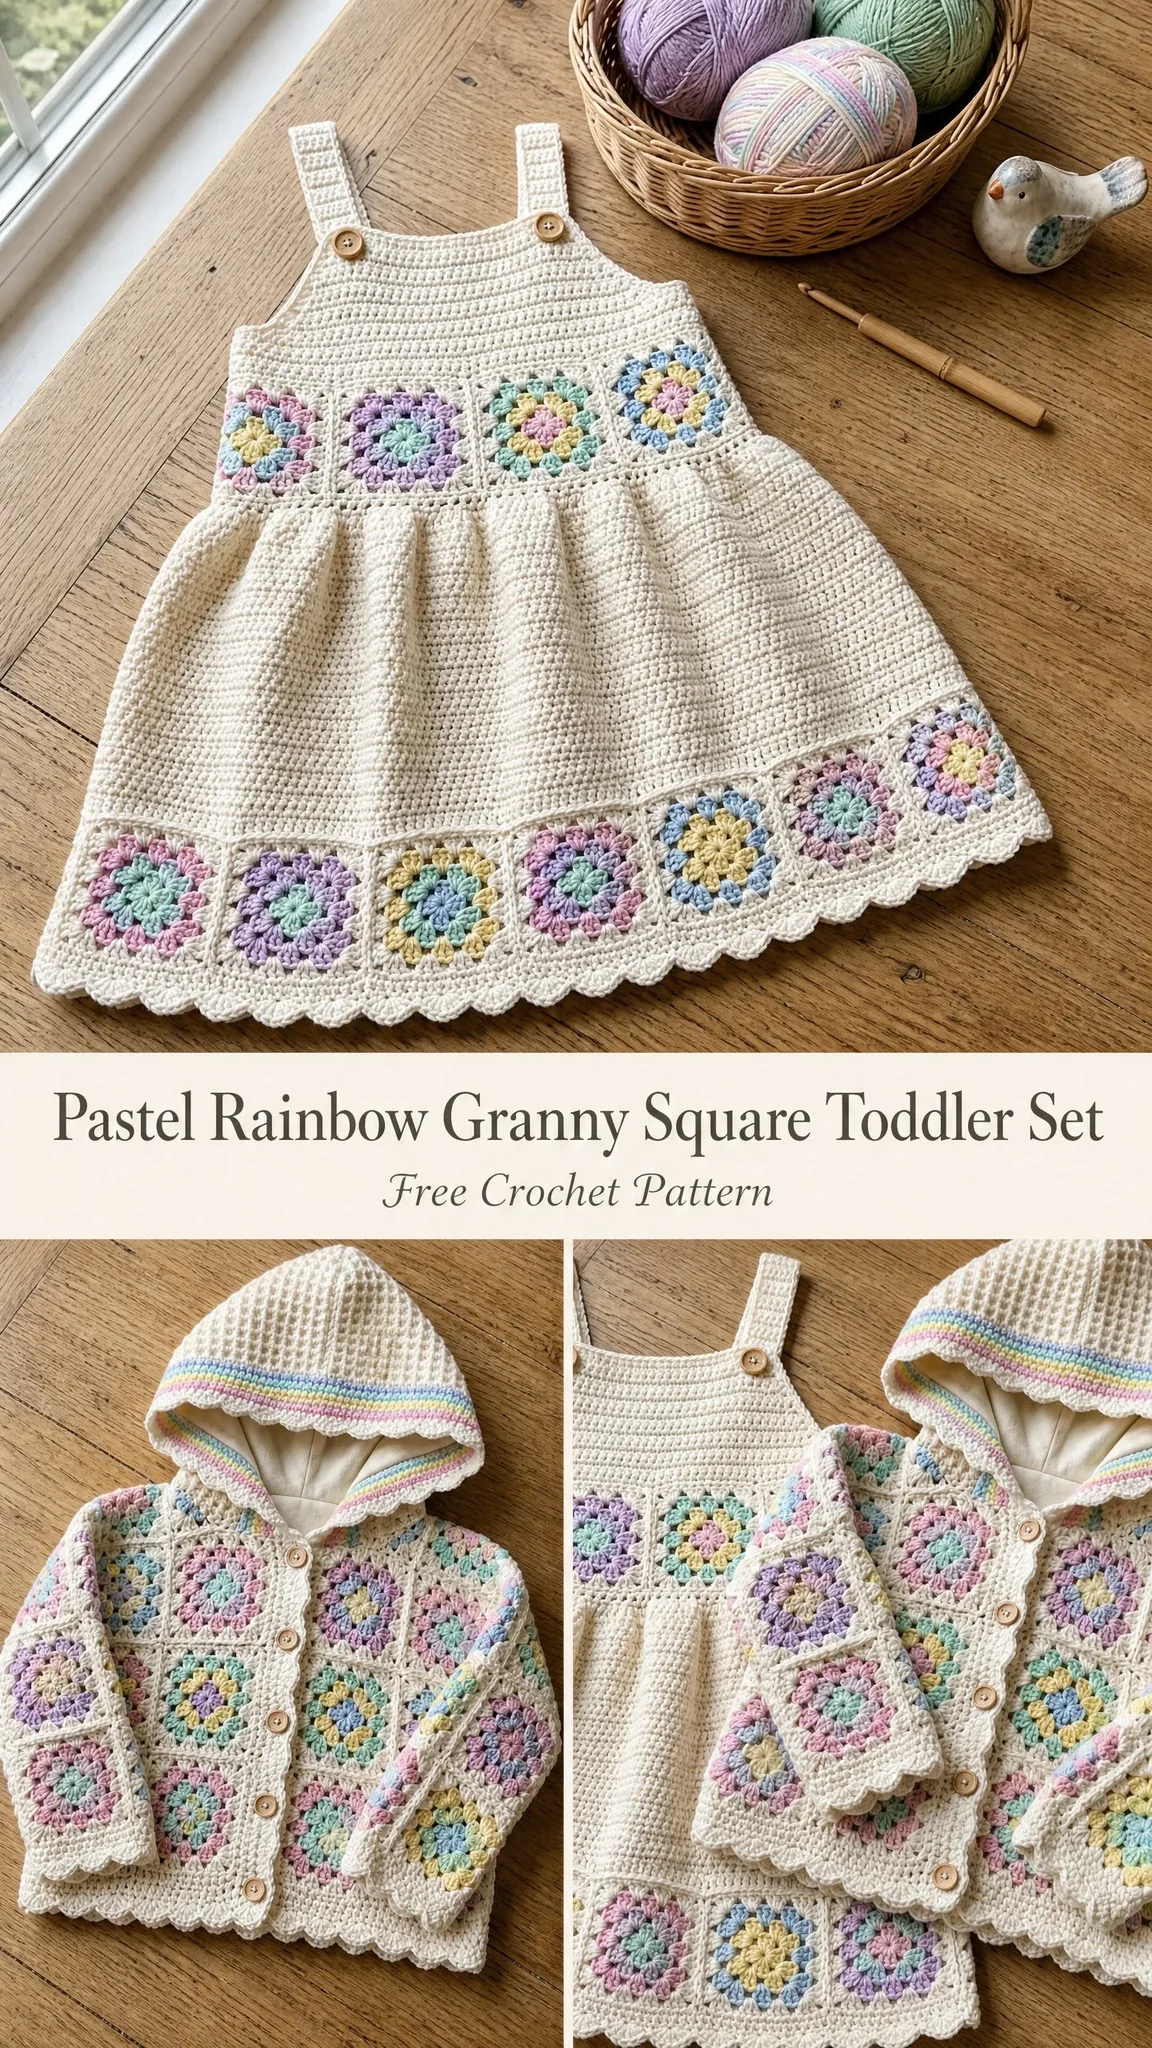
The set uses single crochet for the main fabric and classic granny squares for the decorative bands. You will need intermediate skills including joining motifs, picking up stitches along edges, and working a lined hood.
Total project time runs 34 to 48 hours depending on your experience. The finished size is 2T with a dress chest of 20 inches and cardigan chest of 22 inches.
Why This Toddler Set Works So Well
The combination of a simple pinafore dress and a cozy hooded cardigan creates a complete outfit that looks professionally designed. The granny squares add visual interest without overwhelming the garment. Each square uses a different pastel center so no two adjacent squares share the same color.
The cream base keeps everything cohesive while the rainbow pastels bring that cheerful, vintage charm. The waffle stitch hood adds texture and warmth. A fabric lining inside the hood prevents little fingers from catching in the stitches.
This set makes an incredible gift for baby showers, birthdays, or any special occasion. The quality of handmade crochet clothing shows the love you put into every stitch.
Materials You Will Need
Yarn Requirements:
Hooks:
Notions:
Yarn Suggestions
Lion Brand Comfy Cotton Blend works beautifully for this project. At 252 yards per 100 g skein, the 52% cotton and 48% modal blend gives a soft drape perfect for children. Use Gardenia for Yarn A and select individual pastels for Yarns B through F.
Paintbox Yarns Cotton DK used at a slightly loose gauge also works well. At 276 yards per 100 g, this affordable option comes in a wide range of pastel solids.
Cascade 220 Superwash provides excellent stitch definition with 220 yards per 100 g of 100% superwash wool. Machine washable and durable. Use Aran for Yarn A.
Choose any smooth worsted or heavy DK yarn that achieves gauge. Avoid fluffy or textured novelty yarns because the granny square detail will be lost. Cotton or cotton-blend yarns work best for drape and breathability.
Gauge Information
With US G-6 hook and Yarn A:
18 sc x 22 rows = 4 in / 10 cm in single crochet, blocked.
One completed Granny Square (finished, joined) = 2.25 in / 5.7 cm measured point to point.
Gauge is critical for garment fit. Please swatch and adjust hook size as needed before beginning.
Abbreviations and Definitions
Special Stitches
Granny Square
This pattern uses a 3-round granny square worked in rounds.
Round 1: With first CC, make a magic ring (or ch 4, sl st to first ch to form ring). Ch 3 (counts as first dc), work 2 dc into ring, ch 2, (3 dc into ring, ch 2) 3 times, sl st to top of beg ch-3 to join. Fasten off. (4 clusters of 3 dc, 4 ch-2 corner spaces)
Round 2: Join second CC in any ch-2 corner sp, ch 3 (counts as dc), work 2 dc in same sp, ch 2, 3 dc in same sp (corner made), ch 1, (3 dc, ch 2, 3 dc) in next corner sp, ch 1, rep from ( to ) around all 4 corners, sl st to top of beg ch-3. Fasten off. (8 clusters of 3 dc, 4 ch-2 corner spaces, 4 ch-1 side spaces)
Round 3: Join MC in any ch-2 corner sp, ch 3, work 2 dc in same sp, ch 2, 3 dc in same sp (corner made), ch 1, 3 dc in next ch-1 side sp, ch 1, (3 dc, ch 2, 3 dc) in next corner sp, rep ch 1, 3 dc, ch 1 between each corner, sl st to top of beg ch-3. Fasten off. (12 clusters of 3 dc total, 4 ch-2 corner spaces, 8 ch-1 spaces)
Joining Granny Squares (Flat Join)
Hold two squares WS together. Working through both ch-2 or ch-1 corner and side spaces simultaneously, sl st squares together using MC, working into corresponding spaces. This creates a raised seam on the WS.
Scallop Edging
(Sl st, ch 3, 2 dc, ch 3, sl st) all in same stitch or space, move to next designated stitch. Repeat across. This creates a shell-scallop border visible along the dress hem and cardigan front edges.
Waffle Stitch (for Hood Exterior)
Row 1 (RS): Ch 1, (fpdc around next st, bpdc around next st) across, turn.
Row 2 (WS): Ch 1, (bpdc around next st, fpdc around next st) across, turn.
Rep Rows 1 and 2 for pattern.
Front Post Double Crochet (fpdc)
Yo, insert hook from front to back to front around the vertical post of the indicated stitch, yo and pull up a loop, (yo, pull through 2 loops) twice.
Back Post Double Crochet (bpdc)
Yo, insert hook from back to front to back around the vertical post of the indicated stitch, yo and pull up a loop, (yo, pull through 2 loops) twice.
Pattern Notes
The dress is worked in pieces. The bodice front and back are worked flat in sc. The skirt is worked flat in sc and joined to the bodice. Granny squares are worked separately and sewn or joined into horizontal bands at the yoke and hem. Shoulder straps are worked separately and buttoned.
The cardigan body is worked flat from the bottom up, then split for fronts and back at the armhole. Sleeves are worked separately flat, then joined. The hood is worked flat in waffle stitch, lined with fabric, and attached at the neckline.
All granny squares are made ahead of time and joined into strips before being attached to the garment.
Color placement for granny squares is intentionally varied so no two adjacent squares share the same center color. A suggested rotation for Round 1 and Round 2:
Repeat this rotation across all squares. Round 3 is always MC.
Block all granny squares before joining. Pin to measurements, mist with water, and allow to dry fully.
Turning chains in sc rows count as 0 stitches. Ch 1 at the beginning of each sc row is for turning only and is not worked into at the end of the following row.
Granny Squares: Make Ahead
For the dress: Make 18 granny squares total. 9 will form the yoke band. 9 will form the hem band.
For the cardigan: Make 20 granny squares total. 12 cover the body in a horizontal band. 8 cover the sleeves (4 per sleeve).
Total squares for the set: 38 granny squares.
Work all squares through Round 3 as described in Special Stitches. Join into strips as directed in each garment section.
Pinafore Dress Pattern
Dress Bodice Front
With MC and G-6 hook, ch 47.
Row 1 (RS): Sc in second ch from hook and in each ch across. Turn. (46 sc)
Rows 2-10: Ch 1, sc in each st across. Turn. (46 sc)
Checkpoint: After Row 10, bodice front should measure approximately 4.5 in / 11.5 cm wide by 1.8 in / 4.5 cm tall.
Armhole Shaping:
Row 11 (RS): Ch 1, sl st in first 4 sts, sc in each st to last 4 sts, leave last 4 sts unworked. Turn. (38 sc)
Row 12: Ch 1, sc in each st across. Turn. (38 sc)
Row 13: Ch 1, sc2tog, sc in each st to last 2 sts, sc2tog. Turn. (36 sc)
Row 14: Ch 1, sc in each st across. Turn. (36 sc)
Row 15: Ch 1, sc2tog, sc in each st to last 2 sts, sc2tog. Turn. (34 sc)
Rows 16-22: Ch 1, sc in each st across. Turn. (34 sc)
Checkpoint: Bodice front with armhole shaping should measure approximately 4 in / 10 cm wide across the top and approximately 4 in / 10 cm tall from foundation chain.
Fasten off. Weave in ends. Set aside.
Dress Bodice Back
Work exactly as Dress Bodice Front through Row 22. (34 sc)
Fasten off. Set aside.
Attaching the Granny Square Yoke Band
Take 9 completed granny squares and join them into one horizontal strip using the flat join method. The strip should measure approximately 20.25 in / 51.5 cm long by 2.25 in / 5.7 cm tall.
With RS facing, pin the yoke strip horizontally across the lower edge of the bodice front, aligning one long edge of the strip with Row 10. Using MC and a yarn needle, sew or sl st through corresponding sc sts along the bodice and the top ch-1 spaces of the granny square strip edge. Repeat for bodice back.
Dress Straps (Make 2)
With MC and G-6 hook, ch 7.
Row 1: Sc in second ch from hook and in each ch across. Turn. (6 sc)
Rows 2-32: Ch 1, sc in each st across. Turn. (6 sc per row)
At Row 32, the strap should measure approximately 6 in / 15 cm long.
Fasten off, leaving a 10 in / 25 cm tail for sewing.
Fold under the last 1 in / 2.5 cm of each strap end and sew a buttonhole by working 3 ch over 2 skipped sts, or simply mark with stitch markers and use a separate button loop of ch 5, sl st closed.
Pin straps to bodice front top edge, spaced approximately 1.25 in / 3 cm in from each side edge. Sew securely on WS. Straps cross over the back and button at the back bodice top edge using 2 wooden buttons per strap.
Dress Skirt
With MC and G-6 hook, ch 83.
Row 1 (RS): Sc in second ch from hook and in each ch across. Turn. (82 sc)
Rows 2-22: Ch 1, sc in each st across. Turn. (82 sc)
Checkpoint: Skirt main body should measure approximately 18 in / 46 cm wide and 4 in / 10 cm tall before the hem band is attached.
Do not fasten off. Set aside while you prepare the hem band.
Skirt Hem Granny Square Band
Take remaining 9 granny squares and join into one horizontal strip. With RS of skirt facing, pin strip along Row 22, matching the strip’s top edge ch spaces to the live sts of Row 22. Using MC, sl st or sew the strip to the skirt across the full width, easing gently. The strip overhangs approximately 2.25 in / 5.7 cm below the skirt body.
Skirt Hem Scallop Edging
With MC and F-5 hook, join yarn at bottom edge of the granny square hem strip at the right side. Work scallop edging across the full bottom:
Sl st in first st or ch sp, (sl st, ch 3, 2 dc, ch 3, sl st) in same sp, skip 2 sts or spaces, rep (sl st, ch 3, 2 dc, ch 3, sl st) in next sp across entire hem edge. Fasten off. Weave in ends.
Joining Skirt to Bodice
With WS of skirt facing WS of bodice, align the top edge of the skirt with the lower edge of the bodice front and back. The skirt is wider than the bodice to create a gathered appearance. Distribute gathers evenly. With MC, whipstitch or sl st skirt to bodice across both front and back edges. Sew side seams from hem to underarm, leaving armholes open.
Dress Finishing
Sew side seams of skirt. Weave all ends. Block the finished dress.
Sew 2 wooden buttons to the back bodice top, centered on the strap crossing points.
Checkpoint: Completed dress should measure approximately 20 in / 51 cm across the chest and 14 in / 35.5 cm from shoulder strap top to hem edge.
Hooded Cardigan Pattern
The cardigan body is worked flat as one piece from hem to underarm, then split into left front, right front, and back.
Cardigan Body (Hem to Underarm)
With MC and G-6 hook, ch 101.
Row 1 (RS): Sc in second ch from hook and in each ch across. Turn. (100 sc)
Rows 2-20: Ch 1, sc in each st across. Turn. (100 sc)
Checkpoint: Cardigan body at Row 20 should measure approximately 22 in / 56 cm wide and approximately 3.6 in / 9 cm tall.
Cardigan Granny Square Band (Body)
Take 12 granny squares and join into one horizontal strip measuring approximately 27 in / 68.5 cm x 2.25 in / 5.7 cm. With RS facing, sew or sl st the top edge of the granny square strip along Row 20 of the body, easing evenly across all 100 sc.
Continue Body Above Granny Band
After attaching the granny band, re-join MC at right edge of Row 20 above the band.
Row 21 (RS): Ch 1, pick up and sc evenly across the top of the granny strip. Work 1 sc per ch-1 sp and 2 sc in each ch-2 corner sp as needed to maintain width. Turn. (100 sc)
Place stitch markers at stitch 25 and stitch 75 to mark armhole split positions.
Rows 22-30: Ch 1, sc in each st across. Turn. (100 sc)
Checkpoint: At Row 30, the body from hem foundation chain should measure approximately 8.5 in / 21.5 cm. You are now at the underarm split.
Cardigan Left Front (Underarm to Shoulder)
Row 31 (RS): Ch 1, sc in first 22 sts only. Turn, leaving rem sts unworked. (22 sc)
Row 32: Ch 1, sl st in first 3 sts (armhole shaping), sc to end. Turn. (19 sc)
Row 33: Ch 1, sc to last 2 sts, sc2tog. Turn. (18 sc)
Rows 34-40: Ch 1, sc in each st across. Turn. (18 sc)
Neckline Shaping:
Row 41 (RS): Ch 1, sc in first 12 sts, leave rem 6 sts unworked. Turn. (12 sc)
Row 42: Ch 1, sc2tog, sc to end. Turn. (11 sc)
Fasten off. This is the left shoulder: 11 sc wide.
Cardigan Back (Underarm to Shoulder)
Rejoin MC at stitch 23 of Row 30, with RS facing.
Row 31 (RS): Ch 1, sc across next 56 sts. Turn. (56 sc)
Row 32: Ch 1, sl st in first 3 sts, sc to last 3 sts, sl st in last 3 sts. Turn. (50 sc)
Row 33: Ch 1, sc2tog, sc to last 2 sts, sc2tog. Turn. (48 sc)
Rows 34-42: Ch 1, sc in each st across. Turn. (48 sc)
Fasten off. Back shoulder width: 48 sc across. Left and right shoulder each occupy the outer 11 sc on either side. Center 26 sc is the back neck opening.
Cardigan Right Front (Underarm to Shoulder)
Rejoin MC at stitch 79 of Row 30, with RS facing.
Row 31 (RS): Ch 1, sc in last 22 sts. Turn. (22 sc)
Row 32: Ch 1, sc to last 3 sts, sl st in last 3 (armhole shaping). Turn. (19 sc)
Row 33: Ch 1, sc2tog, sc to end. Turn. (18 sc)
Rows 34-40: Ch 1, sc in each st across. Turn. (18 sc)
Row 41 (RS): Ch 1, sc in first 12 sts, leave rem 6 sts unworked. Turn. (12 sc)
Row 42: Ch 1, sc to last 2 sts, sc2tog. Turn. (11 sc)
Fasten off.
Shoulder Join: With WS together, align left front shoulder (11 sc) with the 11 leftmost sc of the back shoulder. Sl st or whipstitch through both layers to seam. Repeat for right front shoulder with rightmost 11 sc of back.
Cardigan Sleeves (Make 2)
The sleeves are worked flat from cuff upward. The granny square strip wraps around the sleeve near the center.
Sleeve Cuff and Lower Section:
With MC and G-6 hook, ch 35.
Row 1 (RS): Sc in second ch from hook and in each ch across. Turn. (34 sc)
Rows 2-7: Ch 1, sc in each st across. Turn. (34 sc)
Row 8: Ch 1, inc in first st, sc to last st, inc in last st. Turn. (36 sc)
Rows 9-10: Ch 1, sc in each st across. Turn. (36 sc)
Checkpoint: Sleeve at Row 10 should measure approximately 8 in / 20 cm wide and approximately 1.8 in / 4.5 cm tall.
Sleeve Granny Square Band:
Take 4 granny squares and join into a strip measuring approximately 9 in / 23 cm x 2.25 in / 5.7 cm. Sew the strip to the sleeve fabric at Row 10.
Sleeve Upper Section:
Row 11: Pick up sc across top of granny strip. Turn. (36 sc)
Row 12: Ch 1, inc, sc to last st, inc. Turn. (38 sc)
Rows 13-15: Ch 1, sc in each st across. Turn. (38 sc)
Continue working in sc, increasing as needed to shape the sleeve cap. Seam sleeves into tubes and set into armholes.
Cardigan Hood Construction
The hood is worked flat in waffle stitch, creating that lovely textured appearance visible in the finished piece. The rainbow stripe trim along the hood edge uses all pastel colors worked in rows.
Work the hood panel, fold and seam at the back, then attach to the neckline. Cut and sew the cotton lining fabric to the inside of the hood, turning under raw edges and hand stitching in place.
Finishing the Complete Set
Block both garments following standard blocking procedures. Pin to measurements, mist with water, and allow to dry completely. Sew all buttons securely. Weave in any remaining ends.
The completed dress should measure approximately 20 in / 51 cm across the chest and 14 in / 35.5 cm in length. The cardigan should measure approximately 22 in / 56 cm across the chest and 12 in / 30.5 cm in length with 8 in / 20 cm sleeves.
Tips for Success with This Crochet Pattern
Making all 38 granny squares first helps you get into a rhythm. You can work on them while watching TV or waiting in the car. Keep them in a zippered bag so they stay clean.
When joining squares to the main fabric, take your time easing the width differences. A few extra slip stitches or a slightly tighter tension can help everything line up nicely.
For the hood lining, prewash your cotton fabric before cutting to prevent shrinkage after the first wash. A simple straight stitch around the edges prevents fraying.
This set washes beautifully in a mesh laundry bag on gentle cycle. Lay flat to dry to maintain the shape and stitch definition.
Thank you so much for choosing this pattern for your little one. I hope you enjoy every stitch of this sweet toddler set. If you make this pinafore dress and hooded cardigan combo, I would absolutely love to see your finished project. Tag me on Instagram or share a photo in my Facebook group.
Save this pattern to your Pinterest boards so you can find it easily when you are ready to start. And please drop a comment below if you have any questions or want to share your progress. Happy crocheting!
You Might Also Like
- Mint and Peach Baby Dress Free Crochet Pattern
- Tinkerbell Green Fairy Baby Dress Free Crochet Pattern
- Ocean Breeze Ombre Braided Purse Free Crochet Pattern
- Mint and Lavender Bunny Baby Blanket Free Crochet Pattern