Lavender Garden Crochet Summer Dress Free Crochet Pattern
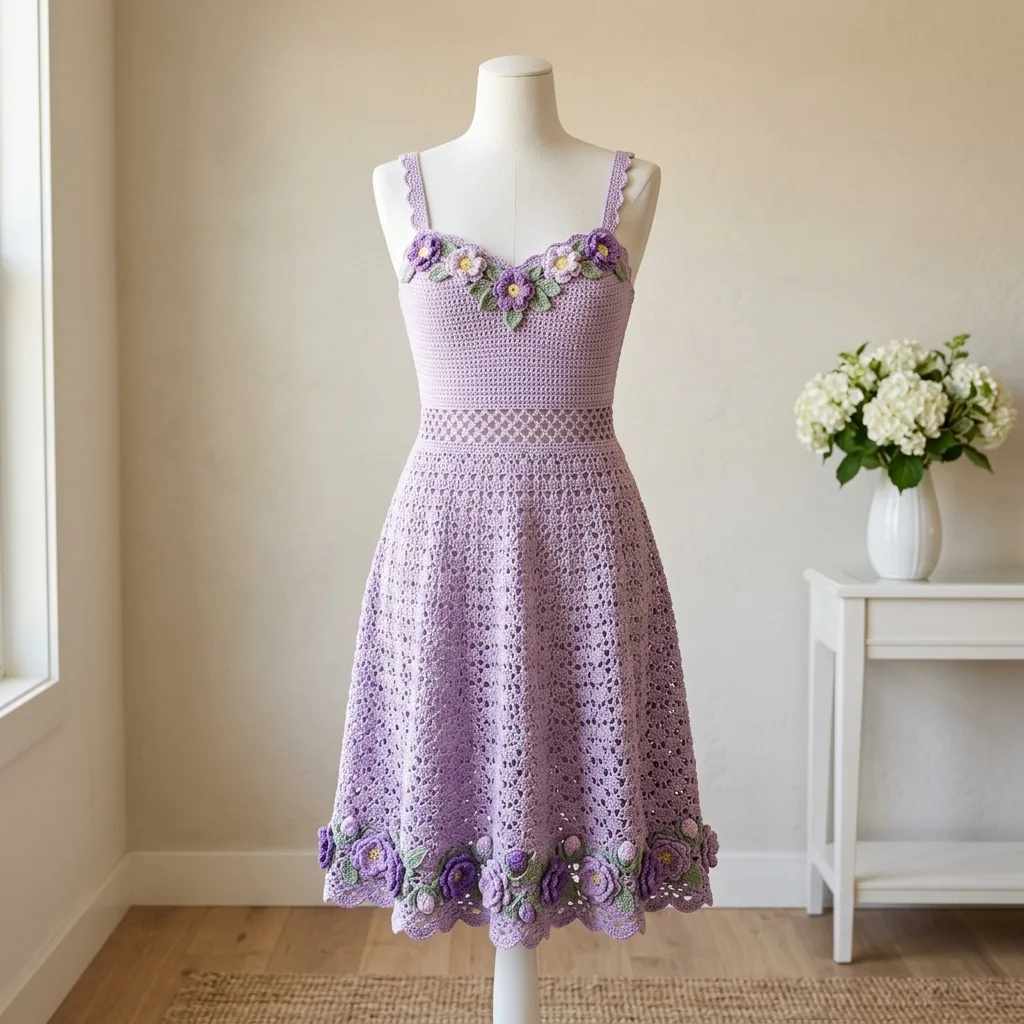
I pulled this pattern from an old design notebook last week, and honestly, I got a little emotional. The Lavender Garden dress started as a sketch I made three summers ago while sitting in my grandmother’s backyard. Her garden was bursting with lavender and roses, and I remember thinking how beautiful it would be to wear those colors and shapes.
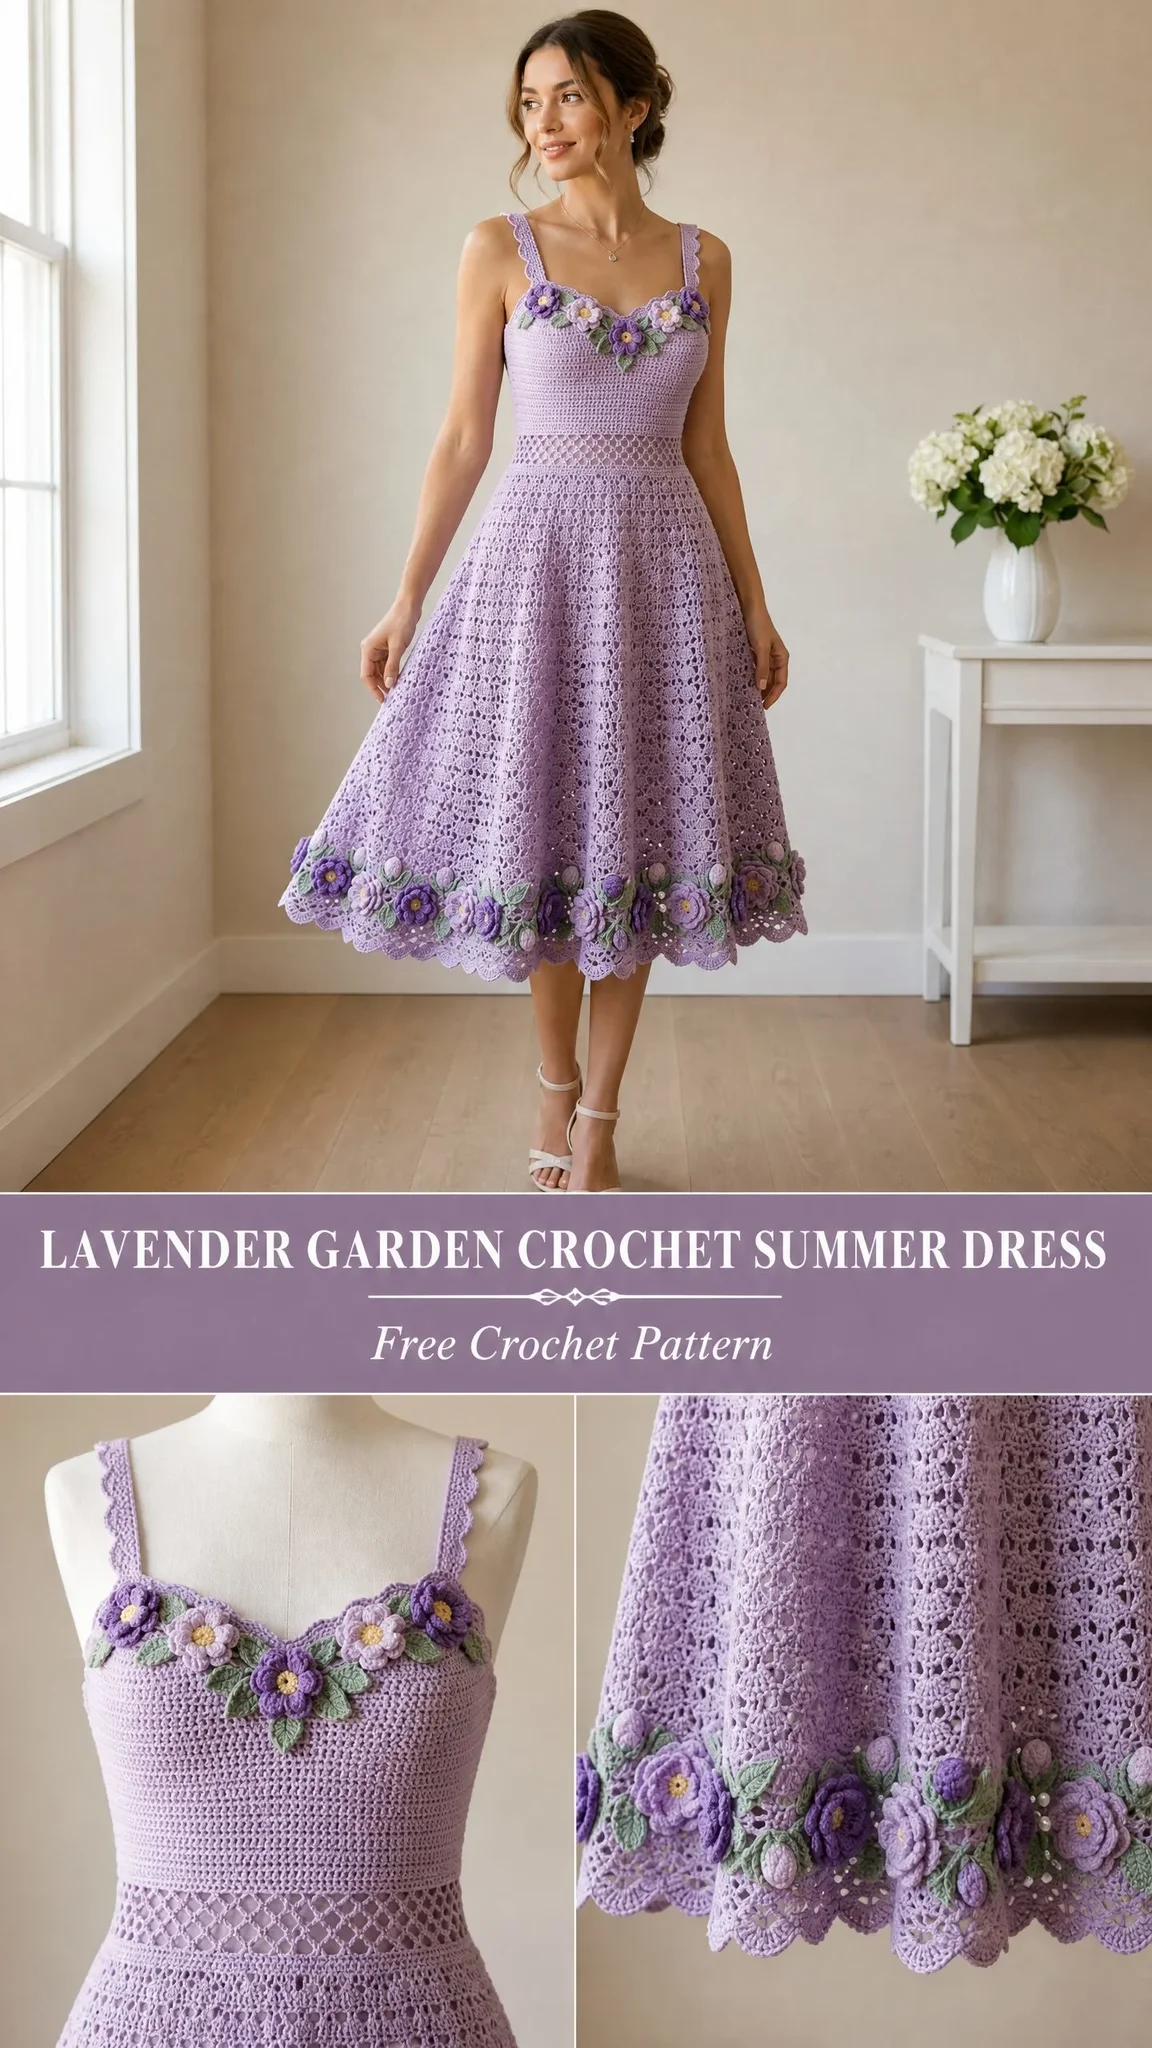
The original version never quite worked out. The bodice was too boxy, the skirt didn’t flow right, and I shelved it for “someday.” Well, someday finally arrived. After dozens of swatches and three full prototypes, this dress finally captures what I imagined that afternoon.
This is an advanced project, no question about it. But if you’ve been crocheting for a while and you’re ready for something that will truly challenge and reward you, the Lavender Garden dress is worth every single one of those 60 to 90 hours.
About This Crochet Pattern
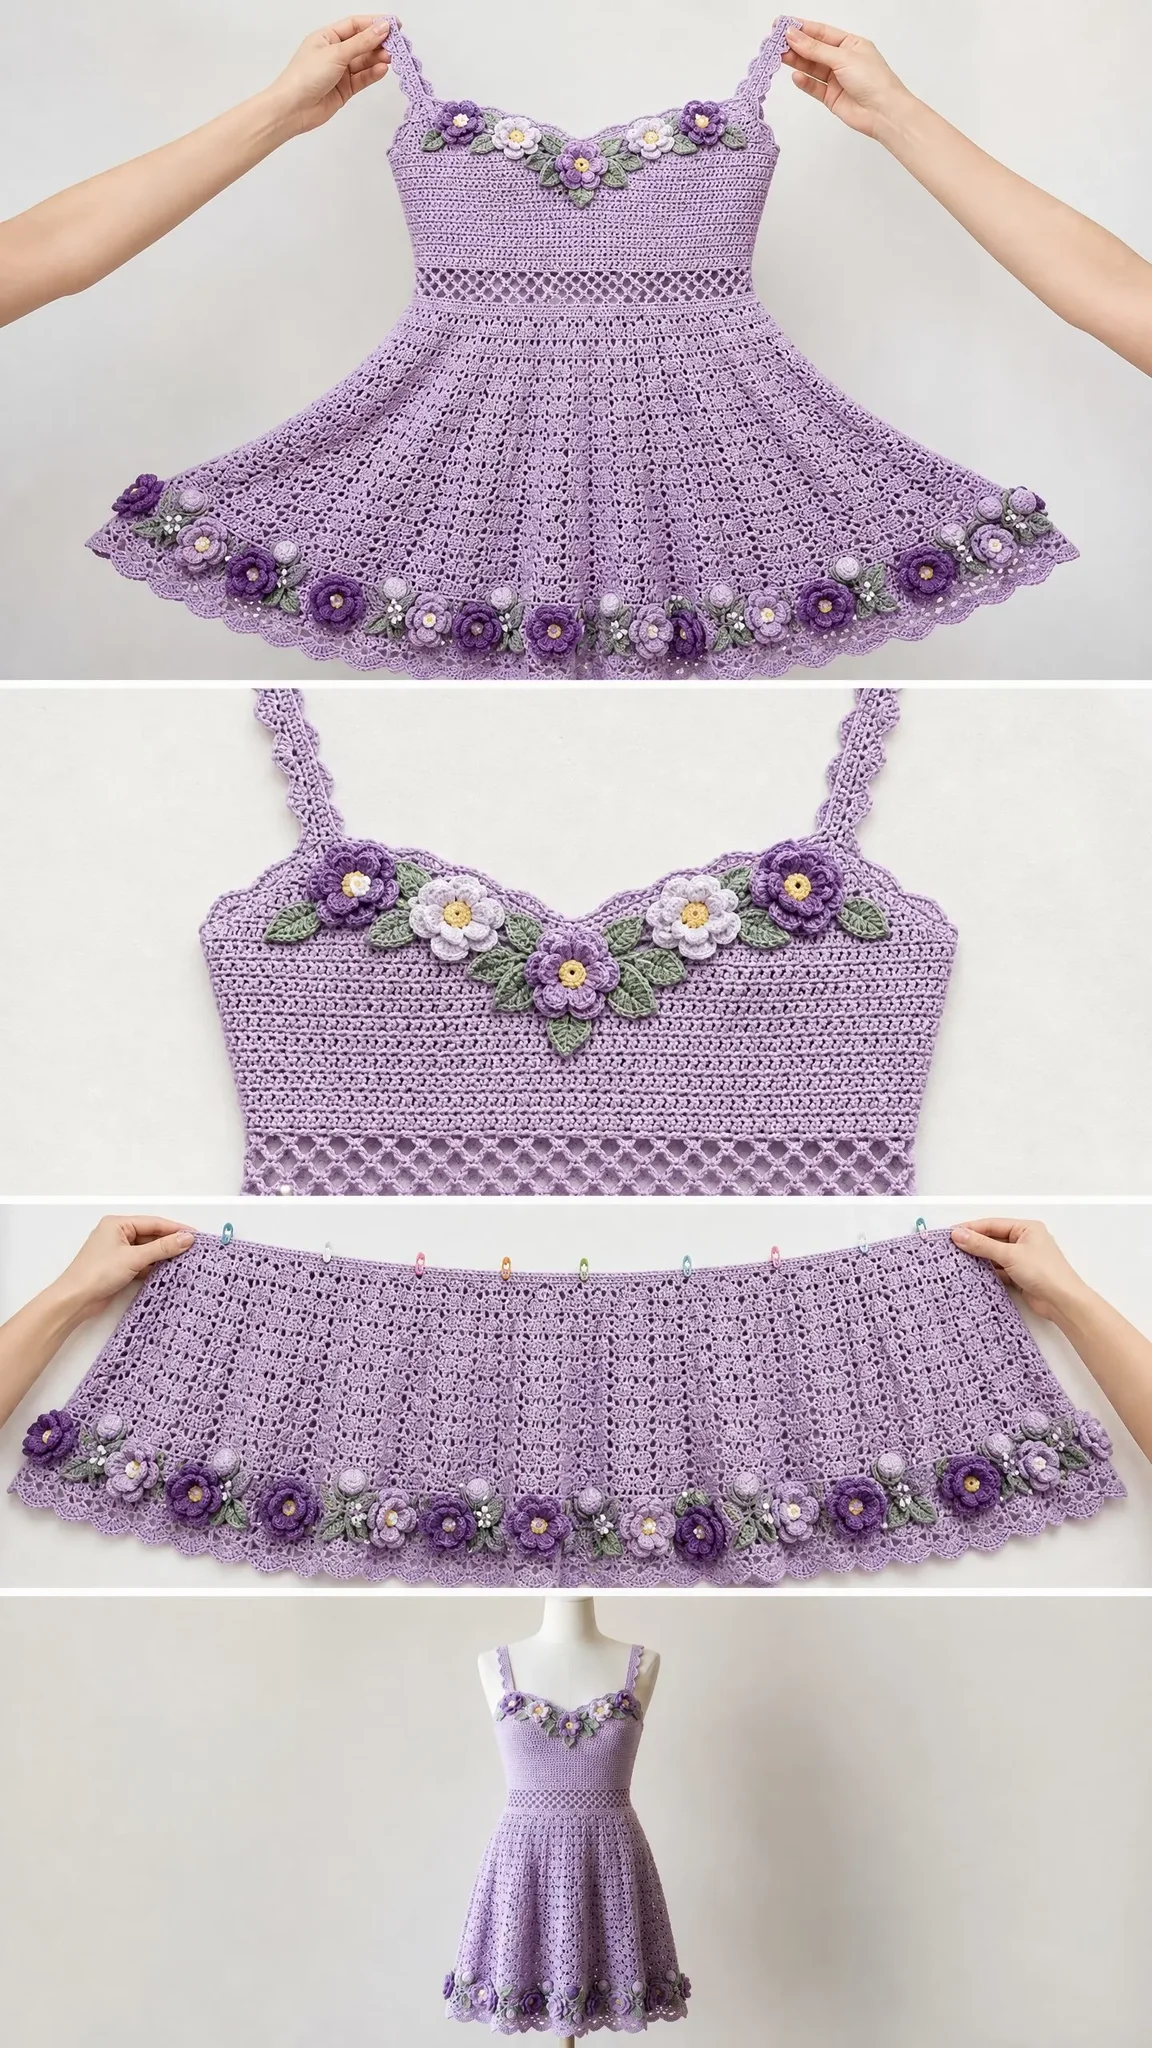
This stunning knee-length sundress features a fitted sweetheart bodice, a defined waist with a textured ridge, and a flowing A-line skirt worked in an elegant lace pattern. The magic happens in the details. Three-dimensional floral appliques trim both the neckline and the hem, bringing that garden-inspired vision to life.
The construction is clever and methodical. You’ll work the dress from the top down, starting with two separate bodice cup panels that get joined together. The back bodice is a simpler rectangular panel. Once everything is seamed into a tube, you’ll add the waistband and transition into the skirt, which is worked in the round all the way down to the scalloped hem.
The shoulder straps come last and get sewn into position after you’ve had a chance to try on the dress (or fit it to a dress form) for placement. The floral appliques are worked separately and attached after blocking.
Skill Level
This pattern is rated advanced. You should be comfortable with working in the round, reading detailed stitch counts, shaping garments across multiple sections, and managing tension changes between different stitch patterns.
The sweetheart neckline requires careful attention to increases and decreases happening simultaneously on different edges of the fabric. The lace skirt uses a 6-stitch repeat that needs consistent tension to maintain the elegant drape. And the 3D floral appliques, while not technically difficult, require patience and attention to assembly.
If you’re an intermediate crocheter eyeing this pattern, I’d suggest practicing with a simpler fitted garment first. Get comfortable with bodice shaping and working lace in the round before tackling this beauty.
Time Estimate
Plan for approximately 60 to 90 hours for an average-speed crocheter working in size Medium. The floral appliques add another 8 to 12 hours depending on how many you make and which sizes you choose.
This is absolutely a labor of love. I worked on mine over about six weeks, crocheting a little each evening. Don’t rush it.
Finished Measurements
The pattern includes five sizes. Instructions are written for size S with changes for M, L, and XL in parentheses. Size XS follows the same structure with adjustments noted at the end of each section.
Size XS: Bust 32 in / 81 cm, Waist 26 in / 66 cm, Hip 34 in / 86 cm, Length 36 in / 91.5 cm
Size S: Bust 34 in / 86 cm, Waist 28 in / 71 cm, Hip 36 in / 91.5 cm, Length 36.5 in / 92.5 cm
Size M: Bust 36 in / 91.5 cm, Waist 30 in / 76 cm, Hip 38 in / 96.5 cm, Length 37 in / 94 cm
Size L: Bust 38 in / 96.5 cm, Waist 32 in / 81 cm, Hip 40 in / 101.5 cm, Length 37.5 in / 95.5 cm
Size XL: Bust 40 in / 101.5 cm, Waist 34 in / 86 cm, Hip 42 in / 106.5 cm, Length 38 in / 96.5 cm
The garment is designed with approximately 0 to 1 inch of positive ease at the bust for a fitted look.
Materials Needed
Yarn:
Hooks:
Notions:
Yarn Suggestions
Choose a smooth DK cotton or cotton-blend with minimal halo. The dress relies on firm stitch structure for the sweetheart shaping and lace skirt panels, so avoid wool or acrylic unless it’s a very smooth, non-stretchy blend.
Paintbox Yarns Cotton DK: 100% cotton, 273 yards / 250 meters per 100 g skein. This gives excellent stitch definition and beautiful drape in the lace sections. Look for Misty Lavender or Wisteria Purple.
Lion Brand 24/7 Cotton DK: 100% mercerized cotton, 186 yards / 170 meters per 100 g skein. Widely available and machine washable. The Lavender colorway is perfect.
Drops Safran: 100% combed cotton, 175 yards / 160 meters per 50 g skein. A finer-spun DK that works up with lovely drape and clarity for lace.
Always crochet a gauge swatch before beginning and adjust your hook size as needed.
Gauge
Using E-4 / 3.5 mm hook and MC:
Using F-5 / 3.75 mm hook and MC in Skirt Lace Pattern:
Gauge is critical for this garment. Differences in gauge will significantly alter fit. Do not skip swatching. Block your gauge swatch before measuring.
Abbreviations
Special Stitches
Shell Stitch: Work 5 dc into the same stitch or space. This creates a fan of 5 double crochets sharing one base point. You’ll use this throughout the skirt lace pattern.
V-Stitch: Work (dc, ch 1, dc) all into the same stitch or space. Think of it as two double crochets with a little chain space between them.
Picot Edging: Work 1 sc into the indicated stitch. Chain 3. Slip stitch into the first chain just made (the one closest to your hook). This creates a small decorative knot.
Single Crochet Decrease (sc2tog): Insert hook into first stitch, pull up a loop (2 loops on hook). Insert hook into next stitch, pull up a loop (3 loops on hook). Yarn over and draw through all 3 loops. One decrease completed.
Bobble Stitch: Yarn over, insert hook into indicated stitch, pull up a loop, yarn over, draw through 2 loops (2 loops remain). Repeat this three more times into the same stitch (5 loops on hook). Yarn over and draw through all 5 loops.
Join-with-sc: Make a slip knot on hook, insert hook into indicated stitch, pull up a loop, yarn over and draw through both loops. This creates a neat join identical to a regular sc.
Pattern Notes Before You Begin
Read through the entire pattern once before starting. Mark the stitch counts for your size throughout, so you’re not searching for numbers mid-project.
The dress is constructed in this order: Left bodice cup panel, Right bodice cup panel, Bodice join and waistband, Skirt worked downward from waist, Hem edging and floral appliques, Shoulder straps.
The bodice cups are worked flat in rows, then joined at center front and center back. The lace pattern in the skirt uses a 6-stitch repeat. All skirt stitch counts are divisible by 6.
The skirt uses a larger hook than the bodice to create natural drape and prevent the lace from pulling tight.
The floral appliques are worked separately and sewn on after blocking.
When working in the round, do not turn unless specifically instructed. Join each round with a slip stitch to the first stitch unless stated otherwise.
Size XS note: Follow all instructions for size S but reduce the starting chain for each bodice cup by 4 stitches, and reduce waist circumference by 8 stitches (144 sc at waist instead of 152).
Instructions
Section 1: Left Front Bodice Cup
The bodice cups are worked flat in rows of sc, shaped with increases along the outer bust line and decreases along the inner center-front edge to create the sweetheart dip.
Using MC and E-4 / 3.5 mm hook.
Foundation: Ch 39 (41, 43, 45).
Row 1 (RS): Sc in second ch from hook and in each ch across. Turn.
38 (40, 42, 44) sc.
Row 2 (WS): Ch 1, sc in each st across. Turn.
38 (40, 42, 44) sc.
Row 3 (RS): Ch 1, 2 sc in first st, sc in each st to last st, 2 sc in last st. Turn.
40 (42, 44, 46) sc.
Row 4 (WS): Ch 1, sc in each st across. Turn.
40 (42, 44, 46) sc.
Row 5 (RS): Ch 1, 2 sc in first st, sc in each st across. Turn.
41 (43, 45, 47) sc.
Row 6 (WS): Ch 1, sc in each st across. Turn.
41 (43, 45, 47) sc.
Row 7 (RS): Ch 1, 2 sc in first st, sc in each st across. Turn.
42 (44, 46, 48) sc.
Row 8 (WS): Ch 1, sc in each st across. Turn.
42 (44, 46, 48) sc.
Row 9 (RS): Ch 1, 2 sc in first st, sc in each st across. Turn.
43 (45, 47, 49) sc.
Row 10 (WS): Ch 1, sc in each st across. Turn.
43 (45, 47, 49) sc.
Increases on the left side only (the right-hand edge as you hold the piece on RS) create the outer bust curve. The left-hand edge (center front) will now begin the sweetheart shaping with decreases.
Row 11 (RS): Ch 1, 2 sc in first st, sc to last 2 sts, sc2tog. Turn.
43 (45, 47, 49) sc.
Row 12 (WS): Ch 1, sc in each st across. Turn.
43 (45, 47, 49) sc.
Row 13 (RS): Ch 1, sc in each st to last 2 sts, sc2tog. Turn.
42 (44, 46, 48) sc.
Row 14 (WS): Ch 1, sc in each st across. Turn.
42 (44, 46, 48) sc.
Row 15 (RS): Ch 1, sc in each st to last 2 sts, sc2tog. Turn.
41 (43, 45, 47) sc.
Row 16 (WS): Ch 1, sc in each st across. Turn.
41 (43, 45, 47) sc.
Row 17 (RS): Ch 1, sc in each st to last 2 sts, sc2tog. Turn.
40 (42, 44, 46) sc.
Row 18 (WS): Ch 1, sc in each st across. Turn.
40 (42, 44, 46) sc.
Row 19 (RS): Ch 1, sc in each st to last 2 sts, sc2tog. Turn.
39 (41, 43, 45) sc.
Row 20 (WS): Ch 1, sc in each st across. Turn.
39 (41, 43, 45) sc.
Do not fasten off. Place live stitches on a holder or spare length of yarn. Set aside.
Section 2: Right Front Bodice Cup
Using MC and E-4 / 3.5 mm hook.
Foundation: Ch 39 (41, 43, 45).
Row 1 (RS): Sc in second ch from hook and in each ch across. Turn.
38 (40, 42, 44) sc.
Rows 2 through 10: Work same as Left Front Bodice Cup Rows 2 through 10, placing all RS increases at the last stitch instead of the first.
After Row 10: 43 (45, 47, 49) sc.
Row 11 (RS): Ch 1, sc2tog, sc to last st, 2 sc in last st. Turn.
43 (45, 47, 49) sc.
Row 12 (WS): Ch 1, sc in each st across. Turn.
43 (45, 47, 49) sc.
Row 13 (RS): Ch 1, sc2tog, sc to end. Turn.
42 (44, 46, 48) sc.
Row 14 (WS): Ch 1, sc in each st across. Turn.
42 (44, 46, 48) sc.
Rows 15 through 20: Continue decreasing at beginning of each RS row as established.
After Row 20: 39 (41, 43, 45) sc.
Do not fasten off.
Section 3: Joining Front Bodice and Adding Back Bodice
With RS facing, hold Right Front cup in working hand. The live stitches of the Left Front cup should be on a holder.
Step 1: With live yarn still attached to Right Front cup, ch 1, then join-with-sc to first held stitch of Left Front cup, sc across all Left Front stitches. Turn.
39 + 39 = 78 (82, 86, 90) sc across joined front.
Row 21 (WS): Ch 1, sc in each st across. Turn.
78 (82, 86, 90) sc.
Row 22 (RS): Ch 1, sc in each st across. Turn.
78 (82, 86, 90) sc.
Repeat Rows 21 and 22 four more times (8 more rows total through Row 30) to create the under-bust straight section of the front bodice.
After Row 30, the joined front bodice panel measures approximately 6 in / 15 cm from foundation chain edge at its center. Fasten off.
Back Bodice Panel:
The back is worked without the sweetheart curve.
Using MC and E-4 / 3.5 mm hook.
Foundation: Ch 79 (83, 87, 91).
Row 1 (RS): Sc in second ch from hook and in each ch across. Turn.
78 (82, 86, 90) sc.
Rows 2 through 30: Ch 1, sc in each st across. Turn.
78 (82, 86, 90) sc each row.
Back bodice should measure the same height as front (approximately 6 in / 15 cm). Fasten off.
Checkpoint: After completing both front and back bodice panels, each should measure approximately 6 in / 15 cm tall and 15.5 (16.5, 17.5, 18.5) in / 39.5 (42, 44.5, 47) cm wide. Lay flat and measure before seaming.
Section 4: Seaming Bodice Side Seams
Hold front and back bodice panels with RS together. Using MC and yarn needle, whipstitch or mattress stitch the side seams together, leaving the top edges (neckline) and bottom edges (waist) open.
After seaming, turn RS out. The bodice forms a tube open at top and bottom.
Bodice tube circumference at waist: 156 (164, 172, 180) sc equivalent.
Section 5: Waist Band and Transition to Skirt
Using MC and E-4 / 3.5 mm hook, join yarn to any stitch at the bottom edge of the bodice tube with RS facing.
Rnd 1: Ch 1, sc evenly around the bottom edge of the bodice, placing 1 sc per row end st on side seam edges and 1 sc per st on front and back panel bottom edges. Total: 152 (160, 168, 176) sc. Join with sl st to first sc. Do not turn.
Rnd 2: Ch 1, sc in each st around. Join.
152 (160, 168, 176) sc.
Rnd 3 (Waist Decrease Round): Work sc evenly around with targeted decreases to bring total to 144 (150, 156, 162) sc. Distribute decreases evenly across the round. Join.
144 (150, 156, 162) sc.
Rnds 4 through 7: Ch 1, sc in BLO of each st around. Join.
144 (150, 156, 162) sc each round.
Working BLO for 4 rounds creates the waistband ridge texture visible in the dress.
Rnd 8: Ch 1, sc in each st around (both loops). Join.
144 (150, 156, 162) sc.
Checkpoint: Waistband section should measure approximately 1.5 in / 4 cm from Rnd 1 to Rnd 8. The bodice tube including waistband should be approximately 7.5 in / 19 cm tall total.
Section 6: Skirt
Switch to F-5 / 3.75 mm hook.
The skirt uses a 6-stitch lace repeat consisting of alternating shell stitches and V-stitches with chain spaces.
Number of 6-stitch repeats per size:
Skirt Lace Pattern:
Sub-Round A: Ch 4 (counts as dc + ch 1), dc in same st (first V-st made), [sk 2 sts, shell in center st of next shell-sp or next marked st, sk 2 sts, V-st in ch-1 sp of next V-st] around. Join with sl st to 3rd ch of beginning ch-4.
Sub-Round B: Sl st into ch-1 sp of first V-st, ch 3 (counts as dc), 4 dc in same ch-1 sp (shell made), [ch 1, V-st in center dc of next shell, ch 1, shell in ch-1 sp of next V-st] around, ch 1, V-st in center of last shell. Join with sl st to top of beginning ch-3.
One complete pattern round = 1 Sub-Round A plus 1 Sub-Round B.
Skirt Rnds 1 through 2: Work lace pattern over 24 (25, 26, 27) repeats.
Skirt Rnd 3 (Increase Round): Work lace pattern around, adding 1 extra shell repeat at 4 evenly spaced points around. This adds 4 repeats total.
After Rnd 3: 28 (29, 30, 31) repeats.
Skirt Rnds 4 through 8: Work lace pattern even.
Skirt Rnd 9 (Increase Round): Add 4 repeats.
After Rnd 9: 32 (33, 34, 35) repeats.
Skirt Rnds 10 through 14: Work lace pattern even.
Skirt Rnd 15 (Increase Round): Add 4 repeats.
After Rnd 15: 36 (37, 38, 39) repeats.
Skirt Rnds 16 through 20: Work lace pattern even.
Skirt Rnd 21 (Increase Round): Add 4 repeats.
After Rnd 21: 40 (41, 42, 43) repeats.
Skirt Rnds 22 through 26: Work lace pattern even.
Skirt Rnd 27 (Increase Round): Add 4 repeats.
After Rnd 27: 44 (45, 46, 47) repeats.
Skirt Rnds 28 through 32: Work lace pattern even.
Skirt Rnd 33 (Increase Round): Add 4 repeats.
After Rnd 33: 48 (49, 50, 51) repeats.
Skirt Rnds 34 through 40: Work lace pattern even.
Continue working even rounds until skirt measures 28 in / 71 cm from waistband before working hem edging. Adjust length to preference. Each 2-sub-round unit adds approximately 0.5 in / 1.3 cm.
Checkpoint: At the widest point, circumference should measure approximately 56 to 64 in / 142 to 162 cm depending on size.
Section 7: Hem Edging
Switch to D-3 / 3.25 mm hook.
Rnd 1: Join MC to any shell center dc, ch 1, sc in same st, [ch 3, sc in center of next V-st, ch 3, sc in center dc of next shell] around. Join.
Rnd 2: Sl st to first ch-3 sp, ch 1, (sc, hdc, dc, hdc, sc) in each ch-3 sp around. Join. This creates a scallop edging.
Rnd 3 (Picot Round): Ch 1, sc in first st, work Picot Edging at the peak of each scallop (at the dc), sc between scallops. Join. Fasten off.
Section 8: Neckline and Top Bodice Edging
Using MC and D-3 / 3.25 mm hook, join to top right edge of back bodice at side seam.
Rnd 1: Ch 1, sc evenly around entire neckline opening, following the sweetheart dip carefully. Place marker at center front lowest dip point. At the center front, work sc2tog at the very base of the V. Join.
Rnd 2: Ch 1, sc around, working sc2tog at center front dip marker. Join.
Rnd 3: Ch 1, work Picot Edging evenly across the back neckline and top edges of cups. At the sweetheart dip, omit picot and work sc only for 5 sts on each side of center point. Join. Fasten off.
Section 9: Shoulder Straps
Using MC and D-3 / 3.25 mm hook. Make 2 straps.
Foundation: Ch 7.
Row 1: Sc in second ch from hook and in each ch across. Turn.
6 sc.
Row 2: Ch 1, sc in each st across. Turn.
6 sc.
Repeat Row 2 until strap measures 12 (12.5, 13, 13.5) in / 30.5 (32, 33, 34) cm or desired length.
Edging: With RS facing and D-3 hook, sc along both long sides of strap, working Picot Edging at 1-inch intervals.
Attach straps: Try on garment before attaching. Pin straps at desired position on front cups and back bodice. Whipstitch securely at both ends.
Section 10: Floral Appliques
Large Roses (make 6 to 8 for hem, 1 to 2 for neckline):
Using CC1 (Deep Purple) and D-3 / 3.25 mm hook.
Foundation: Ch 36.
Row 1: Dc in 4th ch from hook, dc in each ch across. Turn.
34 dc.
Row 2: Ch 1, [2 sc in next dc, sc in next dc] across.
51 sc. Fasten off, leaving 12 in / 30 cm tail.
Roll the strip loosely from one end, gathering slightly at the base. Use the tail to stitch through the base several times to secure. Fasten off and weave in end.
Small Daisy Flowers (make 12 for hem, 6 for neckline):
Using CC2 (Soft White) and D-3 hook.
Foundation: MR.
Rnd 1: Ch 1, 5 sc in MR. Pull ring closed. Join.
5 sc.
Rnd 2: [Ch 5, sl st in next sc] 5 times.
5 petal loops. Fasten off leaving tail.
Flower center: Using CC4 (Pale Yellow), join to center MR, work 1 bobble stitch in center. Fasten off.
Make leaves using CC3 (Leaf Green) and attach alongside flowers as desired.
Blocking and Finishing
Wet block the completed dress by soaking in cool water with a small amount of wool wash or gentle detergent. Gently squeeze out excess water without wringing. Lay flat on blocking mats, shaping the bodice and pinning the skirt to the correct measurements.
Allow to dry completely before attaching floral appliques. Pin appliques in place first to check positioning. Use a yarn needle and matching yarn to stitch securely.
Final Thoughts on This Crochet Summer Dress Pattern
This Lavender Garden crochet summer dress pattern has been such a joy to finally complete and share. Every time I look at it, I’m transported back to that sunny afternoon in my grandmother’s garden. The sweetheart neckline, the flowing lace skirt, those dimensional roses, it all came together better than I ever hoped.
Thank you so much for choosing this pattern for your next project. I know it’s a significant undertaking, but I truly believe the finished dress is worth every stitch. If you make one, I would absolutely love to see it. Tag me on Instagram or share a photo on Facebook, as nothing makes me happier than seeing these designs come to life in your hands.
If this pattern inspired you, go ahead and save it to your Pinterest boards so you can find it when you’re ready to start. And please leave a comment below if you make your own Lavender Garden dress. I’d love to hear which colors you chose and how the sizing worked for you. Happy crocheting!
You Might Also Like
- Sage Green Flutter Sleeve Baby Dress Free Crochet Pattern
- Ocean Blues Beaded Sea Creature Anklet Free Crochet Pattern
- Dusty Rose Peplum Baby Outfit Free Crochet Pattern
- Blush Pink Tiered Baby Dress Free Crochet Pattern