Lavender Butterfly Purse Free Crochet Pattern
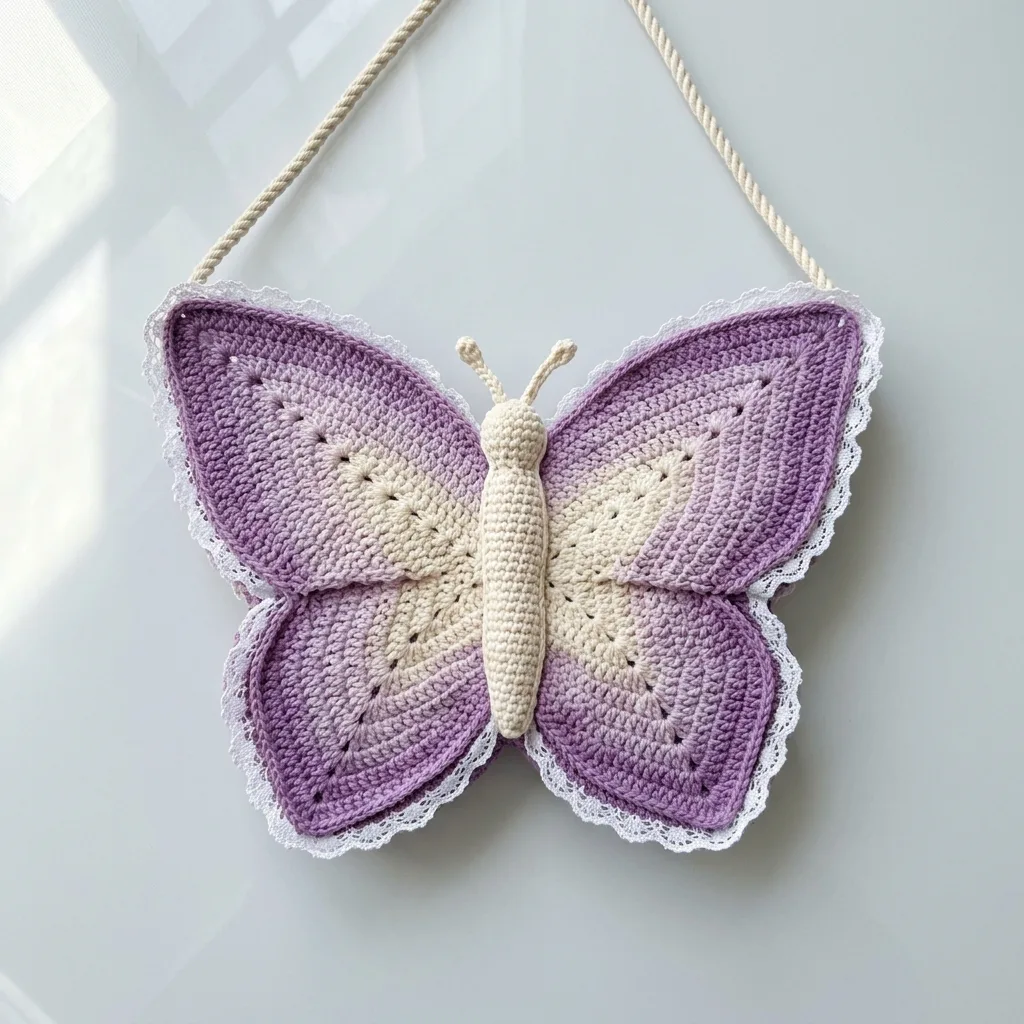
I call this one “Violet,” and she’s been living in my design notebook for almost three years now. The original sketch came from a walk through my grandmother’s garden one summer afternoon when a pale purple butterfly landed on the lavender bushes and stayed long enough for me to really study her wings. I scribbled down the shape on the back of a receipt and tucked it away, waiting for the right moment to bring her to life in yarn.
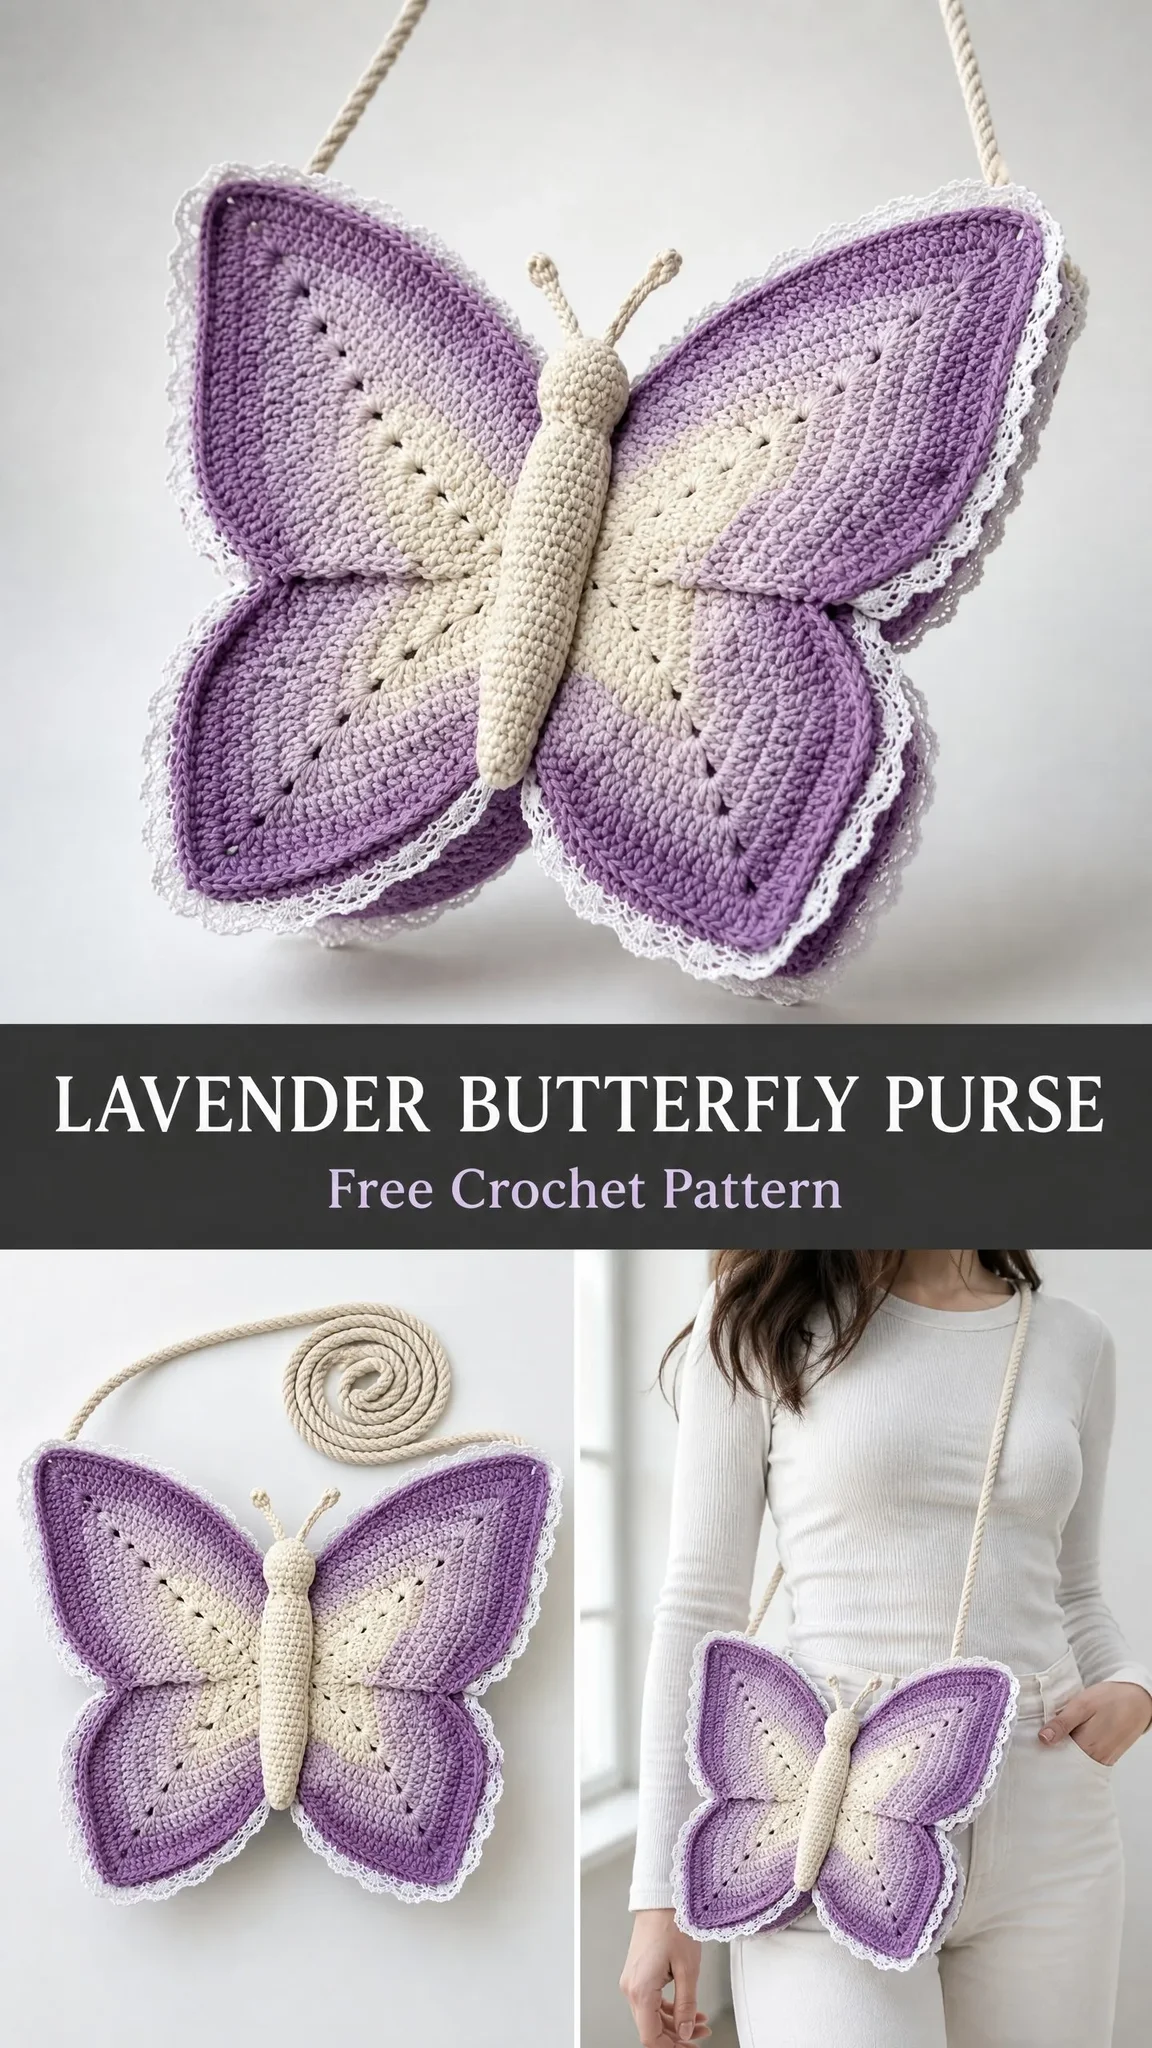
That moment finally came last spring when I found the perfect gradient of cotton yarns at a local shop. The cream, soft lavender, medium purple, and deep purple practically arranged themselves on the counter. I knew Violet was ready to fly.
What I love most about this design is that it’s both whimsical and completely functional. This butterfly-shaped crossbody purse opens at the top center, hidden cleverly behind the stuffed body, so you get all the magic of a sculptural art piece with all the practicality of an everyday bag.
About This Lavender Butterfly Crochet Pattern
This intermediate-level project combines flat panel construction with amigurumi techniques to create a stunning butterfly silhouette. You’ll work four wing panels in a gorgeous ombre gradient, join them together with a lacy scalloped border, then add a three-dimensional crocheted body down the center. White cotton lace trim frames the edges for that delicate, vintage feel.
The finished purse measures approximately 13 inches wide by 9 inches tall, not including the antennae and strap. It’s the perfect size for carrying your phone, wallet, keys, and a few essentials while making a serious style statement.
Skill Level: Intermediate. You should be comfortable working flat panels with color changes, reading shaping rows, joining pieces with decorative borders, and basic amigurumi construction. If you’re a motivated beginner with some experience under your belt, you can absolutely complete this project with patience.
Time Estimate: Approximately 12 to 18 hours for an experienced crocheter. Give yourself extra time if color changes are new to you.
Materials You’ll Need
Yarn:
Additional Materials:
Hook: US size G-6 (4.0 mm)
Yarn Suggestions
Lion Brand 24/7 Cotton in Ecru, Lavender, and Violet works beautifully here. This mercerized cotton has excellent stitch definition and holds its shape well for structured bags.
Paintbox Yarns Simply DK Cotton in Vanilla Cream, Wisteria Purple, and Pansy Purple is another great choice. It’s a smooth, matte cotton that photographs beautifully and works up evenly.
Drops Safran in Off-White, Lavender, and Purple is a fine sports-weight cotton that, when doubled, gives the correct gauge and adds durability.
Important: Choose 100% cotton or cotton-blend yarn for structure. Acrylic yarn will produce a bag that stretches and loses shape over time. Avoid wool or animal fibers unless your finished bag is purely decorative.
Gauge
18 single crochet (sc) and 20 rows = 4 inches (10 cm) worked flat in single crochet with a G-6 (4.0 mm) hook after blocking.
Gauge is critical for finished size. If your swatch is too big, go down a hook size. Too small? Go up a hook size. Don’t skip this step.
Abbreviations (US Terms)
Let me walk you through every abbreviation you’ll encounter. If you’re newer to crochet, bookmark this section.
Special Stitches
Shell Stitch (used in border)
This creates the beautiful scalloped edge around your butterfly wings.
1. Skip 2 stitches.
2. Work 5 double crochet into the next stitch.
3. Skip 2 stitches.
4. Slip stitch into the next stitch.
This completes one shell unit across 6 stitches.
Scallop Border (used on wing edges)
1. Join yarn in any stitch.
2. Chain 1, single crochet in same stitch.
3. Skip 1 stitch, work 5 dc in next stitch.
4. Skip 1 stitch, single crochet in next stitch.
Repeat steps 3 and 4 around the wing edge. This stitch requires a count divisible by 4 along the edge.
Surface Slip Stitch (used for wing vein detail)
This creates those gorgeous raised lines mimicking butterfly wing veins.
1. Hold yarn behind the fabric.
2. Insert hook from front to back through a stitch on the fabric surface.
3. Catch the yarn held behind and pull up a loop to the front.
4. Insert hook through the next stitch along the vein line, catch yarn, pull through both the fabric and the loop on your hook.
Continue along your vein line.
Pattern Notes Before You Begin
1. You’ll make four total wing panels for the front and four for the back. Think of it as two mirrored halves.
2. Color changes follow a gradient: rows 1-5 use Color A, rows 6-10 use Color B, rows 11-16 use Color C, rows 17 to end use Color D. Change colors by completing the last yarn over of the last stitch in the current color with the new color.
3. All flat panels begin with a foundation chain and are worked back and forth in rows with a turning chain of 1. This turning chain does NOT count as a stitch.
4. Stitch counts in parentheses at the end of each row reflect total working stitches, not including the turning chain.
Upper Wing Panel
Make 4 total: 2 identical panels, then 1 mirrored pair for front and back.
The upper wing is the larger, rounder portion of the butterfly wing. It tapers to a point where it meets the body center.
Foundation: With Color A, ch 5.
Row 1 (RS): sc in 2nd ch from hook, sc in next 3 ch, ch 1, turn. (4 sc)
Row 2: inc in first st, sc in 2 sts, inc in last st, ch 1, turn. (6 sc)
Row 3: inc in first st, sc in 4 sts, inc in last st, ch 1, turn. (8 sc)
Row 4: inc in first st, sc in 6 sts, inc in last st, ch 1, turn. (10 sc)
Row 5: inc in first st, sc in 8 sts, inc in last st, ch 1, turn. (12 sc)
Change to Color B.
Row 6: inc in first st, sc in 10 sts, inc in last st, ch 1, turn. (14 sc)
Row 7: inc in first st, sc in 12 sts, inc in last st, ch 1, turn. (16 sc)
Row 8: inc in first st, sc in 14 sts, inc in last st, ch 1, turn. (18 sc)
Row 9: inc in first st, sc in 16 sts, inc in last st, ch 1, turn. (20 sc)
Row 10: inc in first st, sc in 18 sts, inc in last st, ch 1, turn. (22 sc)
Change to Color C.
Row 11: inc in first st, sc in 20 sts, inc in last st, ch 1, turn. (24 sc)
Row 12: inc in first st, sc in 22 sts, inc in last st, ch 1, turn. (26 sc)
Row 13: sc across all 26 sts, ch 1, turn. (26 sc)
Row 14: inc in first st, sc in 24 sts, inc in last st, ch 1, turn. (28 sc)
Row 15: sc across all 28 sts, ch 1, turn. (28 sc)
Row 16: inc in first st, sc in 26 sts, inc in last st, ch 1, turn. (30 sc)
Change to Color D.
Row 17: sc across all 30 sts, ch 1, turn. (30 sc)
Row 18: inc in first st, sc in 28 sts, inc in last st, ch 1, turn. (32 sc)
Row 19: sc across all 32 sts, ch 1, turn. (32 sc)
Now begin upper wing taper on the right side (inner body edge):
Row 20: dec over first 2 sts, sc in rem 30 sts, ch 1, turn. (31 sc)
Row 21: sc in 29 sts, dec over last 2 sts, ch 1, turn. (30 sc)
Row 22: dec over first 2 sts, sc in rem 28 sts, ch 1, turn. (29 sc)
Row 23: sc in 27 sts, dec over last 2 sts, ch 1, turn. (28 sc)
Row 24: dec over first 2 sts, sc in rem 26 sts, ch 1, turn. (27 sc)
Row 25: sc in 25 sts, dec over last 2 sts, ch 1, turn. (26 sc)
Row 26: dec over first 2 sts, sc in rem 24 sts, ch 1, turn. (25 sc)
Row 27: sc in 23 sts, dec over last 2 sts, ch 1, turn. (24 sc)
Row 28: dec over first 2 sts, sc in rem 22 sts, ch 1, turn. (23 sc)
Row 29: sc in 21 sts, dec over last 2 sts, ch 1, turn. (22 sc)
Row 30: dec over first 2 sts, sc in rem 20 sts, ch 1, turn. (21 sc)
Row 31: sc in 19 sts, dec over last 2 sts, ch 1, turn. (20 sc)
Row 32: dec over first 2 sts, sc in rem 18 sts, ch 1, turn. (19 sc)
Row 33: sc in 17 sts, dec over last 2 sts, ch 1, turn. (18 sc)
Row 34: dec over first 2 sts, sc in rem 16 sts, ch 1, turn. (17 sc)
Row 35: sc in 15 sts, dec over last 2 sts, ch 1, turn. (16 sc)
Row 36: dec over first 2 sts, sc in rem 14 sts, ch 1, turn. (15 sc)
Row 37: sc in 13 sts, dec over last 2 sts, ch 1, turn. (14 sc)
Row 38: dec over first 2 sts, sc in rem 12 sts, ch 1, turn. (13 sc)
Row 39: sc in 11 sts, dec over last 2 sts, ch 1, turn. (12 sc)
Row 40: dec over first 2 sts, sc in rem 10 sts, dec over last 2 sts, ch 1, turn. (10 sc)
Row 41: dec over first 2 sts, sc in rem 6 sts, dec over last 2 sts, ch 1, turn. (8 sc)
Row 42: dec over first 2 sts, sc in rem 4 sts, dec over last 2 sts, ch 1, turn. (6 sc)
Row 43: dec over first 2 sts, sc in rem 2 sts, dec over last 2 sts, ch 1, turn. (4 sc)
Row 44: dec, dec. (2 sc)
Row 45: dec. (1 sc) Fasten off.
To mirror for the opposite side: Reverse the taper direction in rows 20-45. Work decreases at the beginning of odd rows and the end of even rows.
Checkpoint: Each completed upper wing panel should measure approximately 7 inches wide at its widest point and 8 inches tall.
Lower Wing Panel
Make 4 total: 2 identical and 1 mirrored pair.
The lower wing is smaller, rounder at the outer bottom edge, and tapers sharply to points.
Foundation: With Color A, ch 4.
Row 1 (RS): sc in 2nd ch from hook, sc in next 2 ch, ch 1, turn. (3 sc)
Row 2: inc in first st, sc in 1 st, inc in last st, ch 1, turn. (5 sc)
Row 3: inc in first st, sc in 3 sts, inc in last st, ch 1, turn. (7 sc)
Row 4: inc in first st, sc in 5 sts, inc in last st, ch 1, turn. (9 sc)
Row 5: inc in first st, sc in 7 sts, inc in last st, ch 1, turn. (11 sc)
Change to Color B.
Row 6: inc in first st, sc in 9 sts, inc in last st, ch 1, turn. (13 sc)
Row 7: inc in first st, sc in 11 sts, inc in last st, ch 1, turn. (15 sc)
Row 8: inc in first st, sc in 13 sts, inc in last st, ch 1, turn. (17 sc)
Row 9: sc across all 17 sts, ch 1, turn. (17 sc)
Row 10: inc in first st, sc in 15 sts, inc in last st, ch 1, turn. (19 sc)
Change to Color C.
Row 11: sc across all 19 sts, ch 1, turn. (19 sc)
Row 12: inc in first st, sc in 17 sts, inc in last st, ch 1, turn. (21 sc)
Row 13: sc across all 21 sts, ch 1, turn. (21 sc)
Row 14: inc in first st, sc in 19 sts, inc in last st, ch 1, turn. (23 sc)
Row 15: sc across all 23 sts, ch 1, turn. (23 sc)
Row 16: inc in first st, sc in 21 sts, inc in last st, ch 1, turn. (25 sc)
Change to Color D.
Row 17: sc across all 25 sts, ch 1, turn. (25 sc)
Row 18: inc in first st, sc in 23 sts, inc in last st, ch 1, turn. (27 sc)
Row 19: sc across all 27 sts, ch 1, turn. (27 sc)
Now taper both sides to shape the lower lobe:
Row 20: dec over first 2 sts, sc in 23 sts, dec over last 2 sts, ch 1, turn. (25 sc)
Row 21: dec over first 2 sts, sc in 21 sts, dec over last 2 sts, ch 1, turn. (23 sc)
Row 22: dec over first 2 sts, sc in 19 sts, dec over last 2 sts, ch 1, turn. (21 sc)
Row 23: dec over first 2 sts, sc in 17 sts, dec over last 2 sts, ch 1, turn. (19 sc)
Row 24: dec over first 2 sts, sc in 15 sts, dec over last 2 sts, ch 1, turn. (17 sc)
Row 25: dec over first 2 sts, sc in 13 sts, dec over last 2 sts, ch 1, turn. (15 sc)
Row 26: dec over first 2 sts, sc in 11 sts, dec over last 2 sts, ch 1, turn. (13 sc)
Row 27: dec over first 2 sts, sc in 9 sts, dec over last 2 sts, ch 1, turn. (11 sc)
Row 28: dec over first 2 sts, sc in 7 sts, dec over last 2 sts, ch 1, turn. (9 sc)
Row 29: dec over first 2 sts, sc in 5 sts, dec over last 2 sts, ch 1, turn. (7 sc)
Row 30: dec over first 2 sts, sc in 3 sts, dec over last 2 sts, ch 1, turn. (5 sc)
Row 31: dec over first 2 sts, sc in 1 st, dec over last 2 sts, ch 1, turn. (3 sc)
Row 32: insert hook in all 3 sts together, YO, pull through, YO, pull through 2 loops (sc3tog). (1 sc) Fasten off.
Checkpoint: Each completed lower wing panel should measure approximately 6 inches wide and 6 inches tall.
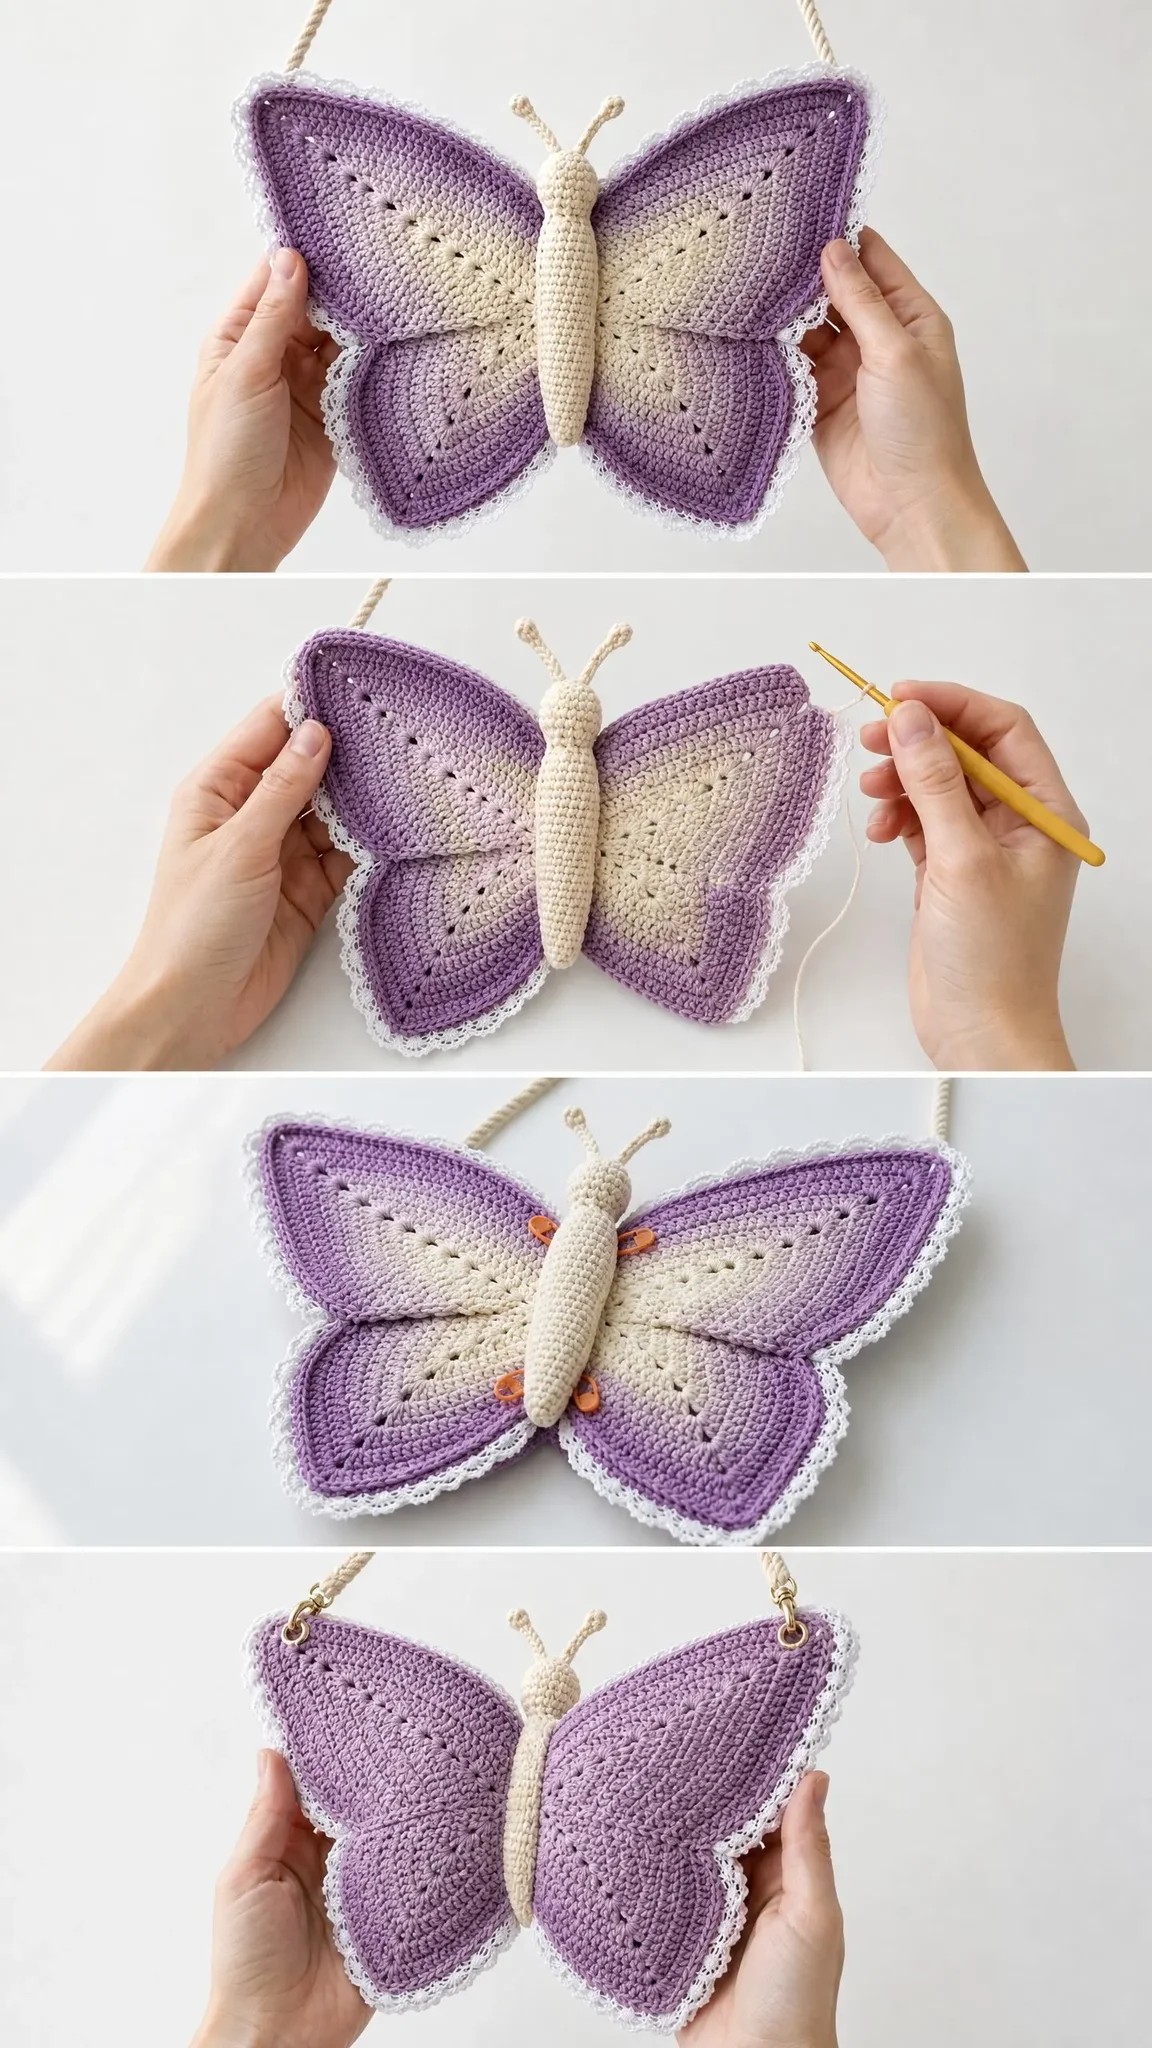
Assembling the Wing Halves
You now have 2 upper wing panels (1 left, 1 mirrored right) and 2 lower wing panels (1 left, 1 mirrored right) for the front face. You’ve made the same set for the back.
For each side (left or right):
1. Hold the upper wing panel with the tapered point facing downward.
2. Hold the lower wing panel with the point of row 1 facing upward.
3. Align the inner straight edges. The foundation chain of the upper wing and the tip of the lower wing will meet at the center body seam line.
4. Using Color D and a yarn needle, whip stitch the inner edges together along approximately 1.5 inches (4 cm) to join the upper and lower wing into one complete half-butterfly silhouette.
5. Leave the remaining inner straight edges open. These will be covered by the body.
Repeat for all four wing halves.
Joining Front and Back Panels
1. Hold the front left and back left panels with wrong sides facing each other. Align edges.
2. Using Color D, work a single crochet join around the outer edge only, inserting hook through both layers simultaneously. Work 1 sc per row end or 1 sc per stitch around curved edges. At each sharp wing tip point, work 3 sc into the same spot to turn the corner.
3. Leave the inner straight body-facing edge open.
4. Repeat for the right wing pair.
5. Hold the joined left wing and joined right wing side by side. The two open inner edges will face each other and form the bag opening at the top.
6. Using Color D, single crochet the bottom center seam to close the base of the bag.
7. Leave the top center opening (approximately 3 to 3.5 inches wide) completely open.
Checkpoint: The assembled bag should measure approximately 13 inches wide and 9 inches tall. The top center opening should be approximately 3 inches wide.
Wing Edge Border
The border is worked around the full outer perimeter of the assembled bag.
1. Join Color D at the top left shoulder point of the bag.
2. Work 1 round of sc evenly around the entire outer perimeter. Work 3 sc at each wing tip point. Total stitch count should be approximately 196 sc, adjusted to the nearest multiple of 4 for the scallop border.
3. Slip stitch to join. Do not turn.
4. Scallop Border Round: ch 1, sc in first st, skip 1 st, 5 dc in next st, skip 1 st, sc in next st. Rep around. Slip stitch to join. Fasten off. (Approximately 49 scallops)
5. Pin white cotton lace trim around the outer edge just inside the scallop border. The lace should peek out from beneath. Hand sew in place.
Vein Details on Wings
Using Color D and the surface slip stitch technique:
Upper Wing Veins: Work one curved line from the inner body seam outward toward the upper outer tip. Work 2 additional shorter lines branching from the main vein.
Lower Wing Veins: Work one line from inner seam toward the outer lower tip. Work 1 shorter branching line toward the rounded lower edge.
Create small dot-like spots at the end of each vein line by working 1 sl st in a tight circle of 3 adjacent stitches.
Butterfly Body
The body is worked in continuous rounds in Color A using the magic ring method.
Round 1: MR, 6 sc into ring. (6 sc)
Round 2: inc in each st around. (12 sc)
Rounds 3-8: sc in each st around. (12 sc)
Round 9: dec 6 times evenly spaced. (6 sc)
Do not fasten off. Stuff lightly with fiberfill.
Round 10: inc in each of 6 sts. (12 sc)
Rounds 11-12: sc around. (12 sc)
Round 13: dec 6 times evenly. (6 sc)
Stuff head lightly. Slip stitch to close. Fasten off, leave a 12-inch tail for sewing.
The body should measure approximately 4 inches long and 1 inch wide.
Antennae (make 2)
With Color A, ch 18.
Sl st in 2nd ch from hook, sl st in next 2 ch (this forms the curled tip), sc in rem 15 ch. Fasten off leaving a 6-inch tail.
Sew the antennae tails to the top of the head, spacing them approximately 0.5 inches apart.
Magnetic Snap Installation
Before sewing the body to the bag, install the magnetic snap inside the top opening. Position one half on the front interior at the center, approximately 0.5 inches down from the opening edge. Position the matching half on the back interior. Secure with the metal backing plates provided. Reinforce with a small square of felt behind each snap plate to protect the crochet fabric.
Attaching the Body
1. Center the completed body vertically over the front seam where the left and right wing panels meet.
2. The head rests at the top, antennae pointing upward.
3. Using the long tail and a yarn needle, sew the body down the center of the bag using whip stitches.
4. The body covers the inner seam line and the sides of the top opening.
5. Sew around the entire perimeter of the body to secure it flat.
Strap
With Color A, cut 6 strands of yarn each measuring 120 inches long.
Fold all 6 strands in half to create 12 working strands each 60 inches long.
Attach the midpoint to one side of the body/seam at the top shoulder using a lark’s head knot.
Divide the 12 strands into 3 groups of 4 strands each.
Braid or twist the groups together firmly for the full length.
Knot securely at the end.
Attach the free end to the opposite shoulder point using an overhand knot or by stitching with yarn needle.
The finished strap should be approximately 48 inches long.
Alternative: Purchase a 48-inch twisted cotton rope in cream and attach at both shoulder points.
Size Customization Tips
For a smaller child-sized version: Use DK weight yarn and a US size E-4 (3.5 mm) hook. Work through row 28 on upper wings and row 24 on lower wings before tapering. This produces a bag approximately 9 inches wide by 7 inches tall.
For a larger tote-style version: Use bulky weight cotton and a US size J-10 (6.0 mm) hook. Add 8 additional rows of increases to both upper and lower wing panels before beginning the tapers. This produces a bag approximately 17 inches wide by 12 inches tall.
Finishing and Blocking
Wet block all wing panels before assembly. Soak each panel in cool water for 10 minutes, gently squeeze out excess water, pin to a foam blocking board in the desired wing shape, and allow to dry completely. Blocking is especially important for the scallop border.
After assembly and body attachment, lightly mist the finished bag and smooth into shape by hand. Allow to dry flat.
Weave in all yarn ends on the interior using a yarn needle. Run each end through at least 1 inch of stitches in two directions before trimming.
Care Instructions
Hand wash in cool water with gentle detergent. Do not wring. Reshape and lay flat to dry. Do not machine wash or tumble dry. Store flat or hanging when not in use.
Thank you so much for choosing this lavender butterfly purse crochet pattern! I truly hope Violet brings as much joy to your crafting hours as she did to mine. If you make her, I would absolutely love to see your finished butterfly. Tag me on Instagram or share in our Facebook group so I can admire your beautiful work!
If this pattern made you smile or you’re planning to cast on soon, save it to your Pinterest boards so you can find it easily when you’re ready. And please drop a comment below to let me know you’re making one. I read every single comment and it genuinely makes my day to hear from you.
You Might Also Like
- Coral Poppy Appliqué Knit Sweater Free Crochet Pattern
- Dusty Rose Backpack Free Crochet Pattern
- Dusty Rose Boho Lace-Up Crochet Set Free Pattern
- Lavender Mint Shell Stitch Baby Dress Free Crochet Pattern