Mint Green Baby Hooded Sweater Free Crochet Pattern
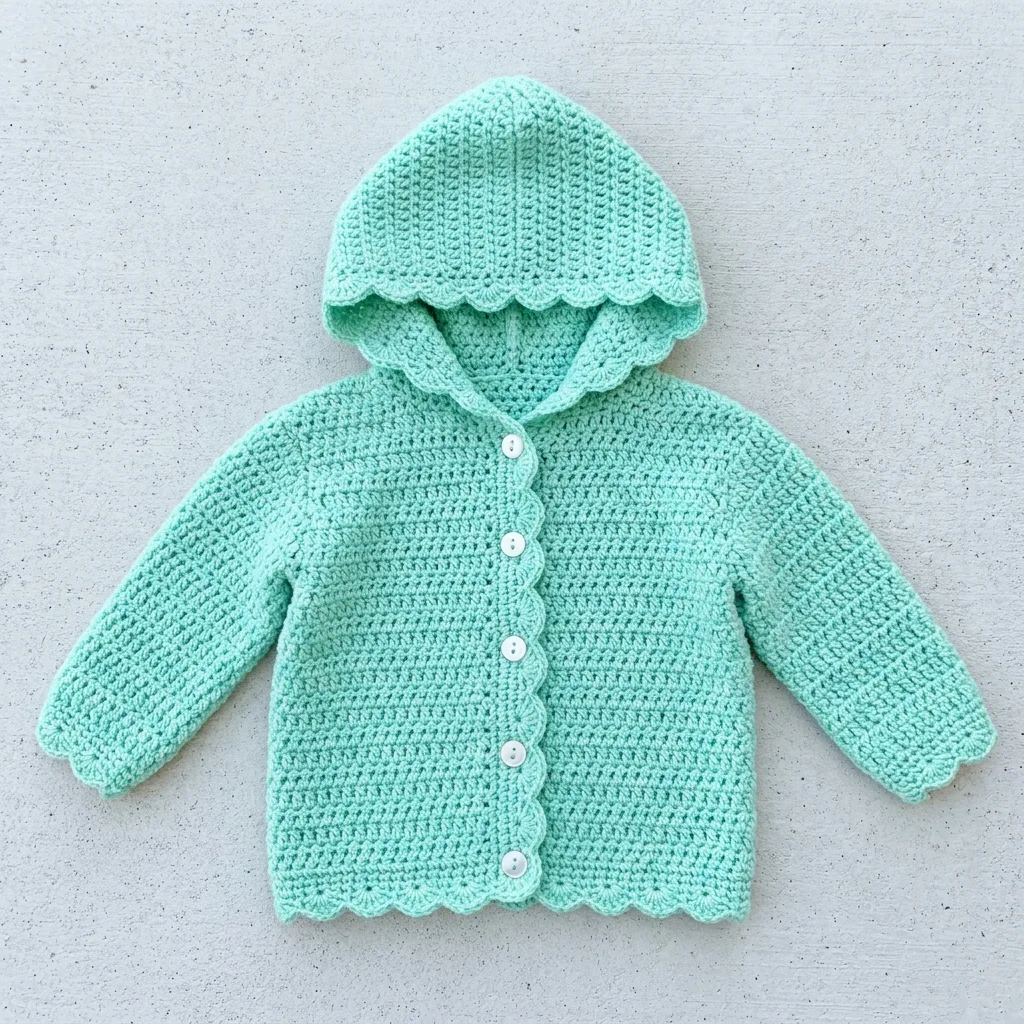
I’ve been looking for the perfect hooded baby cardigan pattern for months now, and this mint green sweater is the one I keep coming back to. The scalloped edges, the cozy hood, the button front closure. It checks every box for a handmade baby gift that looks store-bought but feels like a warm hug.
This is my favourite style of baby sweater construction because it works from the top down in one seamless piece. No fussy seaming of separate panels. No guessing if the sleeves will match the body. You just start at the neckline and work your way down, watching the little cardigan take shape row by row.
Whether you’re making this for a baby shower, a grandchild, or that friend who just announced their pregnancy, this pattern delivers impressive results with straightforward techniques. Let me walk you through everything you need to know.
About This Baby Hooded Cardigan Pattern
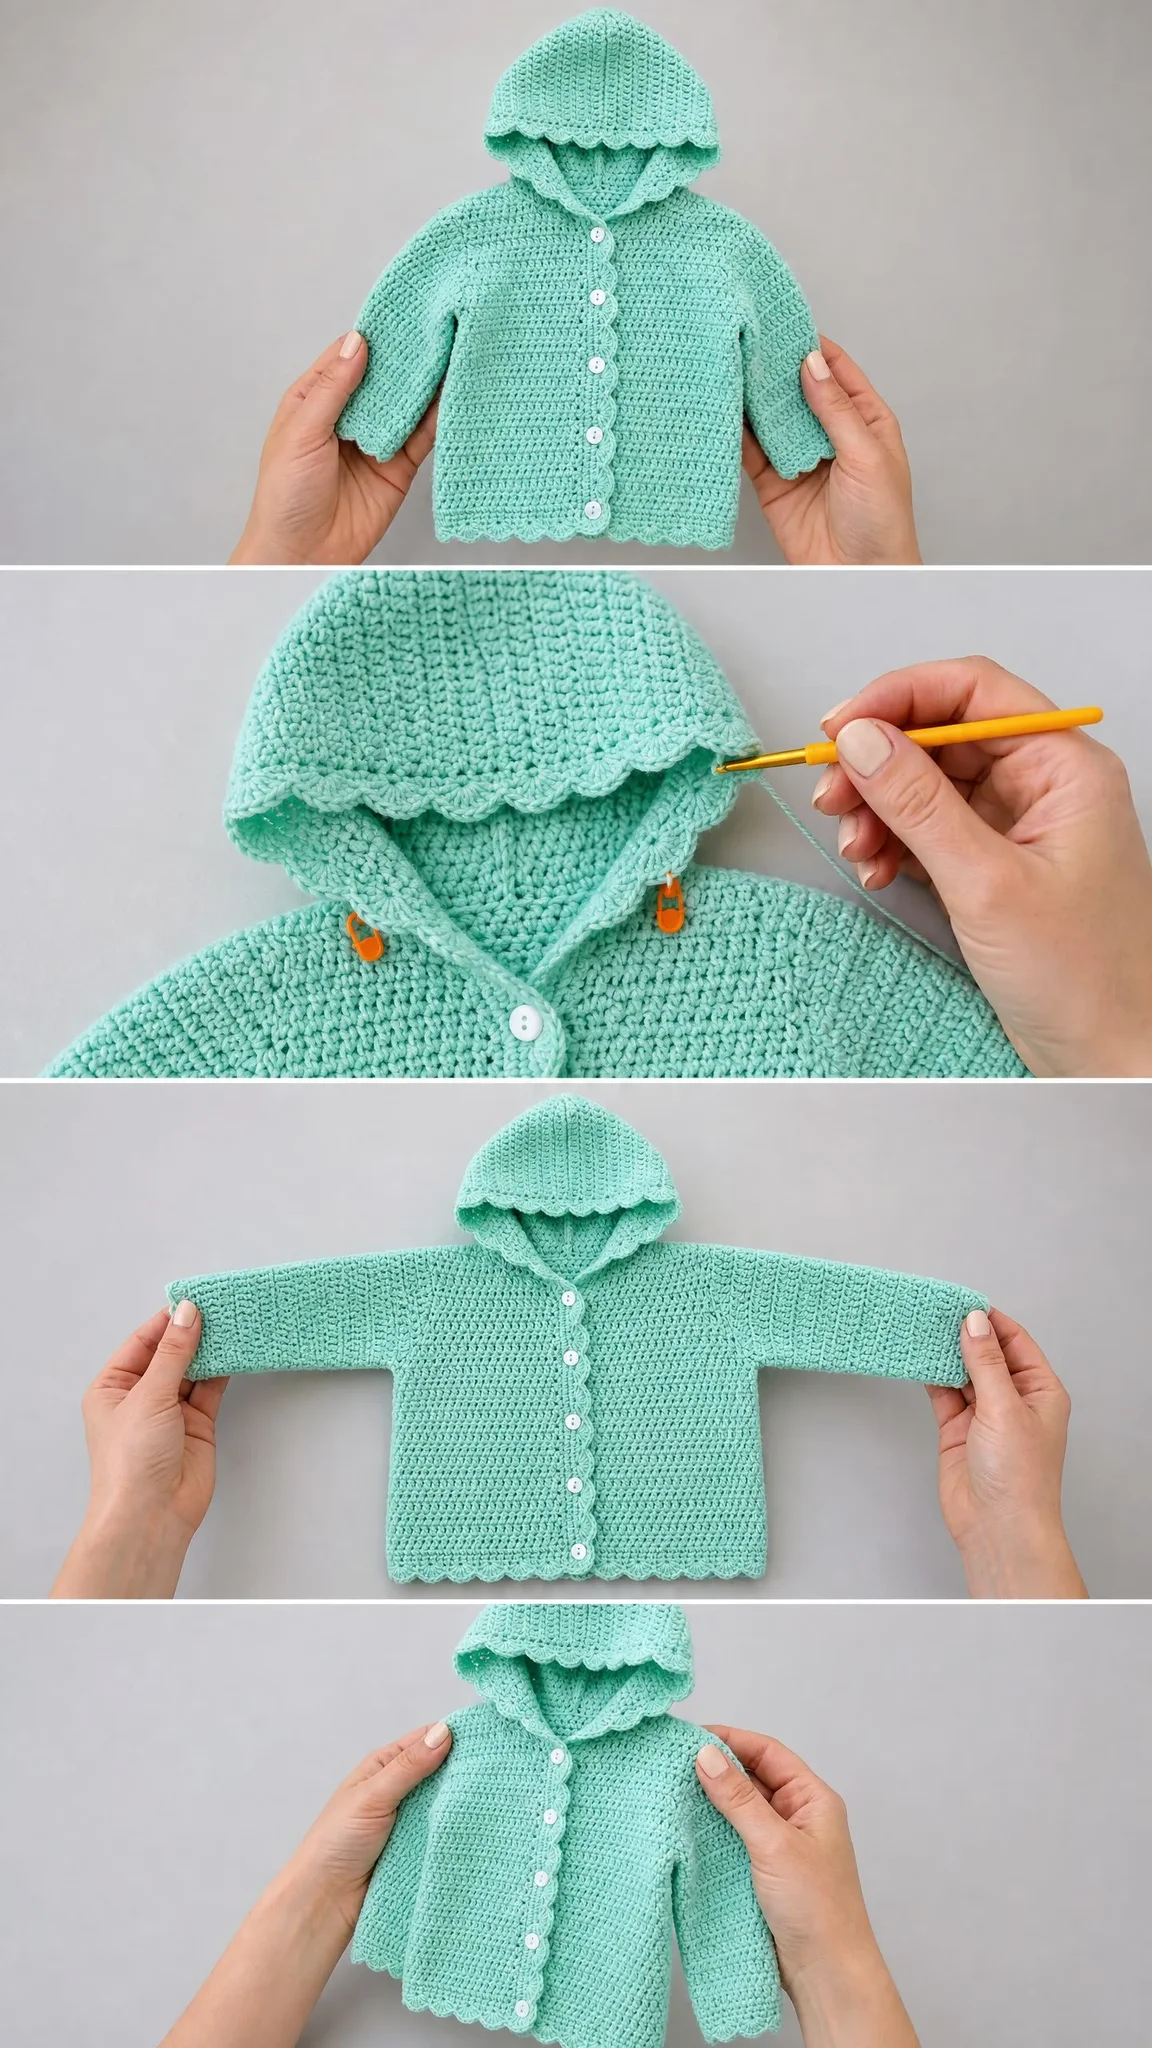
This adorable mint green baby cardigan features a top-down raglan construction, which means you start at the neckline and work downward. The body and sleeves grow together until you reach the underarms, then you divide and finish each section separately. A cozy hood gets picked up along the neckline and seamed at the top. The signature scalloped border finishes the hem, cuffs, hood opening, and front bands for that polished, professional look.
The fabric is dense half double crochet throughout, creating a sturdy but soft texture that’s perfect for keeping little ones warm. Five small buttons close the center front, and the whole piece works up in approximately 8 to 12 hours for an experienced crocheter.
Skill Level
This pattern is rated intermediate. You should be comfortable with:
If you’ve made a basic sweater or worked a raglan hat before, you have all the skills you need. The scallop border is a simple three-step shell that adds gorgeous detail without complexity.
Finished Measurements
This crochet tutorial includes four sizes to fit babies from newborn through toddler:
Size 0 to 3 months: Chest 16 in / 40.5 cm, Length 9 in / 23 cm, Sleeve 6 in / 15 cm
Size 3 to 6 months: Chest 17 in / 43 cm, Length 9.5 in / 24 cm, Sleeve 6.5 in / 16.5 cm
Size 6 to 12 months: Chest 18 in / 45.5 cm, Length 10 in / 25.5 cm, Sleeve 7 in / 18 cm
Size 12 to 18 months: Chest 19 in / 48 cm, Length 10.5 in / 26.5 cm, Sleeve 7.5 in / 19 cm
All instructions are written for size 0 to 3 months. Changes for larger sizes appear in parentheses in the order listed above.
Materials Needed
Yarn: DK weight, approximately 300 (330, 370, 410) yards / 275 (300, 340, 375) meters in mint green
Hook: US size G-6 / 4.0 mm
Notions: Yarn needle, 5 small buttons approximately 3/8 in / 10 mm diameter, stitch markers (at least 4), scissors
Recommended Yarn Options
1. Lion Brand Pound of Love (100% acrylic, 1020 yards per 16 oz skein) in color Pastel Green. Machine washable, very soft against infant skin, widely available.
2. Paintbox Yarns Simply DK (100% acrylic, 137 yards per 50 g ball) in color Spearmint Green. Consistent twist, great stitch definition, affordable.
3. Cascade 220 Superwash (100% superwash merino wool, 220 yards per 100 g skein) in color Mint. Luxuriously soft, excellent drape, machine washable on gentle cycle.
Choose a smooth DK weight yarn with minimal halo so the half double crochet stitch definition remains visible. Avoid bulky or fuzzy fibers that will obscure the scallop trim detail.
Gauge
16 hdc x 12 rows = 4 in / 10 cm in half double crochet, blocked
Gauge matters for garments! Make a swatch and adjust your hook size up or down as needed to match. This ensures your finished sweater will fit properly.
Abbreviations Used
Before we dive into this step by step crochet pattern, let’s define all the abbreviations:
Special Stitch: Scallop Border
This decorative edging creates those beautiful waves you see at the hem, cuffs, and hood. Here’s how to work it:
Step 1: Join yarn with a sl st in the first st.
Step 2: Ch 1, sc in the same st.
Step 3: Sk 1 st, work 5 dc in the next st (this creates the shell).
Step 4: Sk 1 st, sc in the next st.
Step 5: Rep Steps 3 and 4 across or around the edge, ending with a sc. Fasten off.
The scallop border requires a stitch count divisible by 4, plus 1 extra stitch for the final sc. Don’t worry, the pattern tells you exactly how to adjust your pickup counts where needed.
Pattern Notes Before You Begin
Crochet Pattern Instructions
Yoke
Foundation Chain: Ch 36 (38, 40, 42).
Row 1 (WS): Hdc in 3rd ch from hook and in each ch across. Turn. [35 (37, 39, 41) hdc]
The 4 raglan seam points divide this row as follows for size 0 to 3 months: Right front 6 hdc, pm, seam st 1 hdc, pm, right sleeve 5 hdc, pm, seam st 1 hdc, pm, back 10 hdc, pm, seam st 1 hdc, pm, left sleeve 5 hdc, pm, seam st 1 hdc, pm, left front 6 hdc. Total: 35 hdc.
For size 3 to 6 months: Right front 7, seam 1, sleeve 5, seam 1, back 10, seam 1, sleeve 5, seam 1, left front 7. Total: 37 hdc.
For size 6 to 12 months: Right front 7, seam 1, sleeve 5, seam 1, back 12, seam 1, sleeve 5, seam 1, left front 7. Total: 39 hdc.
For size 12 to 18 months: Right front 7, seam 1, sleeve 6, seam 1, back 12, seam 1, sleeve 6, seam 1, left front 8. Total: 41 hdc.
Row 2 (RS, Raglan Increase Row): Ch 2, turn. Work 2 hdc in first st. Hdc to 1 st before first marker. Work 2 hdc in next st, hdc in marked seam st, 2 hdc in next st. Hdc to 1 st before second marker. Work 2 hdc in next st, hdc in marked seam st, 2 hdc in next st. Continue in this manner across all 4 seam points, ending 2 hdc in last st. Turn. [43 (45, 47, 49) hdc]
Row 3 (WS, even row): Ch 2, turn. Hdc in each st across. Turn. [43 (45, 47, 49) hdc]
Row 4 (RS, Raglan Increase Row): Rep Row 2 format, adding 8 hdc. [51 (53, 55, 57) hdc]
Row 5 (WS, even): Ch 2, turn. Hdc across. [51 (53, 55, 57) hdc]
Row 6 (RS, Raglan Increase Row): [59 (61, 63, 65) hdc]
Row 7 (WS, even): Hdc across. [59 (61, 63, 65) hdc]
Row 8 (RS, Raglan Increase Row): [67 (69, 71, 73) hdc]
Row 9 (WS, even): Hdc across. [67 (69, 71, 73) hdc]
Row 10 (RS, Raglan Increase Row): [75 (77, 79, 81) hdc]
Row 11 (WS, even): Hdc across. [75 (77, 79, 81) hdc]
Row 12 (RS, Raglan Increase Row): [83 (85, 87, 89) hdc]
Row 13 (WS, even): Hdc across. [83 (85, 87, 89) hdc]
Row 14 (RS, Raglan Increase Row): [91 (93, 95, 97) hdc]
Row 15 (WS, even): Hdc across. [91 (93, 95, 97) hdc]
Sizes 6 to 12 months and 12 to 18 months only: Continue with 2 more increase rows (Rows 16 and 17 for 6 to 12 months, Rows 16 through 19 for 12 to 18 months, working even rows between each) until you reach (103, 113) hdc total.
Checkpoint: After Row 15, the stitch distribution for size 0 to 3 months should read: Right front 20 hdc, seam 1, right sleeve 19 hdc, seam 1, back 24 hdc, seam 1, left sleeve 19 hdc, seam 1, left front 20 hdc = 91 hdc total. Verify your markers match these counts before dividing.
The piece from neck edge to needle should measure approximately 3.25 in / 8.5 cm tall.
Divide for Body and Sleeves
Dividing Row (RS): Ch 2, turn. Hdc across right front sts up to and including seam st (21 sts for size 0 to 3 months). Ch 2 (underarm chain). Skip all right sleeve sts plus seam st (20 sts). Hdc across back sts including both seam sts at back (26 sts). Ch 2 (underarm chain). Skip all left sleeve sts plus seam st (20 sts). Hdc across left front sts to end (21 sts). Turn.
Stitch count for body only: Size 0 to 3 months: 72 hdc. Size 3 to 6 months: 75 hdc. Size 6 to 12 months: 80 hdc. Size 12 to 18 months: 84 hdc.
Body
Work flat across all body sts, back and forth in rows.
Row 1 (WS): Ch 2, turn. Hdc in each st across. [72 (75, 80, 84) hdc]
Rep Row 1 (working even in hdc) until body measures 5.75 (6, 6.5, 7) in / 14.5 (15, 16.5, 18) cm from underarm, ending on a WS row. Do not fasten off.
Checkpoint: The total garment length from the back neck should be approximately 9 in / 23 cm for the smallest size.
Set the body aside and work the sleeves first.
Sleeves (Make 2)
With RS facing, join yarn at the center of the underarm chain.
Setup Rnd: Ch 2. Pick up and hdc in each of the 2 underarm chain sts, then hdc in each sleeve st around (19 sts for size 0 to 3 months), hdc in rem underarm chain st. Sl st to top of beg ch-2 to join. [22 (23, 25, 27) hdc]
Rnds 1 to 3: Ch 2, hdc in each st around, sl st to top of ch-2. [22 (23, 25, 27) hdc]
Decrease Rnd: Ch 2, hdc2tog over next 2 sts, hdc to last 2 sts, hdc2tog, sl st to top of ch-2. [20 (21, 23, 25) hdc]
Work 4 even rnds in hdc. [20 (21, 23, 25) hdc]
Rep the last 5 rnds (4 even, then 1 decrease rnd) once more. [18 (19, 21, 23) hdc]
Continue even in hdc until sleeve measures 5 (5.5, 6, 6.5) in / 12.5 (14, 15, 16.5) cm from underarm pickup.
Final Rnd: Sl st in each st around. Fasten off.
Checkpoint: Each sleeve should measure approximately 6 in / 15 cm from underarm to cuff for the smallest size.
Hood
With RS facing, join yarn at the top right front corner of the neckline.
Pickup Row: Ch 2. Work 1 hdc in each st along the top of the foundation chain across all 35 (37, 39, 41) neckline sts. Turn. [35 (37, 39, 41) hdc]
Row 1 (WS): Ch 2, turn. Hdc in each st across. [35 (37, 39, 41) hdc]
Row 2 (RS, Increase Row): Ch 2, turn. Hdc in first 16 (17, 18, 19) sts. Work 2 hdc in next st. Hdc in next st (center back). Work 2 hdc in next st. Hdc to end. Turn. [37 (39, 41, 43) hdc]
Row 3: Ch 2, turn. Hdc across. [37 (39, 41, 43) hdc]
Row 4 (Increase Row): Ch 2, turn. Hdc in first 17 (18, 19, 20) sts. Work 2 hdc in next st. Hdc in next st. Work 2 hdc in next st. Hdc to end. Turn. [39 (41, 43, 45) hdc]
Row 5: Hdc across. [39 (41, 43, 45) hdc]
Row 6 (Increase Row): Ch 2, turn. Hdc in first 18 (19, 20, 21) sts. Work 2 hdc in next st. Hdc in next st. Work 2 hdc in next st. Hdc to end. Turn. [41 (43, 45, 47) hdc]
Row 7: Hdc across. [41 (43, 45, 47) hdc]
Row 8 (Increase Row): [43 (45, 47, 49) hdc]
Row 9: Hdc across. [43 (45, 47, 49) hdc]
Row 10 (Increase Row): [45 (47, 49, 51) hdc]
Continue working even in hdc (no more increases) until hood measures 6 (6.25, 6.5, 6.75) in / 15 (16, 16.5, 17) cm from the pickup row.
Hood Seam: Fold the hood in half with RS together so the two short ends are aligned. Sl st through both layers across the top to seam. Fasten off and weave in end. Turn RS out.
Front Band and Button Loops
With RS facing, join yarn at the lower right front corner.
Right Front Band (button loop side): Ch 1. Work sc evenly up the right front edge, placing 1 sc per row end. You should have approximately 26 (28, 30, 32) sc up the right front body, then continue up the hood opening edge.
At the hood edge: Place a marker after the 3rd sc from the bottom. Place 4 additional markers evenly spaced, each approximately 5 (5, 6, 6) sc apart. At each marked position, work ch 2, sk 2 sc (button loop made). Continue sc to the top of the hood face opening. Fasten off.
Left Front Band (button side): With RS facing, join yarn at the top left front corner. Work sc evenly down the entire left front edge mirroring the right band. Fasten off.
Sew 5 buttons to the left front band opposite the button loops.
Scallop Edging
Bottom Hem: With RS facing, join yarn at the lower right front corner. Work sc along the entire bottom edge of the body. Count sts. Adjust to the nearest multiple of 4 plus 1 if needed. Then work the scallop stitch sequence across the entire bottom hem. Fasten off.
Cuffs: Join yarn at the underarm join point of one sleeve cuff. Pick up sc around the cuff, adjusting to nearest multiple of 4 plus 1: 17 (21, 21, 25) sc. Work scallop border in the round, joining at end. Fasten off. Repeat for second sleeve.
Hood Face Opening: Join yarn at the right front top corner of the hood opening. Work sc evenly around the face opening of the hood. Adjust to nearest multiple of 4 plus 1. Work one round of scallop stitch around the hood opening. Fasten off.
Finishing Your Baby Cardigan
Weave in all ends securely, especially at sleeve joins and hood seam.
Blocking: Wet block by submerging the finished sweater in cool water, gently pressing out excess water in a towel, and pinning flat to a foam mat. Pin the scallop edges open slightly to accentuate the shell detail. Allow to dry completely.
Buttons: Sew buttons firmly with doubled thread, stitching through all layers of the front band.
Care Instructions
Machine wash cold on gentle cycle if using superwash or acrylic yarn. Lay flat to dry. Do not hang wet. Do not tumble dry on high heat. If using non-superwash wool, hand wash only.
Size Customization Tips
To add chest width: Add 4 sts to the back and 2 sts to each front at the foundation chain, and continue raglan increase rows 1 to 2 additional times.
To lengthen the body: Work additional even rows before the scallop hem. Each 2 rows adds approximately 0.67 in.
To lengthen the sleeves: Work additional even rounds before the cuff edging.
To size up to 2T or 3T: Add 2 additional raglan increase rows to the yoke, extend body length to 11.5 to 12 in from neck, and extend sleeve length to 8.5 to 9 in.
You Did It!
Thank you so much for choosing this baby hooded cardigan pattern! I hope you love making this sweet little sweater as much as I loved designing it. The finished piece makes such a thoughtful gift, and those scalloped edges really do make it something special.
If you make one, I would absolutely love to see it! Tag me on Instagram or share a photo in our Facebook group. Seeing your finished projects is honestly the best part of sharing patterns.
Save this pattern to your Pinterest boards so you can find it when you’re ready to start, and drop a comment below if you have any questions or just want to share your progress. Happy crocheting!
You Might Also Like
- Blush Pink Rose Garden Bracelet Free Crochet Pattern
- Dusty Rose Floral Granny Square Tote Free Crochet Pattern
- Mint Garden Baby Crochet Dress Free Pattern
- Blush Pink Floral Crochet Gladiator Sandals Free Pattern