Sunset Gradient Floral Heart Halter Free Crochet Pattern
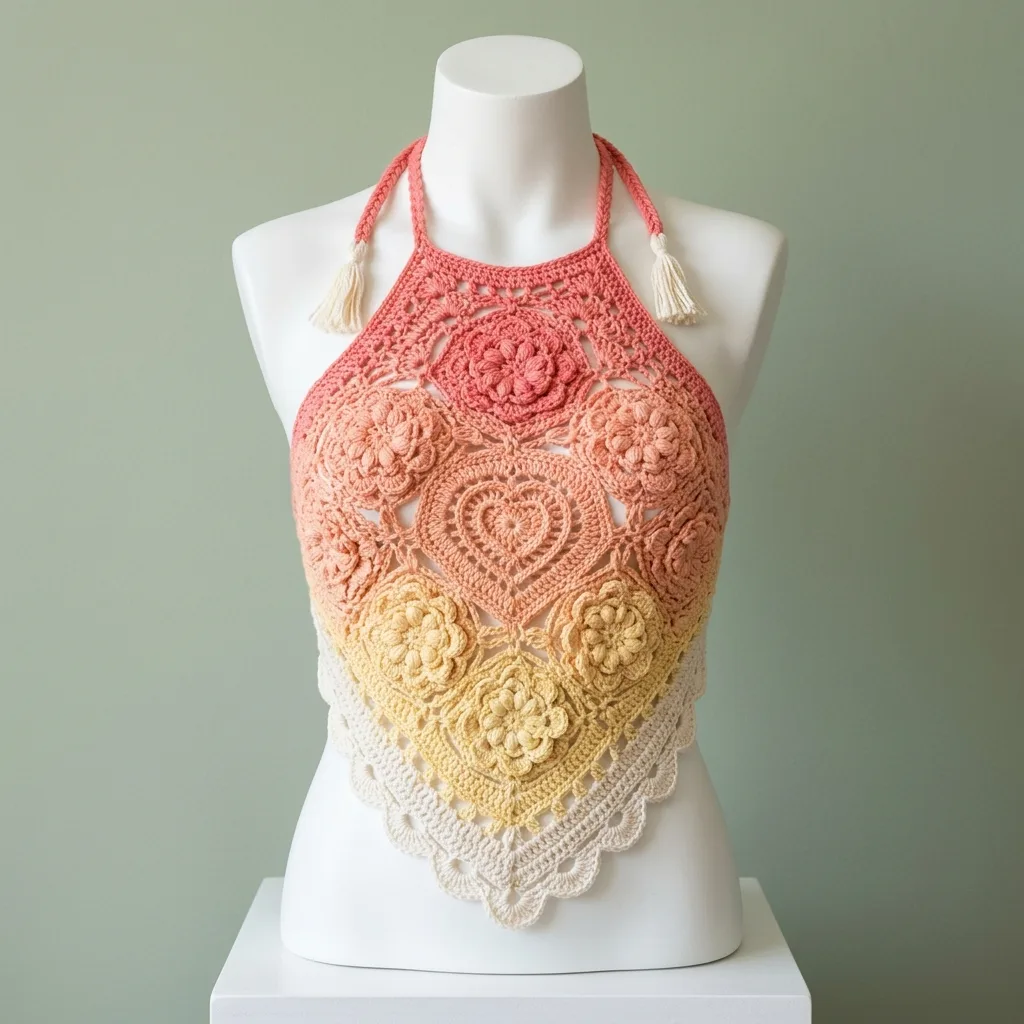
Let me guess. You saw this gorgeous ombre halter top with all those intricate floral motifs and that stunning heart center, and your first thought was “no way I can make that.” I get it. This looks like the kind of piece you would find in a high-end boutique, not something you could create with your own two hands and a hook.
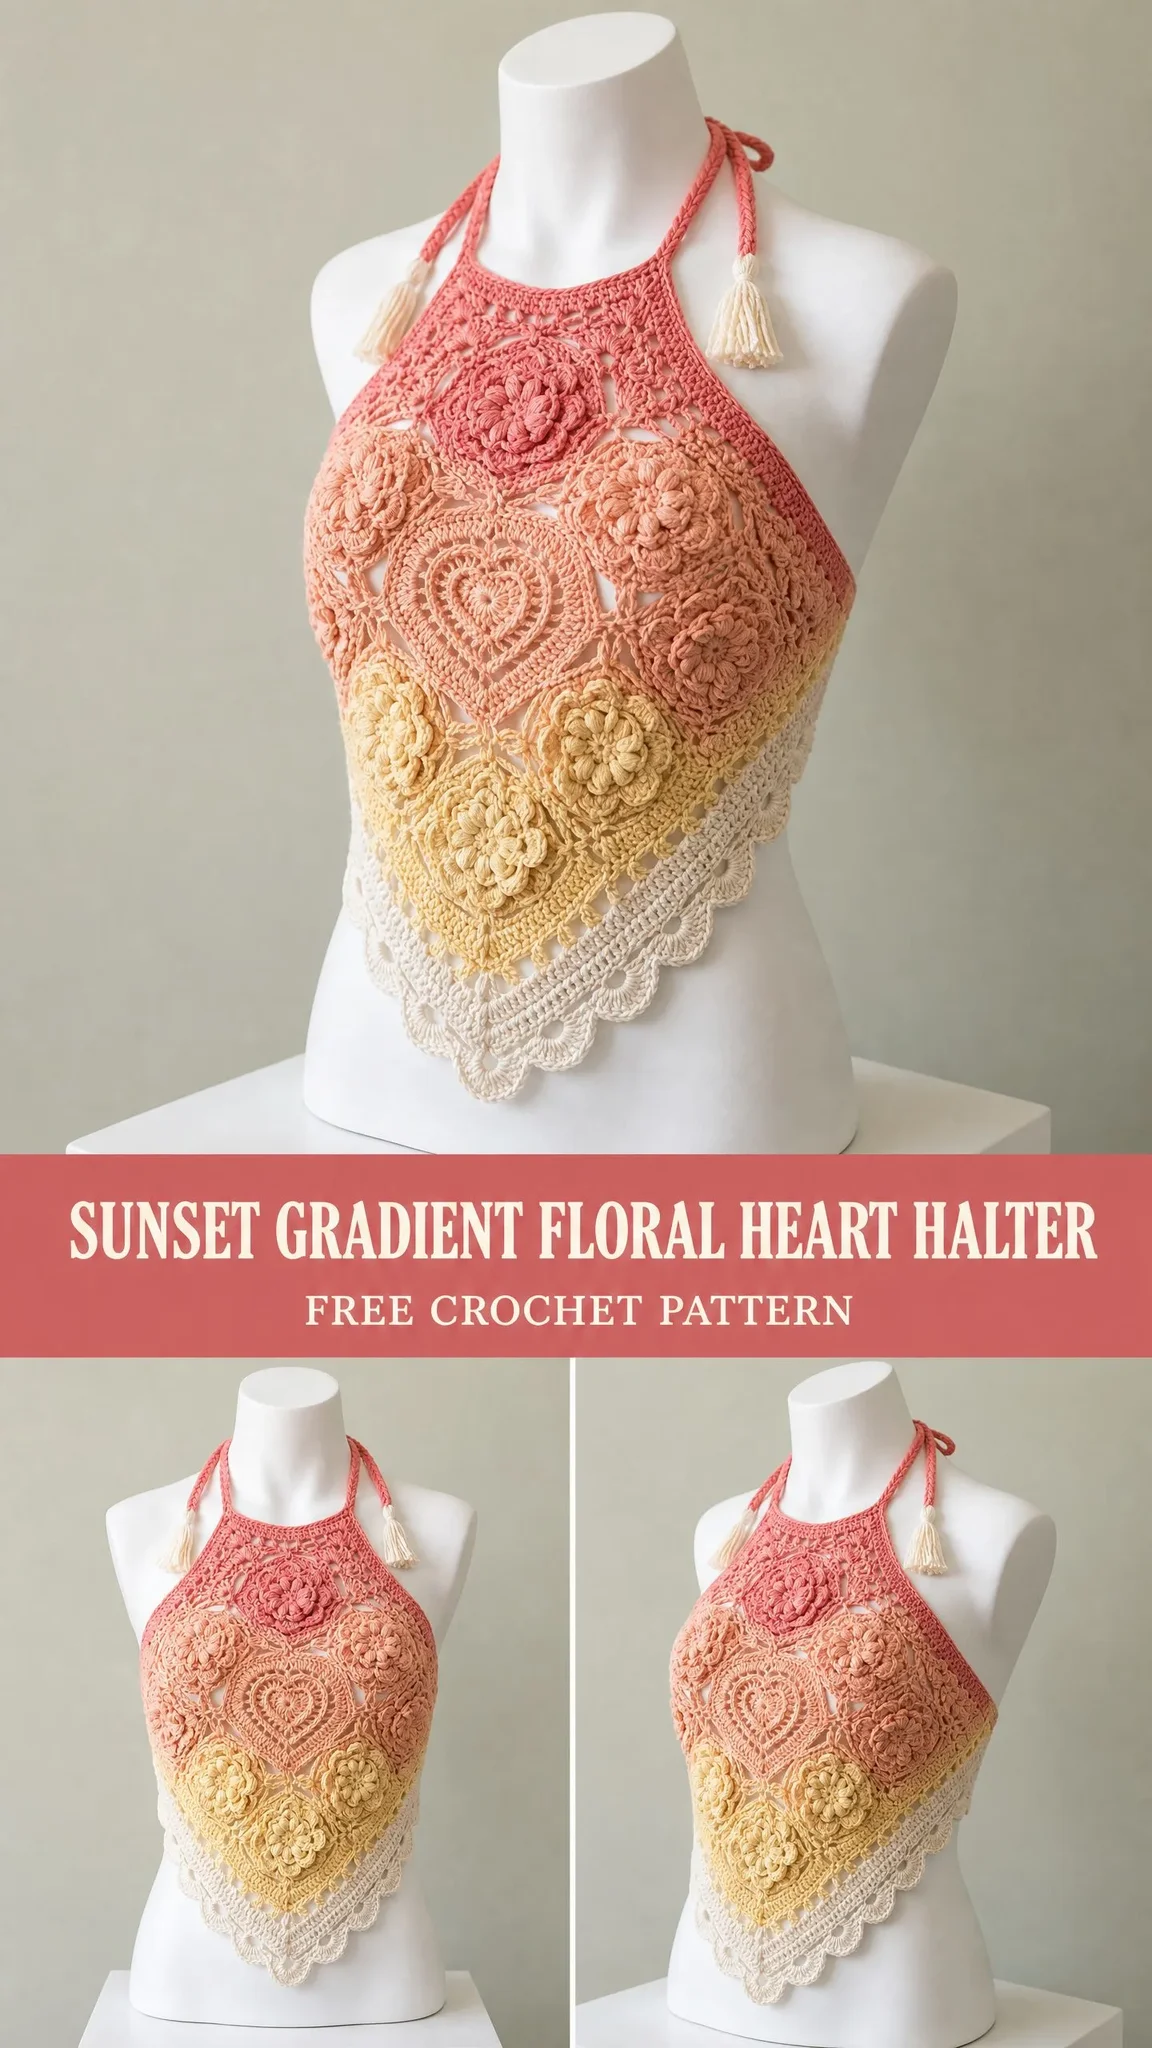
Here is the thing though. If you can crochet a granny square, you already have most of the skills you need for this project. The whole top is built from individual motifs that you make one at a time, then join together like puzzle pieces. No complicated shaping. No confusing increases worked in the round. Just pretty little squares and one heart motif, joined as you go.
I am going to walk you through every single step, from that first magic ring to attaching those cute cream tassels at the end. Whether you have made a few blankets and want to try your first garment, or you are an experienced crocheter looking for your next statement piece, this pattern breaks everything down into manageable chunks. Let me show you how this beautiful boho halter actually comes together.
About This Crochet Halter Top Pattern
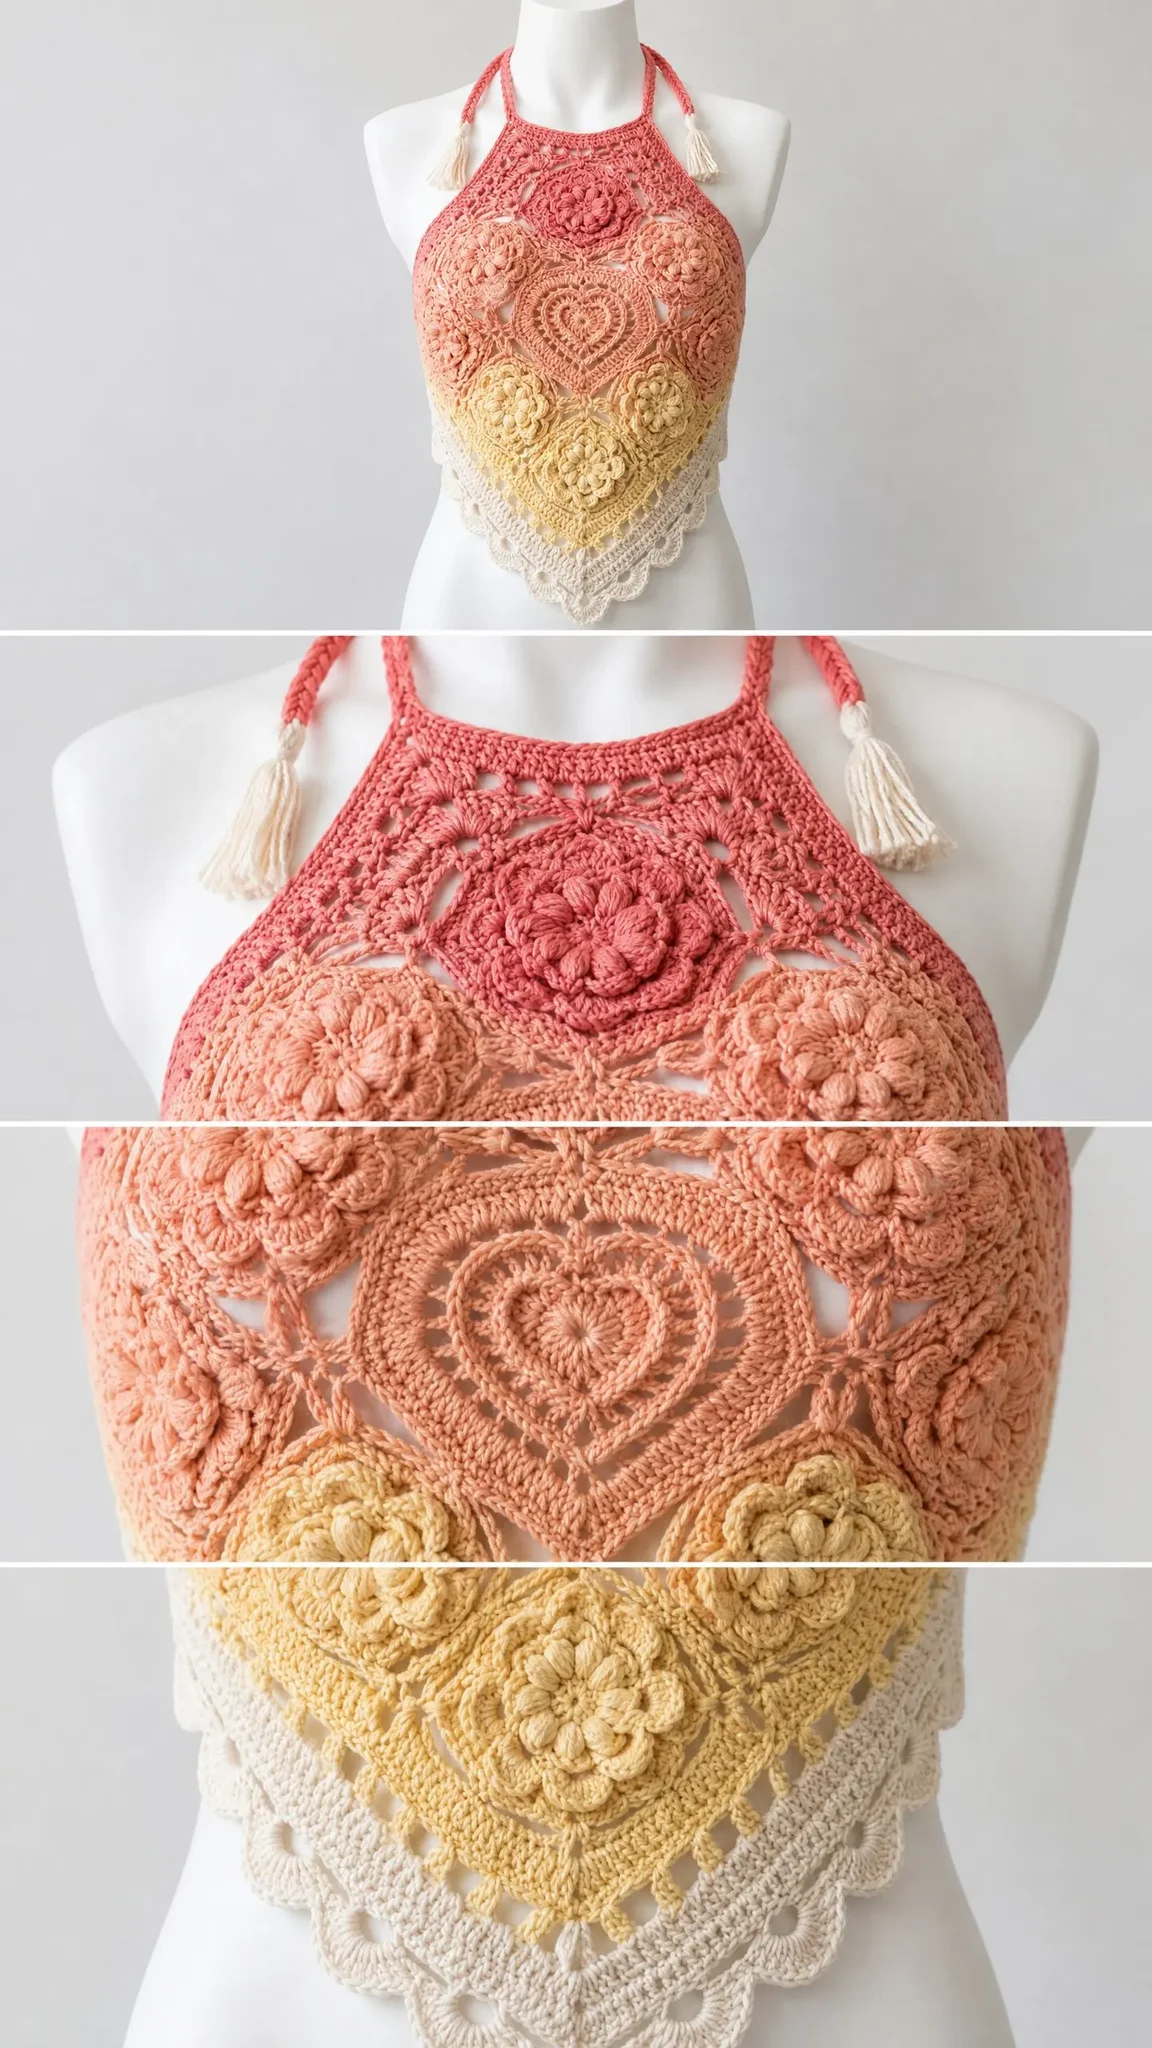
This Sunset Gradient Floral Heart Halter is a boho-chic summer top featuring a dreamy ombre gradient that flows from coral through peach to soft yellow and cream. The front panel is constructed entirely from joined floral and heart motifs arranged in a diamond-point layout. You get a high halter neckline, an open back with tie closures at both the neck and waist, a delicate scalloped hem, and cream tassel embellishments that add that perfect finishing touch.
The construction method is what makes this pattern so approachable. Instead of working the garment in one continuous piece with complicated shaping, you create individual motifs and join them using the join as you go method (JAYG). This technique connects your squares on the final round of each new motif, so there is minimal sewing at the end.
The color gradient happens naturally as you work through the motif rows from top to bottom, changing yarn colors between rows. This means you never have to carry multiple colors or do any complicated color work within a single motif.
Skill Level
This pattern is rated Advanced Intermediate. You should be comfortable working in the round, joining motifs as you go, managing multiple yarn colors, and constructing a garment from a flat panel rather than in the round.
That said, if you have made granny squares before and feel confident with basic crochet stitches, you can absolutely tackle this. The individual motifs are not difficult. The challenge comes from keeping your joins neat and your tension consistent across all eleven motifs.
Time Estimate
Plan for 14 to 22 hours depending on your experience with motif work and color joining. This is not a weekend project, but working motif by motif makes it easy to pick up and put down.
Finished Measurements
The pattern is written for a 34 to 36 inch (86 to 91 cm) bust, which corresponds to approximately a size Small/Medium.
The front panel measures approximately 13 inches (33 cm) wide at the widest point and 14 inches (35.5 cm) tall from the top of the neckline motif to the bottom scalloped hem point. The halter straps add approximately 14 inches (35.5 cm) of length from the top motif to the neck tie.
Keep in mind that back coverage is minimal. This is an open-back style with side tie straps only.
Materials Needed
Yarn
You will need approximately 600 yards (550 m) total of DK weight (CYCA 3) cotton or cotton-blend yarn, divided across four colors:
Yarn Suggestions:
Lion Brand 24/7 Cotton in Coral, Peach, Lemonade, and Ecru works beautifully. This mercerized cotton holds stitch definition well and is ideal for open lacework.
Paintbox Yarns Simply DK in Melon Sorbet, Pale Peach, Vanilla Cream, and Paper White is another excellent choice with smooth stitch definition.
Drops Safran in matching shades offers a fine cotton DK with a slight sheen that suits the boho-romantic aesthetic perfectly.
Substitution Note: Use any DK or light worsted cotton or cotton-blend yarn. Avoid acrylic or wool as they reduce drape and stitch clarity in open lace motifs. Always swatch before substituting.
Hooks
Notions
Gauge
Using US E-4 (3.5 mm) hook:
Gauge is critical for this garment. Block your swatch before measuring. If your motif is larger than 4 inches, go down a hook size. If smaller, go up a hook size.
Abbreviations
Let me define every stitch and term you will encounter:
Special Stitches
Puff Stitch (puff st)
This creates a raised rounded cluster used for the flower petal centers.
(Yarn over, insert hook into indicated stitch or space, yarn over and pull up a loop to approximately 1/2 inch height) 3 times in the same stitch or space. You now have 7 loops on hook. Yarn over and pull through all 7 loops. Chain 1 to close.
3dc Cluster (3dc-cl)
Yarn over, insert hook into indicated stitch or space, yarn over and pull up a loop, yarn over and pull through 2 loops (2 loops remain on hook). Repeat this step 2 more times in the same stitch or space (4 loops on hook). Yarn over and pull through all 4 loops. One 3dc-cl made.
5dc Cluster (5dc-cl)
Yarn over, insert hook into indicated stitch or space, yarn over and pull up a loop, yarn over and pull through 2 loops. Repeat 4 more times in same stitch (6 loops on hook). Yarn over and pull through all 6 loops. One 5dc-cl made. Used for large petal heads.
Picot
Chain 3, slip stitch into the first chain made (the one directly at the base of the ch-3). Creates a small decorative loop used in scallop borders.
Shell
Work (2 dc, ch 2, 2 dc) all into same stitch or space unless otherwise noted.
V-stitch (V-st)
Work (dc, ch 2, dc) all into same stitch or space.
Join As You Go (JAYG)
When joining motifs, instead of working a ch-2 corner space, work ch 1, then slip stitch into the corresponding corner ch-2 space of the adjacent motif, then ch 1 to complete the corner. For side joins, instead of a ch-1 space between dc clusters, work ch 1, slip stitch into the corresponding side ch-1 space of the adjacent motif, ch 1 to continue.
Braided Chain Cord
Work 3 separate chain lengths of equal length, then braid them together and secure both ends with slip stitch or knot. Used for halter straps.
Tassel
Cut 12 strands of C4, each 8 inches (20 cm) long. Fold in half. Insert folded loop through designated attachment point, pass all strand ends through the loop and pull tight. Trim evenly to approximately 3 inches (7.5 cm).
Pattern Notes Before You Begin
The front panel is the entire garment front. The back is open, connected only by halter neck ties and waist ties.
Motifs are worked individually and then joined using the JAYG method on the final round. The join points are at corner ch-2 spaces and at side ch-1 spaces between clusters.
Color assignment by motif row (counting from the top down):
Block all motifs before joining for best results. Final blocking of assembled panel is also recommended.
Right side is always facing for motif rounds unless otherwise noted.
Motif A: Large Floral Square Motif
Finished size: 4 inches x 4 inches (10 cm x 10 cm) blocked.
This motif is used for the main body of the panel. Make in colors as directed per motif row.
Round 1: Using assigned color, make a MR. Ch 3 (counts as first dc here and throughout), work 11 dc into ring, join with sl st to top of ch-3. Pull ring closed. (12 dc)
Round 2: Ch 1, sc in same st. (Ch 5, sk 2 dc, sc in next dc) 3 times, ch 5, sk 2 dc, join with sl st to first sc. (4 sc, 4 ch-5 sps)
Round 3: Sl st into ch-5 sp. In each ch-5 sp work (sc, hdc, 3 dc, hdc, sc). Join with sl st to first sc. (4 petals, 7 sts each = 28 sts)
Round 4: Working behind petals: ch 1, sc into same base sc of Round 2 (insert hook from back into the sc below the petal). (Ch 7, sc into next Round 2 sc from behind) 3 times, ch 7, join with sl st to first sc. (4 sc, 4 ch-7 sps)
Round 5: Sl st into ch-7 sp. In each ch-7 sp work (sc, hdc, dc, 2 tr, dc, hdc, sc). Join with sl st to first sc. (4 large petals, 9 sts each = 36 sts)
Round 6: Working behind large petals: ch 1, sc behind Round 4 sc. (Ch 9, sc behind next Round 4 sc) 3 times, ch 9, join with sl st. (4 sc, 4 ch-9 sps)
Round 7: Sl st into ch-9 sp. Work (sc, hdc, dc, tr, dtr, puff st, dtr, tr, dc, hdc, sc) in each ch-9 sp. Join with sl st to first sc. (4 large outer petals)
Round 8: Sl st into the gap between two petals (find the natural gap at each corner of the flower). Ch 4 (counts as dc plus ch 1). (3dc-cl, ch 3, 3dc-cl) in same gap (corner). Ch 2. (3dc-cl, ch 2) twice working along the side of the motif into the next petal gap, then (3dc-cl, ch 3, 3dc-cl) into the corner gap. Repeat from ( ) for remaining 2 corners. Join with sl st to top of ch-4. (8 corner-cl, 8 side-cl, 4 ch-3 corner sps, 8 ch-2 sps, 4 ch-1 sps between segments)
Each side has 2 side clusters separated by a ch-2 sp, with corner clusters at each end. Total clusters: 4 corners x 2 = 8 corner clusters, 4 sides x 2 = 8 side clusters. (16 clusters total)
Round 9 (final square round): Sl st to ch-3 corner sp. Ch 3 (dc), (dc, ch 2, 2 dc) in same corner sp. (Ch 1, dc in next ch-2 sp, ch 1, dc in next ch-2 sp, ch 1, 2 dc, ch 2, 2 dc in corner ch-3 sp) 3 times, ch 1, dc in next ch-2 sp, ch 1, dc in next ch-2 sp, ch 1, join with sl st to top of ch-3. Each side: 2 dc shell at corners, 2 dc each side cluster position separated by ch-1. (4 corner ch-2 sps, 6 dc along each side not counting corners = confirmed square)
CHECKPOINT: One completed Large Floral Square Motif blocked should measure exactly 4 inches x 4 inches (10 cm x 10 cm). If not, adjust hook size before proceeding.
Motif B: Small Floral Square Motif
Finished size: 2.5 inches x 2.5 inches (6.5 cm x 6.5 cm) blocked.
Used as filler half-motifs along the sides of the diamond panel.
Round 1: MR. Ch 3, work 7 dc into ring, join with sl st to ch-3. Pull ring closed. (8 dc)
Round 2: Ch 1, sc in same st. (Ch 4, sk 1 dc, sc in next dc) 3 times, ch 4, sk 1 dc, join with sl st. (4 sc, 4 ch-4 sps)
Round 3: Sl st into ch-4 sp. (Sc, hdc, 3 dc, hdc, sc) in each ch-4 sp. Join. (4 petals)
Round 4: Working behind petals, ch 1, sc behind each Round 2 sc. (Ch 6, sc behind next sc) 3 times, ch 6, join. (4 sc, 4 ch-6 sps)
Round 5: Sl st into ch-6 sp. (Sc, hdc, dc, tr, dc, hdc, sc) in each ch-6 sp. Join. (4 larger petals)
Round 6: Sl st to corner gap between petals. Ch 3. (Dc, ch 2, 2 dc) in same gap. (Ch 1, dc, ch 1, 2 dc, ch 2, 2 dc) in next corner gap. Repeat for all 4 corners. Join with sl st. This establishes a small square with ch-2 corners and a single dc mid-side. (4 corners, 4 side dc)
Motif C: Heart Center Motif
Finished size: 4 inches x 4 inches (10 cm x 10 cm) blocked.
This motif sits at the center of motif row C and is the visual focal point of the halter top.
Round 1: MR. Ch 3, 11 dc into ring, join with sl st to ch-3. Pull ring closed. (12 dc)
Round 2: Ch 1, sc in first st. (Ch 3, sc in next st) 11 times, ch 3, join. (12 sc, 12 ch-3 sps)
Round 3: In each ch-3 sp work (hdc, dc, hdc). Join. (36 sts forming a ruffled circle)
Round 4: Working behind Round 3 stitches, sl st between Round 2 sc posts from behind. Build the heart outline: The heart is formed by working 2 lobed arches that converge at a bottom point.
Sl st to back of work. Ch 5 (sc into Round 2 sp 2 sps forward, ch 5) 5 times, forming the right lobe of the heart top. Then begin descending toward the center point: (sc, ch 4) twice descending on the right side, then (ch 4, sc) twice ascending on the left side, then (ch 5, sc into Round 2 sp) 5 times completing the left lobe. Ch 5, join. This creates the heart outline in chain-sp arches. (Approximately 12 arch sps of varying ch lengths)
Round 5: Sl st into each ch-sp. Fill each sp with dc clusters to define the heart outline more solidly: work 3 dc in each ch-5 sp along top lobes, 2 dc in each ch-4 sp on the sides, and 1 hdc at the bottom center point. Join. (Heart outline filled)
Round 6 (square frame): At each of the 4 implied corners of the motif (upper left, upper right, lower left, lower right), work (2 dc, ch 2, 2 dc) for corners. Along each side work dc and ch-1 sps as needed to reach the next corner. This establishes the square outer edge matching Motif A dimensions. Join. (4 corner ch-2 sps)
Panel Construction and Motif Arrangement
The front panel uses the following motif layout from top to bottom, visualized as a diamond:
Row A (top point): 1 Large Floral Square Motif (Motif A) in C1. This is the highest point of the diamond, placed on point (rotated 45 degrees so a corner points up and one points down).
Row B (second row): 2 Large Floral Square Motifs (Motif A) in C1/C2 gradient (use C2), joined to left and right lower corners of Row A motif. 2 Small Floral Motifs (Motif B) worked into the upper open triangular spaces on either side of Row A. Total new motifs: 2 large + 2 small filler.
Row C (third row): Heart Center Motif (Motif C) in C2 centered. 2 Large Floral Square Motifs (Motif A) in C2 flanking the heart motif, one on each side. Total new motifs: 3 (1 heart + 2 large floral).
Row D (fourth row): 2 Large Floral Square Motifs (Motif A) in C3, one on each side. Total new motifs: 2.
Row E (fifth row, bottom center point): 1 Large Floral Square Motif (Motif A) in C3/C4 (use C3 for the flower, C4 for the square outer round). Total new motifs: 1.
Lace filler triangles and scallop border complete the outline using C4.
Total motifs: 8 large floral squares + 2 small floral squares + 1 heart motif = 11 motifs.
Joining Motifs Using JAYG Method
Join motifs on their final square round using JAYG as follows:
For each join between two motifs that share a side: When working the final round of the new motif, at each join point replace the ch-1 sp with: ch 1, sl st into the corresponding ch-1 sp of the already-completed adjacent motif, ch 1 (side join). At each shared corner, replace ch-2 with: ch 1, sl st into the corner ch-2 sp of the adjacent motif, ch 1 (corner join).
Work all joins on the RS. Do not fasten off between joins on the same motif. Complete the entire final round of each new motif, joining to neighbors as encountered.
Joining sequence:
1. Complete Row A motif fully. Do not join yet as there is no neighbor.
2. Make Row B left motif. On its final round, join its upper-right side to the lower-left side of Row A motif.
3. Make Row B right motif. Join its upper-left side to the lower-right side of Row A motif. Join its left-corner point to the right-corner point of Row B left motif at the shared bottom corner.
4. Add Row B small fillers into the open upper-side triangular spaces using Small Motif B. Join both sides of each small motif to the corresponding sides of the Row A and Row B large motifs.
5. Make Heart Motif C center. Join its upper-left and upper-right corners to the lower corners of the two Row B large motifs respectively.
6. Make Row C left large motif. Join its right side to the Heart Motif’s left side. Join its upper-right corner to the lower-left corner of Row B left motif.
7. Make Row C right large motif. Join its left side to the Heart Motif’s right side. Join its upper-left corner to the lower-right corner of Row B right motif.
8. Make Row D left motif. Join its upper-right side to Row C left motif’s lower-left side.
9. Make Row D right motif. Join its upper-left side to Row C right motif’s lower-right side. Join its upper-left corner to Row D left motif’s lower-right corner.
10. Make Row E center motif. Join its upper-left side to Row D left motif’s lower side. Join its upper-right side to Row D right motif’s lower side.
CHECKPOINT: After all motifs are joined, the assembled panel should measure approximately 13 inches (33 cm) wide at its widest point (across Row C) and approximately 10 inches (25.5 cm) tall from the top corner of Row A to the bottom corner of Row E, before the scallop border.
Lace Filler Triangles
Work a triangle filler into each open side space along the left and right edges of the assembled panel using C4. These spaces occur where the stepped diamond edge creates right-angle triangles.
Left side triangle fillers (2 total):
Attach C4 to the outermost corner sp of the upper motif on the left edge.
Row 1 (WS): Ch 3 (dc), dc in each ch-1 sp along the shared open edge to the corner of the lower motif. Turn. Count the number of dc made.
Row 2 (RS): Ch 3, dc in each ch-1 sp across minus 1 sp at the outer edge. Turn. (1 fewer dc)
Row 3 (WS): Ch 3, dc across minus 1 sp. Turn.
Continue decreasing 1 sp per row until 1 dc remains. Fasten off.
Repeat mirrored for right side fillers. Work all 4 fillers (2 per side) before adding the scallop border.
Scallop Border
The scallop border outlines the entire lower diamond perimeter of the panel using C4. Work with RS facing.
Attach C4 to any st along the lower perimeter edge of the assembled panel.
Round 1 (foundation): Ch 1, sc evenly around the entire perimeter of the panel (all sides except the top neckline edge), working 1 sc in each dc and 1 sc in each ch-1 sp, and 3 sc into each outer corner sp. Join with sl st to first sc.
Target stitch count for Rnd 1: Approximately 108 sc around the lower 3 sides of the diamond. Adjust by adding or omitting sc in the filler sections to reach a count divisible by 6. (108 sc)
Round 2 (scallop): Ch 1. (Sk 2 sc, 5 dc in next sc, sk 2 sc, sc in next sc) around. Join with sl st to first ch-1. This creates shells of 5 dc separated by single sc. Each repeat uses 6 sc from Rnd 1. 108 divided by 6 = 18 scallop repeats. (18 scallops made)
Round 3 (scallop detail): Sl st to top dc of first shell (3rd dc of the 5-dc group). Ch 1, sc in same st. (Ch 3, sc in next shell top dc, ch 3, sc between the two shells into the sc below, ch 3, sc in first dc of next shell, ch 3, sc in top dc of same shell) around. Join. This adds a delicate picot-style bridge between shells. Fasten off.
CHECKPOINT: The completed scallop border adds approximately 1.5 to 2 inches (4 to 5 cm) to the lower depth of the panel. The full panel from top of Row A to the bottom scallop tip should now measure approximately 14 inches (35.5 cm) tall.
Neckline Edge and Strap Foundation
The top edge of the panel (the upper corner of the Row A motif) is used as the neckline.
Step 1: Attach C1 to the top corner ch-2 sp of the Row A motif.
Row 1 (neckline band): Ch 1. Sc in corner sp. Work sc across the top two sides of Row A motif (upper-left side and upper-right side), working 1 sc per dc and 1 sc per ch-sp. (Approximately 14 sc across the neckline edge. Adjust to 14 sc.)
Row 2: Ch 1, turn. Sc in each sc across. (14 sc)
Row 3: Ch 1, turn. Sc2tog at beginning, sc in each sc to last 2, sc2tog. (12 sc)
Row 4: Ch 1, turn. Sc2tog, sc to last 2, sc2tog. (10 sc)
Row 5: Ch 1, turn. Sc2tog, sc to last 2, sc2tog. (8 sc)
Rows 6 to 7: Ch 1, turn. Sc in each sc across. (8 sc)
This creates the high neckline collar that sits at the base of the straps.
CHECKPOINT: The neckline collar should be approximately 1.5 inches (4 cm) tall and 3.5 inches (9 cm) wide at the base tapering to 3 inches (7.5 cm).
Halter Straps
Two halter straps are worked, one from each upper corner of the neckline collar.
Left Strap:
Attach C1 to the left outer corner of the neckline collar band.
Ch 1, sc in same st and in the next 3 sts (4 sc total across strap width). (4 sc)
Work in rows of sc back and forth with ch-1 turning chain for approximately 12 inches (30.5 cm) or until desired strap length is achieved.
End strap: Work a 3-chain braided cord or chain for 6 inches (15 cm) more for the tie tails. Fasten off.
Right Strap:
Repeat mirrored for right side. Both strap ends pass behind the neck and tie together at the back of the neck.
Tassel attachment: After blocking, attach one C4 tassel to each strap end where the strap transitions to the tie tail. Cut 12 strands of C4 each 8 inches (20 cm) long, fold in half, insert folded loop through the strap end, pass all ends through loop, pull snug. Trim to 3 inches (7.5 cm).
Side Ties for Back Closure
Two side ties are worked, one on each side of the panel, positioned at the midpoint of the lateral edges (approximately at the Row C height, which is the widest point). These form the back closure and waist tie.
Attach C1 to the side edge of the panel at the Row C level.
Ch 80 (approximately 15 inches / 38 cm). Sl st back along the chain for a rounded cord effect. Fasten off.
Repeat on opposite side. The two ties wrap around the back and tie together at center back.
Attach one C4 tassel to each tie end.
Additional lower ties: Attach two shorter ties (ch 50 each) at the lowest side edge points of the panel where Row D meets the panel edge. These provide a second lower back tie that wraps below the first to stabilize the top at the waist. Tassel each end.
Finishing Your Halter Top
Weave in all ends securely using a yarn needle, pulling each end in two directions before trimming to prevent unraveling. With cotton yarn, ends need at least 1.5 inches (4 cm) woven in to be secure.
Wet block the finished top: Soak in cool water for 15 minutes, gently squeeze out excess water in a towel (do not wring), pin to a blocking mat to the specified measurements, and allow to dry fully (12 to 24 hours). Blocking opens the lace, evens out motif joins, and defines the floral textures beautifully.
Check all motif join points after blocking and reinforce with a duplicate stitch in the join yarn if any slip stitch joins appear to have loosened.
Care Instructions
Hand wash in cool water with mild soap or use a gentle machine cycle in a mesh laundry bag. Lay flat to dry. Do not tumble dry or hang dry (hanging stretches the lace). Iron on low with a damp cloth if needed to re-set the fabric. Store folded, not hung.
Size Customization Tips
To size up (38 to 40 inch / 97 to 102 cm bust): Add one additional motif row to each side in Row C, making that row 5 motifs wide instead of 3. Add one additional Row D motif on each side. Recalculate scallop border stitch count accordingly to maintain divisibility by 6.
To size down (30 to 32 inch / 76 to 81 cm bust): Remove the outermost motif from Row C on each side, making Row C 1 motif (heart only) wide.
You Might Also Like
- Ocean Blue Ripple Moon Clutch with Gold Tassel Free Crochet Pattern
- Sage Green Boho Crochet Sundress Free Pattern
- Strawberry Shortcake Turtle Free Crochet Pattern
- Ocean Breeze Granny Tote Bag Free Crochet Pattern