Pink Strawberry Cow Print Crochet Pants Pattern
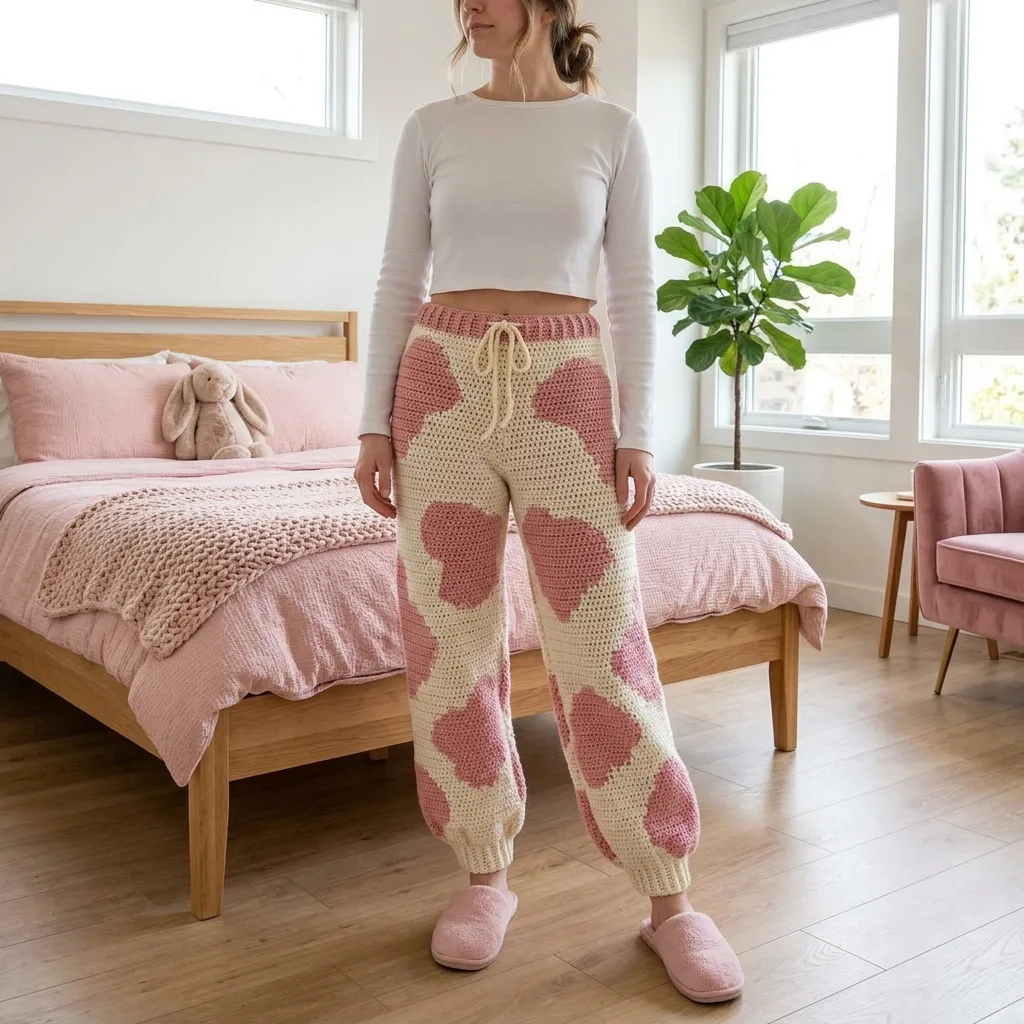
These pants are INCREDIBLE. I am not exaggerating when I say this is one of the most satisfying handmade garments you will ever create. Yes, they take time. Yes, there is color work involved. But the result? Cozy, stylish, one of a kind joggers that look like they belong in a boutique window. You will be wearing these every single lazy Sunday morning for years to come.
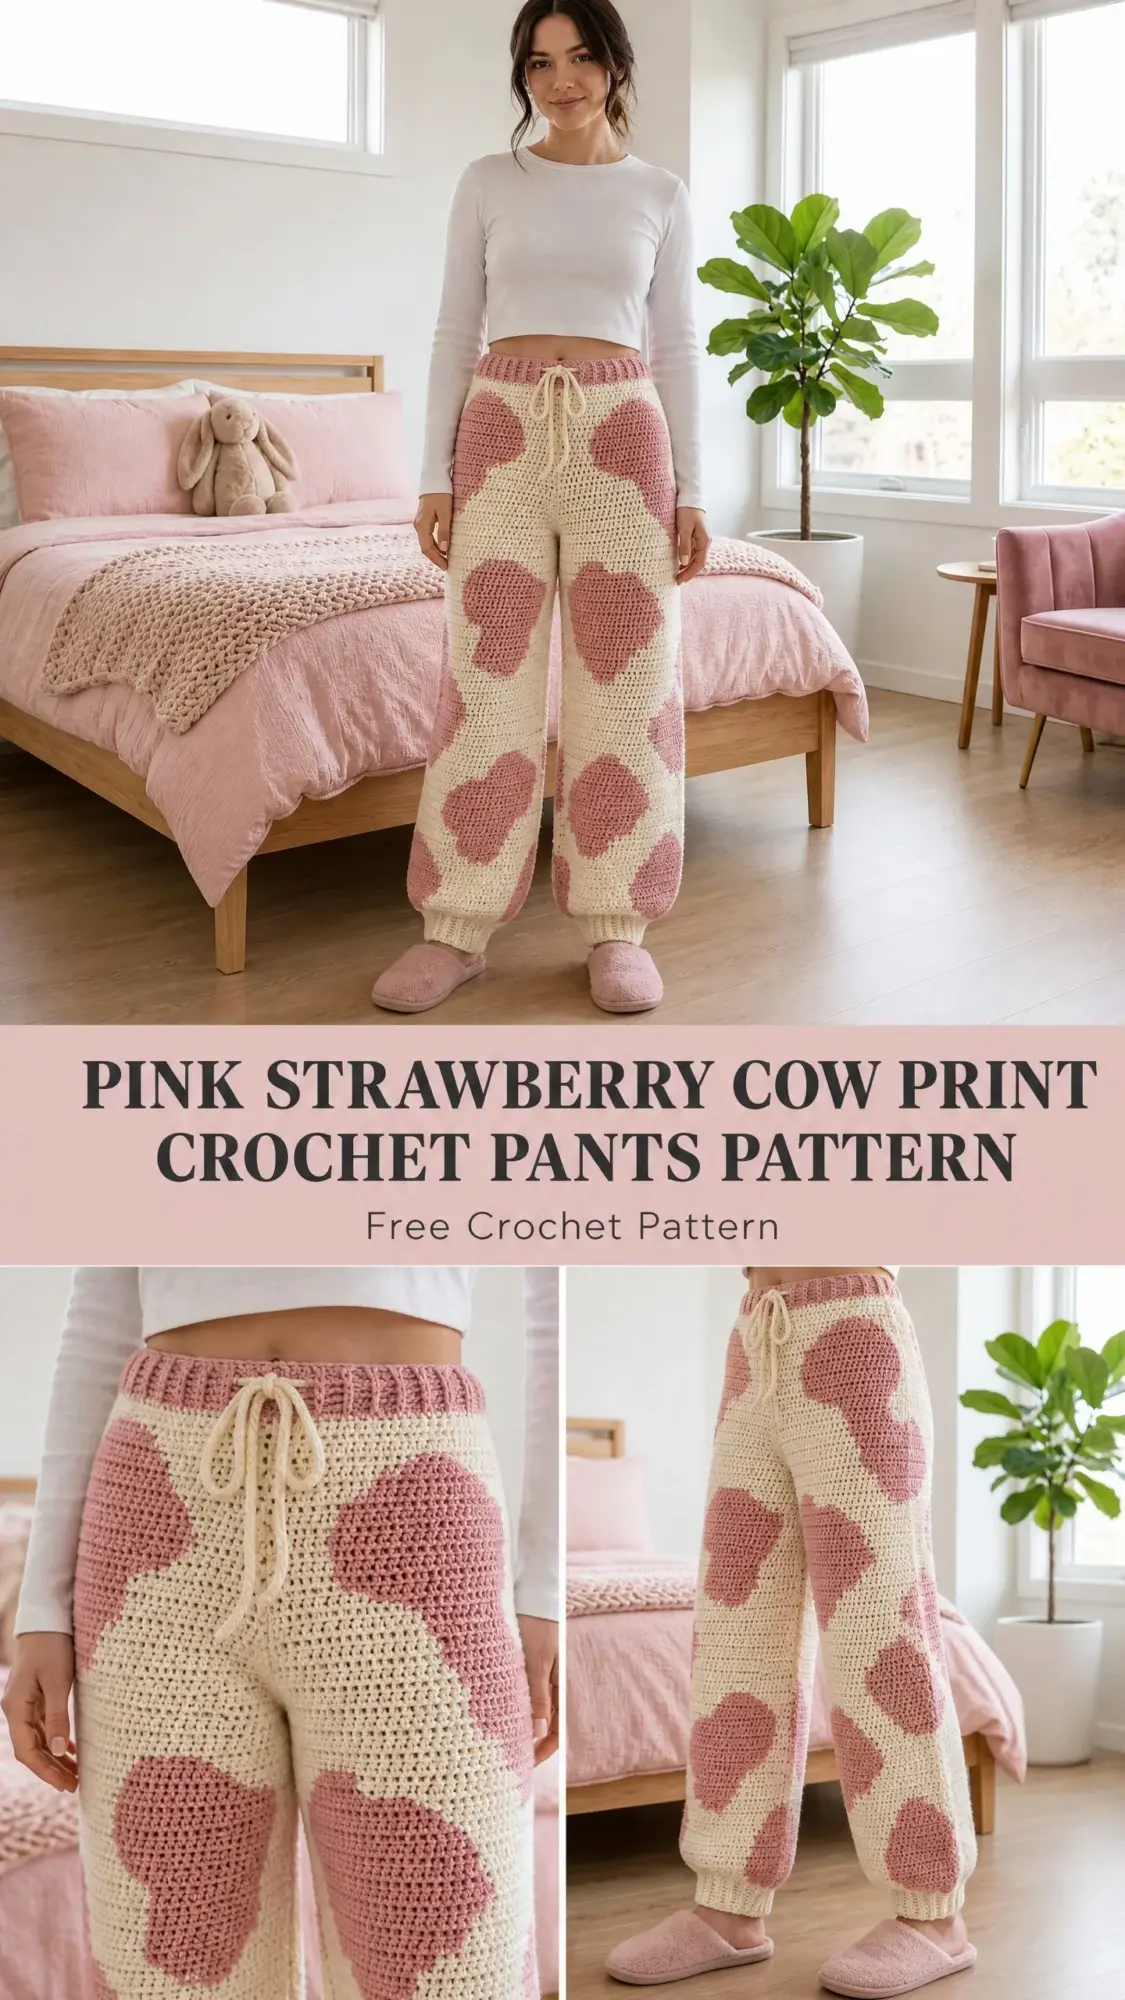
The strawberry cow print trend has taken over, and now you can crochet your own version. These jogger style pants feature oversized organic blob motifs in dusty rose against a creamy background. The finished look is soft, playful, and absolutely perfect for lounging around the house or running quick errands in maximum comfort.
Whether you are making these for yourself or as a truly special handmade gift, this pattern delivers. The construction is straightforward once you understand the basics. You will work from the waistband down, create two separate leg tubes, and finish with ribbed ankle cuffs. Let me walk you through every single step.
Why You Will Love This Crochet Pants Pattern
This is not your average crochet project. These pants combine practical garment construction with eye catching colorwork that looks far more complicated than it actually is. The tapestry crochet technique creates a dense, structured fabric that holds its shape beautifully while remaining comfortable against your skin.
The jogger style silhouette starts relaxed at the hip and tapers down to fitted ribbed cuffs at the ankle. A drawstring waistband ensures a customizable fit, and the ribbing stretches to accommodate a range of sizes. The cow print motifs are worked right into the fabric as you go, so there is no sewing on appliques or embroidering afterward.
I designed this pattern for crafters who want a wearable statement piece. If you have ever admired those gorgeous handmade pants on social media and wondered if you could make your own, this is your sign. You absolutely can.
Skill Level
This pattern is rated Advanced Beginner to Intermediate. The actual stitches are simple. You will primarily work single crochet in the round. The complexity comes from managing two colors using tapestry crochet and following the blob placement chart for each section.
If you have never tried tapestry crochet before, do not panic. I explain the technique in detail below. The key is carrying the unused color along the inside of your work so it stays hidden while remaining accessible for color changes.
Garment construction adds moderate complexity since you will be working a tube, dividing for two legs, and shaping as you go. But every step is clearly explained with stitch counts to keep you on track.
Finished Measurements
This pattern is written for a size Medium with the following finished dimensions:
Waist (unstretched): 28 inches or 71 cm. Stretches to fit 30 to 36 inches or 76 to 91 cm due to ribbing.
Hip circumference: 42 inches or 107 cm
Inseam length: 27 inches or 69 cm
Outseam length (waistband to cuff): 38 inches or 97 cm
Leg opening (unstretched): 8 inches or 20 cm
Thigh circumference: 22 inches or 56 cm
Size customization tips are included at the end of this tutorial for those who need adjustments.
Materials Needed
Yarn: Worsted weight (weight category 4)
Hook: US size J-10 or 6.0 mm crochet hook, or size needed to match gauge
Notions:
Yarn Suggestions
Option 1: Lion Brand Yarn Pound of Love (worsted, 100% acrylic, 1,020 yards per 16 oz skein). Budget friendly, machine washable, and available in Antique White and several soft pinks. You will need 2 skeins Color A and 1 skein Color B.
Option 2: Paintbox Yarns Simply DK used double stranded. The doubled strand brings it to worsted weight. Excellent stitch definition for the tapestry crochet texture. Available in Champagne White and Dusty Rose.
Option 3: WeCrochet Mighty Stitch Worsted (80% acrylic, 20% superwash wool, 208 yards per 100g skein). Slight stretch and excellent drape for garments. You will need approximately 9 skeins Color A and 5 skeins Color B.
Substitution Note: Choose a smooth, plied worsted weight yarn with good stitch definition. Avoid fluffy or brushed yarns, as they will obscure the tapestry crochet color motifs. A machine washable fiber is strongly recommended for a frequently worn garment.
Gauge
18 sc x 20 rows = 4 inches or 10 cm in tapestry single crochet worked in the round, using a J-10 or 6.0 mm hook, after blocking.
Gauge Swatch Instructions
Chain 21. Row 1: single crochet (sc) in 2nd chain from hook and each chain across. (20 sc) Rows 2 to 20: chain 1, turn, sc across. (20 sc) Fasten off and block. Measure interior 4 inch x 4 inch area.
Gauge is critical for a wearable garment. Adjust hook size as needed. Going up a hook size will make the fabric larger and drapier. Going down will make it smaller and denser.
Abbreviations (US Terms)
Before we dive into the crochet pattern instructions, let me define every abbreviation you will encounter:
Special Stitches and Techniques
Tapestry Single Crochet (tsc)
This technique creates the cow print motifs. The unused color is carried along the inside of the fabric, encased within your stitches so there are no long floats.
Step 1: Hold the working yarn (whichever color you are currently using) normally.
Step 2: Lay the unused yarn along the top of the previous round, pointing in the direction of travel.
Step 3: Insert hook into next stitch.
Step 4: Yarn over with the working color and draw up a loop. The unused color is now encased under the stitch.
Step 5: Yarn over with the working color and pull through both loops on hook.
Step 6: The unused color is now carried inside the completed stitch. Continue carrying and switching as indicated by the chart.
How to Switch Colors Mid-Round
Work the last sc of the old color until 2 loops remain on hook. Drop the old color (it becomes the carried yarn). Pick up the new color and pull through both loops to complete the stitch. The new color is now the working yarn and the old color is now carried.
Ribbing Row (Worked Flat)
All ribbing is worked in BLO (back loop only) single crochet.
Row: Chain 1, turn, sc in BLO of each stitch across.
This creates a stretchy, vertical ridged ribbing texture that gives the waistband and cuffs their characteristic stretch.
Sc2tog (Single Crochet Decrease)
Insert hook into next stitch, yarn over, pull up a loop (2 loops on hook). Without completing the stitch, insert hook into following stitch, yarn over, pull up a loop (3 loops on hook). Yarn over and pull through all 3 loops. You have decreased 1 stitch by making 1 stitch from 2.
Pattern Notes Before You Begin
1. Construction order: Waistband ribbing (flat, then seamed into a tube), body worked in the round from waistband down to crotch, legs worked separately in the round from crotch to ankle, ankle ribbing.
2. Continuous rounds: All leg rounds are worked in continuous rounds with no joining and no turning unless otherwise specified. Place a stitch marker at the beginning of each round and move it up as you work.
3. Tapestry crochet alternative: If you prefer to avoid tapestry crochet, you may work plain Color A and duplicate stitch or surface slip stitch the Color B blobs on afterward. The texture will be slightly different but visually similar.
4. Right side always facing: The right side of work faces you at all times during the leg tubes. The inside of the pants (WS) is where the carried yarn sits.
5. Carrying Color B: Color B (dusty rose) is always carried even in sections that are all Color A, to avoid cutting and reattaching frequently. In long all Color A sections, you may choose to drop Color B and pick it back up at the next motif, weaving in ends as you go.
6. Stitch counts: Stitch counts given at the end of each round appear in parentheses, for example (94 sc).
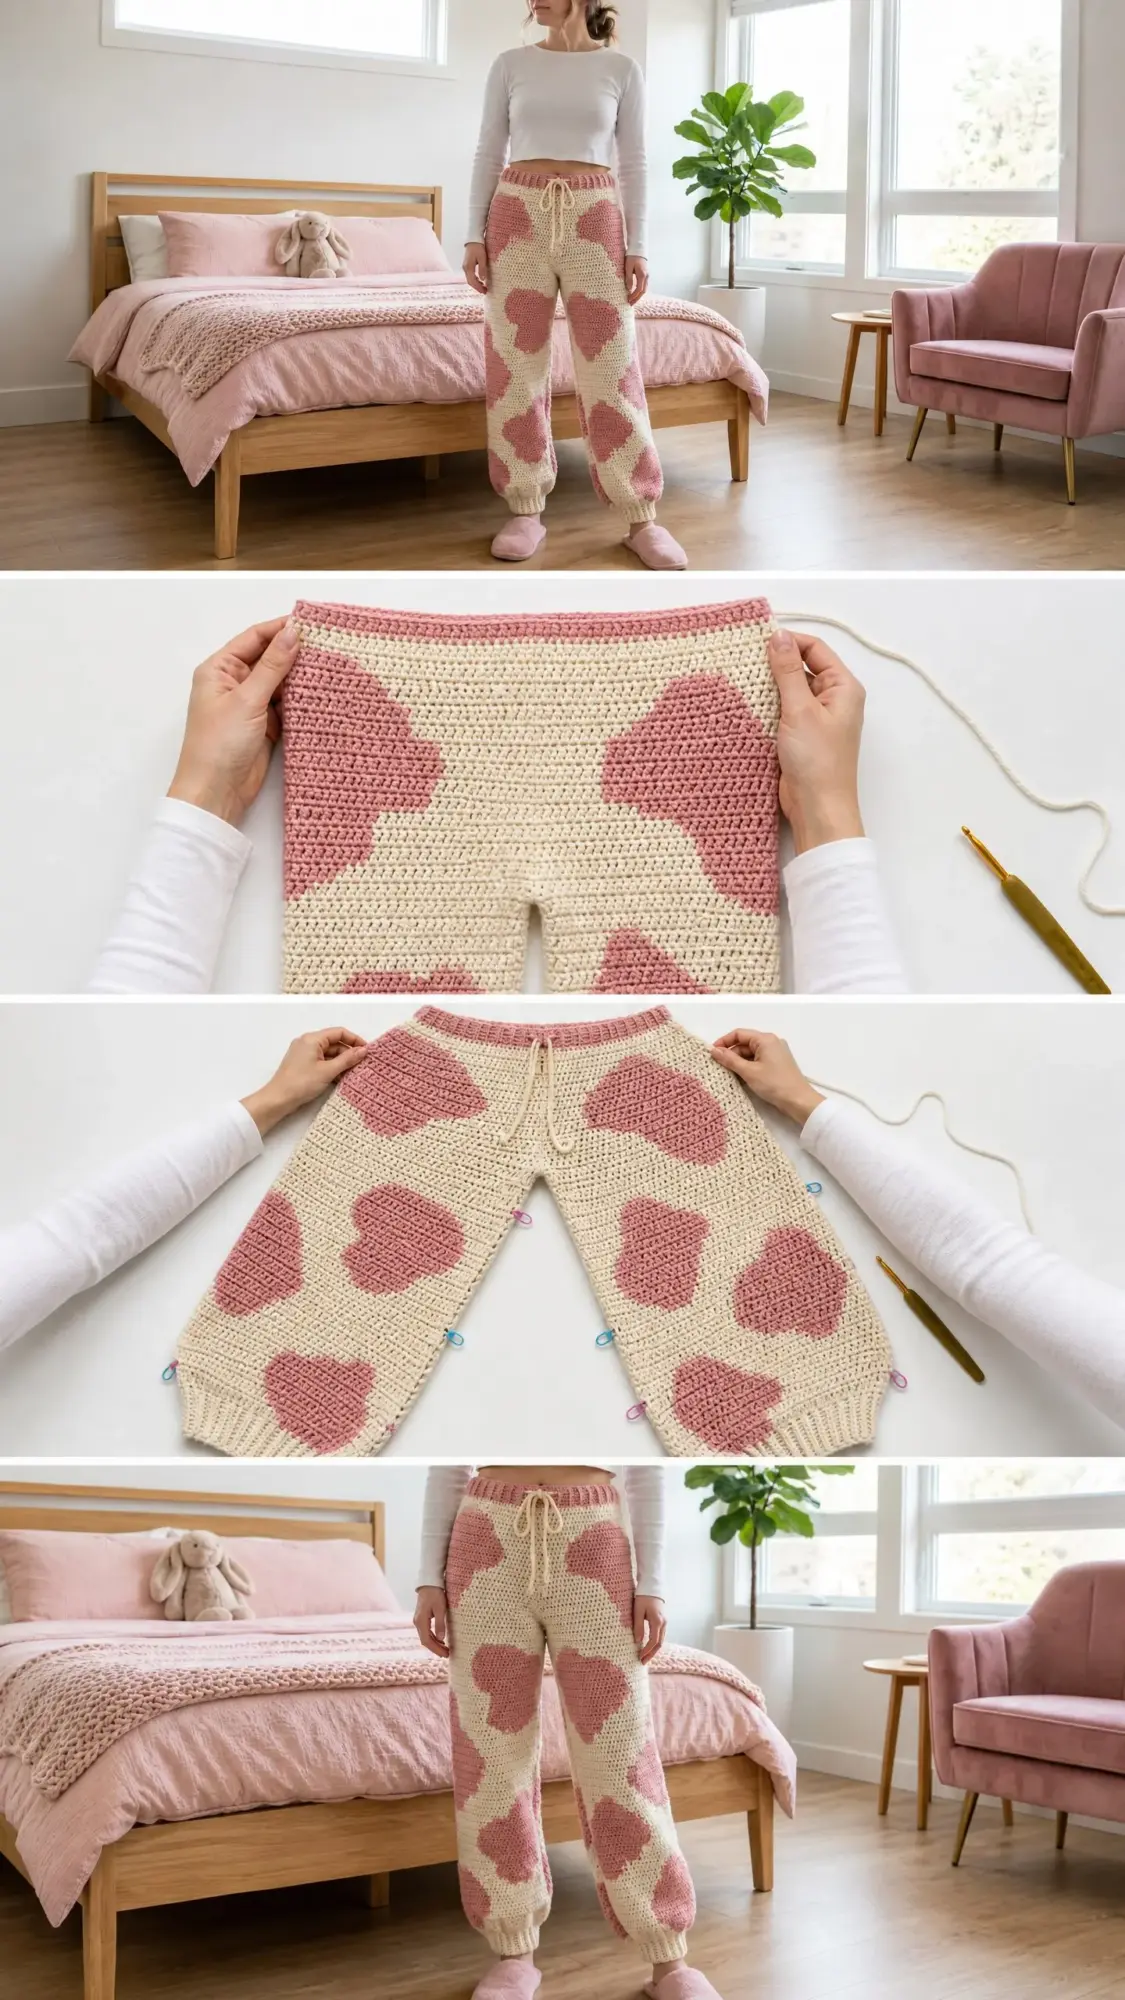
Step by Step Crochet Pattern Instructions
Waistband Ribbing
With Color B and J-10 hook, chain 16.
Foundation Row: Sc in 2nd chain from hook and each chain across. (15 sc)
Rows 2 to 126: Chain 1, turn, sc in BLO of each stitch across. (15 sc per row)
After Row 126, you will have 126 rows of ribbing, creating a waistband approximately 28 inches or 71 cm long before seaming. The ribbing will stretch to fit hips up to 36 inches or 91 cm.
Fasten off, leaving a long tail for seaming.
Seaming the Waistband
Fold the ribbing strip so the short ends meet. Using yarn needle and the long tail, whipstitch or mattress stitch the two short ends together to form a tube. This seam will sit at the center back.
Checkpoint: The seamed waistband tube should measure approximately 28 inches or 71 cm in circumference (unstretched) and 3 inches or 7.6 cm tall. The ribbing ridges should run vertically.
Eyelet Row for Drawstring
With Color A, join yarn to any stitch along the top edge of the waistband. Work a round of sc around the top edge, inserting hook into each row end around the top. You should have approximately 126 stitches. Place a stitch marker at the beginning.
Eyelet Round: (Sc 5, chain 1, skip 1) around. If stitches do not divide evenly, adjust the plain sc sections by 1 stitch as needed to keep eyelets evenly spaced. (You will have 21 ch-1 eyelets and 105 sc, total 126 sts including eyelets as spaces.)
Next Round: Sc in each stitch and chain space around. (126 sc)
Do not fasten off. Continue to body.
Body Section
The body is worked in the round downward from the waistband.
Round 1: With Color A, sc in each stitch around the bottom edge of the waistband. (126 sc)
Place stitch marker at beginning of round.
Rounds 2 to 8: Sc in each stitch around with Color A. (126 sc)
Begin introducing Color B for cow print motifs in Round 9 using tapestry single crochet.
Cow Print Motif Placement for Body
The cow print blobs are large, organic shapes. There are 3 main blobs distributed across the body tube. The body tube is 126 stitches around. Think of the tube as having a front half (stitches 1 to 63) and a back half (stitches 64 to 126).
Blob 1 (upper left hip): Begins at stitch 10, Round 9
Blob 2 (upper right hip): Begins at stitch 74, Round 9
Blob 3 (center back, lower): Begins at stitch 55, Round 18
Work all other stitches in Color A (MC). Below are the stitch ranges for Color B (CC) within each round.
Round 9: Blob 1: stitches 10 to 16 in CC (7 sts). Blob 2: stitches 74 to 82 in CC (9 sts). All others in MC. (126 sc total)
Round 10: Blob 1: stitches 8 to 18 in CC (11 sts). Blob 2: stitches 72 to 84 in CC (13 sts). All others in MC. (126 sc)
Round 11: Blob 1: stitches 7 to 20 in CC (14 sts). Blob 2: stitches 71 to 86 in CC (16 sts). All others in MC. (126 sc)
Round 12: Blob 1: stitches 6 to 22 in CC (17 sts). Blob 2: stitches 70 to 88 in CC (19 sts). All others in MC. (126 sc)
Round 13: Blob 1: stitches 6 to 24 in CC (19 sts). Blob 2: stitches 70 to 90 in CC (21 sts). All others in MC. (126 sc)
Round 14: Blob 1: stitches 7 to 25 in CC (19 sts). Blob 2: stitches 71 to 91 in CC (21 sts). All others in MC. (126 sc)
Round 15: Blob 1: stitches 8 to 25 in CC (18 sts). Blob 2: stitches 72 to 91 in CC (20 sts). All others in MC. (126 sc)
Round 16: Blob 1: stitches 9 to 24 in CC (16 sts). Blob 2: stitches 73 to 90 in CC (18 sts). All others in MC. (126 sc)
Round 17: Blob 1: stitches 10 to 22 in CC (13 sts). Blob 2: stitches 74 to 88 in CC (15 sts). All others in MC. (126 sc)
Round 18: Blob 1: stitches 11 to 20 in CC (10 sts). Blob 2: stitches 75 to 86 in CC (12 sts). Blob 3 starts: stitches 55 to 62 in CC (8 sts). All others in MC. (126 sc)
Round 19: Blob 1: stitches 12 to 18 in CC (7 sts). Blob 2: stitches 76 to 84 in CC (9 sts). Blob 3: stitches 53 to 65 in CC (13 sts). All others in MC. (126 sc)
Round 20: Blob 1 ends. Blob 2: stitches 77 to 82 in CC (6 sts). Blob 3: stitches 51 to 68 in CC (18 sts). All others in MC. (126 sc)
Round 21: Blob 2 ends. Blob 3: stitches 49 to 70 in CC (22 sts). All others in MC. (126 sc)
Round 22: Blob 3: stitches 48 to 72 in CC (25 sts). All others in MC. (126 sc)
Round 23: Blob 3: stitches 48 to 73 in CC (26 sts). All others in MC. (126 sc)
Round 24: Blob 3: stitches 49 to 73 in CC (25 sts). All others in MC. (126 sc)
Round 25: Blob 3: stitches 50 to 72 in CC (23 sts). All others in MC. (126 sc)
Round 26: Blob 3: stitches 51 to 70 in CC (20 sts). All others in MC. (126 sc)
Round 27: Blob 3: stitches 53 to 68 in CC (16 sts). All others in MC. (126 sc)
Round 28: Blob 3: stitches 55 to 65 in CC (11 sts). All others in MC. (126 sc)
Round 29: Blob 3: stitches 57 to 63 in CC (7 sts). All others in MC. (126 sc)
Round 30: All MC. (126 sc)
Rounds 31 to 40: Sc in each stitch around with Color A. (126 sc per round)
Checkpoint: After Round 40 of the body, your work should measure approximately 11 inches or 28 cm from the bottom of the waistband (not including the waistband ribbing itself). You should have 3 visible cow print blobs on the body tube.
Crotch Shaping and Leg Separation
At the end of Round 40, you will divide the body into front and back halves and create two leg tubes.
Step 1: Divide for legs. Identify stitch 1 (beginning of round, center front) and stitch 64 (center back). Place stitch markers at stitches 1 and 64.
Step 2: The front leg opening is stitches 1 to 63 (63 stitches). The back leg opening is stitches 64 to 126 (63 stitches).
Step 3: Adding crotch stitches. To give the pants a proper crotch width, you will work additional chains at the crotch point when beginning each leg.
Right Leg Setup: With Color A, join yarn at stitch 1 (marker). Chain 10, skip the 63 back stitches (stitches 64 to 126), slip stitch into stitch 64 to bridge the crotch, then sc into stitch 64 and continue sc across stitches 64 to 126 (63 sts), then sc into each of the 10 chain stitches just made. (63 + 10 = 73 sc in the first leg round)
Place stitch marker. This is Round 1 of the Right Leg.
Left Leg Setup: With Color A, join yarn at stitch 64 on the front side. Chain 10, skip the 63 front stitches, slip stitch to bridge, sc across stitches 1 to 63 (63 sts), sc into each of the 10 chain stitches. (73 sc)
Place stitch marker. This is Round 1 of the Left Leg.
Both legs are worked simultaneously in their own separate rounds. Complete the Right Leg fully, then work the Left Leg, or work them alternating 5 rounds at a time to keep the blobs visually matching between legs.
Right Leg Instructions
Rounds 1 to 5: Sc in each stitch around with Color A. (73 sc per round)
Begin cow print motifs on Right Leg starting at Round 6.
Right Leg Cow Print Motifs
There are 4 blob groups on each leg. The leg tube is 73 stitches around. Think of the outer leg as stitches 1 to 37 and the inner leg as stitches 38 to 73.
Leg Blob A (outer upper thigh): starts at stitch 5, Round 6
Leg Blob B (inner upper thigh): starts at stitch 42, Round 6
Leg Blob C (outer mid leg): starts at stitch 8, Round 28
Leg Blob D (inner lower leg): starts at stitch 40, Round 50
Leg Blob A Detail (Right Leg, Outer Thigh)
Round 6: Stitches 5 to 10 in CC (6 sts). All others MC. (73 sc)
Round 7: Stitches 3 to 13 in CC (11 sts). All others MC. (73 sc)
Round 8: Stitches 2 to 16 in CC (15 sts). All others MC. (73 sc)
Round 9: Stitches 1 to 19 in CC (19 sts). All others MC. (73 sc)
Round 10: Stitches 1 to 22 in CC (22 sts). All others MC. (73 sc)
Round 11: Stitches 2 to 24 in CC (23 sts). All others MC. (73 sc)
Round 12: Stitches 3 to 25 in CC (23 sts). All others MC. (73 sc)
Round 13: Stitches 4 to 25 in CC (22 sts). All others MC. (73 sc)
Round 14: Stitches 5 to 24 in CC (20 sts). All others MC. (73 sc)
Round 15: Stitches 6 to 23 in CC (18 sts). All others MC. (73 sc)
Round 16: Stitches 8 to 21 in CC (14 sts). All others MC. (73 sc)
Round 17: Stitches 10 to 19 in CC (10 sts). All others MC. (73 sc)
Round 18: Stitches 12 to 17 in CC (6 sts). All others MC. (73 sc)
Round 19: Blob A ends. All MC. (73 sc)
Leg Blob B Detail (Right Leg, Inner Thigh)
Round 6: Stitches 42 to 48 in CC (7 sts). All others MC. (73 sc)
Round 7: Stitches 40 to 52 in CC (13 sts). All others MC. (73 sc)
Round 8: Stitches 38 to 55 in CC (18 sts). All others MC. (73 sc)
Round 9: Stitches 37 to 57 in CC (21 sts). All others MC. (73 sc)
Round 10: Stitches 36 to 59 in CC (24 sts). All others MC. (73 sc)
Round 11: Stitches 36 to 60 in CC (25 sts). All others MC. (73 sc)
Round 12: Stitches 37 to 60 in CC (24 sts). All others MC. (73 sc)
Round 13: Stitches 38 to 59 in CC (22 sts). All others MC. (73 sc)
Round 14: Stitches 40 to 57 in CC (18 sts). All others MC. (73 sc)
Round 15: Stitches 42 to 55 in CC (14 sts). All others MC. (73 sc)
Round 16: Stitches 44 to 52 in CC (9 sts). All others MC. (73 sc)
Round 17: Stitches 46 to 50 in CC (5 sts). All others MC. (73 sc)
Round 18: Blob B ends. All MC. (73 sc)
Rounds 19 to 27: All MC. (73 sc per round)
Leg Shaping Schedule
Begin leg shaping (tapering) at Round 20. The leg tapers from 73 stitches at the thigh to 37 stitches at the ankle opening before ribbing. You will decrease 2 stitches every 7th round, working sc2tog at the inner leg seam.
Decrease rounds are marked with (D):
Round 20 (D): Sc to 2 stitches before marker, sc2tog, sc around to 2 stitches before second inner marker, sc2tog. (71 sc)
Round 27 (D): Sc2tog at each inner leg point. (69 sc)
Round 34 (D): Sc2tog at each inner leg point. (67 sc)
Round 41 (D): Sc2tog at each inner leg point. (65 sc)
Round 48 (D): Sc2tog at each inner leg point. (63 sc)
Round 55 (D): Sc2tog at each inner leg point. (61 sc)
Round 62 (D): Sc2tog at each inner leg point. (59 sc)
Round 69 (D): Sc2tog at each inner leg point. (57 sc)
Round 76 (D): Sc2tog at each inner leg point. (55 sc)
Round 83 (D): Sc2tog at each inner leg point. (53 sc)
Round 90 (D): Sc2tog at each inner leg point. (51 sc)
Round 97 (D): Sc2tog at each inner leg point. (49 sc)
Round 104 (D): Sc2tog at each inner leg point. (47 sc)
Round 111 (D): Sc2tog at each inner leg point. (45 sc)
Round 118 (D): Sc2tog at each inner leg point. (43 sc)
Round 125 (D): Sc2tog at each inner leg point. (41 sc)
Round 132 (D): Sc2tog at each inner leg point. (39 sc)
Round 135 (D): Sc2tog at each inner leg point. (37 sc)
Rounds 132 and 135 have a shorter interval to bring the stitch count down adequately for the cuff. All non decrease rounds between the rounds listed above: sc in each stitch around with Color A (or as directed by blob placement), maintaining current stitch count.
Leg Blob C Detail (Right Leg, Outer Mid Leg)
Blob C begins at Round 28, when the leg has 69 stitches.
Round 28: Stitches 6 to 12 in CC (7 sts). All others MC. (69 sc)
Round 29: Stitches 4 to 15 in CC (12 sts). All others MC. (69 sc)
Round 30: Stitches 3 to 18 in CC (16 sts). All others MC. (69 sc)
Round 31: Stitches 2 to 21 in CC (20 sts). All others MC. (69 sc)
Round 32: Stitches 2 to 23 in CC (22 sts). All others MC. (69 sc)
Round 33: Stitches 3 to 24 in CC (22 sts). All others MC. (69 sc)
Round 34: Stitches 4 to 24 in CC (21 sts). All others MC. (67 sc, shaping round, decrease already applied)
Round 35: Stitches 5 to 23 in CC (19 sts). All others MC. (67 sc)
Round 36: Stitches 7 to 22 in CC (16 sts). All others MC. (67 sc)
Round 37: Stitches 9 to 20 in CC (12 sts). All others MC. (67 sc)
Round 38: Stitches 11 to 18 in CC (8 sts). All others MC. (67 sc)
Round 39: Stitches 13 to 16 in CC (4 sts). All others MC. (67 sc)
Round 40: Blob C ends. All MC. (67 sc)
Leg Blob D Detail (Right Leg, Inner Lower Leg)
Blob D begins at Round 50, when the leg has 63 stitches.
Round 50: Stitches 38 to 44 in CC (7 sts). All others MC. (63 sc)
Round 51: Stitches 36 to 47 in CC (12 sts). All others MC. (63 sc)
Round 52: Stitches 34 to 50 in CC (17 sts). All others MC. (63 sc)
Round 53: Stitches 33 to 52 in CC (20 sts). All others MC. (63 sc)
Round 54: Stitches 32 to 54 in CC (23 sts). All others MC. (63 sc)
Round 55: Stitches 32 to 54 in CC (23 sts). All others MC. (61 sc, shaping round applied)
Round 56: Stitches 33 to 53 in CC (21 sts). All others MC. (61 sc)
Round 57: Stitches 34 to 51 in CC (18 sts). All others MC. (61 sc)
Round 58: Stitches 36 to 49 in CC (14 sts). All others MC. (61 sc)
Round 59: Stitches 38 to 47 in CC (10 sts). All others MC. (61 sc)
Round 60: Stitches 40 to 45 in CC (6 sts). All others MC. (61 sc)
Round 61: Blob D ends. All MC. (61 sc)
Continue working all MC rounds with shaping as scheduled until Round 135. (37 sc)
Checkpoint: After Round 135 of the Right Leg, your leg tube should measure approximately 27 inches or 69 cm from the crotch join and should have 37 stitches. The leg tube at this point should measure approximately 8.2 inches
You Might Also Like
- Ocean Wave Granny Square Bag Free Crochet Pattern
- Pink Rose Garden Crochet Vase Free Crochet Pattern
- Ocean Blue Ombre Crochet Platform Wedge Sandals Pattern
- Lavender Dream Mesh Crochet High Tops Free Pattern