Coral Sunset Granny Square Maxi Dress Free Crochet Pattern
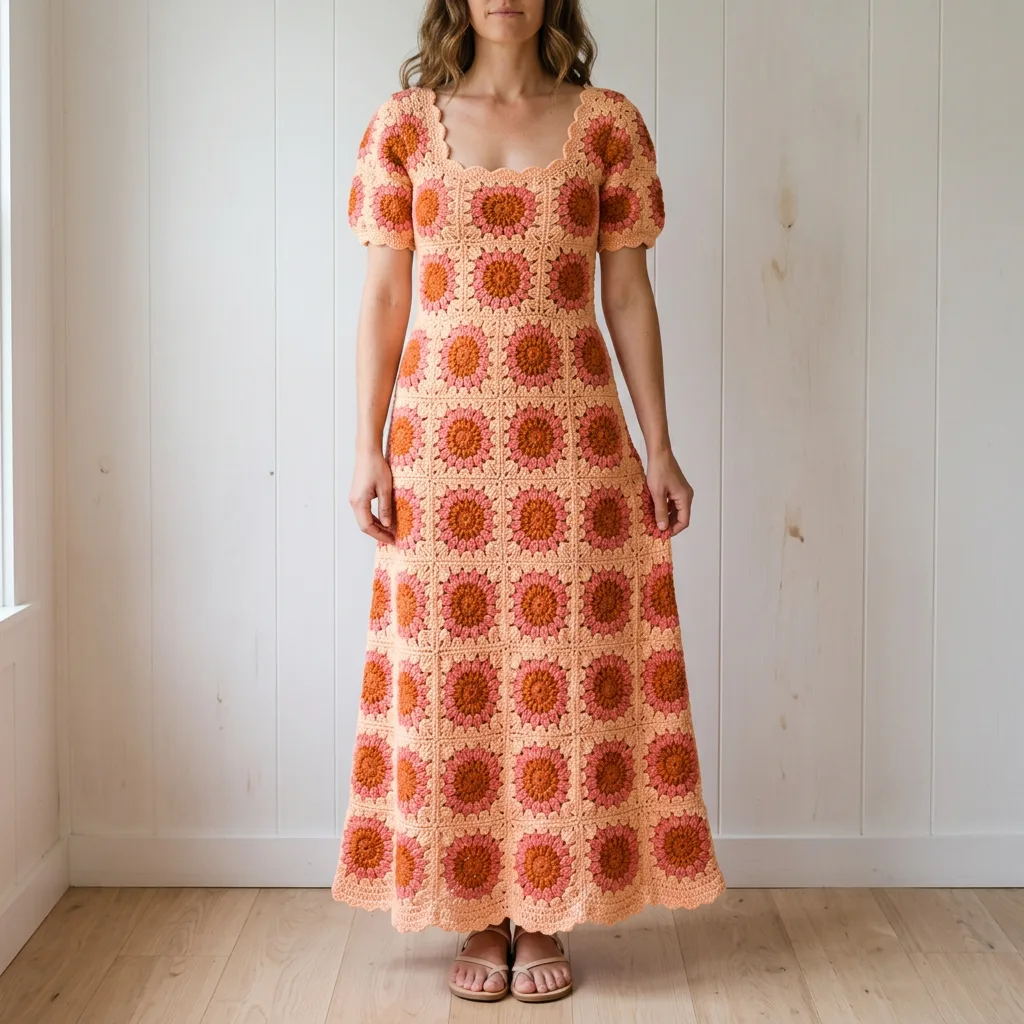
I had a very clear vision when I started designing this dress. I wanted something that felt vintage but looked completely fresh. Something that celebrated the classic granny square but pushed it into wearable art territory.
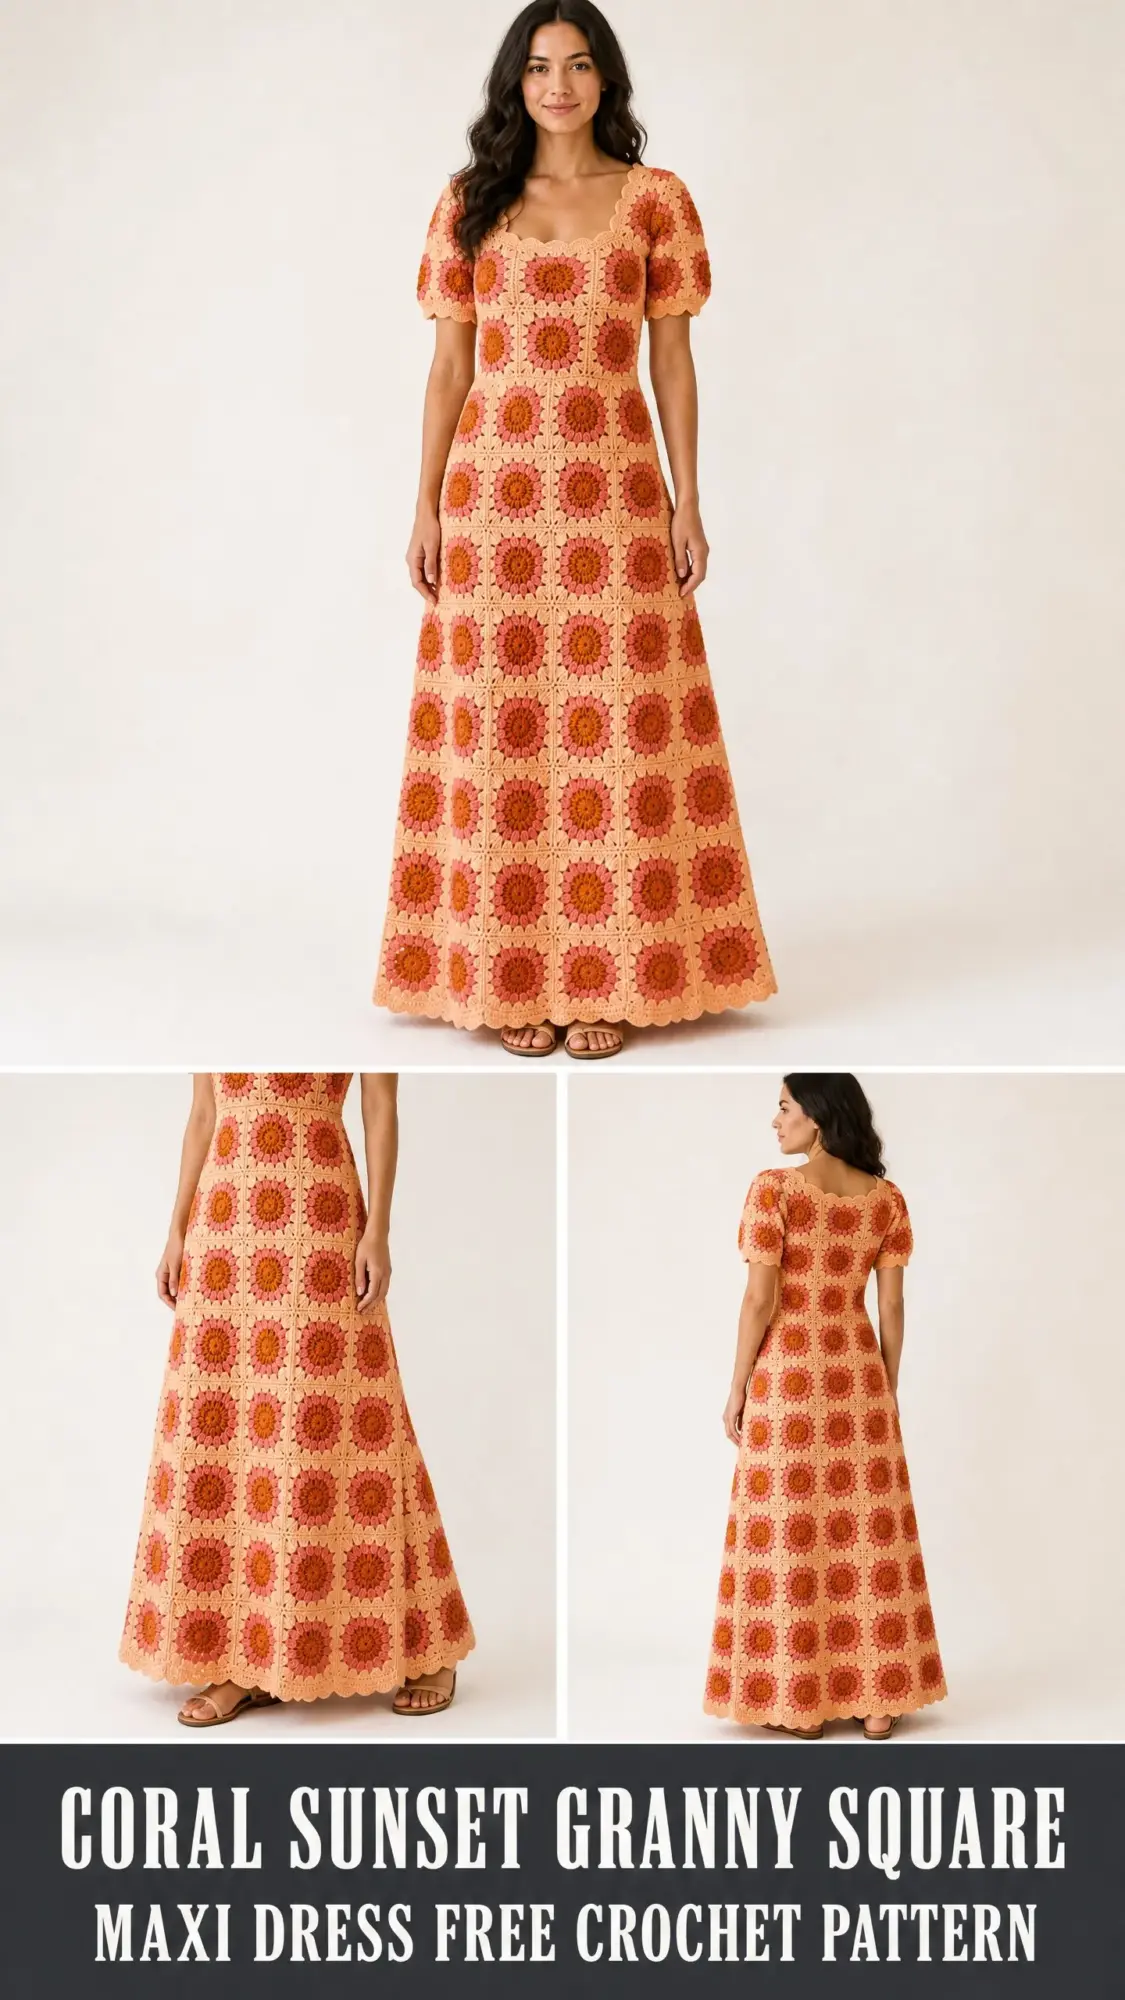
The color palette came first. Those warm sunset tones of burnt orange, coral pink, and soft peach kept calling to me. I wanted the dress to span multiple sizes, use a motif that even intermediate crocheters could master, and have that dreamy bohemian silhouette that works for summer weddings, beach vacations, or just feeling gorgeous on a Tuesday.
I am SO pleased with how this turned out. The fitted bodice, the gentle A-line flare, those sweet puffed sleeves. Every single element came together exactly as I imagined.
About This Granny Square Maxi Dress Crochet Pattern
This maxi dress is constructed entirely from sunflower granny squares joined as you go into flat panels. Each square features a circular sunflower-style center worked in burnt orange, surrounded by a ring of coral pink petals, all set against a warm peach background.
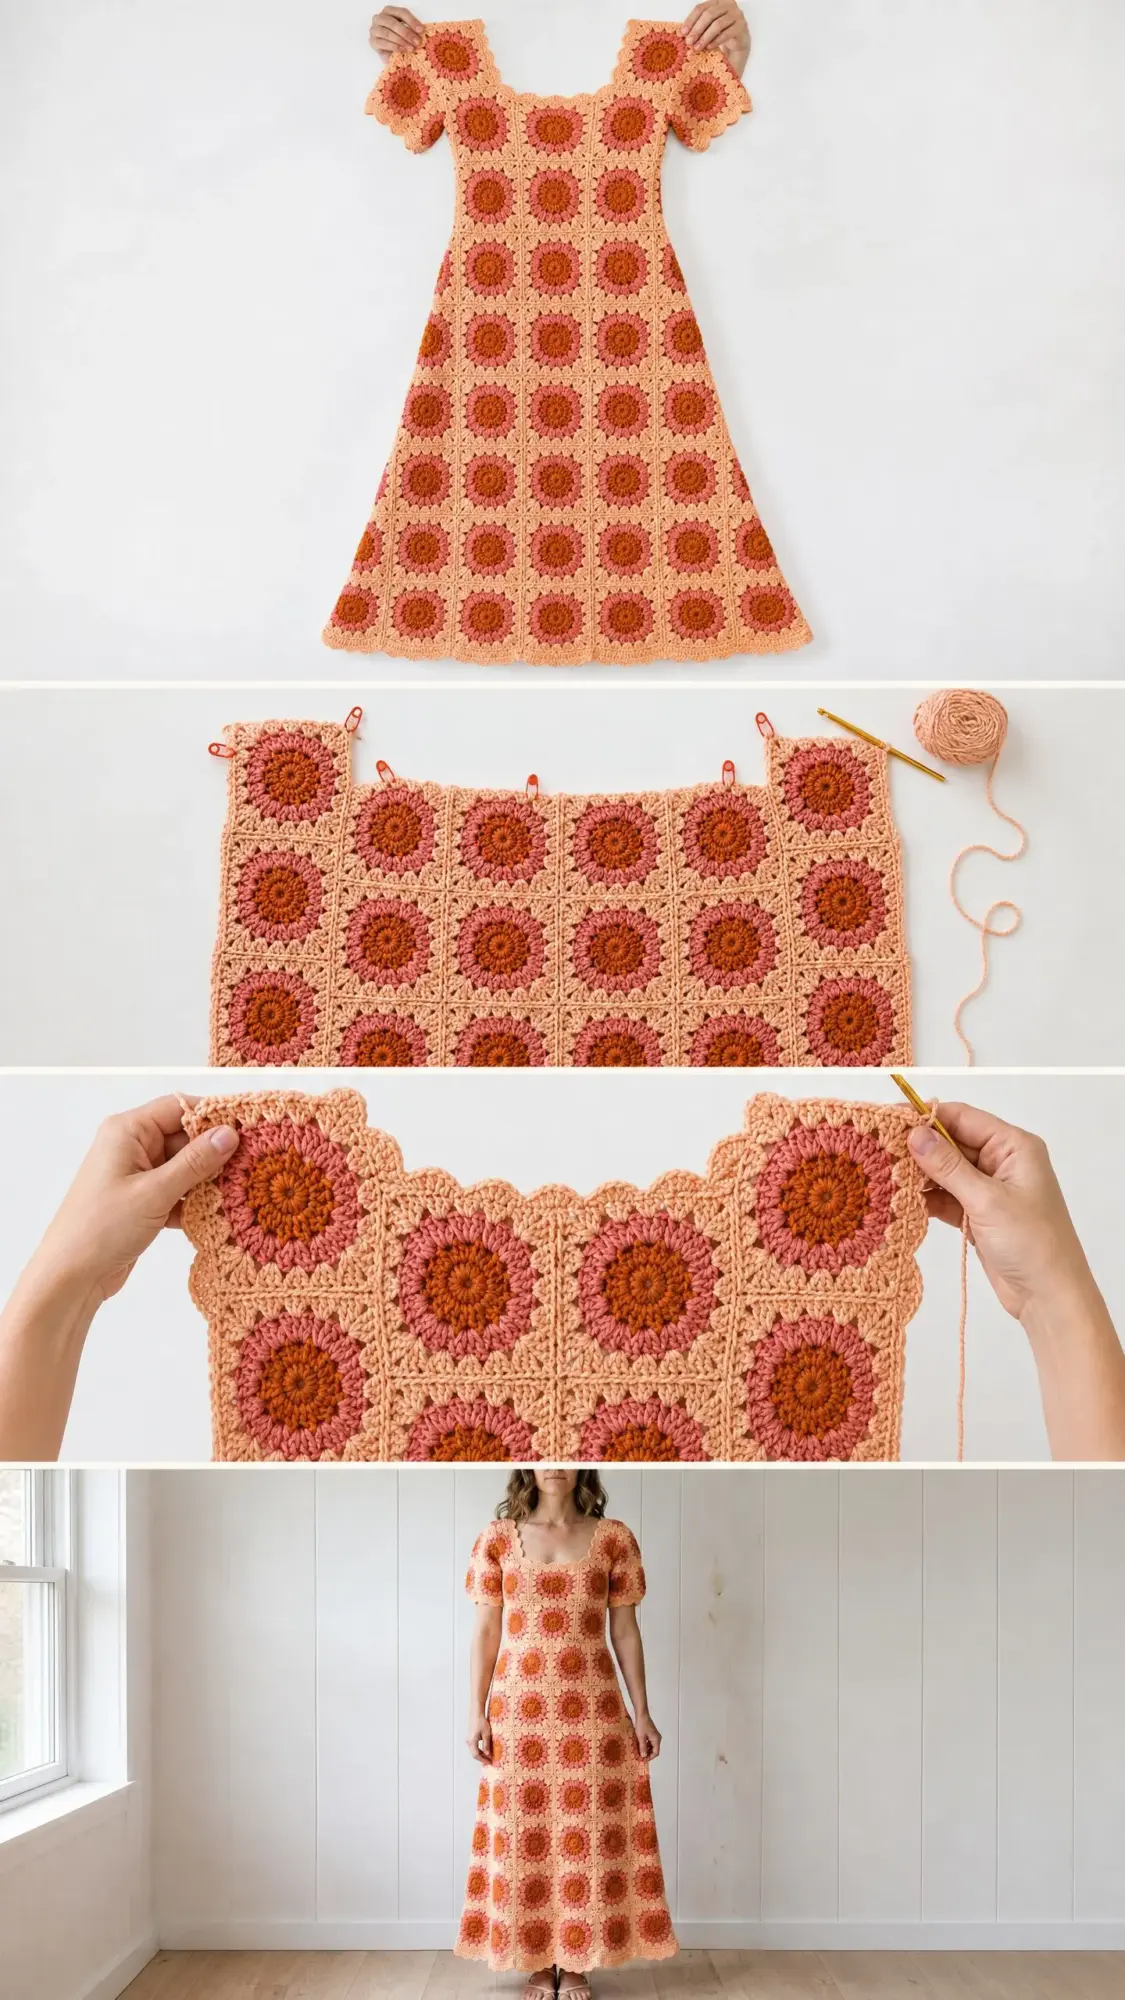
The construction method is straightforward once you understand the flow. You will work flat panels for the bodice front, two bodice back pieces, two sleeve panels, and skirt sections. Then you will seam everything together and add beautiful scalloped borders at the neckline, sleeves, and hem.
The silhouette is fitted through the bust and waist, then flares gradually from the hip to the ankle. It is feminine, flattering, and absolutely stunning in person.
Skill Level
This pattern is rated intermediate to advanced. You will need to be comfortable with several techniques to succeed.
The project requires proficiency in the granny square motif including multi-round color changes. You will use the join as you go technique, which means assembling a large number of squares without seaming them separately. Basic garment shaping is achieved through selective square placement and partial square fill-in triangles. The fitted bodice demands accurate gauge and intentional increases and decreases at shaping seams.
If you have made granny square blankets and feel confident reading construction charts, you will find this manageable. True beginners may feel overwhelmed by the quantity of motifs and the assembly sequence.
Time Estimate
Plan for approximately 80 to 120 hours for a size Medium, depending on your working speed.
Here is how that breaks down. Each square takes roughly 15 to 20 minutes. The complete dress requires approximately 130 to 150 squares plus partial fill-in motifs. Motif production alone accounts for 35 to 50 hours. Assembly, seaming, borders, and finishing add another 10 to 15 hours. Blocking adds 3 to 5 hours of drying time.
This is a commitment piece. But oh, is it worth it.
Finished Sizes
Each finished square measures 4 inches by 4 inches (10 cm by 10 cm) after blocking.
Size XS: Bust 32 in / 81 cm, Waist 26 in / 66 cm, Hip 36 in / 91 cm, Length 52 in / 132 cm
Size S: Bust 34 in / 86 cm, Waist 28 in / 71 cm, Hip 38 in / 97 cm, Length 53 in / 135 cm
Size M: Bust 36 in / 91 cm, Waist 30 in / 76 cm, Hip 40 in / 102 cm, Length 54 in / 137 cm
Size L: Bust 38 in / 97 cm, Waist 32 in / 81 cm, Hip 42 in / 107 cm, Length 55 in / 140 cm
Size XL: Bust 40 in / 102 cm, Waist 34 in / 86 cm, Hip 44 in / 112 cm, Length 56 in / 142 cm
Size 2XL: Bust 44 in / 112 cm, Waist 38 in / 97 cm, Hip 48 in / 122 cm, Length 57 in / 145 cm
All measurements are finished garment measurements with 1 to 2 inches (2.5 to 5 cm) ease built in. Choose the size closest to your actual body measurement at the fullest part of the bust.
Materials Needed
Yarn
You will need DK weight yarn (CYCA 3) in three colors. Smooth, mercerized cotton or cotton blend is recommended for drape and stitch definition.
Color A (Burnt Orange): approximately 400 (440, 480, 520, 560, 640) yards / 366 (402, 439, 476, 512, 585) meters
Color B (Coral Pink): approximately 600 (660, 720, 780, 840, 960) yards / 549 (604, 659, 714, 769, 878) meters
Color C (Warm Peach): approximately 900 (990, 1080, 1170, 1260, 1440) yards / 823 (906, 988, 1070, 1152, 1317) meters
Yarn Suggestions
Lion Brand 24/7 Cotton in Terracotta (Color A), Salmon (Color B), and Peach (Color C). This 100 percent mercerized cotton DK yarn has excellent stitch definition, washes beautifully, and comes in a wide range of warm tones. It is widely available and budget friendly. 186 yards per 3.5 oz skein.
Paintbox Yarns Cotton DK in Mustard Yellow (Color A), Melon Sorbet (Color B), and Blush Pink adjusted to Peach (Color C). This affordable 100 percent cotton DK has a smooth, matte finish that suits granny square work well. 273 yards per 3.5 oz skein.
Rowan Cotton Glace in Burnt Orange (Color A), Coral (Color B), and Ecru/Peach blend (Color C). A slightly lighter DK/sport weight option that produces excellent drape in a maxi length garment. Note: if substituting with Cotton Glace, swatch carefully and adjust hook size up by 0.25 mm if needed to achieve the 4 inch square gauge. 126 yards per 1.75 oz skein.
Hooks
US size G-6 / 4.0 mm for squares and body
US size F-5 / 3.75 mm for neckline and cuff borders
Notions
Gauge
1 completed and blocked granny square = 4 in x 4 in / 10 cm x 10 cm
In standard double crochet (dc) granny square pattern worked in the round on a US G-6 / 4.0 mm hook: 18 dc x 9 rows = 4 in x 4 in / 10 cm x 10 cm. The square measurement takes precedence.
Gauge is critical for a fitted garment. If your square is larger than 4 inches, go down one hook size. If your square is smaller than 4 inches, go up one hook size.
Abbreviations (US Terms)
Before we dive into the pattern instructions, let me define every abbreviation you will encounter.
approx: approximately
beg: beginning
BLO: back loop only (inserting your hook under just the back loop of a stitch instead of both loops)
ch: chain (yarn over and pull through the loop on your hook)
ch-sp: chain space (the gap created by chain stitches in previous rows)
cont: continue
dc: double crochet (yarn over, insert hook, pull up a loop, yarn over and pull through 2 loops, yarn over and pull through remaining 2 loops)
dc2tog: double crochet two together, a decrease stitch
FLO: front loop only (inserting your hook under just the front loop of a stitch)
hdc: half double crochet
JAYG: join as you go (a technique for joining motifs while working the final round)
lp(s): loop(s)
MC: main color (Color C, Warm Peach, in this pattern)
MR: magic ring (an adjustable starting ring that can be pulled tight)
rem: remaining
rep: repeat
rnd: round
RS: right side (the side that faces out when worn)
sc: single crochet (insert hook, pull up a loop, yarn over and pull through both loops)
sk: skip
sl st: slip stitch (insert hook, pull loop through stitch and loop on hook in one motion)
sp(s): space(s)
ss: same stitch
st(s): stitch(es)
WS: wrong side (the side that faces your body when worn)
yo: yarn over
Special Stitches
Sunflower Granny Square (SGS)
This is the signature motif for the entire dress. It is worked in 4 rounds using 3 colors. The square measures 4 in x 4 in / 10 cm x 10 cm after blocking.
Round 1 (Color A, Burnt Orange):
Make a MR. Ch 3 (counts as first dc). Work 11 dc into the MR. Pull ring closed snugly. Sl st to top of beg ch-3 to join. (12 dc)
Round 2 (Color A continuing):
Ch 1. Working in front loops only, work 1 sc in same st, then work (ch 3, sl st in same st) to form a small petal loop, then sl st into next st. Rep (1 sc, ch 3, sl st in same st, sl st to next st) around until 12 petal loops have been formed. Fasten off Color A. (12 petal loops)
Detailed petal instruction: Insert hook into FLO of next dc from Round 1. Pull up a loop. Ch 3. Sl st back into same front loop. Sl st into FLO of next dc. Rep 11 more times, working one petal per dc from Round 1. Do not join. Fasten off. (12 petals total)
Round 3 (Color B, Coral Pink):
Join Color B with sl st into any BLO of a dc from Round 1 that you have not used yet (the back loops are still free behind the petals). Ch 3 (counts as first dc). Work 1 dc in same BLO. Work 2 dc in BLO of each remaining dc from Round 1 around. Sl st to top of beg ch-3 to join. (24 dc)
Now work the outer petal ring: Ch 1. Working in FLO of each dc just made in Round 3, work (sc, ch 4, sc) in same FLO, sl st in FLO of next dc. Rep around to create 24 larger petal loops. Fasten off Color B. (24 petals)
Round 4 (Color C, Warm Peach, the square body):
Join Color C with sl st into any BLO of a dc from Round 3. Ch 3 (counts as first dc).
At each of 4 equally spaced corners, work (2 dc, ch 2, 2 dc) into the BLO cluster.
Working into BLOs of Round 3 only (petals sit to the front and are not engaged in this round): Work 6 dc into BLOs of 6 consecutive Round 3 stitches, ending at a natural corner point, then work (2 dc, ch 2, 2 dc) in the BLO of the next stitch to form the corner. Continue working 6 dc across the side, then corner. Repeat for all 4 sides. Sl st to top of beg ch-3 to join. Fasten off Color C.
Stitch count verification for Round 4: Each side has 6 dc between corners plus 4 dc that are part of the corner cluster (2 dc before ch-2 sp plus 2 dc after), giving (6 + 4) x 4 = 40 dc plus 4 ch-2 corner spaces. Total: 40 dc, 4 ch-2 sps.
Join As You Go (JAYG) Technique
When assembling squares, the last round of each new square is worked simultaneously joining to adjacent finished squares. On the sides being joined, replace the corner ch-2 with (ch 1, sl st into corresponding corner ch-2 sp of adjacent square, ch 1). Replace any ch-1 spaces along the joining side with (sl st into corresponding ch-1 sp of adjacent square). This creates a flat, nearly invisible seam on the right side. The joining is worked on the wrong side of both squares. Hold squares with WS facing each other when executing the sl st joins.
Scallop Shell Border
Used at neckline, cuff edges, and hem edge.
Join Color C (or Color B for contrast, as pictured) with sl st into any sc or ch-sp along the edge. Skip 2 sts, work 5 dc all into next st (shell made), skip 2 sts, sl st into next st. Rep around the entire edge. Sl st to first sl st to join. Fasten off.
Each shell repeat uses 6 stitches (2 skipped + 1 shell st + 2 skipped + 1 sl st). For clean shells, ensure your edge stitch count is divisible by 6 before beginning the border.
Half Granny Square (HGS) Fill-In Triangle
Used at waist shaping wedges and underarm curves. These are worked back and forth in rows, not rounds, and create a right triangle shape half the size of a full square.
Row 1 (RS, Color C): Ch 4. Work 3 dc in 4th ch from hook. Turn. (3 dc + foundation ch counts as first cluster)
Row 2 (Color C): Ch 3 (counts as dc). Work 2 dc in same st, ch 1. In turning ch-sp, work (3 dc, ch 2, 3 dc). Ch 1. Work 3 dc in top of beg ch-3 of previous row. Turn.
Row 3 (Color C): Ch 3. Work 2 dc in same st. Ch 1. Work 3 dc in next ch-1 sp. Ch 1. In corner ch-2 sp, work (3 dc, ch 2, 3 dc). Ch 1. Work 3 dc in next ch-1 sp. Ch 1. Work 3 dc in turning ch. Fasten off, leaving tail for seaming.
The long straight edge of the HGS equals one full side of a SGS (4 in / 10 cm). The two short sides each equal half a square side (2 in / 5 cm). Use HGS pieces to fill diagonal openings at the underarm and waist step shaping.
Square Count Overview
Before you begin, know how many squares you need for your size.
Front Bodice Panel: 4 (4, 5, 5, 5, 6) squares wide x 6 squares tall
Each Back Bodice Panel: 2 (2, 3, 3, 3, 3) squares wide x 6 squares tall
Each Sleeve Panel: 2 squares wide x 2 squares tall (all sizes)
Front Skirt Panel: 6 (7, 8, 9, 10, 11) squares wide x 7 (7, 7, 8, 8, 8) squares tall (tapered, wider at hem)
Each Back Skirt Panel: 3 (4, 4, 5, 5, 6) squares wide x 7 (7, 7, 8, 8, 8) squares tall
Total squares approximate: 130 (140, 152, 164, 174, 188) full SGS plus approximately 12 to 16 HGS fill-ins depending on size.
Pattern Notes
Please read these notes before beginning.
1. The dress is worked in flat panels: one front bodice panel, two back bodice panels (left and right, creating the center back opening), two sleeve panels, and combined front and back skirt panels. All panels are assembled via JAYG as squares are added.
2. Shaping is achieved geometrically by adding or removing squares at the edges of panels.
3. All stitch counts in the instructions refer to number of squares in each panel row unless otherwise stated. A row of squares runs horizontally across the panel.
4. The neckline is shaped by leaving center top squares of the front bodice panel unworked and finishing with the scallop shell border.
5. The center back seam is left open for approximately 10 in / 25 cm from the neckline downward. This opening is reinforced with a row of sc along both edges, then chain button loops are added.
6. Color sequence for every SGS: Rounds 1 and 2 are Color A (Burnt Orange). Round 3 is Color B (Coral Pink). Round 4 is Color C (Warm Peach). This is consistent for every square.
7. The dress has no zipper. The back opening is finished with button loops. Alternatively, it can be left as a simple overlapping flap.
8. Instructions are written for Size M (36 in / 91 cm bust). Changes for XS, S, L, XL, 2XL are given in parentheses in the order XS, S, M, L, XL, 2XL. When only one number appears, it applies to all sizes.
Step by Step Pattern Instructions
Section 1: Standard Square Construction
Before assembling panels, make 4 test squares and block them. Confirm each measures exactly 4 in x 4 in / 10 cm x 10 cm.
Work all squares following the SGS instructions. For JAYG squares, work Round 4 while joining to adjacent squares.
Make starter squares for each panel:
Section 2: Front Bodice Panel
The front bodice panel is built from bottom to top (waist to shoulder). Add squares left to right, then begin a new row above. Use JAYG for all squares after the first in each row.
Row 1 of Front Bodice (bottom row, waist level):
Place starter square at left position. JAYG squares 2 through 5 (size M) to the right of the first, joining along the right side of each preceding square. (5 squares in Row 1 for size M)
XS and S: 4 squares. L and XL: 5 squares. 2XL: 6 squares.
Row 2 of Front Bodice:
JAYG new square at left above Row 1 square 1, joining new square’s bottom edge to top edge of Row 1 square 1. Continue JAYG across to the right, joining each square’s left side to the previous square and bottom to the corresponding Row 1 square below. (Same width as Row 1)
Rows 3 through 6 of Front Bodice:
Rep Row 2 for each subsequent row. Work straight, no shaping, for rows 3 through 4. (Same width throughout)
Neckline Shaping (Rows 5 and 6):
In Row 5, work the full width of the panel. In Row 6, leave the center 1 (1, 1, 1, 1, 2) square(s) unworked at top center to create the neckline opening.
Work the left side: make squares for positions 1 and 2 from the left, JAYG to Row 5 below. Work the right side: make squares for positions 4 and 5 from the left (size M), JAYG to Row 5 below. Leave position 3 (center) open.
For XS and S (4-wide): leave center 2 squares of Row 6 open (positions 2 and 3), work 1 square on each shoulder.
For L, XL: leave center 1 square open, work 2 squares on each shoulder.
For 2XL (6-wide): leave center 2 squares open, work 2 squares on each shoulder.
Checkpoint: The Front Bodice Panel should measure approximately 20 in / 51 cm wide and 24 in / 61 cm tall for size M. The neckline opening is approximately 4 in / 10 cm wide and 4 in / 10 cm deep.
Section 3: Back Bodice Panels (Make 2, Mirror Image)
Each back bodice panel is 2 (2, 3, 3, 3, 3) squares wide x 6 squares tall. The center back edge remains as a finished straight edge.
For size M: Each panel is 3 squares wide x 6 squares tall.
Row 1 (bottom of each back panel):
Make starter square. JAYG 2 additional squares to the right. (3 squares for size M)
Rows 2 through 5:
Work straight, 3 squares wide. JAYG each square to the one below and to the left-neighbor square.
Row 6 (shoulder row):
Work full width. For size M, work all 3 squares.
Checkpoint: Each back bodice panel should measure 12 in / 30 cm wide and 24 in / 61 cm tall for size M.
Section 4: Sleeve Panels (Make 2)
Each sleeve is a 2 square wide x 2 square tall panel (all sizes). This creates a cuff-to-shoulder span of approximately 8 in x 8 in / 20 cm x 20 cm.
Make 1 starter square. JAYG 1 square to its right. JAYG 1 square below the starter square. JAYG 1 square to the right of the third square, completing the 2×2 grid. (4 squares total per sleeve)
Sleeve puff gathering row:
Join Color C at top left corner of sleeve panel. Work sc evenly across the top 2 square edge: approximately 18 to 20 sc across 8 in / 20 cm. At the halfway point, work a gentle decrease by skipping 1 st once on each side of center. This pulls the sleeve top inward very slightly for the puff effect. (16 to 18 sc across gathering row)
Set sleeve aside.
Section 5: Skirt Panels
The skirt is wider than the bodice at the hip and flares further to the hem.
Front Skirt Panel:
Begin at the waist edge with the same width as the bottom of the front bodice, then increase by 1 square per side every 2 rows.
Size M front skirt starts 5 squares wide at the top and expands to 8 squares wide at the hem over 7 rows.
Row 1 of Front Skirt (waist row, attached to front bodice):
JAYG 5 squares (size M) across, joining the top edge of each square to the bottom edge of the corresponding front bodice Row 1 square. (5 sq for size M; XS: 4 sq, S: 4 sq, L: 5 sq, XL: 5 sq, 2XL: 6 sq)
Row 2 of Front Skirt:
JAYG same width as Row 1. (5 sq)
Row 3 of Front Skirt (first expansion row):
Add 1 HGS at each end of the row before adding the full square at the outer edge. This expands the panel by 1 full square per side. (7 sq for size M)
Row 4 of Front Skirt:
Work straight, same width as Row 3. (7 sq)
Row 5 of Front Skirt (second expansion row):
Add 1 sq per side again. (8 sq for size M)
Rows 6 and 7 of Front Skirt:
Work straight at full hem width. (8 sq for size M)
Front Skirt width progression by row (size M):
Row 1: 5 sq, Row 2: 5 sq, Row 3: 7 sq, Row 4: 7 sq, Row 5: 8 sq, Row 6: 8 sq, Row 7: 8 sq
Total height: 7 rows x 4 in = 28 in / 71 cm skirt length
Back Skirt Panels (Make 2):
Each back skirt panel begins at the same width as the corresponding back bodice panel and expands similarly. For size M, each back skirt panel begins at 3 sq wide and expands to 4 sq wide by the hem.
Row progression for each back skirt panel (size M):
Row 1: 3 sq (attached to back bodice bottom)
Rows 2-4: 3 sq
Rows 5-7: 4 sq (expand by 1 sq on outer edge only; inner edge remains at center back straight edge)
Checkpoint: The combined front skirt panel should measure 32 in / 81 cm wide and 28 in / 71 cm tall for size M. Each back skirt panel should measure 16 in / 41 cm wide and 28 in / 71 cm tall for size M.
Section 6: Assembly
Step 1: Join front bodice to back bodice panels at side seams
With RS facing each other, use yarn needle and Color C to whipstitch the right side edge of the front bodice to the left side edge of the right back bodice panel. Rep for the left side.
Important: Do not seam all 6 rows of the side edges. Leave the top 2 rows (8 in / 20 cm) of each side seam open. These open sections form the armhole openings.
Pin sleeve into armhole opening with RS facing and gathering distributed evenly. Whipstitch sleeve into place using Color C.
Step 2: Join skirt to bodice
With RS facing, pin the top (waist) edge of the front skirt panel to the bottom edge of the front bodice panel, matching squares to squares. Whipstitch across. Rep for each back skirt panel joined to each back bodice panel bottom. Then join the back skirt panels to the front skirt panel at the side seams using whipstitch.
Step 3: Fill-in HGS triangles
At any diagonal step edges created during skirt expansion, sew in the HGS fill-in triangles using whipstitch, matching the long edge of the HGS to the step edge.
Section 7: Neckline Border
With RS facing, join Color C to any stitch along the neckline edge using a US F-5 / 3.75 mm hook. Work 1 round of sc evenly around the entire neckline opening, working approximately 1 sc per dc and 1 sc per ch-sp around. Count total sc after this round.
Ensure the total sc count is divisible by 6 for the scallop shell border. Adjust by adding or subtracting 1 to 3 sc evenly spaced as needed.
Next round: Work the Scallop Shell Border around the neckline. Sl st to first sl st. Fasten off.
Section 8: Sleeve Cuff Borders
For each sleeve, with RS facing, join Color C to the lower edge of the sleeve panel using a US F-5 / 3.75 mm hook. Work 1 round of sc evenly around the cuff edge. Ensure count is divisible by 6. Work the Scallop Shell Border. Fasten off.
Section 9: Hem Border
With RS facing, join Color C to the bottom edge of the skirt. Work 1 round of sc evenly around the entire hem. Ensure count is divisible by 6. Work the Scallop Shell Border. Fasten off.
Section 10: Back Closure
Reinforce both center back edges with a row of sc worked evenly from neckline to the point where the back seam begins (approximately 10 in / 25 cm down from neckline).
On the right back edge, work button loops: at evenly spaced intervals (approximately 3 to 5 loops), ch 6, sl st back into the edge to create a loop. Sew buttons to the left back edge to correspond with loops.
Finishing
Weave in all ends securely. Block the entire dress by soaking in lukewarm water, gently squeezing out excess, and laying flat on blocking mats. Pin to measurements. Allow 3 to 5 hours to dry completely.
Optional: Add a slip lining for opacity if desired.
Helpful Tips for Success
Test your gauge religiously. A fitted garment has no forgiveness for gauge issues. Make at least 4 full squares before purchasing your full yardage.
Keep your color changes consistent. Every single square uses the same color sequence. This repetition is what creates that beautiful unified look.
Block as you go if needed. Some crocheters find it helpful to block squares in batches before joining.
Take breaks. This is a marathon, not a sprint. Those 130+ squares will feel endless if you push too hard.
Celebrate your progress. Take photos at each stage. Seeing those panels grow is incredibly satisfying.
I would absolutely love to see your finished Coral Sunset Granny Square Maxi Dress. If you make this pattern, please save it to your Pinterest boards so you can find it easily later. And drop a comment below to share your progress or ask any questions. I am always here to help, and there is nothing better than seeing these designs come to life in your hands.
You Might Also Like
- Cream White Nursery Wall Organizer Free Crochet Pattern
- Sage Green Summer Tote with Cream Tassels Free Crochet Pattern
- Lavender Garden Bobble Pullover Free Crochet Pattern
- Pastel Daisy Crochet Hoodie Free Crochet Pattern