Emerald Diamond Lattice Mermaid Gown Free Crochet Pattern
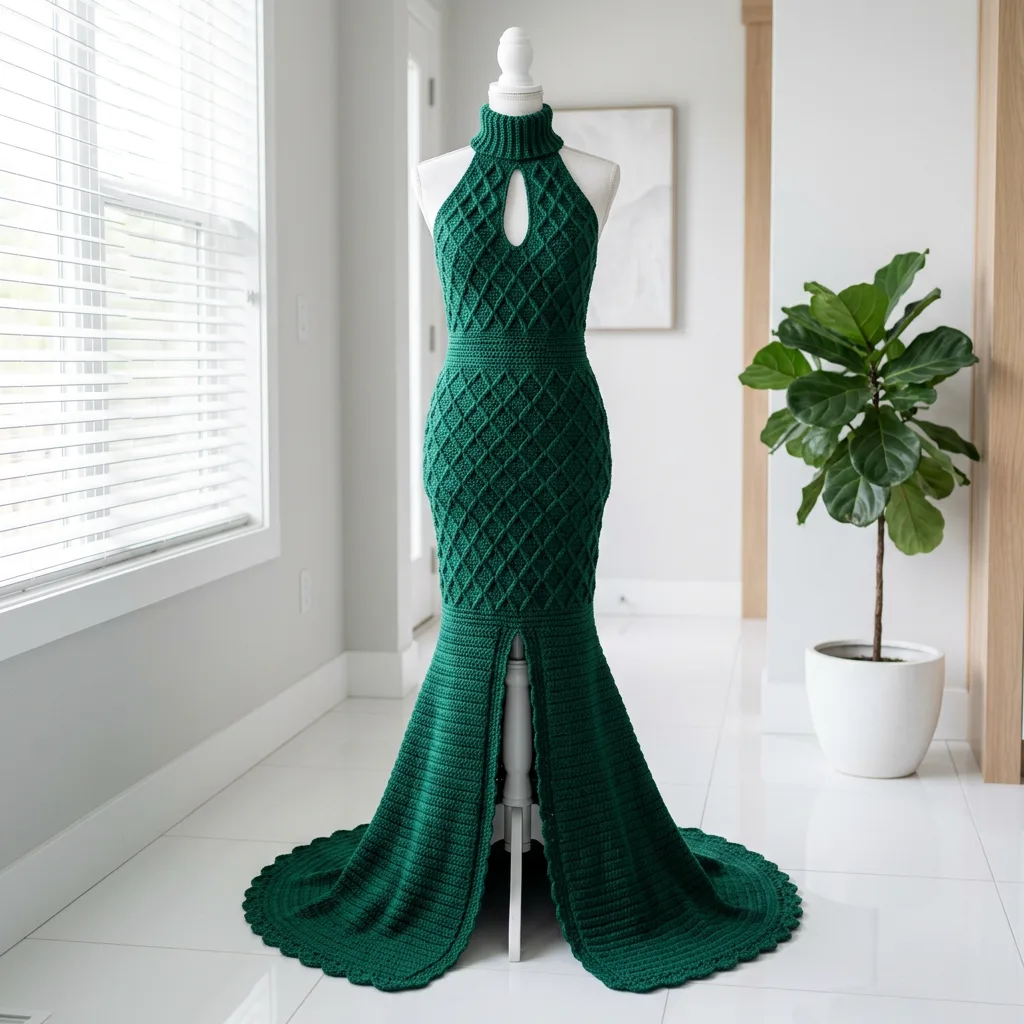
I call this one “The Siren.” I sketched the original concept in a battered notebook during a friend’s wedding reception three years ago. The bride wore emerald, and I remember thinking how the color caught the light like sea glass. That night, I started drafting what would become the most ambitious crochet pattern I have ever written. The notebook sat in a drawer for two years before I finally had the courage to pick up my hook and bring The Siren to life.
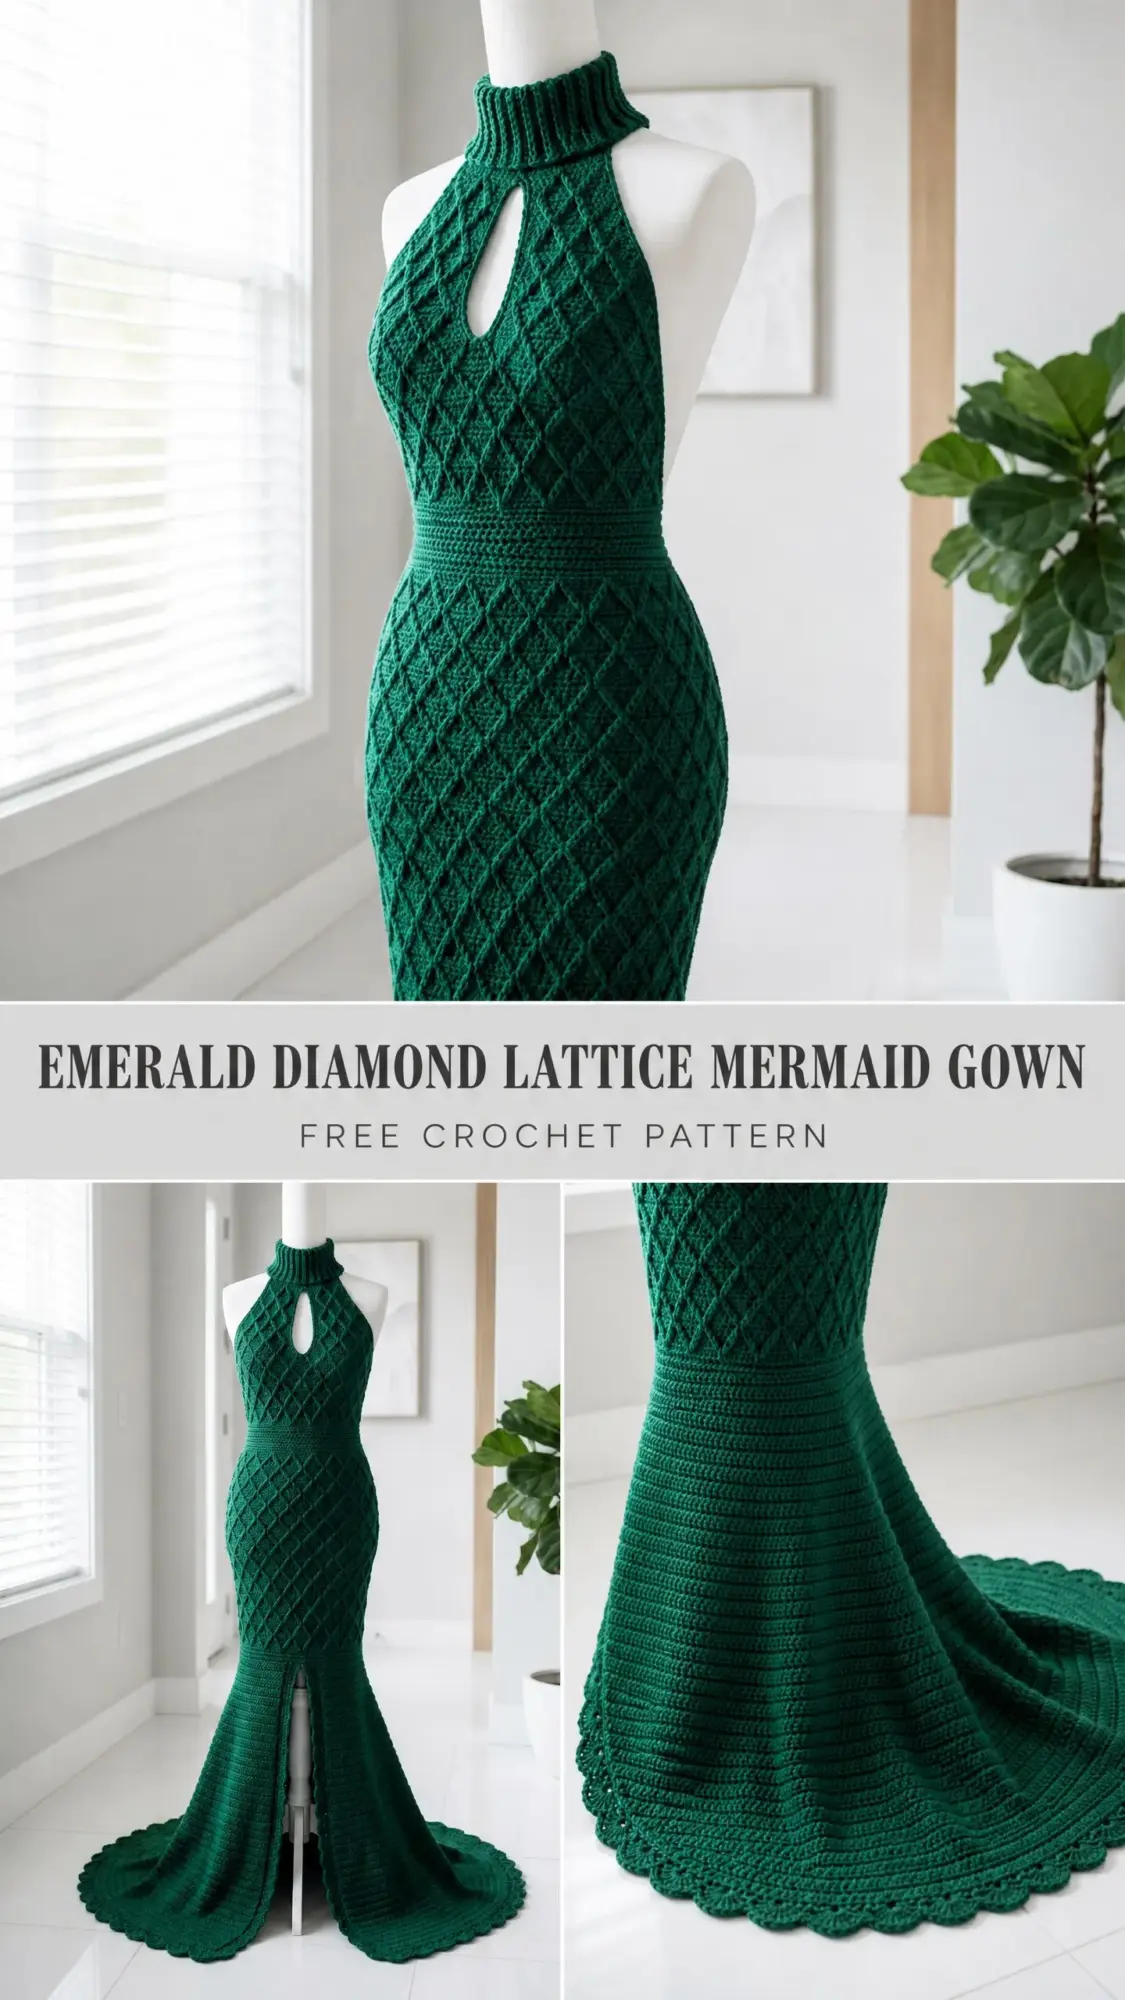
This floor length halter neck mermaid gown features an all over raised diamond lattice bodice, a fitted hip and upper skirt, a flared trumpet hem with a front center slit, a scalloped hem border, and an open back halter construction with a ribbed turtleneck collar. It is a showstopper. It is also completely achievable if you take it section by section.
This is an advanced crochet pattern requiring comfort with working in the round and flat simultaneously, managing a center front keyhole opening, executing raised front post and back post crochet cables to create the diamond lattice, precise mermaid shaping with evenly spaced decreases and increases, and finishing a scalloped hem border. If you have completed at least two fitted garments before, you are ready for this challenge.
Why This Emerald Mermaid Gown Crochet Pattern Stands Out
The construction method here is what makes this gown special. You start at the top of the ribbed turtleneck collar, work down through the halter straps, create separate bodice panels with that gorgeous raised diamond texture, join everything at the side seams, then work the skirt in the round with careful shaping that creates the true mermaid silhouette. The trumpet flare at the bottom creates dramatic pooling fabric that photographs beautifully.
The raised diamond lattice is not as complicated as it looks. You are simply alternating front post and back post double crochet stitches in a specific sequence. The offset between rows creates the diagonal diamond visual. Once you get the rhythm, it becomes almost meditative.
Finished Measurements
This pattern is written for a size Medium with the following finished measurements:
Size customization tips are provided at the end of the pattern.
Materials Needed for This Crochet Gown Pattern
Yarn: Approximately 2,800 yards (2,560 meters) of a worsted weight (size 4) yarn with good stitch definition, low halo, and high twist. Wool blend or cotton acrylic blend recommended for drape and structure.
Specific yarn suggestions:
1. Lion Brand Heartland (100% acrylic, 251 yds / 230 m per 5 oz / 142 g skein) in colorway Yosemite or Olympic. You will need approximately 12 skeins. This yarn has excellent stitch definition and holds the raised lattice crisp.
2. Paintbox Yarns Simply DK used doubled (100% acrylic, 137 yds / 125 m per 50 g ball) in Racing Green. Using two strands held together throughout achieves a worsted gauge. You will need approximately 21 balls. Doubles beautifully for dense structure.
3. WeCrochet Wool of the Andes Worsted (100% Peruvian Highland Wool, 200 yds / 183 m per 100 g skein) in Hollyberry or a deep forest green. You will need approximately 15 skeins. Blocks beautifully for couture finish.
Substitution note: Choose a yarn that passes the drape test (fabric should fold without stiffness) and has a smooth ply for cable definition. Avoid fuzzy or bouclé textures.
Hooks:
Notions:
Gauge
Getting gauge right is mandatory for a fitted garment like this. Please swatch.
With J / 6 mm hook and worsted weight yarn in diamond lattice stitch pattern (after blocking):
14 stitches = 4 inches (10 cm)
18 rows = 4 inches (10 cm)
With H / 5 mm hook in back loop only single crochet (for collar and waistband):
16 stitches = 4 inches (10 cm)
20 rows = 4 inches (10 cm)
Swatch at least a 6 inch (15 cm) square in each stitch pattern, block the swatch, then measure. Adjust hook size as needed.
Abbreviations
Special Stitches and Techniques
Diamond Lattice Pattern (worked over a multiple of 8 stitches plus 4)
This pattern creates the raised diamond grid visible across the bodice and skirt. It uses alternating rows of front post and back post double crochet to push cables to the right side of the fabric.
Row 1 (RS): Ch 3 (counts as dc), dc in each st across. Turn.
Row 2 (WS): Ch 3 (counts as dc), dc in next st, then work BPdc around each of next 2 sts, dc in next 2 sts; rep from (BPdc in next 2, dc in next 2) across to last 2 sts, dc in last 2 sts. Turn.
Row 3: Ch 3, dc in next st, FPdc around each of next 2 sts, dc in next 2 sts; rep (FPdc in next 2, dc in next 2) across to last 2 sts, dc in last 2 sts. Turn.
Row 4: Ch 3, dc in next 3 sts, BPdc around next 2 sts, (dc in next 2 sts, BPdc around next 2 sts) across to last 4 sts, dc in last 4 sts. Turn.
Row 5: Ch 3, dc in next 3 sts, FPdc around next 2 sts, (dc in next 2 sts, FPdc around next 2 sts) across to last 4 sts, dc in last 4 sts. Turn.
Rows 2 through 5 form the diamond lattice repeat. Every 8 rows, the diamond completes one full vertical repeat. The post stitches are always worked around the post of the stitch two rows below, not the current row, to maintain height alignment.
Scallop Border Stitch
Slip stitch into next stitch, chain 3, work 4 double crochet into same stitch, chain 3, slip stitch into same stitch to create one scallop shell. Move to the next anchor stitch and repeat across.
Keyhole Opening
A small teardrop shaped hole worked at the center front neck. At the designated row, work to center, chain 3, skip 3 stitches, continue to end of row. On the return row, work 3 single crochet into the chain 3 space to close the bottom of the keyhole while leaving the opening at the top.
Step by Step Crochet Tutorial
Section 1: Ribbed Turtleneck Collar
The collar is worked as a flat rectangle in back loop only single crochet, then seamed into a tube.
Foundation: Using H / 5 mm hook, ch 25.
Row 1: Sc in 2nd ch from hook and in each ch across. (24 sc)
Rows 2 through 70: Ch 1, turn. Sc in BLO of each st across. (24 sc)
After Row 70, fold the rectangle so the short ends meet. Slip stitch the two short ends together through both loops to form a tube. You should have 70 ridges around the tube circumference. This creates a ribbed tube approximately 17.5 inches (44.5 cm) in circumference and 6 inches (15 cm) tall.
Checkpoint: The collar tube should measure 17.5 inches (44.5 cm) in circumference and 6 inches (15 cm) tall. Adjust row count if your collar circumference differs from your neck measurement plus 1 inch (2.5 cm) ease.
With RS facing and J / 6 mm hook, join yarn at collar base seam. Work 1 round of sc evenly around the lower edge of the collar, placing 1 sc per ridge end. (70 sc)
Slip stitch to first sc to join. Do not turn. This round is the pickup round for the halter straps.
Section 2: Halter Strap Formation and Keyhole
The halter is open at the back. The front strap is one wide central strap running from collar base to upper chest. The back is open with two narrow strap ties.
Front strap:
With RS facing, count 35 sts along the collar base round for the front. Place markers at st 1 and st 35 of the front. The remaining 35 sts are the back opening.
Join yarn at marker 1. Work on front 35 sts only. Turn and work flat.
Row 1 (RS): Ch 1, sc in next 16 sts, ch 3, sk 3 sts, sc in last 16 sts. (32 sc + 3-ch sp)
This is the keyhole row. The chain 3 creates the teardrop hole visible at center front neck.
Row 2 (WS): Ch 1, turn. Sc in next 16 sts, work 3 sc into the ch-3 sp, sc in next 16 sts. (35 sc)
Rows 3 through 6: Ch 1, turn. Sc in each st across. (35 sc)
Row 7 (begin shaping for strap divergence): Ch 1, turn. Sc in first 16 sts, sl st in next 3 sts (center), sc in last 16 sts. Do not count sl sts as working sts. (32 sc plus 3 sl sts)
Row 8: Ch 1, turn. Work on right strap only: sc in 16 sts. Turn. (16 sc)
Right front strap Rows 9 through 24: Ch 1, turn. Sc across. (16 sc)
Fasten off and leave a long tail for seaming. Work left front strap symmetrically for Rows 8 through 24 starting at the left side 16 sts.
Back strap ties:
Join yarn at the first of the 35 back sts. Work a narrow strip of 8 sts wide and 24 rows tall on each side of the back opening for the tie straps. Fasten off and leave long tails.
Section 3: Front Bodice Panel
The front bodice panel is worked flat from the chest down to the waist. It will be seamed to the back panels at the side seams.
Pick up sts along the lower edge of the front strap / chest area. With J / 6 mm hook, RS facing, work 64 sc across the full width of the front chest. (64 sc)
This is your working stitch count for the front bodice. 64 is divisible by 8, which accommodates the diamond lattice repeat.
Row 1 (RS): Ch 3 (counts as dc), dc in each st across. (64 dc)
Row 2 (WS): Ch 3, dc in next 1 st, BPdc around next 2 sts, (dc in next 2 sts, BPdc around next 2 sts) across to last 2 sts, dc in last 2 sts. (64 sts)
Row 3 (RS): Ch 3, dc in next 1 st, FPdc around next 2 sts, (dc in next 2 sts, FPdc around next 2 sts) across to last 2 sts, dc in last 2 sts. (64 sts)
Row 4 (WS): Ch 3, dc in next 3 sts, BPdc around next 2 sts, (dc in next 2 sts, BPdc around next 2 sts) across to last 4 sts, dc in last 4 sts. (64 sts)
Row 5 (RS): Ch 3, dc in next 3 sts, FPdc around next 2 sts, (dc in next 2 sts, FPdc around next 2 sts) across to last 4 sts, dc in last 4 sts. (64 sts)
Rows 6 through 25: Repeat Rows 2 through 5 five more times. (64 sts per row)
The front bodice panel is now approximately 6.5 inches (16.5 cm) tall. Fasten off.
Checkpoint: The front bodice panel should measure approximately 18 inches (45.5 cm) wide and 6.5 inches (16.5 cm) tall before side seaming.
Section 4: Back Bodice Panels
Two back panels are worked separately. Each is 28 sts wide to allow for the open back design.
Left back bodice panel:
Ch 29. Sc in 2nd ch from hook and across. (28 sc)
Work Rows 1 through 25 of the diamond lattice pattern exactly as written for the front bodice panel, over 28 sts. (28 sts per row throughout)
Fasten off.
Right back bodice panel:
Work identically to left back panel. (28 sts per row, 25 rows)
Fasten off.
Side seam assembly:
Using tapestry needle and mattress stitch, seam the right edge of the left back panel to the left edge of the front bodice panel. Seam the left edge of the right back panel to the right edge of the front bodice panel. Leave the back center open.
Total circumference at bodice join: 64 front sts plus 28 plus 28 back sts = 120 working sts around the bodice tube.
After seaming, the bodice tube circumference is 120 sts = approximately 34 inches (86.5 cm). This gives approximately 1 to 2 inches (2.5 to 5 cm) negative ease at the bust for a fitted look.
Checkpoint: After bodice section assembly, the piece should measure approximately 6 inches (15 cm) tall from the underarm pickup to the bottom of the bodice panel.
Section 5: Waistband
The waistband is worked in the round in BLO sc using the H / 5 mm hook for tighter compression.
With RS facing and H / 5 mm hook, join yarn at the right back edge of the bodice bottom. Work 1 sc in each st around the lower edge of the joined bodice. On the back opening edges, add 2 sc per edge to neaten. Total: 120 sc around the waist round. (120 sc)
Rounds 1 through 8: Ch 1, sl st to join, work BLO sc in each st around. Sl st to join at end of each round. (120 sc)
Begin waist decreases to achieve waist measurement of 28 inches (71 cm). Target stitch count: approximately 98 sts.
Round 9: (Sc in next 18 sts, sc2tog) 6 times. Sl st to join. (114 sc)
Round 10: (Sc in next 17 sts, sc2tog) 6 times. Sl st to join. (108 sc)
Round 11: (Sc in next 16 sts, sc2tog) 6 times. Sl st to join. (102 sc)
Round 12: (Sc in next 15 sts, sc2tog) 6 times. Sl st to join. (96 sc)
Switch back to J / 6 mm hook.
Rounds 13 through 16: BLO sc in each st around. Sl st to join. (96 sc)
Checkpoint: The waistband should measure approximately 4 inches (10 cm) tall and 27.5 inches (70 cm) in circumference.
Section 6: Upper Skirt with Diamond Lattice
From the waist, the skirt begins to taper slightly through the hips, then expand. The lattice continues seamlessly down.
With J / 6 mm hook, continue in the round from the waistband base. 96 sts in round.
Round 1: Dc in each st around. Sl st to join. (96 dc)
Round 2: (Dc in next 2 sts, BPdc around next 2 sts) around. Sl st to join. (96 sts)
Round 3: (Dc in next 2 sts, FPdc around next 2 sts) around. Sl st to join. (96 sts)
Round 4: (BPdc around next 2 sts, dc in next 2 sts) around. Note offset by 2 sts from Round 2. Sl st to join. (96 sts)
Round 5: (FPdc around next 2 sts, dc in next 2 sts) around. Sl st to join. (96 sts)
Rounds 6 through 9: Repeat Rounds 2 through 5. Sl st to join at end of each round. (96 sts)
Hip increase section: Target hip circumference: 38 inches (96.5 cm) = approximately 133 sts. Increase from 96 to 134 sts over 12 rounds by adding 4 sts every 2 rounds.
Round 10: Dc in each st around, placing inc (2 dc into 1 st) at 4 evenly spaced points. (100 sts)
Round 11: Work diamond lattice Round 2 pattern around. (100 sts)
Round 12: Work diamond lattice Round 3 pattern. Inc 4 evenly. (104 sts)
Round 13: Work diamond lattice Round 4 pattern. (104 sts)
Round 14: Work diamond lattice Round 5 pattern. Inc 4 evenly. (108 sts)
Round 15: Work diamond lattice Round 2 pattern. (108 sts)
Round 16: Work diamond lattice Round 3 pattern. Inc 4 evenly. (112 sts)
Round 17: Work diamond lattice Round 4 pattern. (112 sts)
Round 18: Work diamond lattice Round 5 pattern. Inc 4 evenly. (116 sts)
Round 19: Work diamond lattice Round 2 pattern. (116 sts)
Round 20: Work diamond lattice Round 3 pattern. Inc 4 evenly. (120 sts)
Round 21: Work diamond lattice Round 4 pattern. (120 sts)
Round 22: Work diamond lattice Round 5 pattern. Inc 4 evenly. (124 sts)
Round 23: Work diamond lattice Round 2 pattern. (124 sts)
Round 24: Work diamond lattice Round 3 pattern. Inc 4 evenly. (128 sts)
Round 25: Work diamond lattice Round 4 pattern. (128 sts)
Round 26: Work diamond lattice Round 5 pattern. Inc 4 evenly. (132 sts)
Round 27: Dc in each st around. (132 sts)
At 132 sts, the circumference is approximately 37.7 inches (95.8 cm). This is within tolerance of the 38 inch (96.5 cm) hip target.
Checkpoint: The upper skirt section from waist to here should measure approximately 14 inches (35.5 cm). You are at the widest hip point.
Section 7: Lower Skirt Taper (Thigh Section)
The mermaid silhouette requires the skirt to taper back inward below the hip. Decrease from 132 sts down to 112 sts over 10 rounds.
Round 28: (Sc in next 9 sts, sc2tog) 12 times. Sl st to join. (120 sts)
Round 29: Sc in each st around. (120 sts)
Round 30: (Sc in next 18 sts, sc2tog) 6 times. Sl st to join. (114 sts)
Round 31: Sc in each st around. (114 sts)
Round 32: (Sc in next 17 sts, sc2tog) 6 times. Sl st to join. (108 sts)
Round 33: Sc in each st around. (108 sts)
Round 34: (Sc in next 16 sts, sc2tog) 6 times. Sl st to join. (102 sts)
Round 35: Sc in each st around. (102 sts)
Round 36: (Sc in next 15 sts, sc2tog) 6 times. Sl st to join. (96 sts)
Round 37: Sc in each st around. (96 sts)
Rounds 38 through 46: Sc in each st around. Sl st to join at end of each round. (96 sts)
The thigh column should now measure approximately 10 inches (25.5 cm) in length. The circumference at the narrowest thigh point is approximately 27.4 inches (69.6 cm), creating the fitted mermaid taper.
Checkpoint: From the waist, you should be approximately 26 inches (66 cm) down. The thigh area should feel snug on a size medium dress form.
Section 8: Trumpet Flare
The skirt now flares dramatically from the knee down.
Round 47: (Sc in next 2 sts, 2 sc in next st) around. Sl st to join. (128 sts)
Round 48: Sc in each st around. (128 sts)
Round 49: (Sc in next 3 sts, 2 sc in next st) around. Sl st to join. (160 sts)
Round 50: Sc in each st around. (160 sts)
Round 51: (Sc in next 4 sts, 2 sc in next st) around. Sl st to join. (192 sts)
Round 52: Sc in each st around. (192 sts)
Round 53: (Sc in next 3 sts, 2 sc in next st) around. Sl st to join. (240 sts)
Round 54: Sc in each st around. (240 sts)
Round 55: (Sc in next 4 sts, 2 sc in next st) around. Sl st to join. (288 sts)
Round 56: Sc in each st around. (288 sts)
Round 57: (Sc in next 5 sts, 2 sc in next st) around. Sl st to join. (336 sts)
Round 58: Sc in each st around. (336 sts)
Circumference at 336 sts: approximately 96 inches (243.8 cm). This is the full trumpet sweep that creates the dramatic pooling skirt.
Checkpoint: The flare section (Rounds 47 through 58) is approximately 6.5 inches (16.5 cm) tall. Total gown length from collar base to here: approximately 56 inches (142 cm).
Section 9: Center Front Slit and Front Hem
The center front slit begins at Round 47 (knee level). To work the slit, divide the hem round into front and back halves and work the front separately.
Place marker A at center front (stitch 1 of front 168 sts) and marker B at center back (stitch 169).
After Round 46 (last thigh column round), work as follows:
Front section: Join yarn at marker A. Ch 1. Sc across next 48 sts (right front). Ch 1, turn for next row.
The front is worked in two separate flat panels (right front and left front) from the center front slit to the side seams. Continue working right and left front halves flat through Rounds 47 to 58, applying the same increase math above but across the flat rows, mirroring increases across the center front slit edge.
Back half in the round: Continue working the 168 back sts in joined rounds with the same increase rates. Join front and back at side seams every 4 rounds with a slip stitch seam through both edges.
At the end of Round 58 equivalent on both front and back, total sts are 336 per the joined circumference above.
Section 10: Scallop Hem Border
The scalloped border is worked in one continuous pass around the entire hem circumference (336 sts), including the center front slit edges.
With J / 6 mm hook and RS facing, join yarn at the center front right slit corner at the hem.
Round 1: Sc in each st around the hem, including up the right slit edge, across the hem, and down the left slit edge. When working up and down the slit edges, work 1 sc per row end. At the corner of the slit at the knee, work 3 sc into the corner st. Total approximate sc count around the full hem and slit: approximately 384 sc total. (384 sc)
Scallop round: (Sl st in next st, ch 3, 4 dc in same st, ch 3, sl st in same st, sl st in next st) across entire hem edge. Adjust starting position so that scallops land evenly. One scallop is worked every 2 sts. Total scallops: approximately 192.
Fasten off and weave in end.
Finishing Your Mermaid Gown
Seaming: If any panel seams remain open, use mattress stitch with the tapestry needle and a length of yarn. Seam RS to RS and close neatly.
Weave all ends: Thread each tail onto tapestry needle and weave in at least 2 inches (5 cm) in the direction of the stitches, then back in the opposite direction to secure.
Halter tie finishing: At the top back edges of the two narrow back strap ties, work 1 row of sc along each edge to neaten. Optionally, attach a small toggle or hook closure.
Blocking: Block aggressively after assembly. The lattice opens up beautifully with wet blocking. A dress form is strongly recommended. Pin the bodice to shape while still damp.
Time Estimate
Expect approximately 80 to 120 hours depending on individual speed and swatch time. This is a couture project that rewards patience.
Pattern Notes to Remember
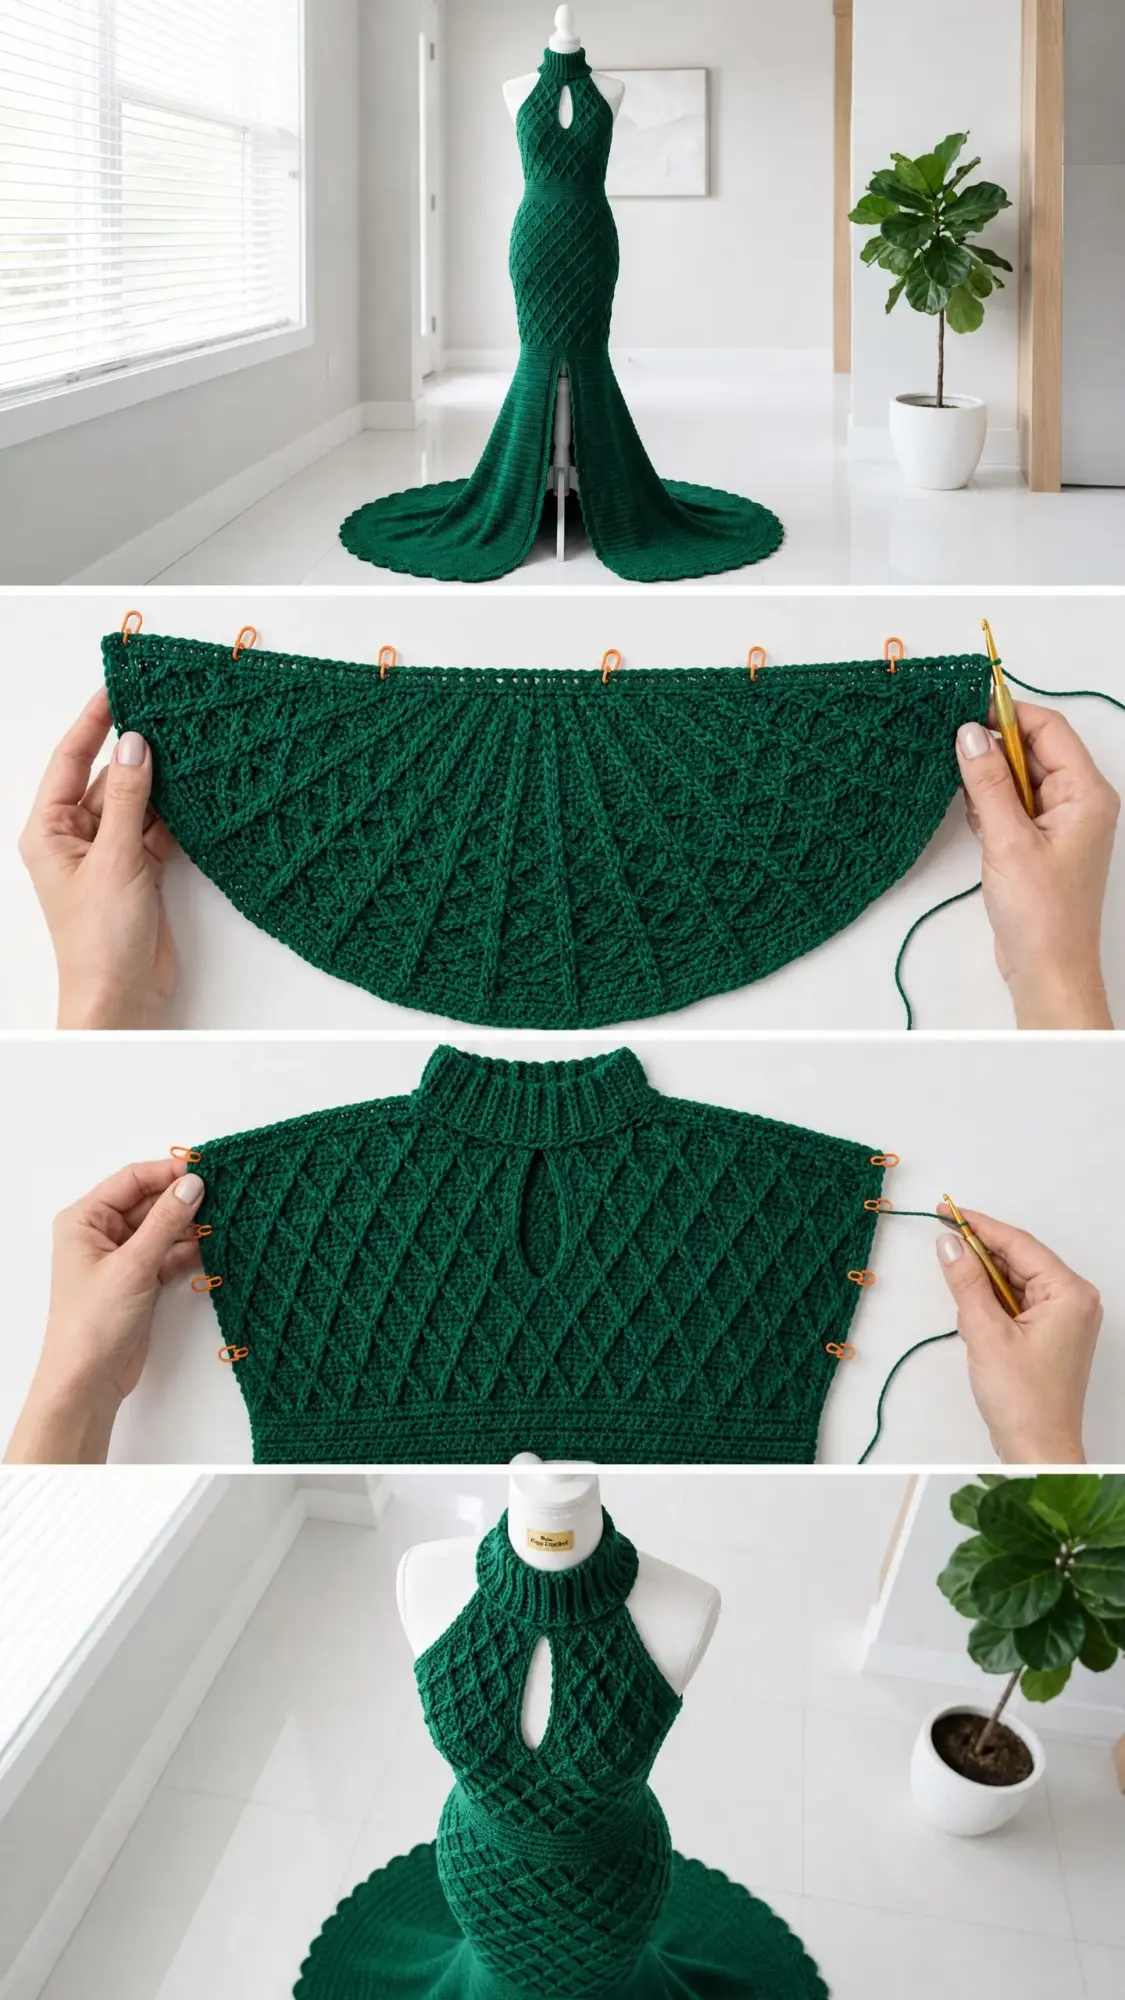
The gown is constructed in this order: ribbed turtleneck collar worked in the round, halter strap shaping worked flat, front bodice panel worked flat with diamond lattice, back panels worked flat (two separate back panels left open for the open back design), side seams joined, waistband worked in the round in BLO sc, skirt body worked in the round with diamond lattice continuing, skirt flare worked in the round with plain single crochet and increases, center front slit divided and worked flat on each side, scalloped hem applied.
Right side is always facing outward when working in the round. When working flat on panels, alternate RS and WS rows.
Stitch counts given at the end of each row or round reflect working stitches only and do not count the turning chain as a stitch unless specified.
Post stitches in the diamond lattice are always worked around the stitch directly below the current position, maintaining fabric stability.
The front center slit begins at approximately 20 inches (51 cm) from the waist. Below that, the two front halves are worked separately and joined only at the hem via the scallop border.
Thank you so much for choosing to make The Siren. I know this is a significant undertaking, and I am genuinely honored that you trust this pattern enough to invest your time and beautiful yarn into bringing it to life. If you make this gown, I would absolutely love to see it. Tag me on Instagram or share your photos on my Facebook page. Seeing your finished pieces is the best part of designing.
If this emerald diamond lattice mermaid gown crochet pattern has captured your imagination, go ahead and pin it to your Pinterest boards so you can find it when you are ready to start. And please drop a comment below if you make it or if you have any questions along the way. I read every single one.
You Might Also Like
- Sky Blue Dragon Amigurumi Plush Free Crochet Pattern
- Dusty Rose Puff Flower Tote Free Crochet Pattern
- Arctic Ice Mermaid Plush Doll Free Crochet Pattern
- Midnight Blue Floral Bell Sleeve Top Free Crochet Pattern