Dusty Rose Granny Square Mini Dress Free Crochet Pattern
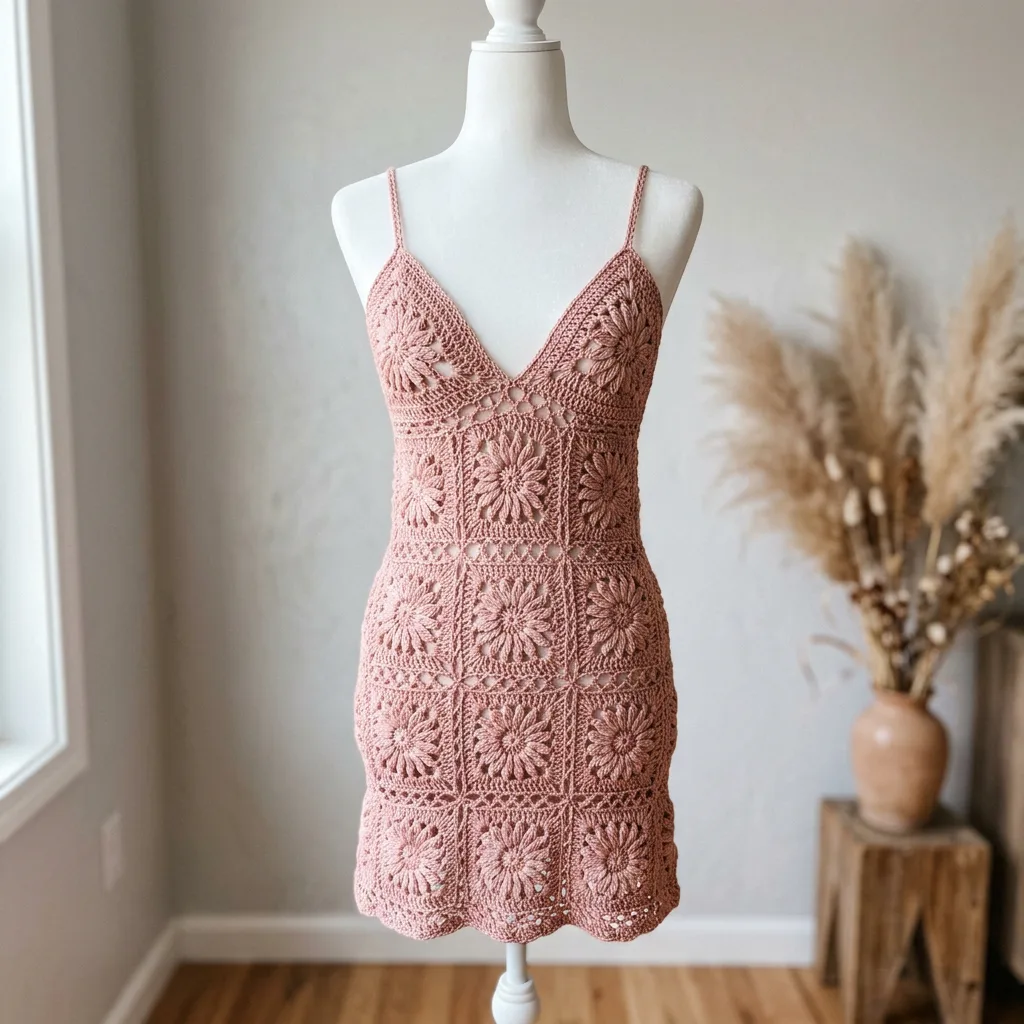
Got some gorgeous cotton yarn sitting in your stash that you’ve been waiting to use for something truly special? This is your sign to finally pull it out. This granny square mini dress is the perfect project to showcase that beautiful dusty rose skein you’ve been hoarding.
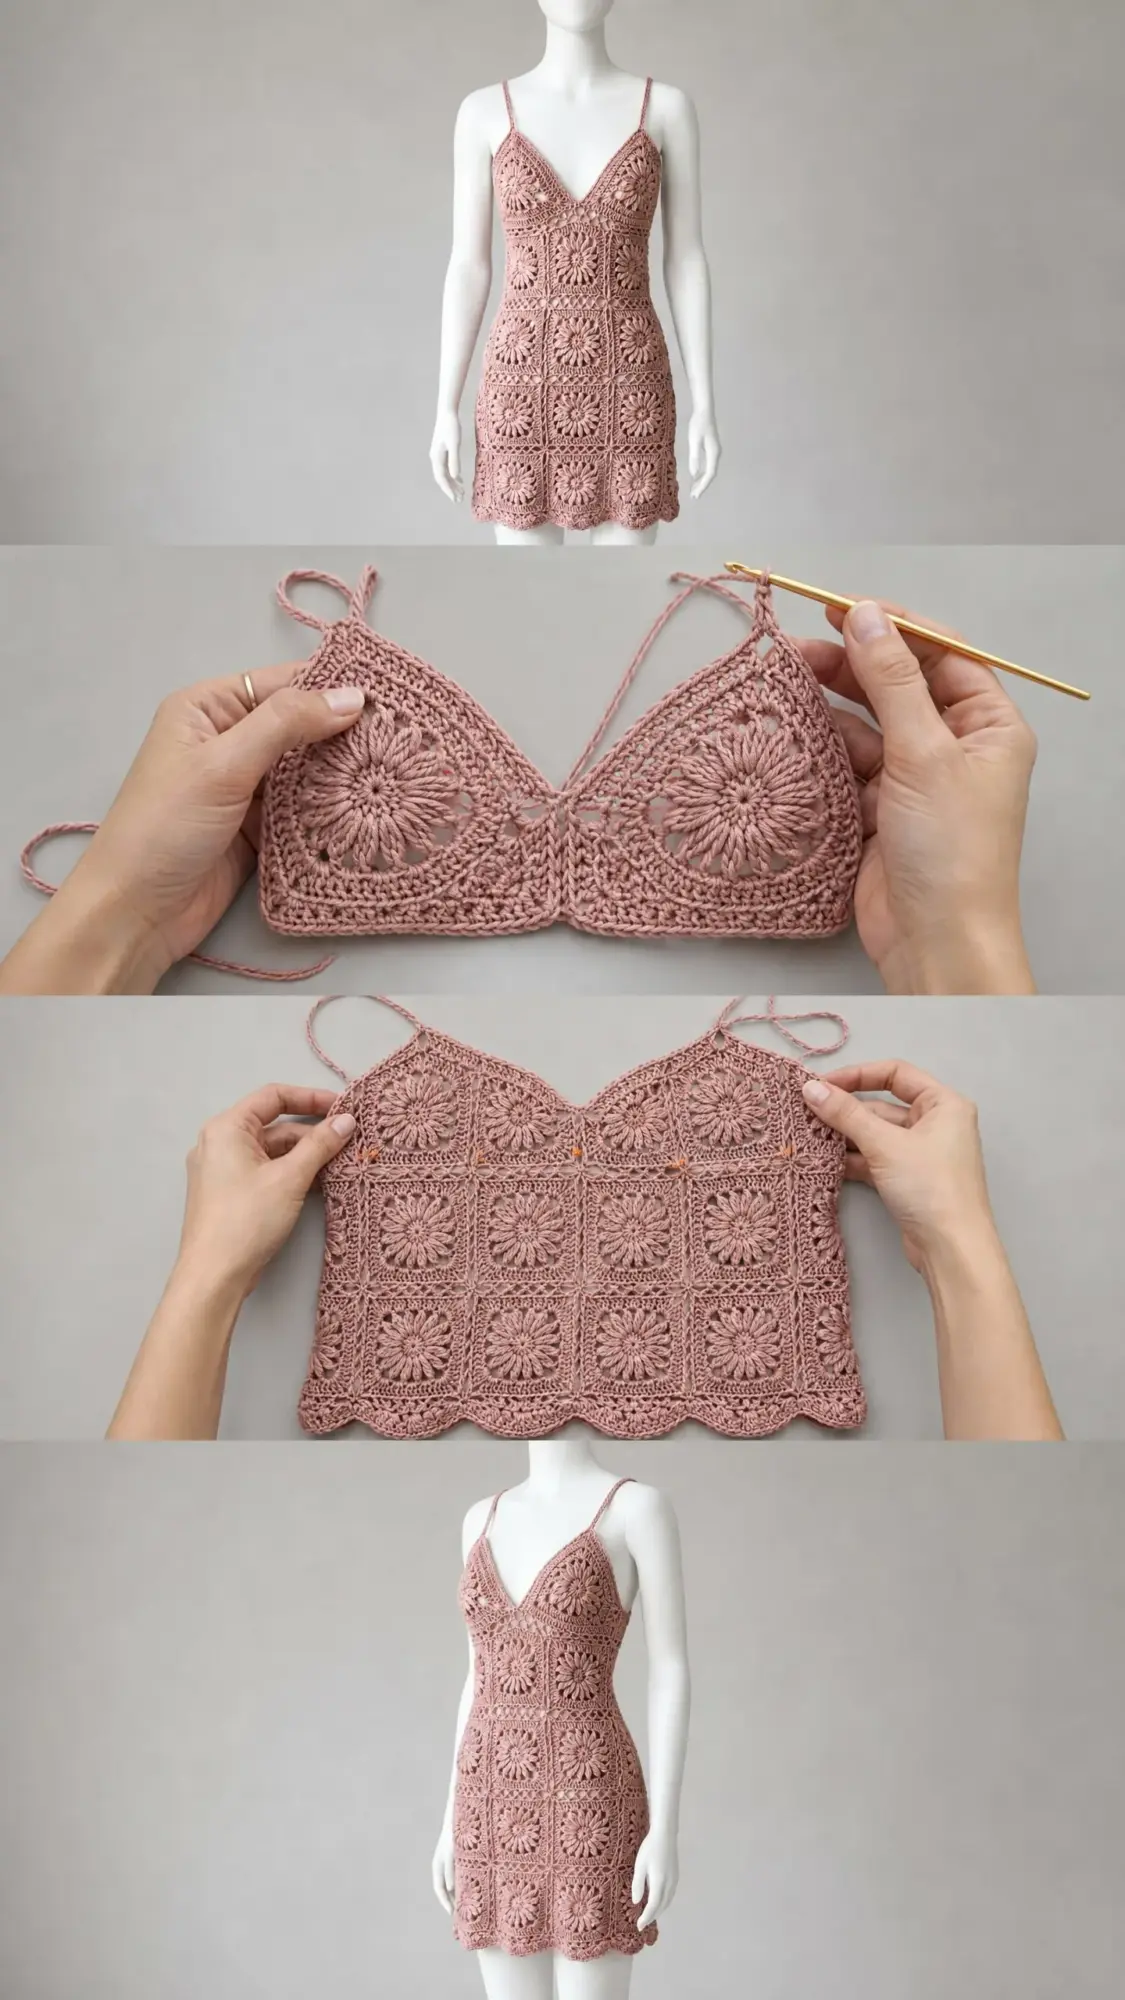
The construction is fascinating if you enjoy motif-based work. You’ll create individual floral granny squares with raised puff stitch centers, then join them into a fitted bodycon silhouette. The deep V-neckline gets shaped through clever placement of half-squares and quarter-squares rather than complicated decreases within the stitches themselves.
I won’t sugarcoat it. This is an intermediate to advanced project that requires comfort with joining motifs, reading a schematic layout, and thinking spatially about garment construction. But if you’ve made granny square blankets or bags before and you’re ready for a wearable challenge, you absolutely have the skills to tackle this dress.
About This Crochet Pattern
This stunning mini dress features a grid of floral granny squares worked in a dusty rose cotton yarn. The silhouette is body-skimming with a deep V-neckline, delicate spaghetti straps, and a pretty scalloped hem that hits at the upper thigh. Because of the lace-like openwork inherent to granny square construction, this dress is designed to be worn over a slip or bodysuit.
The total time investment runs approximately 40 to 60 hours for a size Small/Medium. I know that sounds like a lot, but remember that you’re essentially creating a custom-fitted garment from scratch. The individual squares work up quickly once you get into a rhythm, and the joining process is meditative once you understand the layout.
Finished measurements for size Small:
Materials You’ll Need
Yarn: Approximately 1,000 yards (915 meters) of DK weight yarn (CYCA #3), 100 percent cotton or cotton-blend
Cotton is strongly recommended here. It provides the drape, stitch definition, and breathability that this fitted style demands. I suggest Lion Brand 24/7 Cotton in Rose, which requires approximately 6 balls. Paintbox Yarns Cotton DK in Blush Pink (about 8 balls) or We Are Knitters The Cotton in Dusty Rose (about 7 balls) also work beautifully.
Avoid stretchy or textured yarns. Granny square construction requires dimensional stability to keep your motifs consistent.
Hooks:
Notions:
Gauge
One full granny square = 4 inches x 4 inches (10 cm x 10 cm) after blocking when worked with a US size E/4 (3.5 mm) hook.
Gauge in half double crochet (abbreviated hdc, which is yarn over, insert hook, pull up a loop, yarn over and pull through all three loops): 18 hdc x 14 rows = 4 inches x 4 inches (10 cm x 10 cm)
Please don’t skip the gauge swatch for this project. This is a fitted garment, and even small variations in square size will compound across 52 squares into a dress that doesn’t fit. Work at least 2 full squares, block them, and measure before committing to the full project.
Abbreviations
Special Stitches for This Granny Square Dress Pattern
Puff Stitch (puff st): This creates the raised floral center of each square. Yarn over, insert hook into indicated stitch or space, yarn over and pull up a loop to approximately 1/2 inch height. Repeat this action 3 more times into the same stitch or space (you’ll have 9 loops on hook). Yarn over and pull through all 9 loops. Chain 1 to close. One puff stitch made.
3-dc Cluster (3-dc cl): Yarn over, insert hook into indicated stitch or space, yarn over and pull up a loop, yarn over and pull through 2 loops (2 loops remain on hook). Repeat twice more into the same stitch or space (4 loops on hook). Yarn over and pull through all 4 loops on hook.
Shell Stitch: Work 5 dc into the same stitch or space.
Scallop Border Stitch: Slip stitch into indicated stitch, chain 3, work 4 dc into same stitch, slip stitch into the stitch 4 stitches forward.
Join-As-You-Go (JAYG): When joining the final round of a new square to a completed square, replace each corner or side chain space with a slip stitch into the corresponding chain space of the adjacent completed square. This creates a flat, seamless join on the right side.
Pattern Notes Before You Begin
Read through all instructions before starting. Seriously. Understanding the layout and construction order will save you from ripping back later.
All granny squares are worked in continuous rounds with the right side always facing. Do not turn unless instructed.
The dress body layout for size Small uses 8 squares across the circumference by 5 rows of squares for the skirt, plus a bodice section with partial motifs for the V-neckline shaping. Your total square count: approximately 52 full squares plus 4 half-squares and 4 quarter-squares.
Always block individual squares before joining. I cannot stress this enough. Unblocked squares vary slightly in size, which causes puckering and distortion in your finished seams.
Full Granny Square Instructions (Make 52)
Each finished square measures 4 inches x 4 inches (10 cm x 10 cm) after blocking.
Foundation Ring: Ch 6, sl st to first ch to form a ring.
Round 1 (RS): Ch 1, work 12 sc into ring, sl st to first sc to join. (12 sc)
Round 2: Ch 1, sc in same st, ch 2, (puff st in next sc, ch 2) 11 times, puff st in same st as first sc, ch 2, sl st to first sc to join. (12 puff sts, 12 ch-2 sps)
This round creates the raised petal effect of the floral center. The puff stitches will fan outward beautifully once the next round is worked.
Round 3: Sl st into first ch-2 sp, ch 3 (counts as first dc), 2 dc in same ch-2 sp, ch 1, (3 dc in next ch-2 sp, ch 1) 11 times, sl st to top of ch-3 to join. (12 groups of 3 dc, 12 ch-1 sps)
Round 4: Sl st into sp between ch-3 and next dc, ch 3 (counts as first dc), dc in same sp, ch 1, sk next dc, (2 dc in sp between groups, ch 1, sk 3 dc) 11 times, sl st to top of ch-3 to join. (24 dc, 12 ch-1 sps)
Round 5: Sl st into first ch-1 sp, ch 3 (counts as first dc), 2 dc in same ch-1 sp, ch 1, (3 dc in next ch-1 sp, ch 1) 11 times, sl st to top of ch-3 to join. (36 dc, 12 ch-1 sps)
After Round 5, you have a circular motif. Round 6 transforms it into a square by creating 4 corner spaces.
Round 6: Sl st into first ch-1 sp, ch 3 (counts as first dc), 2 dc in same sp, ch 2, 3 dc in same sp (corner made), ch 1, sk next ch-1 sp, 3 dc in next ch-1 sp, ch 1, sk next ch-1 sp, (3 dc, ch 2, 3 dc) in next ch-1 sp (corner made), ch 1, sk next ch-1 sp, 3 dc in next ch-1 sp, ch 1, sk next ch-1 sp, rep from to twice more, sl st to top of ch-3. (4 corners with ch-2 sps, 8 side ch-1 sps, 48 dc total)
Round 7: Sl st to corner ch-2 sp, ch 3, 2 dc in corner sp, ch 2, 3 dc in same corner sp, ch 1, 3 dc in next ch-1 sp, ch 1, 3 dc in next ch-1 sp, ch 1, (3 dc, ch 2, 3 dc) in corner ch-2 sp, ch 1, 3 dc in next ch-1 sp, ch 1, 3 dc in next ch-1 sp, ch 1, rep from to for remaining 2 corners, sl st to top of ch-3. (4 corners, 12 side ch-1 sps, 60 dc total)
Fasten off and weave in ends. Block each square to exactly 4 inches x 4 inches (10 cm x 10 cm).
Half-Square Motif (Make 4)
These fill the upper corners of the bodice front at the V-neck. They measure 4 inches wide x 2 inches tall (10 cm x 5 cm) after blocking.
Foundation: Ch 16.
Row 1 (RS): Dc in 4th ch from hook, dc in next ch, ch 1, sk 1 ch, 3 dc in next ch, ch 1, sk 1 ch, (3 dc, ch 2, 3 dc) in next ch (center corner), ch 1, sk 1 ch, 3 dc in next ch, ch 1, sk 1 ch, 3 dc in last 3 ch. Turn. (4 groups of 3 dc, 1 center corner)
Row 2 (WS): Ch 3, 2 dc in first ch-1 sp, ch 1, 3 dc in next ch-1 sp, ch 1, (3 dc, ch 2, 3 dc) in corner ch-2 sp, ch 1, 3 dc in next ch-1 sp, ch 1, 3 dc in last sp. Turn.
Row 3: Ch 3, 2 dc in first ch-1 sp, ch 1, 3 dc in next ch-1 sp, ch 1, 3 dc in next ch-1 sp, ch 1, (3 dc, ch 2, 3 dc) in corner ch-2 sp, ch 1, 3 dc in next ch-1 sp, ch 1, 3 dc in next ch-1 sp, ch 1, 3 dc in last sp. Fasten off.
Quarter-Square Motif (Make 4)
These fill the center bottom of the V and the side triangular gaps. They measure approximately 2 inches x 2 inches (5 cm x 5 cm).
Foundation Ring: Ch 4, sl st to form ring.
Round 1 (RS): Ch 3, 2 dc in ring, ch 2, 3 dc in ring, ch 2, sl st to top of ch-3. Fasten off. (2 groups of 3 dc, 2 ch-2 sps)
Joining Your Granny Squares
Join all squares using the Join-As-You-Go method on the final round, or use a slip stitch flat seam after blocking.
For flat sl st seam: Hold two blocked squares with wrong sides together. Using a separate length of yarn, insert hook through the outermost dc of both squares simultaneously, yarn over and pull through, sl st across all corresponding sts and ch sps along one edge. Fasten off.
Joining order:
1. Join all skirt squares into 8 vertical strips of 5 squares each
2. Join the 8 vertical strips side by side to form a tube (leave one seam open until bodice is attached)
3. Join the 4 bodice back lower squares into a strip, then attach to the top of the skirt back
4. Join the second row of bodice back squares on top of the first
5. Join the 4 bodice front lower squares to the top of the skirt front
6. Attach half-squares and quarter-squares to form V-neckline front upper row
7. Close the remaining side seam
Scalloped Hem Border
Setup Round: With RS facing, attach yarn to any bottom corner ch-2 sp, ch 1. Work sc evenly along the entire bottom edge, working 3 sc into each corner ch-2 sp and 1 sc into each dc and 1 sc into each ch-1 sp across. Join with sl st to first sc. Adjust count to 140 sc.
Round 1: Ch 1, sc in each sc around. Sl st to first sc. (140 sc)
Round 2 (scallop round): (Sl st in next st, ch 3, 4 dc in same st, sl st in st 4 sts forward) 28 times. (28 scallops)
Fasten off and weave in ends.
Neckline Edging and Straps
Neckline Setup Round: With RS facing, attach yarn to the right shoulder point of the back neckline, ch 1. Work sc evenly around the entire neckline edge including the V-front, working 3 sc into each outer corner and sc2tog at the inner V-point. Join with sl st to first sc.
Round 1: Ch 1, sc in each sc around, working sc2tog at inner V-point again. Join with sl st. Fasten off.
Straps: Attach yarn to the top right front bodice edge approximately 1.5 inches (4 cm) from center V-point. Ch 50 (or to desired length), sl st in 2nd ch from hook and in each ch across. Fasten off. Attach securely at both ends with yarn needle. Repeat for left strap.
Finishing Your Crochet Mini Dress
Weave in all yarn ends thoroughly. Wet-block the finished dress by soaking in cool water for 20 minutes, pressing out excess water in a towel (do not wring), and pinning to final measurements. Allow to dry completely.
Try on over a slip or bodysuit to check fit. If any seams pull or gap, reinforce with additional slip stitches on the inside.
For care, hand wash in cool water with gentle detergent. Do not wring. Lay flat to dry, reshaping to original measurements. Store folded rather than hanging to prevent stretching.
I hope you love making this granny square mini dress as much as I loved designing it. If you found this crochet tutorial helpful, save it to your Pinterest boards so you can find it easily when you’re ready to start. And please leave a comment below if you make one. I would absolutely love to see your finished dress!
You Might Also Like
- Coastal Blue Granny Square Patchwork Cardigan Free Pattern
- Lavender Daisy Granny Square Backpack Free Crochet Pattern
- Dusty Rose Pink Mini Backpack Free Crochet Pattern
- Pastel Daisy Crochet Hoodie Free Crochet Pattern