Dusty Rose Bloom Capelet Free Crochet Pattern
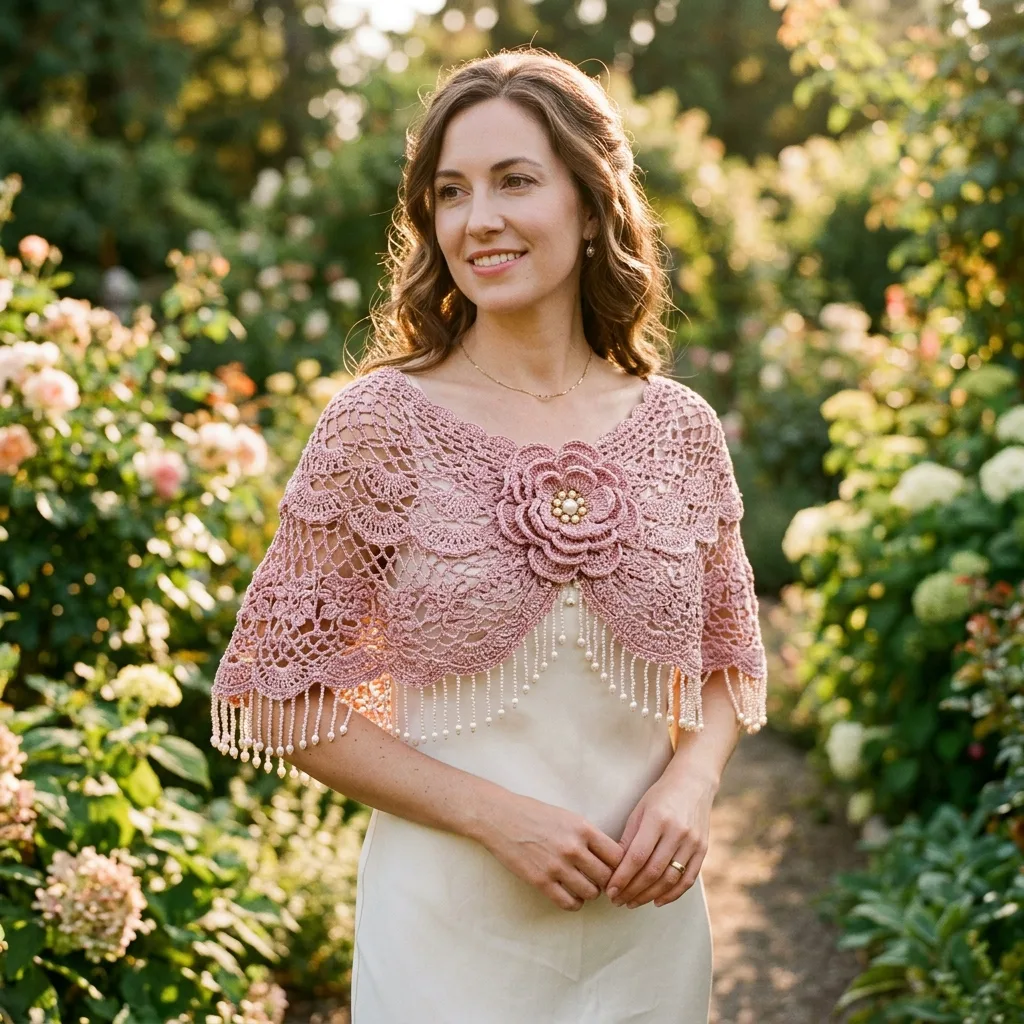
When I sat down to design this capelet, I had a clear vision in my head. I wanted something romantic and elegant, something that would drape beautifully over the shoulders and make the wearer feel like she stepped out of a garden party in another era. I needed it to showcase classic lace techniques while still being achievable for crocheters ready to stretch their skills.
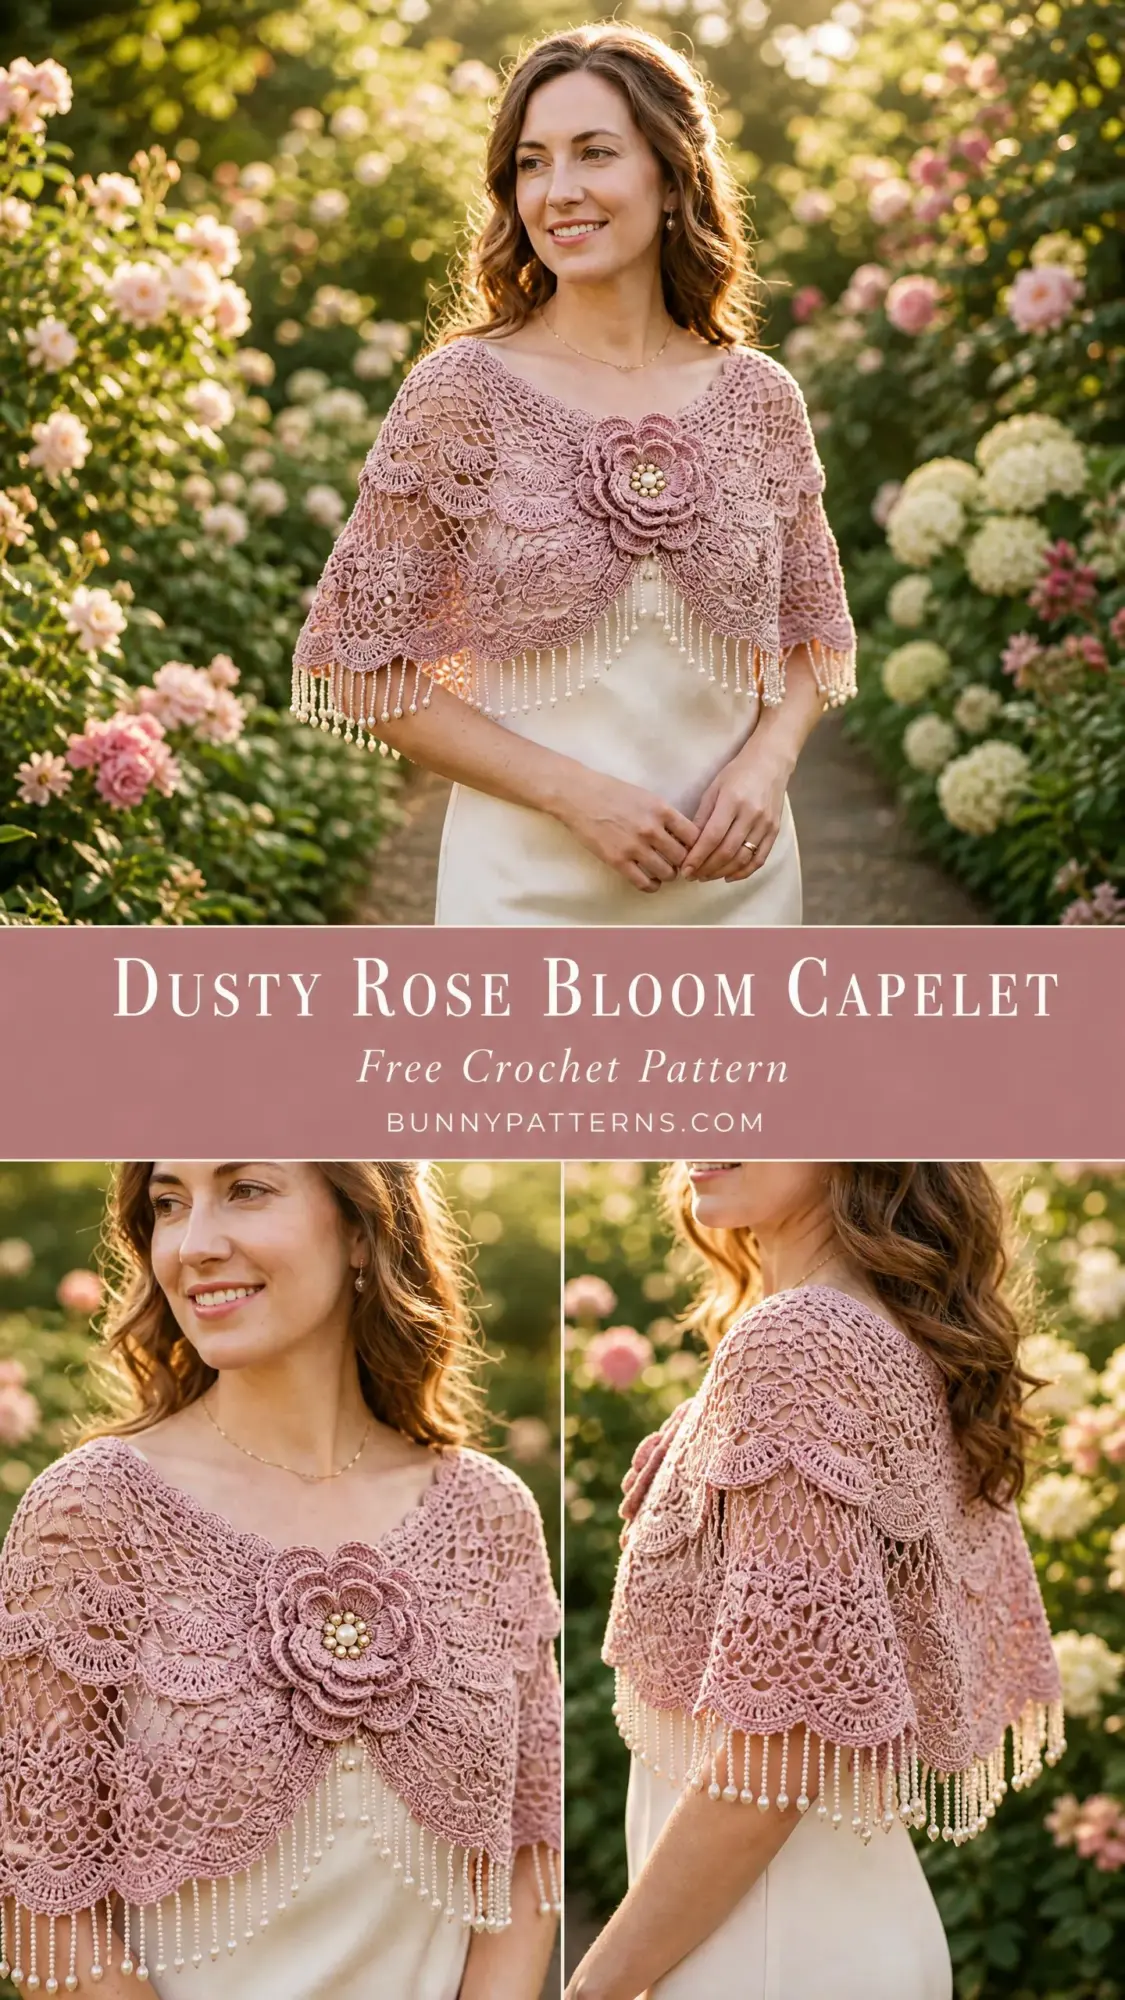
The pineapple motifs, the delicate mesh background, the pearl bead fringe, and that gorgeous oversized rose closure all came together exactly as I hoped. I am SO pleased with how it turned out.
This is not a quick weekend project, and I want to be upfront about that. But if you have been craving a true heirloom piece, something you will treasure for years and pass down through generations, this dusty rose bloom capelet crochet pattern delivers that kind of satisfaction.
About This Dusty Rose Bloom Capelet Pattern
This romantic capelet sits gracefully over your shoulders and upper back, falling to approximately mid-torso. The construction combines pineapple motifs, shell stitches, and an open mesh ground that creates that airy, vintage lace look you see in the photos.
The lower edge features a scalloped border with dangling pearl bead fringe that catches the light beautifully. At the front, a large crocheted rose embellishment with pearl center serves as both decoration and closure. The capelet opens fully at the front center and stays closed with just the flower, pinned through both front edges.
You will work this piece from the neckline down in joined rounds, then transition to rows for front edge shaping. The decorative edging comes last, followed by attaching the bead fringe after blocking.
Skill Level
I am marking this as advanced. You will need comfort with pineapple stitch clusters, increases across multiple pattern repeats, precise stitch placement in mesh backgrounds, and three-dimensional flower construction.
If you have completed at least two lace shawls or openwork garments, these techniques will feel familiar. If you are newer to lace crochet, I would recommend practicing pineapple motifs on a smaller project first. There is no shame in building up to something like this.
Time Estimate
Plan for approximately 25 to 35 hours for the capelet body, plus another 3 to 5 hours for the flower and finishing work. This varies depending on your working speed and how many breaks you take. I like to spread projects like this across several weeks so I can enjoy the process without rushing.
Finished Measurements
This pattern is designed as one size fits most adults.
Materials Needed
Yarn
You will need 750 yards (686 meters) of fingering weight yarn (CYC 1 Super Fine) in dusty rose or antique mauve. A yarn with slight sheen, such as mercerized cotton, produces the best stitch definition for lace patterns like this one.
Yarn suggestions:
Choose any fingering weight yarn that is smooth and tightly spun with a round ply structure. Avoid fuzzy, hairy, or loosely spun yarns because they will obscure your beautiful pineapple clusters.
Hook
US size B-1 / 2.25 mm steel crochet hook, or size needed to obtain gauge.
Notions
Gauge
With US B-1 / 2.25 mm hook and chosen yarn, after wet blocking:
Gauge is critical. I cannot stress this enough. A difference of even one stitch per inch will significantly alter your finished dimensions. Please swatch the pineapple pattern block specifically, block the swatch, and measure before beginning the body.
Abbreviations and Special Stitches
Let me walk you through every abbreviation and special stitch you will encounter. I know this list looks long, but having it all in one place will save you from scrolling back and forth.
Standard Abbreviations (US Terms)
Special Stitches
Pineapple Cluster (pc-cl): This is a 5-dc cluster worked into one space. Yarn over, insert hook into designated chain space or stitch, yarn over, pull up loop, yarn over, draw through 2 loops. Repeat this sequence 5 times into the same space. You will have 6 loops on your hook. Yarn over and draw through all 6 loops. Chain 1 to close if instructed.
Shell Stitch (shell): Work 5 double crochet stitches into the same stitch or space. When a 7-dc shell is specified, work 7 dc instead.
Fan Stitch (fan): Work (2 dc, ch 2, 2 dc) into the same stitch or space.
Picot: Chain 3, then slip stitch into the first chain made. This forms a small decorative loop.
V-Stitch (v-st): Work (dc, ch 2, dc) into the same stitch or space.
Mesh Unit: Double crochet into designated stitch, chain 2, skip 2 stitches (or a ch-2 space). This counts as 1 mesh unit.
Pineapple Base (pb): Into a ch-4 space, work (tr, ch 1) 8 times, then 1 tr. This creates 9 treble crochets separated by ch-1 spaces and forms the foundation of a pineapple motif.
Pineapple Decrease Row (pdr): Single crochet into first ch-1 space of pineapple, then (ch 3, sc into next ch-1 sp) across all remaining ch-1 spaces. Each subsequent round decreases by 1 single crochet until only 1 sc remains at the tip.
Crossed Double Treble (ctr): Skip 2 stitches, double treble into next stitch, chain 1, double treble back into the first skipped stitch. This forms an X shape.
Pattern Notes Before You Begin
Please read through these notes before starting. They will save you confusion later.
1. The capelet is worked in joined rounds from the neck downward. The front center remains open throughout, so you are not working a full tube. Each round begins and ends at the right front edge with a turning chain.
2. At the end of each round, join with slip stitch to the top of the turning chain, then turn. Do not spiral.
3. Use stitch markers at the beginning of each round and at each pineapple repeat boundary. Trust me on this one.
4. The neckline foundation chain is worked first, then stitches are picked up across it for the first working round.
5. All ch-3 turning chains count as 1 dc throughout the body. All ch-4 turning chains count as 1 tr.
6. Blocking is mandatory. Unblocked, the capelet will look dense and puckered. After blocking, pineapples open fully and the mesh becomes airy and elegant.
7. Bead fringe is attached after all crocheting and blocking are complete.
8. The rose embellishment is crocheted separately and pinned on with the brooch finding so you can remove it for laundering.
Dusty Rose Bloom Capelet Crochet Pattern Instructions
Section 1: Foundation Neckline Chain and Setup Round
Foundation Chain:
With MC and hook, ch 181. This is the base for the neckline arc.
Round 1 (Foundation Mesh Round, RS):
Ch 3 (counts as 1 dc), sk 2 ch, dc into next ch, (ch 2, sk 2 ch, dc into next ch) across to last ch, turn. You will have worked 60 mesh units across the arc.
(61 dc, 59 ch-2 sps, 60 mesh units total)
Checkpoint: After Round 1, the foundation arc should measure approximately 18 inches (46 cm) across when gently stretched. If it measures differently, adjust your foundation chain count in multiples of 3.
Section 2: Yoke Mesh Expansion (Rounds 2 Through 5)
The yoke section fans the work outward from the neck. You increase by adding mesh units at even intervals.
Round 2:
Join with sl st to top of t-ch from Round 1, turn to WS, ch 5 (counts as dc + ch 2). Dc into same sp as join. Work across in mesh pattern: (ch 2, sk 1 ch-2-sp, dc into next dc) across, ending dc into top of t-ch. Ch 2, dc into same top-of-t-ch. Join, turn.
(62 mesh units)
Round 3:
Ch 5, dc into same sp (increase). Work across in mesh pattern. At end, ch 2, dc into top of t-ch (increase). Join, turn.
(63 mesh units)
Round 4:
Ch 5, dc into same sp (increase at right edge). Work 9 mesh units. Increase: (dc, ch 2, dc) into next dc. Work 11 mesh units. Increase: (dc, ch 2, dc) into next dc. Work 11 mesh units. Increase: (dc, ch 2, dc) into next dc. Work 11 mesh units. Increase: (dc, ch 2, dc) into next dc. Work 11 mesh units. Increase: (dc, ch 2, dc) into next dc. Work 9 mesh units. Ch 2, dc into top of t-ch (increase at left edge). Join, turn.
(71 mesh units)
Round 5:
Ch 5, dc into same sp (increase at right). Work across in plain mesh to final sp. Ch 2, dc into top of t-ch (increase at left). Join, turn.
(72 mesh units)
Checkpoint: After Round 5, the piece should measure approximately 2.5 inches (6.5 cm) from neck foundation to working edge, and approximately 20 inches (51 cm) across.
Section 3: Pineapple Base Round (Round 6)
This round establishes the 9 pineapple bases distributed across the 72 mesh units. Each pineapple base occupies 4 consecutive ch-2 spaces, with 4 mesh units between pineapples and 2 mesh units at each edge.
Round 6 (Pineapple Base Establishment):
Ch 3 (t-ch, counts as dc). Work 2 mesh units (dc, ch 2, dc, ch 2, dc). Into next 4 consecutive ch-2 sps, work pineapple base: ch 1, (tr, ch 1) 8 times, tr, working across all 4 sps, inserting hook under each ch-2 sp in sequence and distributing 9 tr across the 4 sps with ch-1 between each. After pineapple base, work 4 mesh units. Rep (pineapple base into next 4 ch-sps, 4 mesh units) 7 more times. Work pineapple base into next 4 sps. Work 2 mesh units. Dc into top of t-ch. Join, turn.
(9 pineapple bases established, each with 9 tr; mesh columns of 4 units between; 2-mesh edges)
Use stitch markers at the base of each pineapple to track position.
Section 4: Pineapple Body Rounds (Rounds 7 Through 14)
Each round works across the mesh columns in plain mesh and decreases each pineapple by one sc-arch unit per round, narrowing the pineapples from 9 tr down to 1 sc at the tip.
Round 7 (Pineapple Round 1, 8 arches):
Ch 5 (t-ch, counts as dc + ch 2). Sk 1 sp, dc into next dc. Work 2 mesh units across edge. At pineapple: sc into first ch-1 sp, (ch 3, sc into next ch-1 sp) 7 times. 4 mesh units across column. Rep (pineapple across 8 ch-1 sps with 7 ch-3 arches, 4 mesh column) 7 more times. Last pineapple: sc into first ch-1 sp, (ch 3, sc into next ch-1 sp) 7 times. 2 mesh units. Dc into top of t-ch. Join, turn.
(9 pineapples each with 8 sc and 7 ch-3 arches)
Round 8 (Pineapple Round 2, 7 arches):
Ch 5, sk 1, dc into next dc (2 edge mesh). At pineapple: sc into first ch-3 arch, (ch 3, sc into next ch-3 arch) 6 times. 4 mesh column. Rep 8 times. 2 edge mesh. Dc into t-ch. Join, turn.
(9 pineapples each with 7 sc and 6 ch-3 arches)
Round 9 (Pineapple Round 3, 6 arches):
Work as established. Each pineapple: sc into each ch-3 arch, (ch 3, sc into next arch) 5 times. 4 mesh column. Rep. 2 edge mesh. Join, turn.
(9 pineapples each with 6 sc and 5 ch-3 arches)
Round 10 (Pineapple Round 4, 5 arches):
Each pineapple: 5 sc separated by ch-3 arches, 4 arches total. 4 mesh column. Rep. Join, turn.
(9 pineapples each with 5 sc and 4 ch-3 arches)
Round 11 (Pineapple Round 5, 4 arches):
Each pineapple: 4 sc, 3 ch-3 arches. 4 mesh column. Join, turn.
(9 pineapples each with 4 sc and 3 ch-3 arches)
Round 12 (Pineapple Round 6, 3 arches):
Each pineapple: 3 sc, 2 ch-3 arches. 4 mesh column. Join, turn.
(9 pineapples each with 3 sc and 2 ch-3 arches)
Round 13 (Pineapple Round 7, 2 arches):
Each pineapple: 2 sc, 1 ch-3 arch. 4 mesh column. Join, turn.
(9 pineapples each with 2 sc and 1 ch-3 arch)
Round 14 (Pineapple Tip Round):
Ch 5. 2 edge mesh. At pineapple: sc into the single ch-3 arch. 4 mesh column. Rep across all 9 pineapples. 2 edge mesh. Dc into t-ch. Join, turn.
(9 pineapple tips, each a single sc; mesh columns maintained)
Checkpoint: After Round 14, the piece should measure approximately 7 inches (18 cm) from neckline to working edge at center back.
Section 5: Lower Mesh Expansion (Rounds 15 Through 18)
After the pineapple tips, return to full mesh for 4 rounds with gentle increases to accommodate the flared lower edge.
Round 15 (Post-Pineapple Mesh):
Ch 5. Work across in full mesh, treating each sc pineapple tip as a dc anchor. At each tip, work (dc, ch 2, dc) into the sc tip (v-stitch increase at each of 9 tips). Work plain mesh through columns. 2 edge mesh. Join, turn.
(81 mesh units)
Round 16:
Work across in plain mesh, no increases. Join, turn.
(81 mesh units)
Round 17:
Ch 5. Work 3 mesh. Increase with v-st at every 9th dc (9 increases evenly distributed). Continue in mesh. Join, turn.
(90 mesh units)
Round 18:
Work across in plain mesh. Join, turn.
(90 mesh units)
Checkpoint: After Round 18, the piece should measure approximately 10 inches (25.5 cm) from neckline to working edge. The lower edge should span approximately 28 inches (71 cm).
Section 6: Shell Edging Round (Round 19)
Round 19:
Ch 3. Into first ch-2 sp, sk sp, 5-dc shell into next ch-2 sp, sk next ch-2 sp, sc into next dc. Rep (sk 1 sp, shell into next sp, sk next sp, sc into next dc) across, working the repeat 30 times total. End with sk 1 sp, shell into next sp, sc into top of t-ch. Join, turn.
(30 shells, 30 sc)
Section 7: Scallop Edging Rounds (Rounds 20 and 21)
Round 20:
Ch 1, sc into first sc of Round 19. Ch 3, (sc, ch 3, sc, ch 3, sc, ch 3, sc, ch 3, sc) into top of shell (into the center dc of the 5-dc shell), ch 3, sc into next sc. Rep across all 30 shells. At end, join to first sc. Do not turn.
(30 shell fans expanded; 5 sc per fan with 4 ch-3 arches; 30 sc at base points between fans)
Round 21 (Picot Border):
Sl st into first ch-3 sp. Ch 1, sc into same sp. (Ch 3, sl st into first ch to form picot, sc into next ch-3 sp) across each fan, working picot-sc into each of the 4 ch-3 arches per fan, then sc into the sc at base of next fan. Rep across all 30 fans. Join to first sc. Fasten off.
(120 picots total across lower edge)
Section 8: Neckline Edging
Return to neckline foundation. With RS facing, join MC to the right front edge of the neckline foundation chain.
Neckline Round 1:
Ch 1. Work sc evenly across the top of Round 1 (the neckline mesh row): sc into each dc post and 1 to 2 sc into each ch-2 sp. Work to achieve a smooth, flat neckline without puckering. Aim for approximately 120 sc evenly placed, adjusting as needed. Sl st to join. Do not turn.
(Approximately 120 sc around neckline)
Neckline Round 2 (Picot Edging):
Ch 1. (Sc into next sc, ch 2, sl st into top of same sc to form small picot) across all sc. Join. Fasten off.
(120 picot-sc)
Section 9: Front Edge Finishing
Right Front Edge:
With RS facing, join MC at lower right corner of right front edge. Work sc evenly up the right front edge, placing 1 sc for every dc row-end visible, approximately 21 sc. Fasten off.
(Approximately 21 sc)
Left Front Edge:
With RS facing, join MC at top left corner of left front edge. Work sc evenly down the left front edge, approximately 21 sc. Fasten off.
(Approximately 21 sc)
Blocking Your Capelet
This step is not optional. Blocking transforms your work from dense and puckered to open, airy, and elegant.
Fill a basin with cool water and a small amount of gentle wool wash. Submerge the capelet and allow it to soak for 20 minutes. Gently press out water without wringing or twisting. Roll in a clean towel to remove excess moisture.
Lay flat on blocking boards. Using rust-proof pins, pin the neckline arc to shape, then pin each pineapple point downward so they open into full fan shapes. Pin the scalloped lower edge at each picot point, stretching gently to open the mesh. Allow to dry completely, typically 12 to 24 hours depending on humidity. Do not move until fully dry.
Adding the Bead Fringe
Each fringe strand hangs from a picot point on the lower edging. You have 120 picot points. Attach fringe to every other picot point (60 fringe strands) for the density shown in the photos.
Making one fringe strand:
Cut a 12-inch (30.5 cm) length of yarn. Fold in half. Insert the folded loop through the picot ch-3 sp from front to back. Draw the two cut ends through the loop and pull snug (this is called a lark’s head knot).
After all 60 fringe strands are attached, thread each pair of tail ends through a beading needle. String beads onto each tail: 1 small pearl (4 mm), 1 large pearl (6 mm), 1 small pearl (4 mm). Tie a double overhand knot after the last bead. Trim tails to 0.25 inch (6 mm) below the knot.
For additional density matching the photograph, add a second strand to each picot point already used. This produces 240 individual bead-tipped dangle ends.
Trim all fringe ends evenly to approximately 3.5 inches (9 cm) from the lower edge.
Large Crochet Rose Embellishment
The rose is worked in rounds with each round producing a larger set of petals layered behind the previous.
Foundation:
Ch 5, sl st to first ch to form ring.
Rose Round 1 (Inner Petal Base):
Ch 3, work 14 dc into ring, sl st to top of ch-3 to join.
(15 dc)
Rose Round 2 (Inner Petals):
(Ch 1, sl st into next dc) 15 times, forming 15 small loops at the base. Into each ch-1 sp: (sc, hdc, dc, hdc, sc) to create 1 small petal. Work 15 small petals total. After last petal, sl st to join round.
(15 small petals)
Rose Round 3 (Mid Petals):
Working behind Round 2 petals, sl st into the back loop of each dc in Round 1. Ch 2. Into each BLO dc: work (sc, hdc, 3 dc, hdc, sc). Rep 15 times. Join.
(15 medium petals)
Rose Round 4 (Outer Petals):
Working even further behind Round 3 petals, sl st into the base mesh of Round 1 between the previous sl sts. Ch 3. Into each available gap: work (sc, hdc, 2 dc, tr, 2 dc, hdc, sc). Work 10 large petals evenly around the foundation. Join.
(10 large petals)
Rose Round 5 (Leaf Accent, optional):
Join with sl st at any point on the outer edge of Round 4. Ch 8. Sc into 2nd ch from hook, hdc into next, dc into next 2, hdc into next, sc into next, sl st into base ch to create 1 leaf. Sl st forward 3 sts on outer edge. Rep for a second leaf. Fasten off.
(2 leaves)
Finishing the Rose:
Weave in all ends. Using a tapestry needle, take a few gathering stitches through the base to slightly tighten and cup the center. Sew or glue a cluster of 5 to 7 pearl beads (4 mm) at the center. Attach the brooch pin finding to the back so the brooch can be pinned and unpinned from the capelet.
To wear, position the rose at center front bust, overlapping where the two front edges meet. Pin through both layers of the front edges to hold the capelet closed.
Size Customization Tips
Larger neck circumference: Add 3 chains to the foundation chain per additional 0.5 inch (1.3 cm) needed, keeping additions in multiples of 3 to maintain mesh repeat divisibility.
More length: After Section 5 (Round 18), add 2 additional plain mesh rounds before beginning the shell edging.
Final Thoughts on This Crochet Tutorial
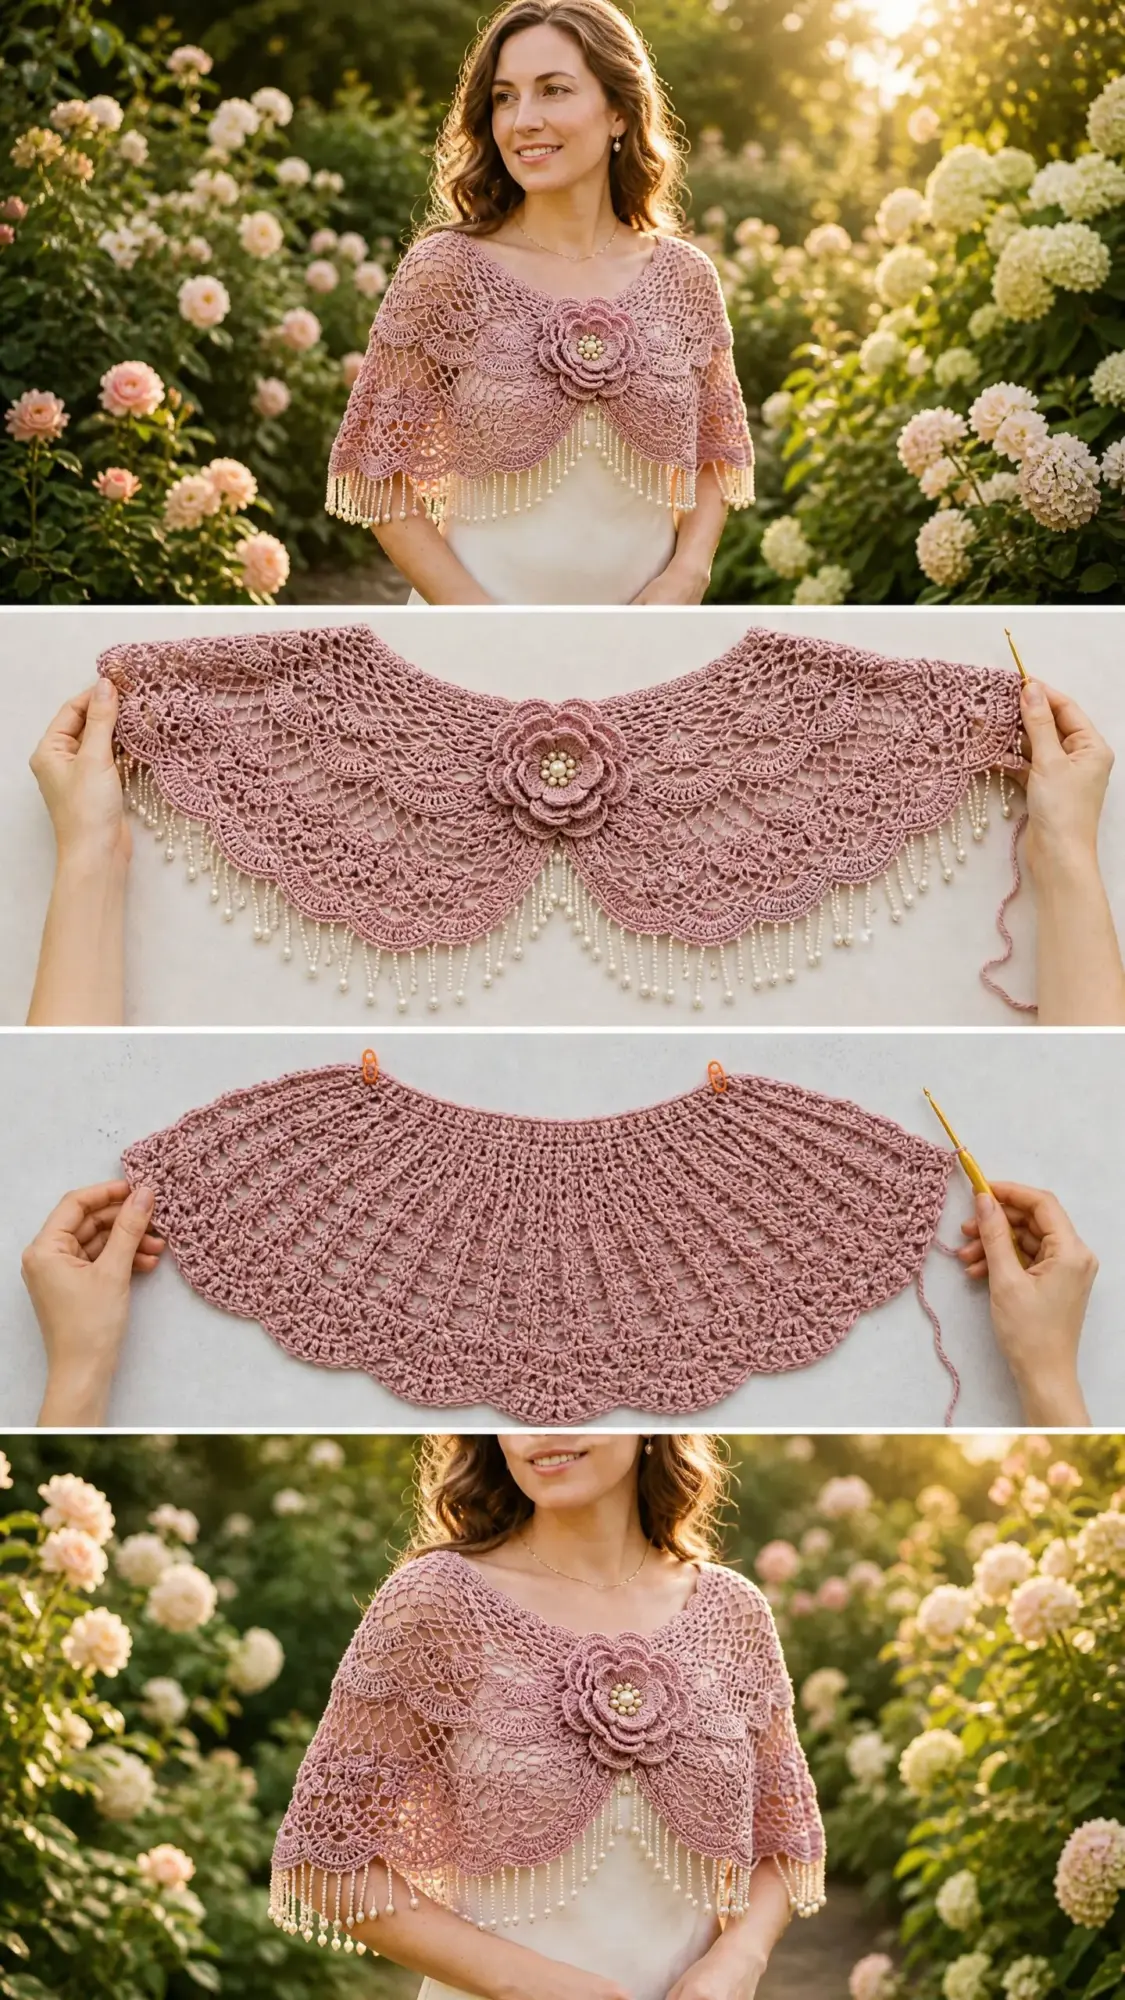
This dusty rose bloom capelet is a labor of love. It takes time, patience, and attention to detail. But when you slip it over your shoulders for the first time, feeling the weight of those pearl beads swaying gently and seeing those pineapple motifs catching the light, you will understand why this kind of crochet project is worth every hour.
I hope this step by step crochet pattern gives you everything you need to create your own heirloom piece. Thank you so much for trusting me with your crafting time.
If you make this capelet, I would absolutely love to see it. Share your photos with me on Instagram or Facebook. Tag me so I can celebrate your work with you.
I hope you will save this pattern to your Pinterest boards so you can find it easily when you are ready to start. And if you make this gorgeous capelet, please come back and leave a comment below. I love hearing about your projects and seeing how different yarn choices bring this design to life.
You Might Also Like
- Coral Sunset Textured Handbag Free Crochet Pattern
- Sunset Peach Woven Crochet Clutch Free Pattern
- Blush Pink Tassel Tote Free Crochet Pattern
- Lavender Purple Drawstring Bucket Bag Free Crochet Pattern