Dusty Rose Vine Crochet Midi Dress Free Pattern
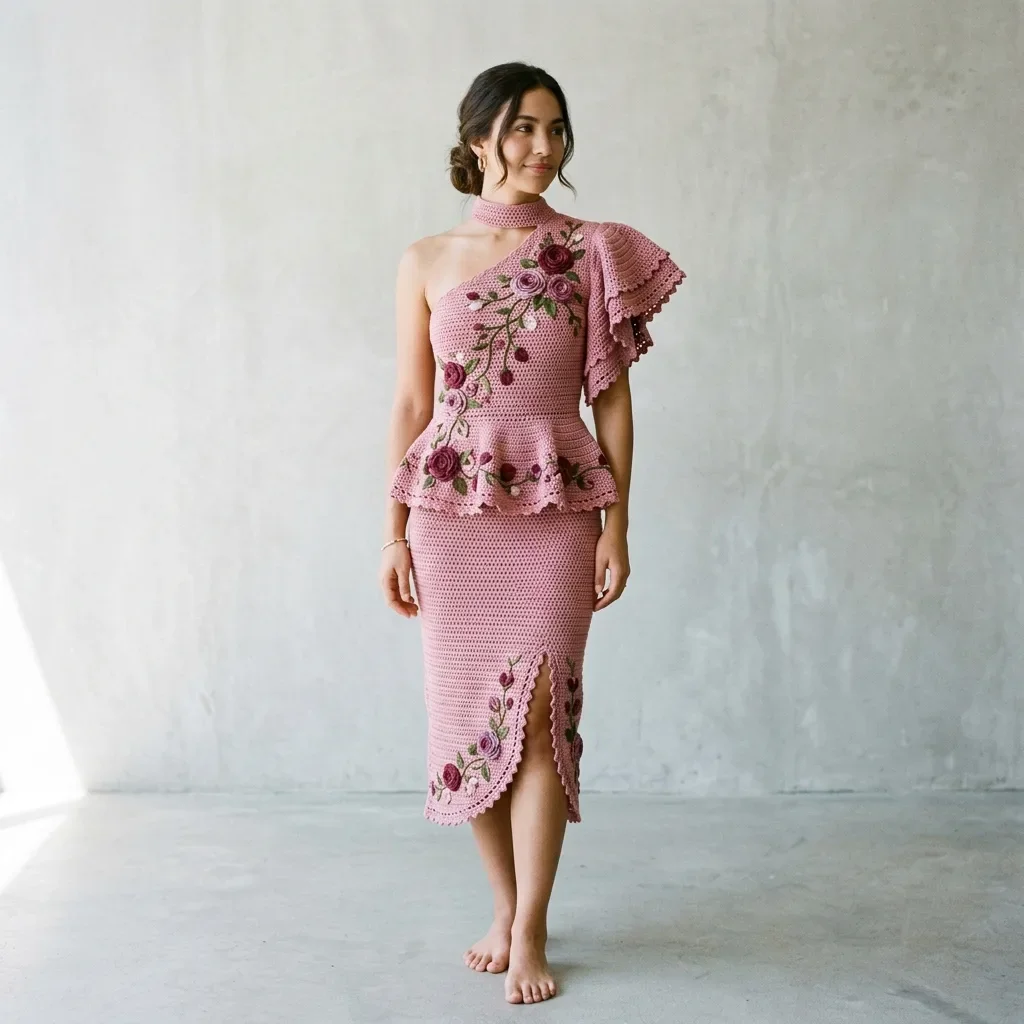
THIS is the showstopper you’ve been waiting for. I mean it. If you’ve ever wanted to walk into a room and have everyone ask “wait, you MADE that?”, this dusty rose vine crochet midi dress is your moment.
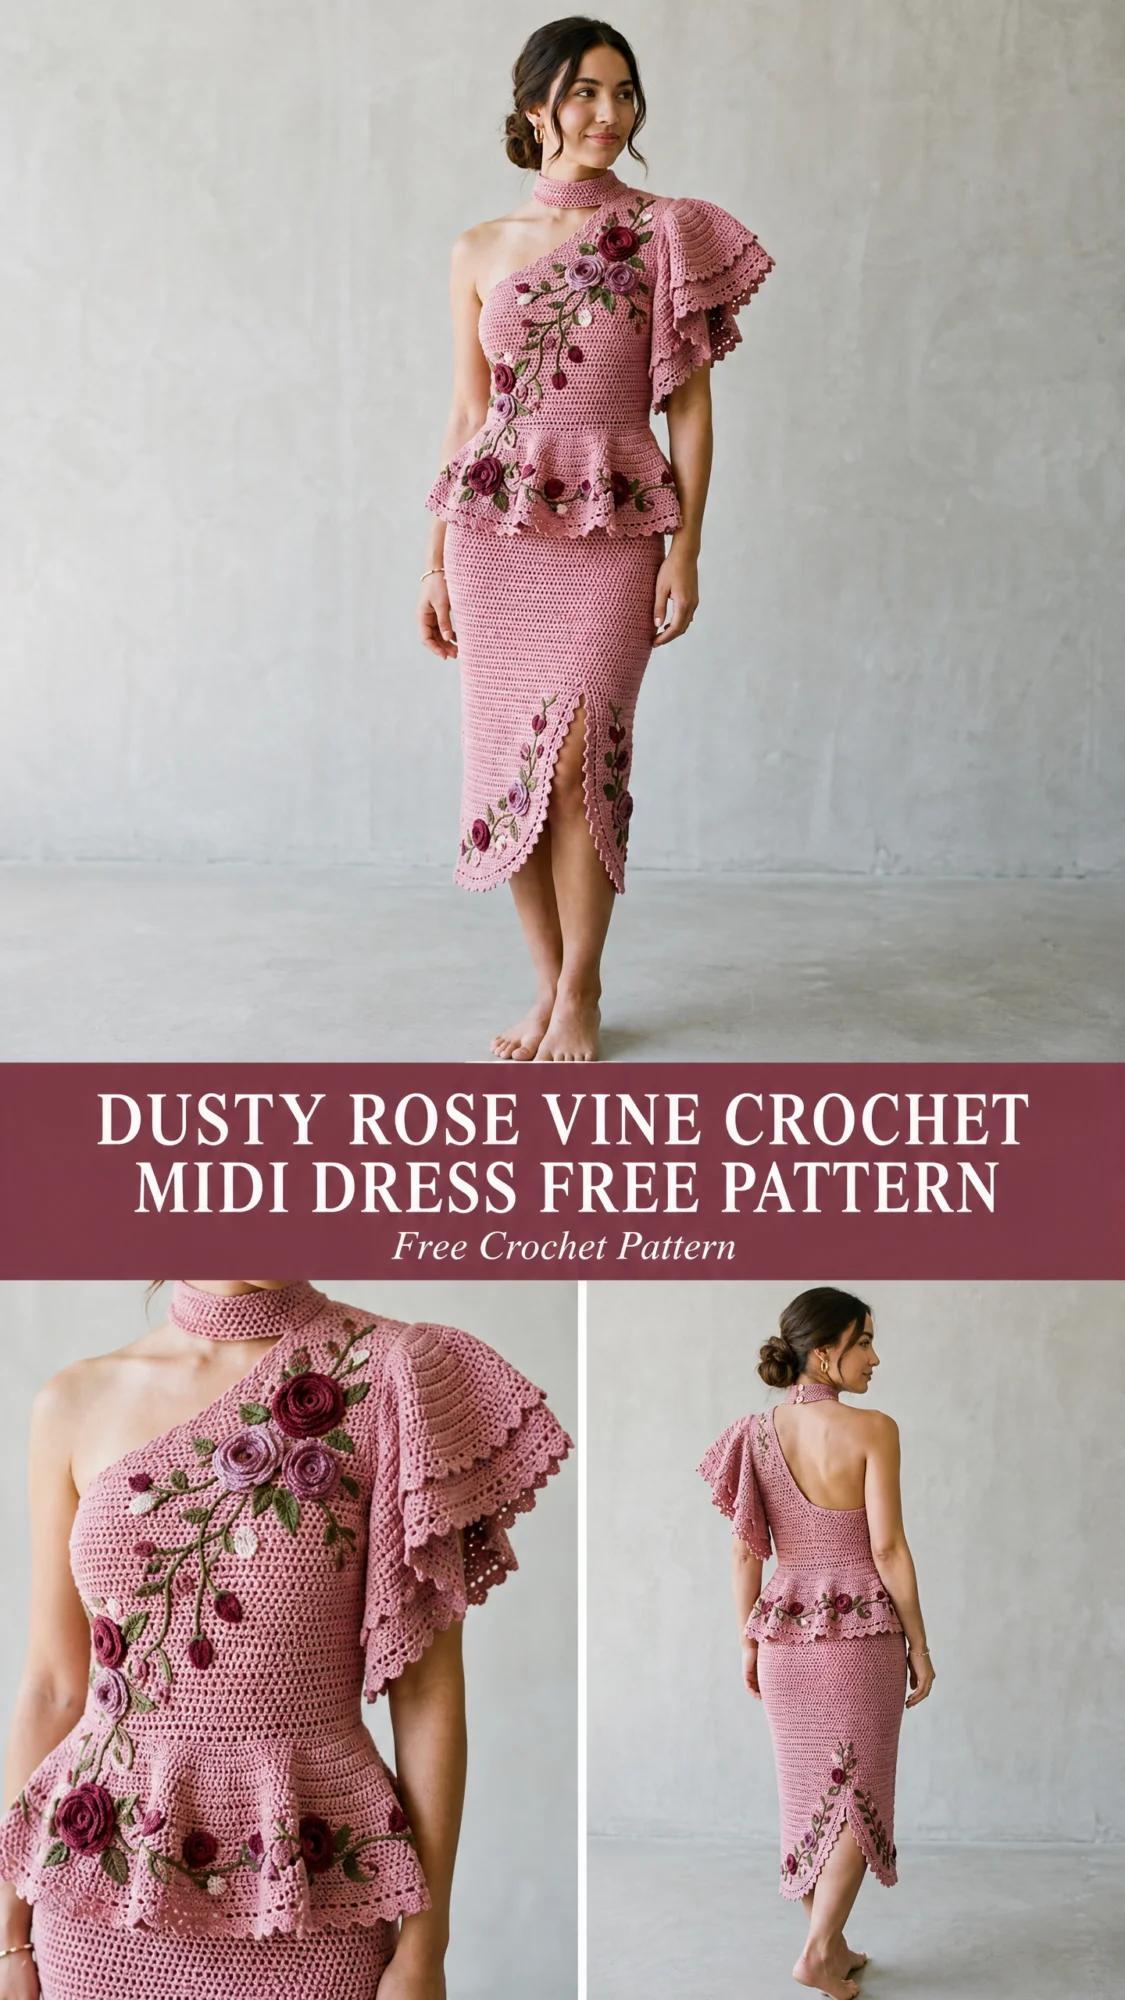
Yes, it’s an advanced project. Yes, it will take you somewhere between 120 to 180 hours to complete. But here’s the thing. Every single hour is worth it. You’re creating an actual couture-level garment with your own two hands. The kind of piece that looks like it belongs on a runway in Milan.
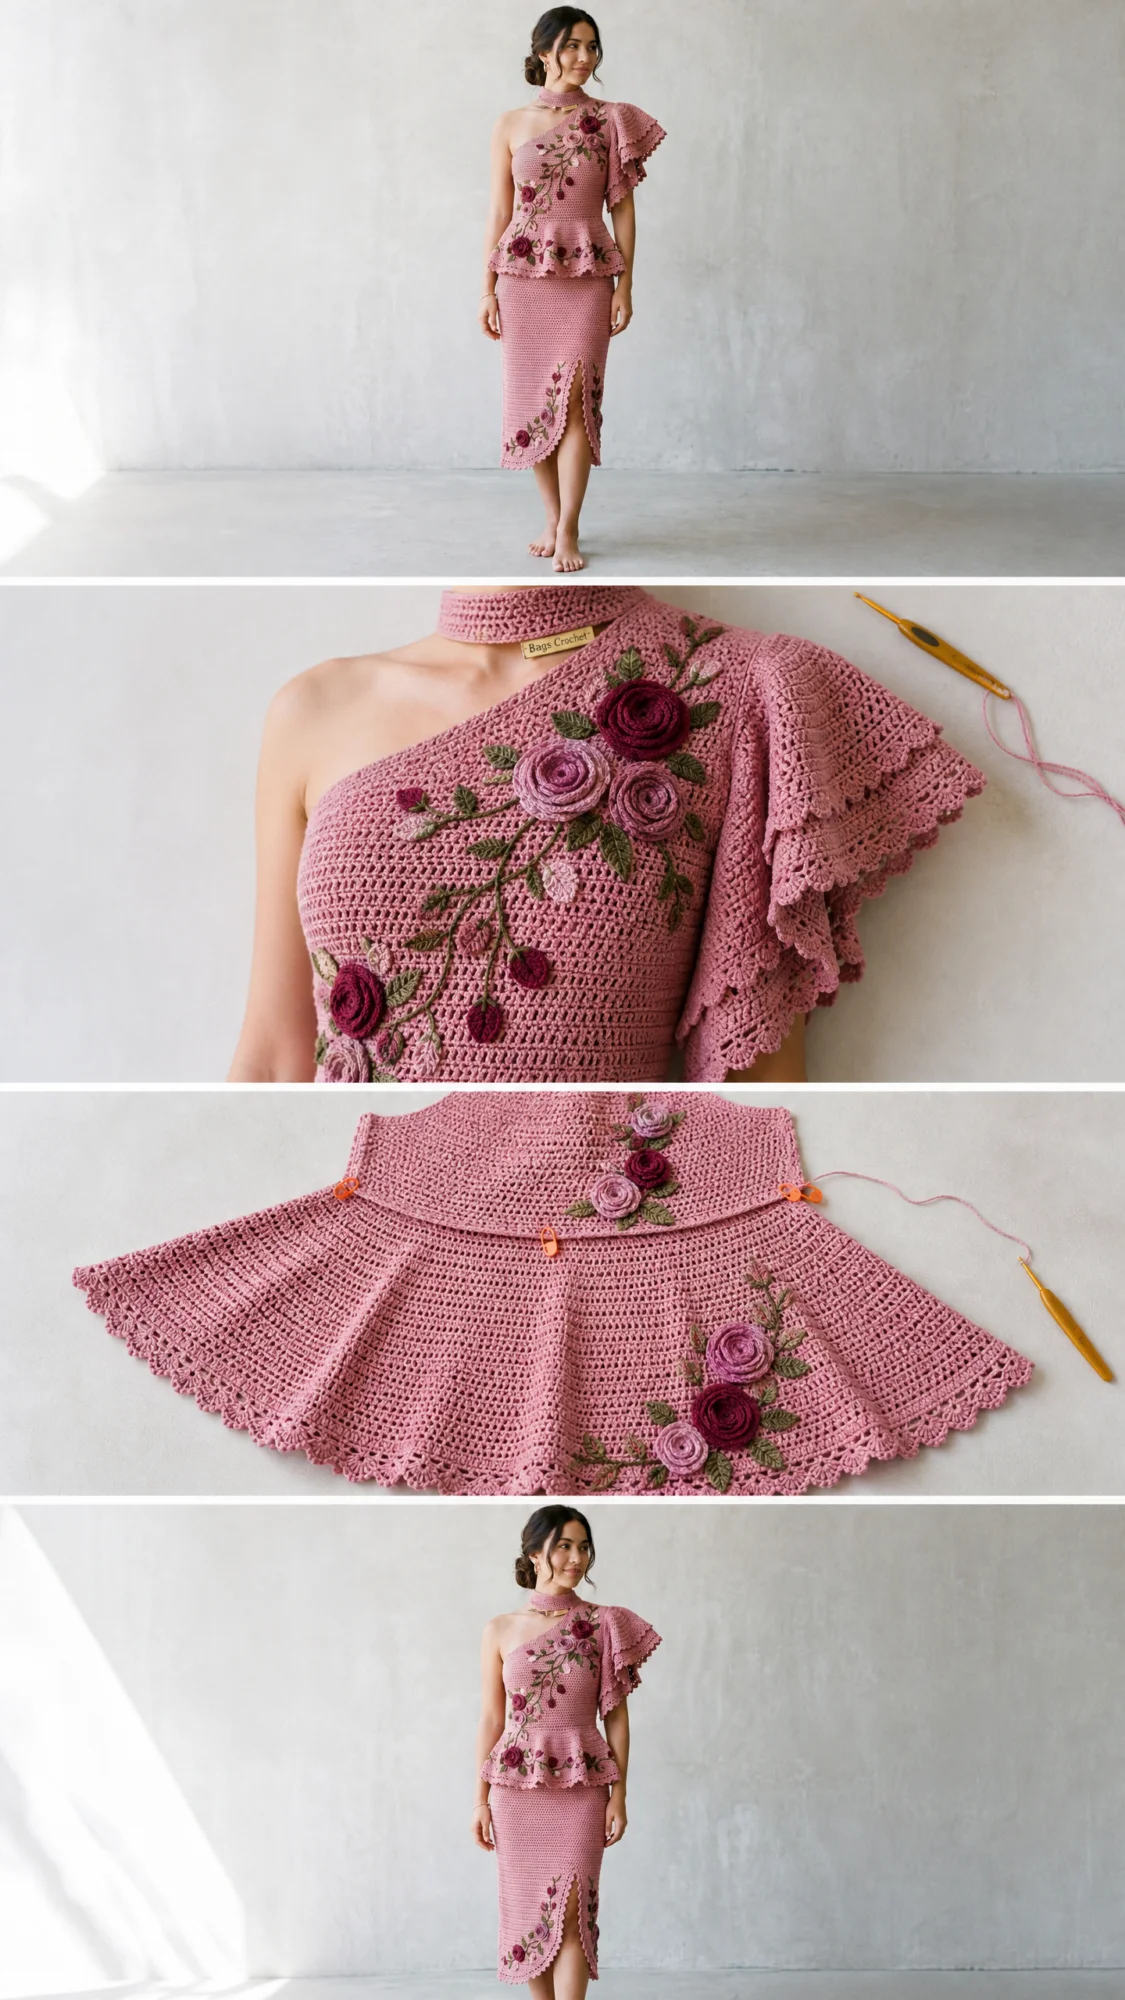
This stunning two-piece set features a one-shoulder peplum top with a dramatic tiered ruffle sleeve, a matching choker collar, and a fitted midi skirt with an asymmetric wrap hem. The three-dimensional roses cascading down the bodice and skirt? Those are crocheted separately and applied by hand. The trailing vines connecting them? Surface embroidery you’ll add at the very end. It’s detailed work, but I’m walking you through every single step.
What Makes This Crochet Dress Pattern So Special
Let me paint the picture for you. The main fabric is worked in a single crochet mesh stitch that creates this gorgeous, dense yet breathable texture with perfect drape. It hugs the body beautifully without being stiff or uncomfortable. The dusty rose color photographs like a dream, and those deep burgundy and soft mauve roses add dimension that flat embroidery simply cannot achieve.
The construction is methodical and logical. You’ll work the skirt first in the round from waist to hem. Then the top bodice is worked flat and seamed. The ruffle sleeve, peplum flounce, and choker collar are all worked separately and attached. Finally, all those beautiful rose motifs and vine embroidery come last.
This pattern produces a coordinating set, meaning the top and skirt are separate pieces worn together. They’re never joined, so you can actually wear them separately with other items in your wardrobe if you want versatility.
Skill Level and Time Commitment
I’m being completely honest with you here. This is an advanced pattern. You should have completed at least two fitted garments before attempting this design. You’ll need to be comfortable reading both in-the-round and flat construction, working precise stitch-count shaping over a long garment, creating multiple small motifs with yarn tails, doing surface crochet embellishment, and seaming garments.
Plan for 120 to 180 hours for a size medium, including all the motif construction and embroidery. Allow additional time for blocking and assembly. This is not a weekend project. This is a labor of love that you’ll treasure forever.
Finished Measurements
The pattern is written for size Small (S), with Medium (M) and Large (L) given in parentheses throughout as S (M, L).
Top Measurements:
Skirt Measurements:
Choker Collar:
Materials You’ll Need
Yarn:
Hooks:
Notions:
Recommended Yarn Suggestions
Paintbox Yarns Simply DK (100% cotton, 137 yards / 125 m per 50 g skein). Choose colorway Dusty Rose for MC. This yarn has excellent stitch definition for the mesh fabric and consistent twist for tight single crochet work.
Lion Brand 24/7 Cotton DK (100% cotton, 186 yards / 170 m per 100 g skein). Widely available, machine washable, and produces a smooth, slightly shiny fabric that photographs beautifully and matches the finish seen in this design.
Drops Safran (100% combed cotton, 175 yards / 160 m per 50 g skein). Produces a slightly matte, soft finish with excellent drape. Choose colorway Old Rose for MC.
Substitution Note: Any smooth DK weight 100% cotton or cotton-blend yarn may be substituted. Avoid yarns with significant halo (such as mohair blends) as they will obscure the mesh stitch texture and dimensional roses. Always crochet a gauge swatch and adjust hook size as needed before beginning the garment. Do not substitute a yarn of a different fiber category without re-swatching, as synthetic fibers will not block to the same dimensions.
Gauge (This Is Mandatory)
Using US D-3 / 3.25 mm hook and MC:
Gauge is measured in single crochet mesh stitch after blocking.
I cannot stress this enough. Gauge is mandatory for this garment. A difference of even one stitch per inch will result in a garment that is more than two inches off in circumference. Crochet a swatch of at least 5 in x 5 in / 13 cm x 13 cm, block it, and measure before beginning. Adjust hook size up if your swatch is too small, down if your swatch is too large.
Abbreviations (US Terms)
Special Stitches and Techniques
Single Crochet Mesh Stitch (sc-mesh)
This is the primary body stitch used for all large fabric sections. It creates an open, net-like texture with small square holes.
Row or Rnd 1 (foundation): Ch any even number. Sc in second ch from hook and in each ch across.
Row or Rnd 2: Ch 1, turn. Sc in first st, ch 1, sk next st, sc in next st. Rep (ch 1, sk 1, sc in next st) across to last st, sc in last st.
Row or Rnd 3: Ch 1, turn. Sc in first st, sc in ch-1 sp, sc in next sc. Rep (sc in ch-1 sp, sc in next sc) across.
Rep Rows 2 and 3 for pattern.
Note: In the round, omit turning chains. Work Row 2 equivalent continuously, joining at end of round with sl st to first sc. Row 3 equivalent is worked back into ch-1 spaces.
Picot Edging
This edging is worked along all outer hem edges, peplum hem, sleeve ruffle edges, and skirt hem.
Step 1: Work 1 sc in edge stitch.
Step 2: Ch 3.
Step 3: Sl st in first ch of ch-3 just made (creates picot).
Step 4: Work 1 sc in next edge stitch.
Rep Steps 2 through 4 across entire edge.
Scallop Ruffle Edge
Used on tiered sleeve ruffle layers and skirt slit edge lining.
Step 1: Work 1 sc in edge stitch.
Step 2: Ch 2, dc 4 times in same stitch, ch 2.
Step 3: Sl st in next edge stitch.
Step 4: Sc in next edge stitch.
Rep Steps 2 through 4 across.
Three-Dimensional Rose Motif (Large)
Approximately 2.5 in / 6.5 cm diameter. Used in CA (burgundy) and CB (mauve). Make approximately 8 in CA and 7 in CB.
Foundation: Ch 36. Sl st to form ring if desired, or work as a flat strip.
Row 1: Ch 1. Work 1 sc in second ch from hook and in each ch across. (35 sc)
Row 2: Ch 3 (counts as dc), turn. Work 2 dc in same st, 3 dc in each st across. (105 dc)
Row 3: Ch 1, turn. Sc in each st across. (105 sc)
Row 4: Ch 3, turn. Work 2 dc in each st across. (210 dc)
Row 5: Sl st in each st across. Fasten off, leaving a 12-in / 30-cm tail.
Assembly: Roll the strip tightly starting from one end, with Row 5 (the longest row) forming the outer petals. Use the tail and tapestry needle to stitch the base securely. The layers of increasing dc height naturally create the spiral rose shape. Flatten base and weave in inner tail. Outer tail is used to attach rose to garment.
Three-Dimensional Rose Motif (Small)
Approximately 1.25 in / 3 cm diameter. Used in CA and CB. Make approximately 10 in CA and 8 in CB.
Foundation: Ch 20.
Row 1: Ch 1. Sc in second ch from hook and in each ch across. (19 sc)
Row 2: Ch 3, turn. Work 2 dc in same st, 3 dc in each st across. (57 dc)
Row 3: Ch 1, turn. Sc in each st across. (57 sc)
Row 4: Sl st in each st across. Fasten off, leaving a 10-in / 25-cm tail.
Assembly: Roll tightly from one end as for large rose. Secure base with tail.
Crochet Leaf
Approximately 1.5 in / 4 cm long. Make in CC. Approximately 20 leaves needed total.
Ch 9.
Row 1: Sc in second ch from hook, hdc in next ch, dc in next 2 ch, hdc in next ch, sc in next ch, sl st in last ch. Do not turn. Working into the opposite side of the foundation chain: sc in first ch, hdc in next ch, dc in next 2 ch, hdc in next ch, sc in next ch, sl st in last ch. (16 sts total around leaf)
Fasten off, leaving a 10-in / 25-cm tail for attachment.
Surface Slip Stitch Vine
Used to create the main vine stems connecting roses and leaves.
Thread CC onto tapestry needle or use hook. Insert hook from RS to WS through a stitch of the garment fabric. Pull up a loop of CC from WS to RS. Insert hook into next stitch to the right (or in the direction of vine travel), pull loop through both the fabric and the loop on hook. Continue in this manner along the vine path, curving as needed to follow the design. At each rose or leaf attachment point, fasten off and re-join to continue a new branch of the vine.
Chain Stitch Embroidery Vine
Alternative to surface slip stitch for finer lines.
Thread CC onto tapestry needle with a comfortable working length. Bring needle up through fabric at vine start. Re-insert needle adjacent to exit point, then bring needle back up one stitch length ahead, keeping working yarn under needle tip. Pull gently to form first chain link. Repeat to create continuous chain stitch vine line.
Important Pattern Notes Before You Begin
1. The top and skirt are worked as separate pieces and never joined together. They are worn as a coordinating set.
2. All single crochet mesh fabric sections begin with a foundation chain that includes the working stitch count plus one (for the turning chain treated as a chain, not a stitch). The first sc is worked in the second chain from the hook.
3. When working the skirt in the round, place a locking stitch marker in the first stitch of each round and move it up as work progresses. The beginning of the round is at the center back.
4. The peplum flounce is worked separately and slip-stitched to the waistline join of the top bodice. It is not integrated into the bodice rows.
5. The tiered ruffle sleeve is worked in three layers of decreasing width, then attached to the right shoulder edge.
6. The choker collar is worked separately as a flat strip and fastened at center back with a button or hook-and-eye.
7. All roses and leaves are applied after blocking, using their yarn tails and a tapestry needle. Press rose bases flat before attaching.
8. Vine embroidery is added last, after all roses and leaves are attached, to connect motifs in a naturalistic trailing pattern.
9. Pattern is written with RS facing for all in-the-round sections.
10. For the asymmetric skirt hem, the front-right panel is worked slightly longer than the front-left panel to create the wrap appearance. This is achieved by adding short rows to the right front before the final edging round.
11. Gauge is critical. Review gauge section carefully before beginning.
12. Stitch counts in parentheses at the end of each row or round indicate total stitches at that point.
Pattern Instructions
Section 1: Skirt
The skirt is worked in the round from waist to hem. The waistband is a firm single crochet band. The body is worked in sc-mesh stitch.
Skirt Waistband
With MC and D-3 hook, ch 141 (151, 161). Take care not to twist the chain. Sl st to first ch to form ring.
Rnd 1: Ch 1 (does not count as st throughout waistband). Sc in each ch around. Sl st to first sc to join. (140, 150, 160 sc)
Rnd 2: Ch 1. Sc in each sc around. Sl st to join. (140, 150, 160 sc)
Rnd 3: Ch 1. Sc in each sc around. Sl st to join. (140, 150, 160 sc)
Rnd 4: Ch 1. Sc in each sc around. Sl st to join. (140, 150, 160 sc)
Rnd 5: Ch 1. Sc in each sc around. Sl st to join. (140, 150, 160 sc)
Waistband complete. Waistband should measure approximately 1 in / 2.5 cm tall.
Skirt Body: Waist to Hip Increase Zone
Begin sc-mesh pattern as follows:
Rnd 6: Ch 1. Sc in first sc, (ch 1, sk 1, sc in next sc) rep around to last sc, ch 1, sk last sc, sl st to first sc to join. (70, 75, 80 sc and 70, 75, 80 ch-1 sps = 140, 150, 160 sts total)
Rnd 7: Ch 1. Sc in first sc, (sc in ch-1 sp, sc in next sc) rep around. Sl st to join. (140, 150, 160 sc)
Rnd 8: Rep Rnd 6. (70, 75, 80 sc and 70, 75, 80 ch-1 sps)
Rnd 9: Rep Rnd 7. (140, 150, 160 sc)
Rnd 10: Rep Rnd 6. (70, 75, 80 sc and 70, 75, 80 ch-1 sps)
Rnd 11: Ch 1. Sc in first sc, sc in ch-1 sp, sc in next sc, 2 sc in ch-1 sp (inc made), sc in next sc. Rep (sc in ch-1 sp, sc in next sc) 16 (17, 18) times, 2 sc in ch-1 sp (inc), sc in next sc. Rep (sc in ch-1 sp, sc in next sc) 17 (18, 19) times, 2 sc in ch-1 sp (inc), sc in next sc. Rep (sc in ch-1 sp, sc in next sc) 16 (17, 18) times, 2 sc in ch-1 sp (inc), sc in next sc, sc in rem ch-1 sps and sc to end. Sl st to join. (144, 154, 164 sc)
Rnd 12: Rep Rnd 6 equivalently, working sc in each sc and (ch 1, sk 1) across. (72, 77, 82 sc and 72, 77, 82 ch-1 sps)
Rnd 13: Rep Rnd 7. (144, 154, 164 sc)
Rnd 14: Rep Rnd 6. (72, 77, 82 sc and 72, 77, 82 ch-1 sps)
Rnd 15: Ch 1. Distribute 4 more increases evenly as in Rnd 11. Sl st to join. (148, 158, 168 sc)
Rnd 16: Rep Rnd 6. (74, 79, 84 sc and 74, 79, 84 ch-1 sps)
Rnd 17: Rep Rnd 7. (148, 158, 168 sc)
Rnd 18: Rep Rnd 6. (74, 79, 84 sc and 74, 79, 84 ch-1 sps)
Rnd 19: Distribute 4 increases evenly. Sl st to join. (152, 162, 172 sc)
Rnd 20: Rep Rnd 6. (76, 81, 86 sc and 76, 81, 86 ch-1 sps)
Rnd 21: Rep Rnd 7. (152, 162, 172 sc)
Rnd 22: Rep Rnd 6. (76, 81, 86 sc and 76, 81, 86 ch-1 sps)
Rnd 23: Distribute 4 increases evenly. Sl st to join. (156, 166, 176 sc)
Rnd 24: Rep Rnd 6. (78, 83, 88 sc and 78, 83, 88 ch-1 sps)
Rnd 25: Rep Rnd 7. (156, 166, 176 sc)
Note for Size M: Rnd 12 and subsequent mesh rounds have 77 sc, which is not evenly divisible by 2 for standard sc-mesh. For size M, work the mesh round with 77 sc positions as follows: work (ch 1, sk 1, sc) 76 times, sc in last sc, to maintain visual consistency. This single-stitch adjustment at the round join is invisible in the finished fabric. The same approach applies to size L with 82 sc.
CHECKPOINT: After Rnd 25, the skirt should measure approximately 4.5 in / 11.5 cm from the top of the waistband. The circumference should be approximately 31 (33, 35) in / 79 (84, 89) cm at this point.
Hip Zone: Maximum Circumference
Rnds 26 through 28: Work 3 rnds even in sc-mesh pattern without any increases. (156, 166, 176 sc)
Rnd 29: Distribute 4 increases evenly. (160, 170, 180 sc)
Rnds 30 through 32: Work even. (160, 170, 180 sc)
Rnd 33: Distribute 4 increases evenly. (164, 174, 184 sc)
Rnds 34 through 36: Work even. (164, 174, 184 sc)
CHECKPOINT: After Rnd 36, circumference should be approximately 33 (35, 37) in / 84 (89, 94) cm. This is the hip fullness zone.
Hip to Thigh Taper
The skirt now tapers slightly inward for a body-skimming fit through the thigh.
Rnd 37: Ch 1. Work sc-mesh across to marker, sc2tog over next 2 sts, cont mesh to next marker, sc2tog, cont to next marker, sc2tog, cont to last marker, sc2tog, finish rnd. (160, 170, 180 sc)
Rnd 38: Work even. (160, 170, 180 sc)
Rnd 39: Work even. (160, 170, 180 sc)
Rnd 40: Rep decrease rnd as Rnd 37. (156, 166, 176 sc)
Rnd 41: Work even. (156, 166, 176 sc)
Rnd 42: Work even. (156, 166, 176 sc)
Rnd 43: Rep decrease rnd. (152, 162, 172 sc)
Rnds 44 through 46: Work even. (152, 162, 172 sc)
Rnd 47: Rep decrease rnd. (148, 158, 168 sc)
Rnds 48 through 52: Work even. (148, 158, 168 sc)
Rnd 53: Rep decrease rnd. (144, 154, 164 sc)
Rnds 54 through 60: Work even. (144, 154, 164 sc)
CHECKPOINT: After Rnd 60, skirt should measure approximately 11 in / 28 cm from top of waistband. At this point the fabric is gently tapered and the skirt circumference should be approximately 29 (31, 33) in / 74 (79, 84) cm.
Lower Skirt Body
Rnds 61 through 100: Work even in sc-mesh pattern throughout. No shaping. (144, 154, 164 sc)
CHECKPOINT: After Rnd 100, skirt should measure approximately 19 (19.5, 20) in / 48 (49.5, 51) cm from top of waistband. The lower body is straight from this point to the hem.
Rnds 101 through 120: Work even. (144, 154, 164 sc)
CHECKPOINT: After Rnd 120, skirt body length from waistband top should be approximately 23 (23.5, 24) in / 58 (59.5, 61) cm.
Front Slit Preparation
The front slit begins at Rnd 121. The skirt is now worked in two flat sections (front and back) for the lower 9 in / 23 cm of the skirt.
Identify the center front stitch (place marker) and the center back stitch. The center front divides the front panel. At center front, the work will be divided.
Back Panel (worked flat)
Row 121A: With RS facing, attach MC to center front stitch. Ch 1. Sc across back half of skirt (from center front stitch to center back stitch). Turn. (72, 77, 82 sc)
Note: For the flat sections, return to standard sc with turning chains as follows. The mesh pattern continues as rows rather than rounds.
Row 122A: Ch 1, turn. Work sc-mesh row across. (72, 77, 82 sc)
Row 123A: Ch 1, turn. Sc in each st and ch-sp across. (72, 77, 82 sc)
Rows 124A through 148A: Continue alternating sc-mesh rows as established. (72, 77, 82 sc per row)
After Row 148A, back panel is complete. The back panel should now extend to the full skirt length.
Front Right Panel (worked flat, longer for wrap effect)
Row 121B: With RS facing, attach MC to center front stitch. Ch 1. Sc across right front half. Turn. (36, 39, 41 sc)
Note: The front is divided at the center into left and right halves. The right front panel (as worn, right side of body) extends lower to create the diagonal wrap overlay appearance.
Rows 122B through 148B: Work even in sc-mesh pattern. (36, 39, 41 sc)
Rows 149B through 155B (short-row extension for wrap effect): Work 7 additional rows on the right front panel only to create the longer wrap overlay. (36, 39, 41 sc)
Front Left Panel (worked flat, shorter)
Row 121C: With RS facing, attach MC to the stitch directly to the left of center front (one stitch past center front). Ch 1. Sc across remaining left front stitches. Turn. (36, 38, 41 sc)
Rows 122C through 148C: Work even in sc-mesh. (36, 38, 41 sc)
The left front panel ends at Row 148C. It is shorter than the right front panel, creating the asymmetric diagonal hem.
Skirt Hem Edging
The picot edging and scallop border are applied to all hem edges.
Lower hem of back panel: With RS facing and B-1 hook, attach MC to lower right corner of back panel hem. Work picot edging across entire lower edge. Fasten off.
Lower hem of right front panel: Attach MC to lower right corner. Work picot edging across. Fasten off.
Diagonal inner edge of right front panel (the angled wrap edge visible from front): Work scallop ruffle edge along this diagonal edge. Fasten off.
Lower hem of left front panel: Work picot edging across. Fasten off.
The side edges of the slit (the vertical edges created by the division at center front): Work 1 rnd of sc along each vertical edge, working 1 sc per row end. Then work picot edging over these sc. Fasten off.
Section 2: Top Bodice
The top bodice is worked flat in panels and seamed. The top is a one-shoulder design. The left shoulder (as worn) is open. The right shoulder carries the ruffle. The neckline on the right side connects to the choker collar via a ch loop or crochet tab.
Back Bodice Panel
With MC and D-3 hook, ch 89 (95, 101).
Row 1 (WS): Sc in second ch from hook and in each ch across. Turn. (88, 94, 100 sc)
Row 2 (RS): Ch 1, turn. Sc in first st, (ch 1, sk 1, sc in next st) across to last st, sc in last st. (88, 94, 100 sts in mesh)
Row 3 (WS): Ch 1, turn. Sc in first st, (sc in ch-1 sp, sc in next sc) across. (88, 94, 100 sc)
Rows 4 through 37 (WS): Continue in sc-mesh pattern as established, alternating Rows 2 and 3. No shaping. (88, 94, 100 sc)
Row 38 (waist shaping, RS): Ch 1, turn. Sc in first st, sc2tog, work sc-mesh to last 3 sts, sc2tog, sc in last st. (86, 92, 98 sc)
Row 39: Work even. (86, 92, 98 sc)
Row 40: Sc in first st, sc2tog, work to last 3 sts, sc2tog, sc in last st. (84, 90, 96 sc)
Row 41: Work even. (84, 90, 96 sc)
Row 42: Sc in first st, sc2tog, work to last 3 sts, sc2tog, sc in last st. (82, 88, 94 sc)
Rows 43 through 45: Work even. (82, 88, 94 sc)
Row 46: Sc in first st, sc2tog, work to last 3 sts, sc2tog, sc in last st. (80, 86, 92 sc)
Rows 47 through 49: Work even. (80, 86, 92 sc)
This is the narrowest waist point. Place marker on each side edge at this row to mark waist level.
Back Bodice Armhole and Shoulder Shaping
Row 50 (begin armhole): Ch 1, turn. Sl st across first 5 (6, 6) sts. Ch 1. Sc in next st, work sc-mesh to last 5 (6, 6) sts. Turn, leaving last sts unworked. (70, 74, 80 sc)
Row 51: Work even. (70, 74, 80 sc)
Row 52: Ch 1, turn. Sc2tog, work to last 2 sts, sc2tog. (68, 72, 78 sc)
Row 53: Work even. (68, 72, 78 sc)
Row 54: Sc2tog, work to last 2 sts, sc2tog. (
You Might Also Like
- Sunflower Granny Square Bucket Bag Free Crochet Pattern
- Coral Reef Summer Tote Free Crochet Pattern
- Blush Pink Romantic Granny Backpack Free Crochet Pattern
- Sage Green Crochet Romper Free Pattern