Sage Green Crochet Romper Free Pattern
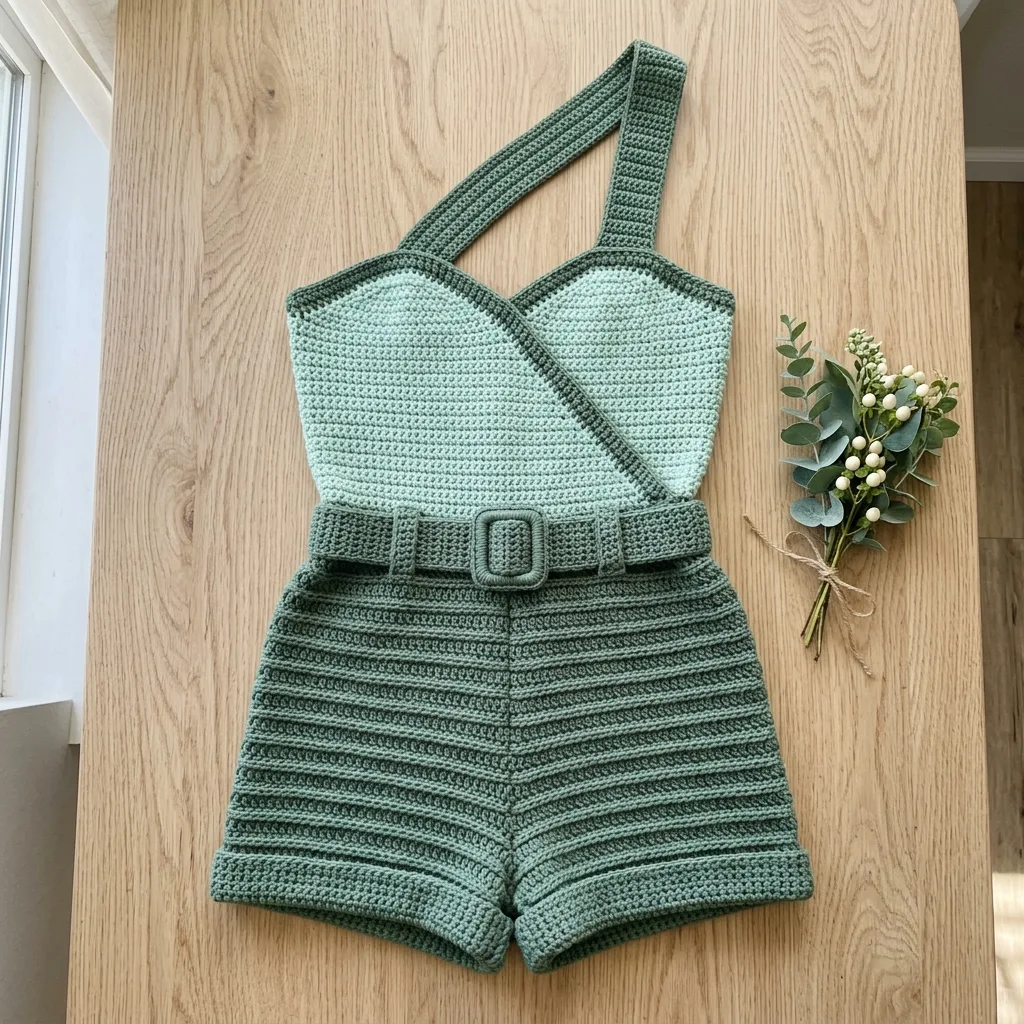
This is THE romper pattern you’ve been looking for. I’m talking about a STUNNING one-shoulder design that looks like it walked straight off a boutique rack. And here’s the best part: it’s completely achievable for intermediate crocheters who want to level up their garment-making skills.
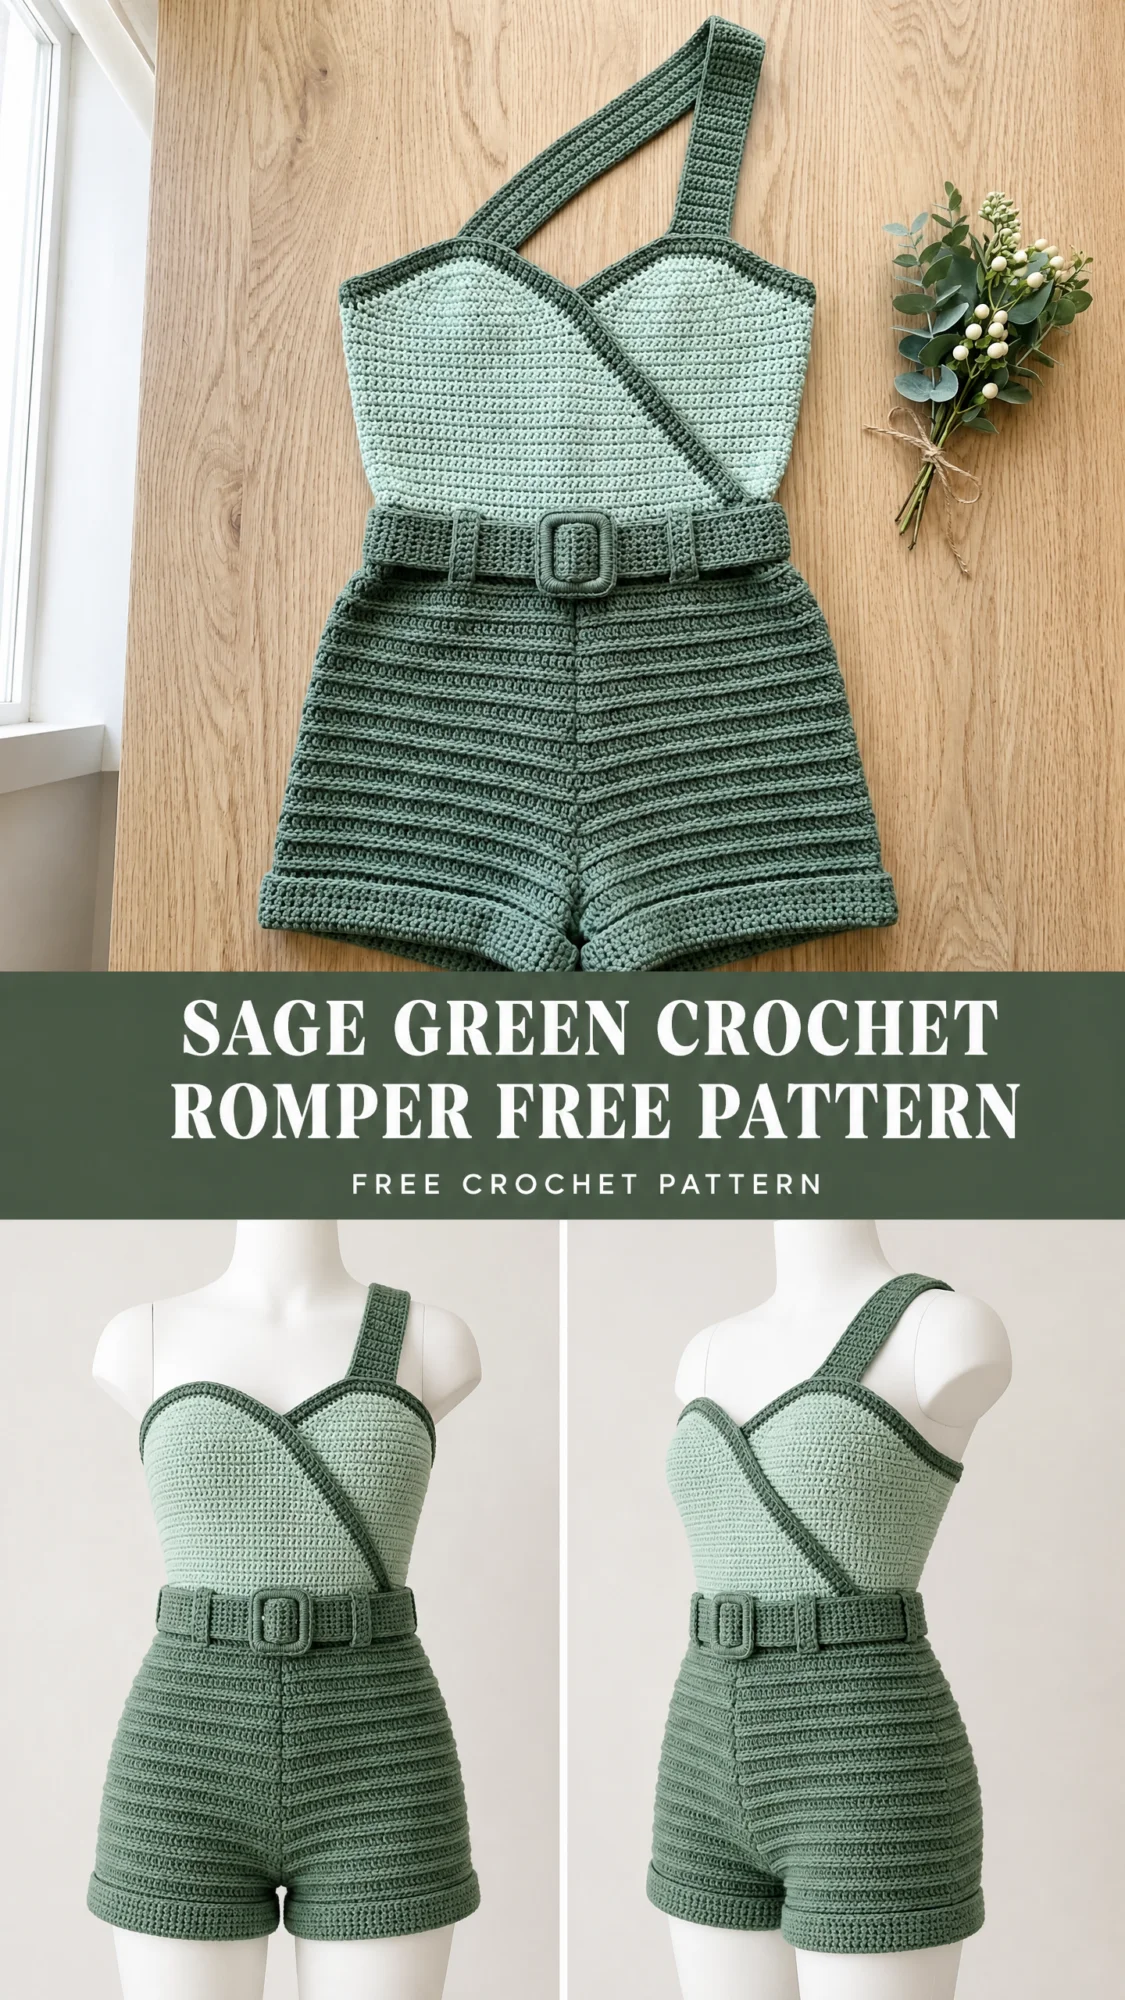
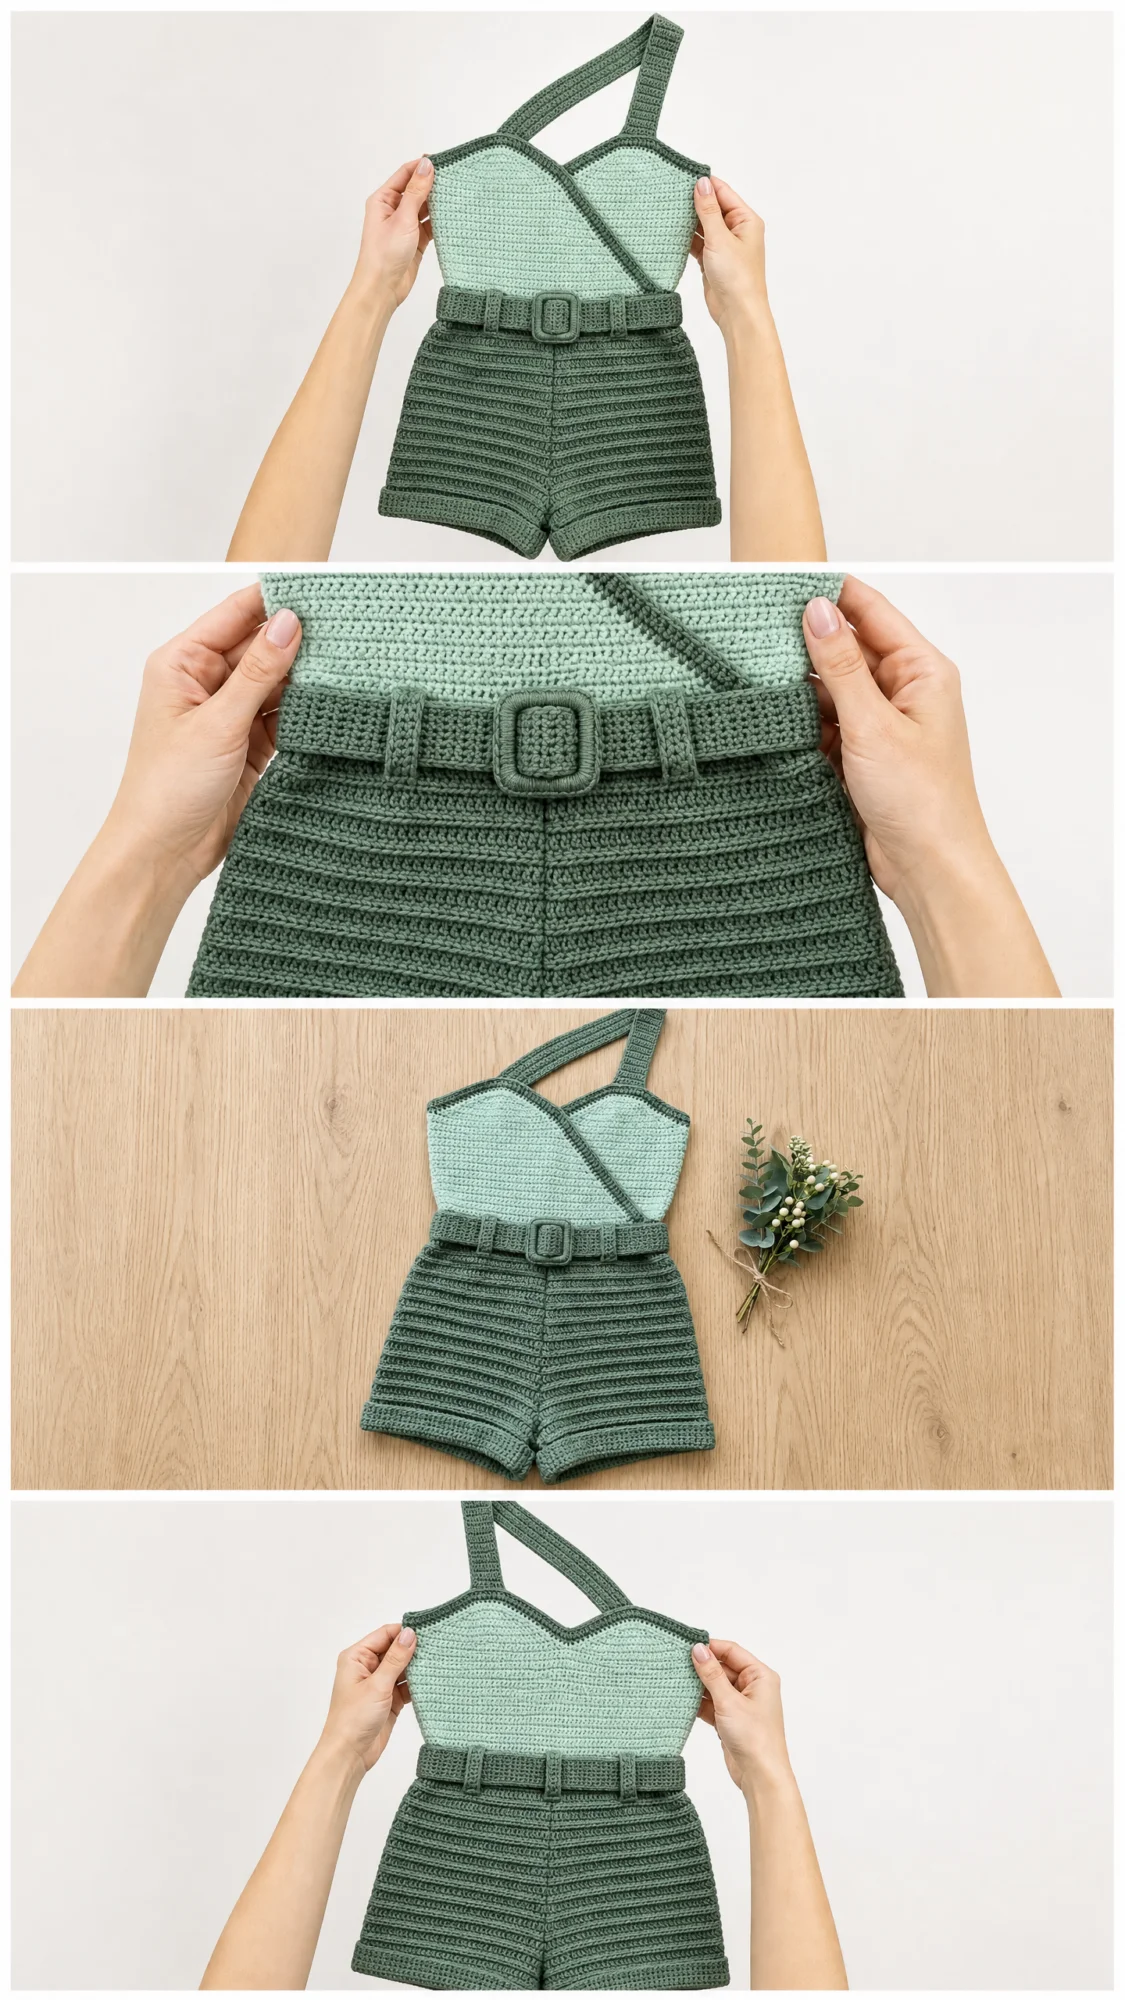
This project took me about 25 hours from start to finish, and every single minute was worth it. The fitted bodice with that gorgeous asymmetric strap, the high-waisted ribbed shorts, the matching crocheted belt with a square buckle detail. It all comes together into one showstopping piece.
If you’ve been itching to make something truly impressive, something that makes people say “wait, you MADE that?”, then grab your hook and let’s dive in. This sage green crochet romper is about to become your new favorite summer staple.
Why This Crochet Romper Pattern Works So Well
The magic of this design lives in the details. The bodice uses a two-tone colorwork approach with a light mint panel framed by sage green borders. Meanwhile, the shorts feature those beautiful horizontal ridges you can see in the finished piece. Those ridges come from a simple technique called back loop only stitches, which I’ll explain fully below.
Construction is straightforward once you understand the pieces. You’ll work the bodice front, bodice back, two leg panels for the shorts, the shoulder strap, and the belt with its buckle. Everything is worked flat and then seamed together. No complicated in-the-round shaping or tricky joins.
The asymmetric one-shoulder look comes from how the strap attaches. It crosses diagonally from the left shoulder to create that modern, fashion-forward silhouette. Trust me, once you see it on, you’ll understand why this design is worth the effort.
Materials You’ll Need
Before you start, gather these supplies:
Yarn:
Hook: US size E-4 / 3.5 mm crochet hook
Notions:
Great Yarn Options:
Lion Brand 24/7 Cotton in “Sage” and “Mint” works beautifully here. It’s 100 percent mercerized cotton with excellent stitch definition. Paintbox Yarns Cotton DK in “Grass Green” and “Seafoam Blue” is a budget-friendly alternative that performs well.
Important: Choose a cotton or cotton-blend with low stretch and good stitch definition. Avoid fuzzy yarns or anything with significant elasticity. This structured silhouette needs yarn that holds its shape.
Finished Measurements
This pattern is written for size Small/Medium:
Size customization tips are included at the end of this tutorial.
Gauge (Please Don’t Skip This)
I know checking gauge isn’t the fun part, but for a fitted garment like this romper, it’s essential.
Standard single crochet: 20 sc x 22 rows = 4 inches / 10 cm worked flat
Back loop only single crochet: 20 sc x 24 rows = 4 inches / 10 cm worked flat
Make a 6-inch swatch in each stitch pattern. Wash and dry it the way you plan to care for the finished piece. Then measure. Adjust your hook size up or down as needed to match gauge.
Abbreviations and Stitch Definitions
Here’s every abbreviation used in this crochet pattern, along with plain-English definitions:
Special Stitches Explained
BLO sc (Back Loop Only Single Crochet):
Instead of inserting your hook under both loops at the top of the stitch, you’ll go under only the back loop. This creates a visible horizontal ridge on the right side of your fabric. It’s what gives the shorts that gorgeous ribbed texture.
sc2tog (Single Crochet Two Together):
This is your decrease stitch. Insert your hook into the first stitch and pull up a loop (2 loops on hook). Without finishing, insert your hook into the next stitch and pull up another loop (3 loops on hook). Yarn over and pull through all 3 loops. You’ve just turned 2 stitches into 1.
Surface Slip Stitch:
With the right side facing you, insert your hook through the fabric from front to back. Place a slip knot on the hook at the back and draw the loop through to the front. Work slip stitches along the surface by inserting your hook at regular intervals. This creates the belt loop detail.
Pattern Notes Before You Begin
1. The romper is worked flat in separate pieces and seamed. All seams go on the wrong side.
2. Chain 1 at the beginning of a sc row does NOT count as a stitch throughout this pattern.
3. When changing colors, make the switch on the last yarn over of the stitch before the new color begins.
4. Stitch counts in parentheses at the end of each row show your total working stitches after any shaping.
5. Block all pieces before seaming for best results. Seriously, blocking makes a huge difference.
6. The shoulder strap crosses the body from the left shoulder to the right underarm in the front.
Section 1: Bodice Front
The bodice front is shaped like a trapezoid, wider at the bust and narrowing at the waist. The upper left corner has the strap attachment. The CC panel fills the center while MC frames the edges.
Begin with MC.
Foundation chain: Ch 86.
Row 1 (RS): Sc in second ch from hook and in each ch across. Ch 1, turn. (85 sc)
Row 2: Sc across in MC. Ch 1, turn. (85 sc)
Row 3: Change to CC. Sc across. Ch 1, turn. (85 sc)
Rows 4 through 14: Continue in CC, sc across each row. Ch 1, turn. (85 sc each row)
Row 15: Change to MC. Sc across. Ch 1, turn. (85 sc)
Row 16: MC. Sc across. Ch 1, turn. (85 sc)
Bust Shaping
Now we’ll shape the bodice with paired decreases at the side edges. This creates the fitted waist.
Row 17: Sc2tog, sc to last 2 sts, sc2tog. Ch 1, turn. (83 sc)
Rows 18 to 20: Sc across. Ch 1, turn. (83 sc each row)
Row 21: Sc2tog, sc to last 2 sts, sc2tog. Ch 1, turn. (81 sc)
Rows 22 to 24: Sc across. Ch 1, turn. (81 sc each row)
Row 25: Sc2tog, sc to last 2 sts, sc2tog. Ch 1, turn. (79 sc)
Rows 26 to 28: Sc across. Ch 1, turn. (79 sc each row)
Row 29: Sc2tog, sc to last 2 sts, sc2tog. Ch 1, turn. (77 sc)
Rows 30 to 32: Sc across. Ch 1, turn. (77 sc each row)
Row 33: Sc2tog, sc to last 2 sts, sc2tog. Ch 1, turn. (75 sc)
Rows 34 to 36: Sc across. Ch 1, turn. (75 sc each row)
Row 37: Sc2tog, sc to last 2 sts, sc2tog. Ch 1, turn. (73 sc)
Row 38: Sc across. Ch 1, turn. (73 sc)
The bodice front main body is complete. Don’t fasten off yet.
Neckline Shaping (Bodice Front)
The right side (when worn) has a low angled armhole. The left side carries the strap.
Row 39: Sc across first 50 sts only. Leave remaining 23 sts unworked. Ch 1, turn. (50 sc)
Row 40: Sc2tog, sc to end. Ch 1, turn. (49 sc)
Row 41: Sc to last 2 sts, sc2tog. Ch 1, turn. (48 sc)
Row 42: Sc2tog, sc to end. Ch 1, turn. (47 sc)
Row 43: Sc to last 2 sts, sc2tog. Ch 1, turn. (46 sc)
Row 44: Sc2tog, sc to end. Ch 1, turn. (45 sc)
Row 45: Sc across. Ch 1, turn. (45 sc)
Row 46: Sc2tog, sc to end. Ch 1, turn. (44 sc)
Row 47: Sc across. Ch 1, turn. (44 sc)
Row 48: Sc2tog, sc to end. Ch 1, turn. (43 sc)
Row 49: Sc across. Fasten off. (43 sc)
Place stitch markers at each corner of the shoulder line for strap attachment.
Now return to the unworked 23 stitches on Row 38. Rejoin MC with RS facing at the inner edge.
Row 39B: Sc across 23 sts. Ch 1, turn. (23 sc)
Row 40B: Sc2tog, sc to last 2 sts, sc2tog. Ch 1, turn. (21 sc)
Row 41B: Sc across. Ch 1, turn. (21 sc)
Row 42B: Sc2tog, sc to last 2 sts, sc2tog. Ch 1, turn. (19 sc)
Row 43B: Sc across. Fasten off. (19 sc)
This right upper panel forms the armhole facing.
Checkpoint: Your bodice front should measure approximately 8 inches tall from foundation to shoulder and approximately 14.6 inches wide at the widest point.
Section 2: Bodice Back
The bodice back mirrors the front shaping but is worked entirely in MC. Both shoulders are full width to the top.
Foundation chain: Ch 86.
Row 1 (RS): Sc in second ch from hook and in each ch across. Ch 1, turn. (85 sc)
Rows 2 to 16: Sc across each row. Ch 1, turn. (85 sc each row)
Waist Shaping
Row 17: Sc2tog, sc to last 2 sts, sc2tog. Ch 1, turn. (83 sc)
Rows 18 to 20: Sc across. Ch 1, turn. (83 sc each row)
Row 21: Sc2tog, sc to last 2 sts, sc2tog. Ch 1, turn. (81 sc)
Rows 22 to 24: Sc across. Ch 1, turn. (81 sc each row)
Row 25: Sc2tog, sc to last 2 sts, sc2tog. Ch 1, turn. (79 sc)
Rows 26 to 28: Sc across. Ch 1, turn. (79 sc each row)
Row 29: Sc2tog, sc to last 2 sts, sc2tog. Ch 1, turn. (77 sc)
Rows 30 to 32: Sc across. Ch 1, turn. (77 sc each row)
Row 33: Sc2tog, sc to last 2 sts, sc2tog. Ch 1, turn. (75 sc)
Rows 34 to 36: Sc across. Ch 1, turn. (75 sc each row)
Row 37: Sc2tog, sc to last 2 sts, sc2tog. Ch 1, turn. (73 sc)
Row 38: Sc across. Ch 1, turn. (73 sc)
Back Shoulder Shaping
Row 39: Sc across first 43 sts. Ch 1, turn. (43 sc)
Rows 40 to 49: Sc across. Ch 1, turn. (43 sc each row)
Row 50: Sc across. Fasten off. (43 sc)
Return to Row 38. Rejoin MC at stitch 44.
Row 39B: Sc across remaining 30 sts. Ch 1, turn. (30 sc)
Rows 40B to 49B: Sc across. Ch 1, turn. (30 sc each row)
Row 50B: Sc across. Fasten off. (30 sc)
Checkpoint: Bodice back should measure the same height as the bodice front, approximately 8 inches tall.
Section 3: Shoulder Strap
The strap is a simple flat strip worked in MC.
Foundation chain: Ch 11.
Row 1: Sc in second ch from hook and in each ch across. Ch 1, turn. (10 sc)
Continue working sc across all rows (no increases or decreases) until the strap measures 22 inches from beginning.
Fasten off, leaving a 12-inch tail for sewing.
Section 4: Shorts – Right Leg Panel
Here’s where those beautiful horizontal ridges come in. The shorts are worked flat in BLO sc.
Begin with MC.
Foundation chain: Ch 87.
Row 1 (RS): Sc in second ch from hook and in each ch across. Ch 1, turn. (86 sc)
Row 2: BLO sc across. Ch 1, turn. (86 sc)
Rows 3 to 8: Rep Row 2. Ch 1, turn. (86 sc each row)
Hip Shaping
Increase 1 stitch at each end every 6 rows.
Row 9: Inc in first st, BLO sc to last st, inc in last st. Ch 1, turn. (88 sc)
Rows 10 to 14: BLO sc across. Ch 1, turn. (88 sc each row)
Row 15: Inc in first st, BLO sc to last st, inc in last st. Ch 1, turn. (90 sc)
Rows 16 to 20: BLO sc across. Ch 1, turn. (90 sc each row)
Row 21: Inc in first st, BLO sc to last st, inc in last st. Ch 1, turn. (92 sc)
Rows 22 to 26: BLO sc across. Ch 1, turn. (92 sc each row)
Row 27: Inc in first st, BLO sc to last st, inc in last st. Ch 1, turn. (94 sc)
Rows 28 to 32: BLO sc across. Ch 1, turn. (94 sc each row)
Crotch Shaping
Decrease 1 stitch at the inner leg every row for 8 rows.
Row 33: BLO sc to last 2 sts, sc2tog. Ch 1, turn. (93 sc)
Row 34: Sc2tog, BLO sc to end. Ch 1, turn. (92 sc)
Row 35: BLO sc to last 2 sts, sc2tog. Ch 1, turn. (91 sc)
Row 36: Sc2tog, BLO sc to end. Ch 1, turn. (90 sc)
Row 37: BLO sc to last 2 sts, sc2tog. Ch 1, turn. (89 sc)
Row 38: Sc2tog, BLO sc to end. Ch 1, turn. (88 sc)
Row 39: BLO sc to last 2 sts, sc2tog. Ch 1, turn. (87 sc)
Row 40: Sc2tog, BLO sc to end. Ch 1, turn. (86 sc)
Rows 41 to 44: BLO sc across. Ch 1, turn. (86 sc each row)
Hem edging: Work 1 row of sc in both loops across. Fasten off. (86 sc)
Section 4B: Shorts – Left Leg Panel
Work exactly as the Right Leg Panel through Row 32.
Foundation chain: Ch 87. Work Rows 1 to 32 identically to the Right Leg Panel.
Crotch Shaping (Mirrored)
Row 33: Sc2tog, BLO sc to end. Ch 1, turn. (93 sc)
Row 34: BLO sc to last 2 sts, sc2tog. Ch 1, turn. (92 sc)
Row 35: Sc2tog, BLO sc to end. Ch 1, turn. (91 sc)
Row 36: BLO sc to last 2 sts, sc2tog. Ch 1, turn. (90 sc)
Row 37: Sc2tog, BLO sc to end. Ch 1, turn. (89 sc)
Row 38: BLO sc to last 2 sts, sc2tog. Ch 1, turn. (88 sc)
Row 39: Sc2tog, BLO sc to end. Ch 1, turn. (87 sc)
Row 40: BLO sc to last 2 sts, sc2tog. Ch 1, turn. (86 sc)
Rows 41 to 44: BLO sc across. Ch 1, turn. (86 sc each row)
Hem edging: Work 1 row of sc in both loops. Fasten off. (86 sc)
Checkpoint: Each leg panel should measure approximately 17.2 inches wide and 9 inches tall.
Joining the Leg Panels
Hold the two leg panels with RS together. Using your yarn needle and MC, whipstitch the crotch seam (the curved edges from Rows 33 to 40) together. Then whipstitch the inseam together. Press seams flat.
Section 5: Belt
Foundation chain: Ch 7.
Row 1: Sc in second ch from hook and in each ch across. Ch 1, turn. (6 sc)
Rows 2 to 140: Sc across each row. Ch 1, turn. (6 sc each row)
Row 141: Sc across. Fasten off. (6 sc)
The belt should measure approximately 28 inches in length. Adjust row count to fit your waist.
Belt Buckle
The buckle is a small square frame worked in joined rounds.
Round 1: With MC, ch 16, sl st to join to first ch to form a ring. Be careful not to twist. (16 ch)
Round 2: Ch 1, sc in each ch around. Sl st to join. (16 sc)
Round 3: Ch 1, sc in first 4 sts, ch 4, skip 4 sts (this creates the center bar opening), sc in next 4 sts, ch 4, skip 4 sts, sl st to join. (8 sc + 8 ch)
Round 4: Ch 1, sc in each sc and each ch around. Sl st to join. (24 sc)
Round 5: Ch 1, sc in each st around. Sl st to join. Fasten off leaving a long tail. (24 sc)
Thread the belt through the center bar of the buckle. Tack the buckle frame to the belt using the yarn tail, stitching along both sides.
For the belt loop, cut a 12-inch length of MC. Using the surface slip stitch technique, create a small horizontal bar of 4 stitches centered at the back waist seam.
Assembly and Finishing
Step 1: Block all individual pieces before assembly. Wet blocking is recommended for cotton yarns.
Step 2: Side seams. Place the bodice front and back with RS together. Whipstitch the side seams from waist to underarm on both sides. Leave the armhole open on the no-strap side.
Step 3: Shoulder seam. Align the right shoulder of the bodice front (the 19-stitch panel) with the corresponding shoulder of the bodice back. Seam together.
Step 4: Strap attachment. Position the strap along the left shoulder edge of the bodice front. Pin it, checking the diagonal drape. Sew the front end securely, then carry the strap across to the back and sew that end to the left shoulder edge of the bodice back.
Step 5: Attach shorts to bodice. Align the waist edge of the shorts with the lower edge of the bodice. Pin evenly around, easing any fullness. Whipstitch together.
Step 6: Thread the belt through the belt loop on the back. Position across the front waist and secure through the buckle.
Step 7: Weave in all ends on the WS. Trim to approximately 0.5 inches after weaving.
Step 8: Optional: Add a single crochet edging around the armhole and neckline to neaten the edges.
Size Customization Tips
To go up or down a size: Adjust the foundation chain in increments of 4 stitches for the bodice. Each 4 stitches adds approximately 0.8 inches of width.
For the shorts: Adjust the foundation chain by 6 stitches per size.
To lengthen the shorts: Add more BLO sc rows before beginning crotch shaping. Each row adds approximately 0.18 inches.
For Plus sizes (hip 42 to 44 inches): Begin the bodice with ch 106 and decrease every 3 rows instead of every 4 rows.
Blocking and Care Instructions
Blocking: Soak finished pieces in cool water for 15 minutes. Press out excess water in a towel. Do not wring. Pin flat to measurements and let dry completely.
Care: Machine wash cold on gentle. Lay flat to dry. Do not hang dry or tumble dry on high heat.
You Did It!
This sage green crochet romper is a project to be proud of. The combination of colorwork, texture, and shaping creates a garment that looks professionally made. Every time you wear it, you’ll know you created something truly special with your own hands.
Thank you so much for choosing this pattern. I hope it brings you joy both in the making and the wearing. If you’d like to share your finished romper, tag me on Instagram or post it in my Facebook group. I absolutely love seeing your makes.
If this pattern is calling your name, go ahead and save it to your Pinterest boards so you can find it when you’re ready to cast on. And please drop a comment below if you make this romper. I’d love to hear how it turns out for you!
You Might Also Like
- Blush Pink Shell Stitch Halter Dress Free Crochet Pattern
- Gray and Pink Heart Granny Square Blanket Free Crochet Pattern
- Cozy Gray Hexagon Sofa Throw Free Crochet Pattern
- Coral Sunset Ruffled Baby Romper Free Crochet Pattern