Blush Pink Tiered Ruffle One-Shoulder Dress Crochet Pattern
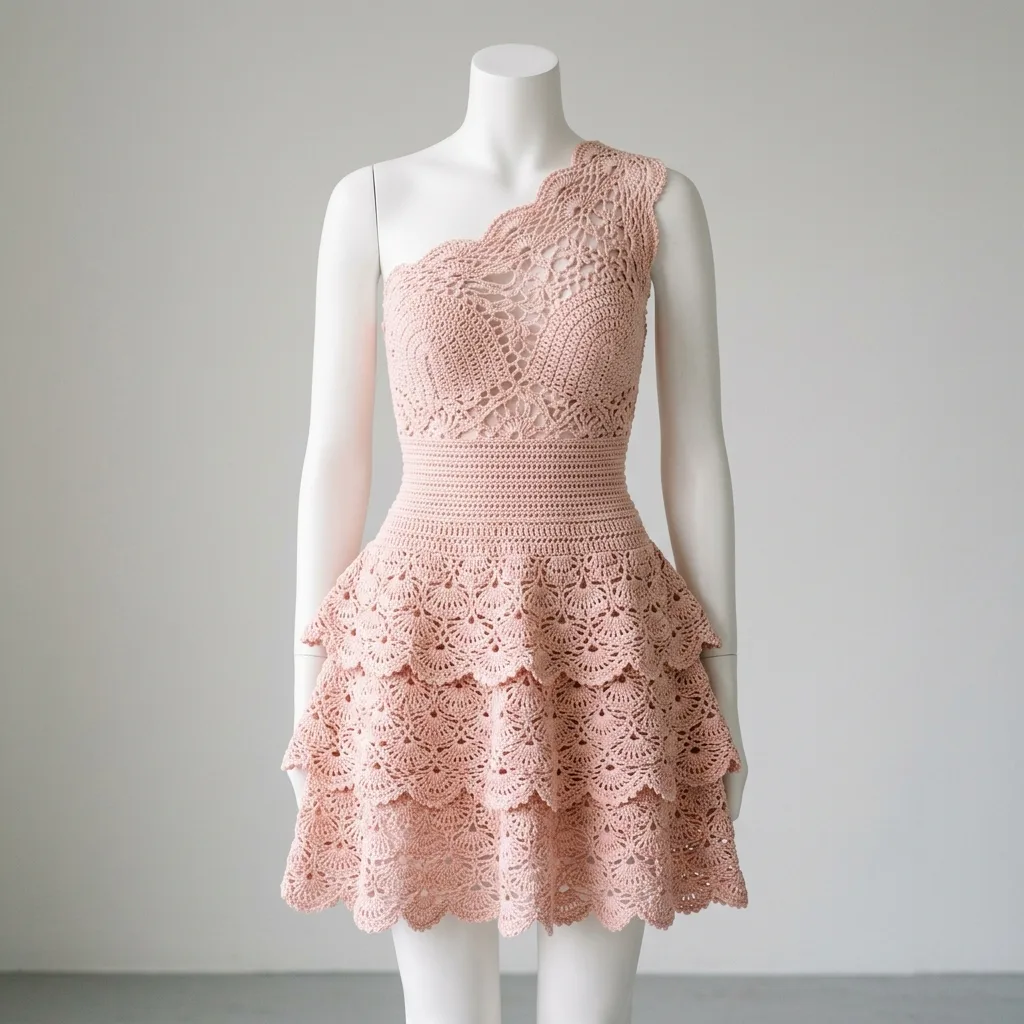
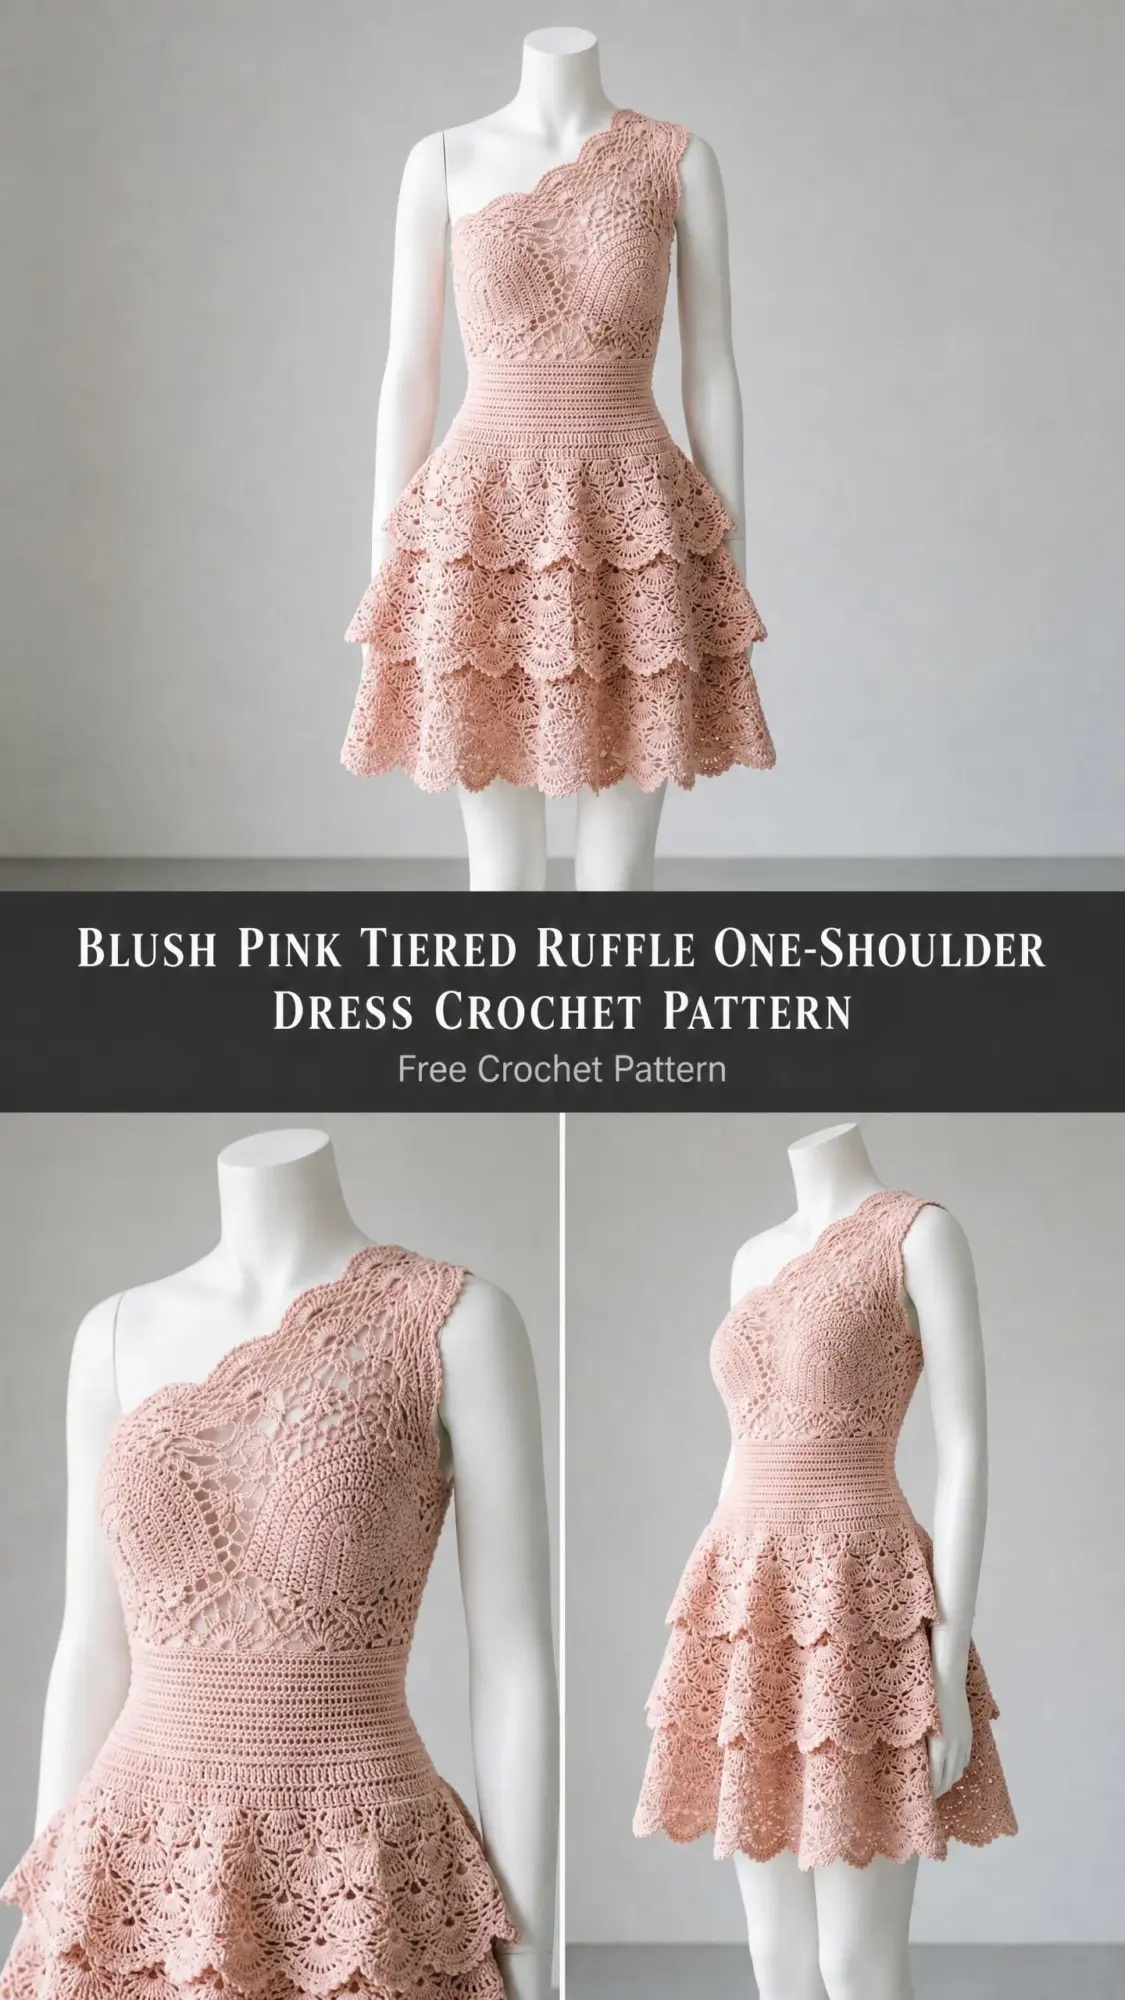
This is a one-shoulder fitted dress with a lace bodice, ribbed waistband, and three tiered ruffled skirt. It uses fingering weight yarn, a B-1 hook for the bodice and C-2 hook for the skirt, and combines fan lace stitches with back loop only single crochet ribbing.
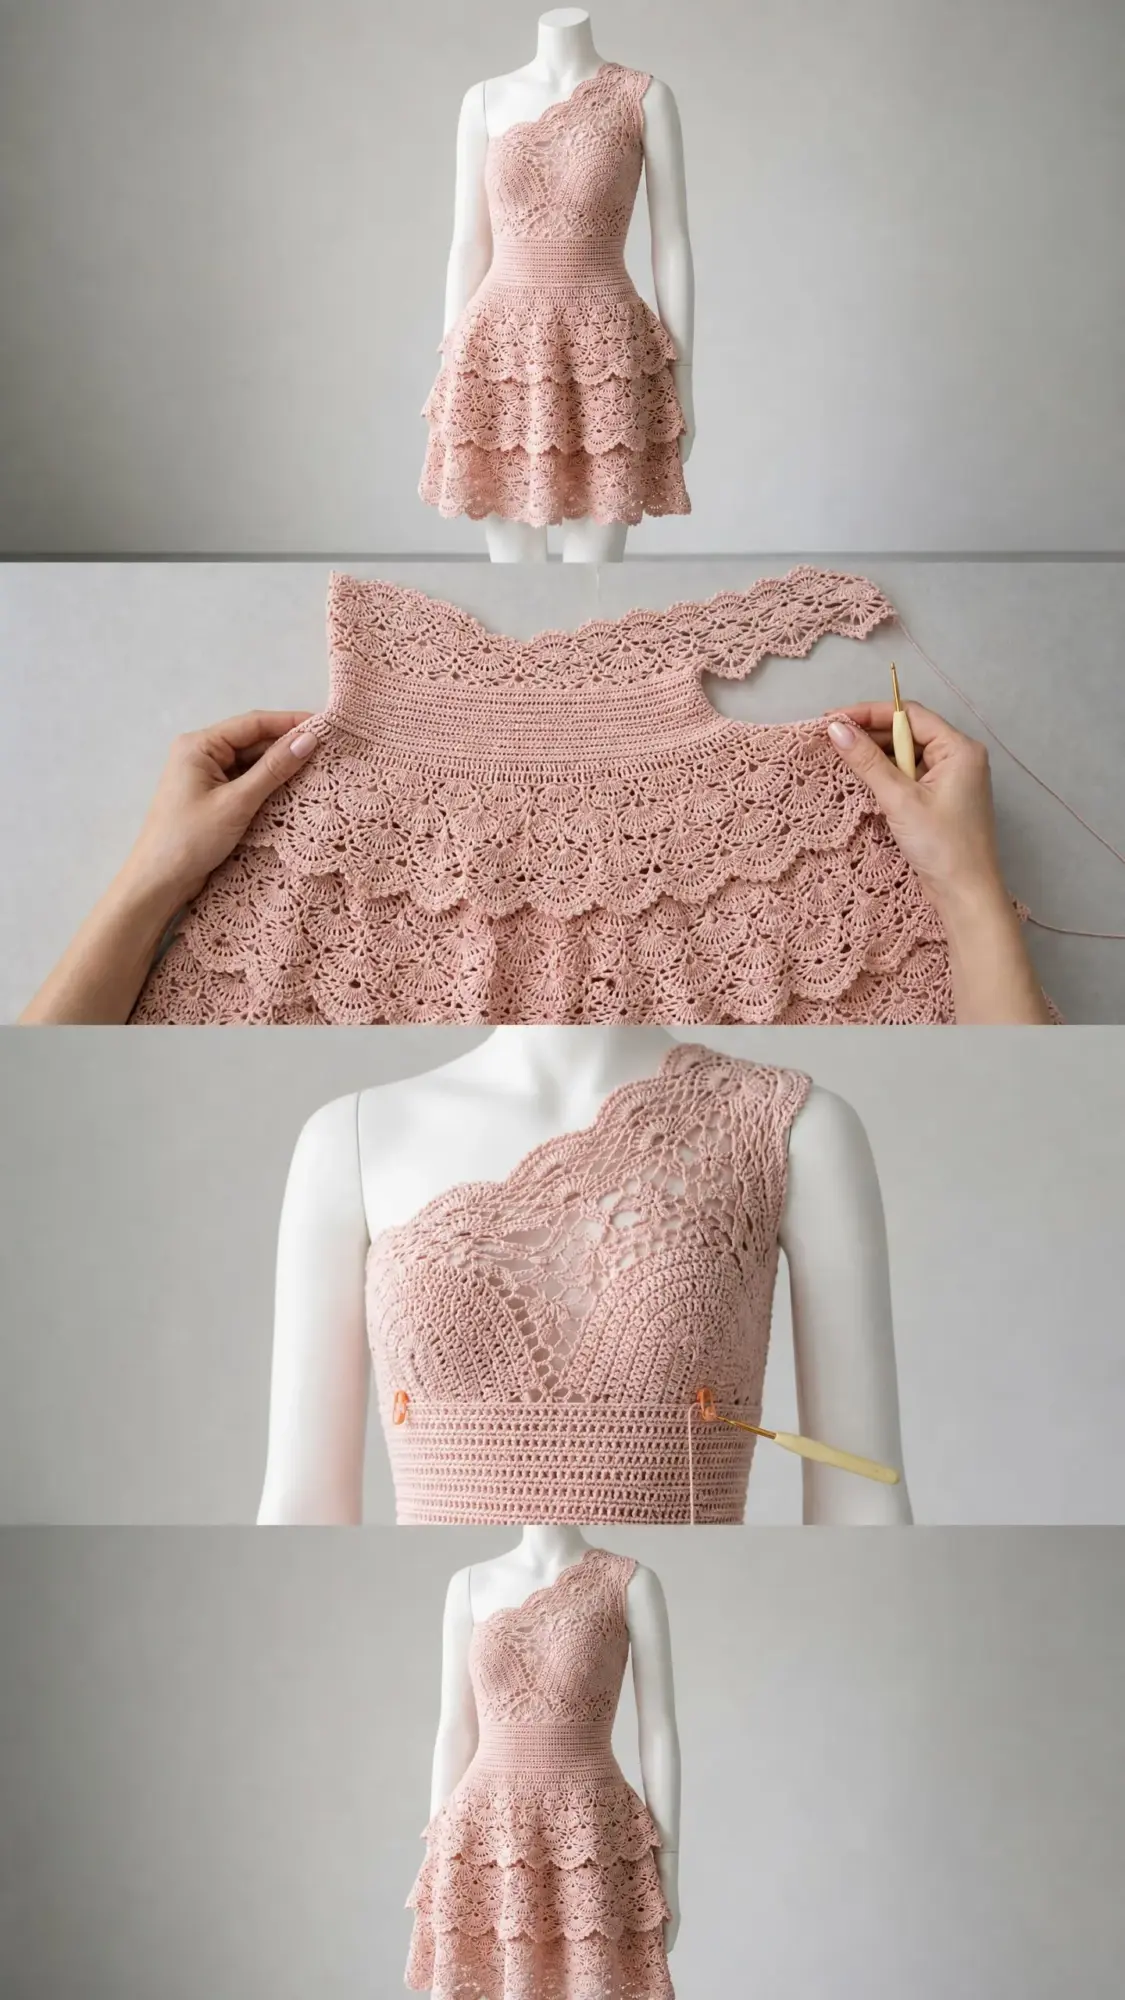
The construction is straightforward once you understand the sections. You work the bodice flat in two panels, join them, add a waistband in the round, then build each skirt tier from the top down.
If you have experience with lace patterns and garment shaping, you can absolutely make this dress. Let me walk you through every single step.
About This Crochet Dress Pattern
This dress pattern creates a stunning fitted garment with romantic details throughout. The one-shoulder neckline is shaped with diagonal decreases on the front panel while the back remains full width. The waistband cinches in with ribbed single crochet worked through the back loop only. Each of the three skirt tiers gets progressively wider, creating that beautiful A-line silhouette you see in the photos.
The entire dress is worked in a single blush pink color. The fan lace stitch creates an open, airy texture perfect for special occasions. The scalloped edges on every tier and along the neckline give the finished piece a cohesive, polished look.
Skill level: Advanced Intermediate. You should be comfortable with lace stitch patterns, working in the round, diagonal shaping, and managing stitch count increases. If you have made lace garments before, you are ready for this project.
Time estimate: Approximately 40 to 60 hours depending on your working speed.
Finished Measurements
This pattern is written for size Small/Medium:
Materials Needed for This Crochet Pattern
Yarn: Fingering weight yarn (CYCA 1), approximately 1,800 to 2,200 yards / 1,645 to 2,012 meters total in blush pink
Great yarn options include Paintbox Yarns Simply DK worked at fingering gauge, Scheepjes Catona 4-ply (100% mercerized cotton with excellent stitch definition), or Drops Safran. Choose a smooth, plied yarn with minimal halo so the lace openwork stays visible.
Hooks:
Notions:
Gauge
Using B-1 hook and Lace Fan Stitch:
Gauge swatch instructions: Chain 42. Work Lace Fan Stitch for 12 rows. Block the swatch. Measure the center 6 repeats and the center 10 rows. Adjust hook size up if your swatch is too tight or down if too loose.
Gauge is mandatory for this garment. Even a small variance will significantly alter your finished bust and hip measurements. Please do not skip this step.
Abbreviations
Special Stitches for This Dress Pattern
Fan (5-dc fan): Work 5 double crochet stitches all into the same stitch or space. This creates the shell shape that forms the lace pattern throughout.
V-stitch: Work (dc, ch 2, dc) all in the same stitch or space.
Picot: Chain 3, slip stitch into the first chain of the ch-3.
Ribbed Waistband Stitch: Single crochet worked in the back loop only (BLO) throughout. This creates vertical ridges that naturally compress.
Scallop Edge: [Sl st, ch 1, 5 dc, ch 1, sl st] all in same stitch, skip 2 stitches. This creates the decorative scalloped hem that finishes each tier.
Lace Fan Pattern (Foundation)
The fan lace pattern is worked over a multiple of 10 plus 3 stitches.
Row 1 (RS): Ch 1, sc in first st, [sk 4 sts, 5-dc fan in next st, sk 4 sts, sc in next st] across, turn.
Row 2 (WS): Ch 4 (counts as dc plus ch 1), 2 dc in first sc (partial fan top), [sc in center dc of fan, 5-dc fan in sc between fans] across to last sc, sc in center dc of last fan, 2 dc in last sc, ch 1, dc in last sc, turn.
Row 3 (RS): Ch 1, sc in first dc, [5-dc fan in next sc, sc in center dc of fan] across, ending sc in 3rd ch of t-ch, turn.
Repeat Rows 2 and 3 for pattern.
Step-by-Step Crochet Pattern Instructions
Section 1: Back Bodice Panel
The back panel spans the full width of the bust, from underarm to underarm.
Finished dimensions: 17 in / 43 cm wide, 12 in / 30.5 cm tall
Using B-1 hook, chain 173.
Foundation Row (WS): Sc in 2nd ch from hook, sc in each ch across, turn. (172 sc)
Row 1 (RS): Ch 1, sc in first st, [sk 4 sts, 5-dc fan in next st, sk 4 sts, sc in next st] across. (17 fans total, 172 working sts)
The 172-stitch count accommodates 17 fan repeats of 10 stitches each (170 stitches), plus 1 sc at each edge (2 stitches) for 172 total.
Row 2 (WS): Ch 4 (counts as dc plus ch 1), 2 dc in first sc, [sc in center dc of fan, 5-dc fan in sc between fans] 16 times, sc in center dc of last fan, 2 dc in last sc, ch 1, dc in last sc, turn. (17 fans)
Row 3 (RS): Ch 1, sc in first dc, [5-dc fan in next sc, sc in center dc of fan] across, sc in 3rd ch of t-ch, turn. (17 fans)
Repeat Rows 2 and 3 until back panel measures 12 in / 30.5 cm from foundation row, ending with a Row 3. This will be approximately 28 rows of fan pattern after the foundation row.
Do not fasten off. Place live stitches on holder or scrap yarn. (172 sts)
Checkpoint: Your back panel should measure 17 in / 43 cm wide and 12 in / 30.5 cm tall.
Section 2: Front Bodice Panel
The front panel begins the same width as the back but is shaped along the top-left edge to create the diagonal one-shoulder neckline.
Using B-1 hook, chain 173. Work Foundation Row same as Back Panel. (172 sc)
Rows 1 through 6: Work same as Back Panel with no shaping. (17 fans per row)
Begin diagonal shaping on Row 7:
You will eliminate one fan repeat every 2 rows from the left edge. This removes 10 stitches every 2 rows.
Row 7 (RS, decrease row): Ch 1, sc in first st, [sk 4 sts, 5-dc fan in next st, sk 4 sts, sc in next st] 16 times, turn leaving last fan repeat unworked. (16 fans, 162 sts)
Row 8 (WS): Work Row 2 pattern across 16 fans, turn. (16 fans)
Row 9 (RS, decrease row): Work Row 3 pattern across 15 fans, turn leaving last fan unworked. (15 fans, 152 sts)
Row 10 (WS): Work Row 2 pattern across 15 fans. (15 fans)
Continue this decrease pattern:
Row 28 corresponds to the full 12 in / 30.5 cm height on the right side. The left side now has zero height at the neckline edge, creating the diagonal opening. The remaining 6 fan repeats form the shoulder strap.
Fasten off. Place live stitches on holder. (62 sts)
Section 3: Side Seams and Joining
Block both bodice panels lightly before joining.
With RS facing each other, align back and front panels at the right side seam. Seam the right side using mattress stitch or slip stitch join for the full 12 in / 30.5 cm.
Leave the left side open for the armhole.
Right shoulder seam: Align the top 32 stitches (3 fan repeats plus edges) of the right back panel edge with the top 32 stitches of the right front shoulder strap. Seam together.
Section 4: One-Shoulder Neckline and Armhole Edging
Using B-1 hook, join yarn at the top-right corner of the left armhole opening.
Work one round of sc evenly around the entire left armhole and neckline opening: approximately 28 sc along back armhole edge, approximately 14 sc along diagonal front neckline.
Total approximately 48 sc. Adjust to nearest even number. Join with sl st to first sc. (48 sc)
Next Round (Scallop Edge): [Sl st in next st, ch 1, 5 dc in same st, ch 1, sl st in same st, sk 2 sts] around. Fasten off.
Section 5: Waistband
The waistband is worked in the round in BLO sc ribbing.
Using C-2 hook with RS facing, join yarn at the right side seam at the bottom of the bodice.
Pickup Round: Work sc evenly around the entire bottom edge of the bodice, picking up approximately 1 sc per fan anchor point. Join with sl st to first sc. Do not turn. (182 sc)
Waistband Rounds 1 through 14: Ch 1, sc in BLO of each st around, sl st to first sc to join. Do not turn. Work in the round. (182 sc per round)
Work 14 rounds total for a waistband depth of 2.5 in / 6.5 cm.
Checkpoint: The waistband should measure approximately 2.5 in / 6.5 cm deep and pull in to approximately 28 in / 71 cm circumference.
Section 6: Tier 1
Tier 1 is worked in the round, attached to the bottom of the waistband.
Setup Increase Round: At the bottom of the waistband, work into the BLO of the last waistband round. Work [2 sc in next st, sc in next 2 sts] 60 times, then sc in remaining 2 sts. (242 sc)
Work sc2tog once to arrive at 240 sts. (240 sc, 24 fan repeats)
Tier 1 Round 1 (fan setup): Ch 1, sc in first st, [sk 4 sts, 5-dc fan in next st, sk 4 sts, sc in next st] 24 times around. Join with sl st to first sc. (24 fans, 240 working sts)
Tier 1 Rounds 2 through 7: Work fan lace pattern in the round, alternating in-round versions of Rows 2 and 3 for 6 rounds (3 complete pattern repeats) plus the setup round for 7 rounds total.
In-round Row 2: Ch 3 (counts as dc), 2 dc in joining sc, [sc in center dc of fan, 5-dc fan in sc between fans] 23 times, sc in center dc of last fan, 2 dc in joining sc, join with sl st to top of ch-3. (24 fans)
In-round Row 3: Ch 1, sc in joining sl st, [5-dc fan in next sc, sc in center dc of fan] 24 times. Join to first sc. (24 fans)
Tier 1 Scallop Edge Round: [Sl st in next sc anchor, ch 1, 5 dc in same st, ch 1, sl st in same st, sk 2 sts] around. Fasten off. (24 scallops)
Tier 1 should measure approximately 4 in / 10 cm deep.
Section 7: Tier 2
Using C-2 hook, join yarn at the beginning of the Tier 1 setup increase round on the WS.
Tier 2 Pickup Round: Working into the tops of the Tier 1 attachment row stitches, work [2 sc in next st, sc in next st] 80 times around. (320 sc, 32 fan repeats)
Tier 2 Round 1 (fan setup): Ch 1, sc in first st, [sk 4 sts, 5-dc fan in next st, sk 4 sts, sc in next st] 32 times around. Join with sl st. (32 fans, 320 sts)
Tier 2 Rounds 2 through 9: Work fan lace pattern in the round for 8 rounds (4 complete pattern repeats) plus the setup round for 9 rounds total.
Tier 2 Scallop Edge Round: Work 32 scallops same as Tier 1. Fasten off. (32 scallops)
Tier 2 should measure approximately 5 in / 12.5 cm deep.
Section 8: Tier 3
Using C-2 hook, join yarn at the beginning of the Tier 2 attachment row.
Tier 3 Pickup Round: Working into the 320-st Tier 2 attachment row, work [2 sc in next st, sc in next 2 sts] around. Adjust with sc2tog to arrive at 420 sts. (420 sc, 42 fan repeats)
Tier 3 Round 1 (fan setup): Ch 1, sc in first st, [sk 4 sts, 5-dc fan in next st, sk 4 sts, sc in next st] 42 times around. Join with sl st. (42 fans, 420 sts)
Tier 3 Rounds 2 through 11: Work fan lace pattern in the round for 10 rounds (5 complete pattern repeats) plus the setup round for 11 rounds total.
Tier 3 Scallop Edge Round: Work 42 scallops. Fasten off. (42 scallops)
Tier 3 should measure approximately 6.5 in / 16.5 cm deep and flare to approximately 54 in / 137 cm at the hem.
Section 9: Shoulder Strap Edging
Using B-1 hook, join yarn at the base of the right shoulder seam.
Work 1 round of sc evenly around the shoulder strap top edge. (approximately 32 sc)
Work 1 round of Scallop Edge same as neckline. Fasten off.
Finishing Your Dress
Weave in all ends using a tapestry needle. Secure fan stitch ends thoroughly since the open lace structure can loosen over time.
Check that all tier pickup rows lie flat without puckering.
Optional: Thread blush satin ribbon through the BLO waistband ribbing, weaving in and out every 4 rounds, and tie in a small bow at the back.
Optional: Sew a small hidden snap or hook-and-eye closure at the left underarm to prevent gaping.
Blocking Instructions
Wet blocking is strongly recommended and not optional for this garment.
1. Hand wash the finished dress in cool water with gentle wool wash or mild soap
2. Press out excess water gently without wringing
3. Lay flat on blocking mats
4. Pin the bodice to measurements (17 in wide, 12 in tall)
5. Pin each tier flat, stretching scallop edges to full width to open the fan lace
6. Allow to dry completely before removing pins (24 to 36 hours for cotton yarns)
The lace fans require blocking to open fully and the tiers need blocking to drape correctly.
Size Customization Tips
To size up: Add fan repeats in sets of 10 stitches to the foundation chain. Each additional 10-stitch repeat adds approximately 1 in / 2.5 cm to width.
To size down: Remove fan repeats in sets of 10. Removing 2 fan repeats from each panel reduces the bust by approximately 2 in / 5 cm.
For a longer bodice: Work additional fan pattern rows before beginning diagonal shaping on the front panel.
For deeper tiers: Add 2-row fan repeats to any tier. Each additional 2-row repeat adds approximately 1 in / 2.5 cm.
Care Instructions
Hand wash in cool water only. Do not machine wash or tumble dry. Lay flat to dry away from direct sunlight. Do not wring or twist. Store folded, not hung, to prevent stretching.
Final Thoughts on This Tiered Dress Crochet Pattern
This blush pink one-shoulder dress is a true statement piece. The combination of delicate lace bodice work, structured waistband, and those gorgeous tiered ruffles creates something really special. Yes, it takes time. Yes, it requires attention to detail. But when you slip on that finished dress, you will feel every hour was worth it.
Take your time with each section. Check your gauge obsessively. Block thoroughly. And most importantly, enjoy the process of creating something this beautiful with your own hands.
Thank you so much for choosing this pattern for your next project. I would absolutely love to see your finished dress, so please tag me on Instagram or share in my Facebook group when you complete yours.
If this crochet dress pattern caught your eye, go ahead and save it to your Pinterest boards so you can find it when you are ready to start. And if you make this dress, I would love to hear about your experience in the comments below. Happy crocheting!
You Might Also Like
- Midnight Silver Lace Bucket Bag Free Crochet Pattern
- Dusty Rose Garden Bobble Sweater Free Crochet Pattern
- Dusty Rose Cable Cuff Slipper Boots Free Crochet Pattern
- Lavender Daisy Granny Square Bag Free Crochet Pattern