Sage Green Daisy Crochet Dress Free Crochet Pattern
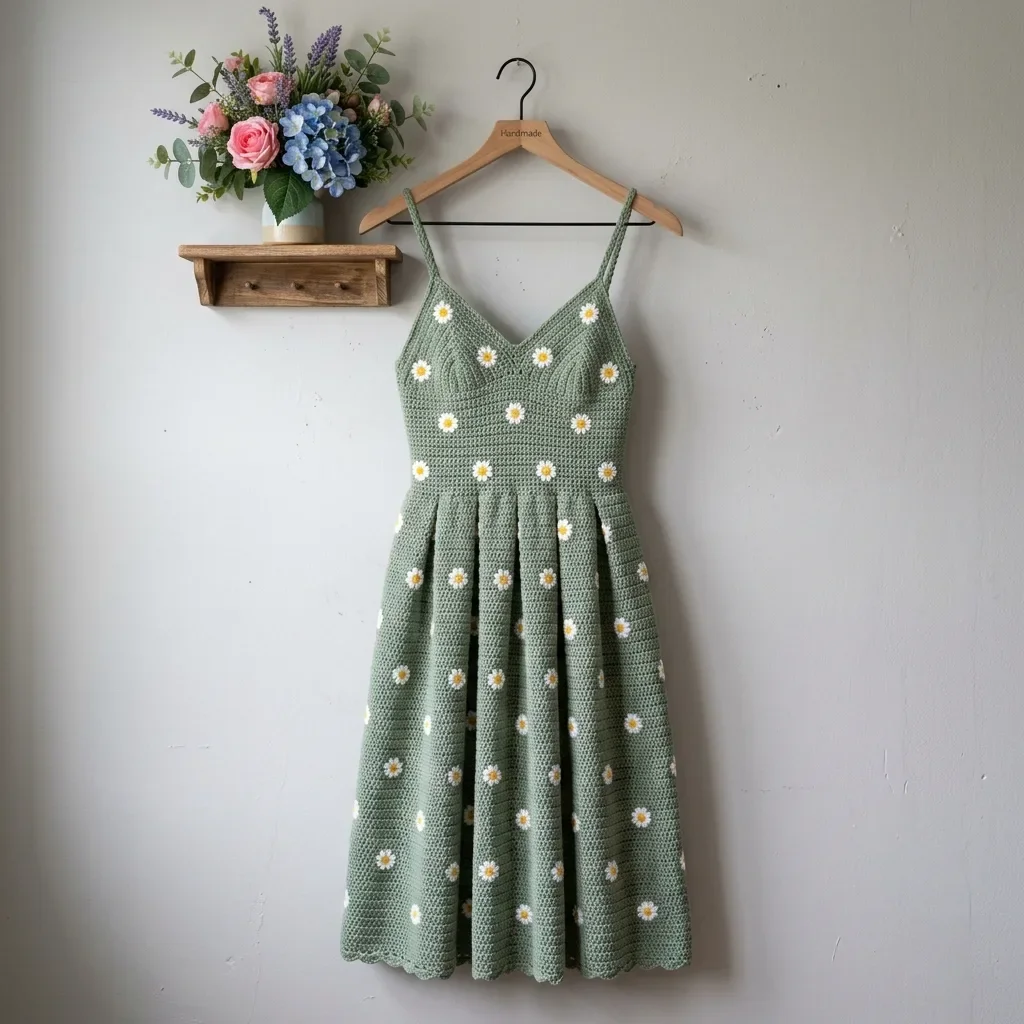
A full crochet dress sounds intimidating, right? I get it. The idea of crocheting an entire garment with shaping, a fitted bodice, and a flowing skirt feels like something reserved for expert crafters with decades of experience. But here is the truth: if you can work single crochet, follow a stitch count, and seam pieces together, you can absolutely make this dress.
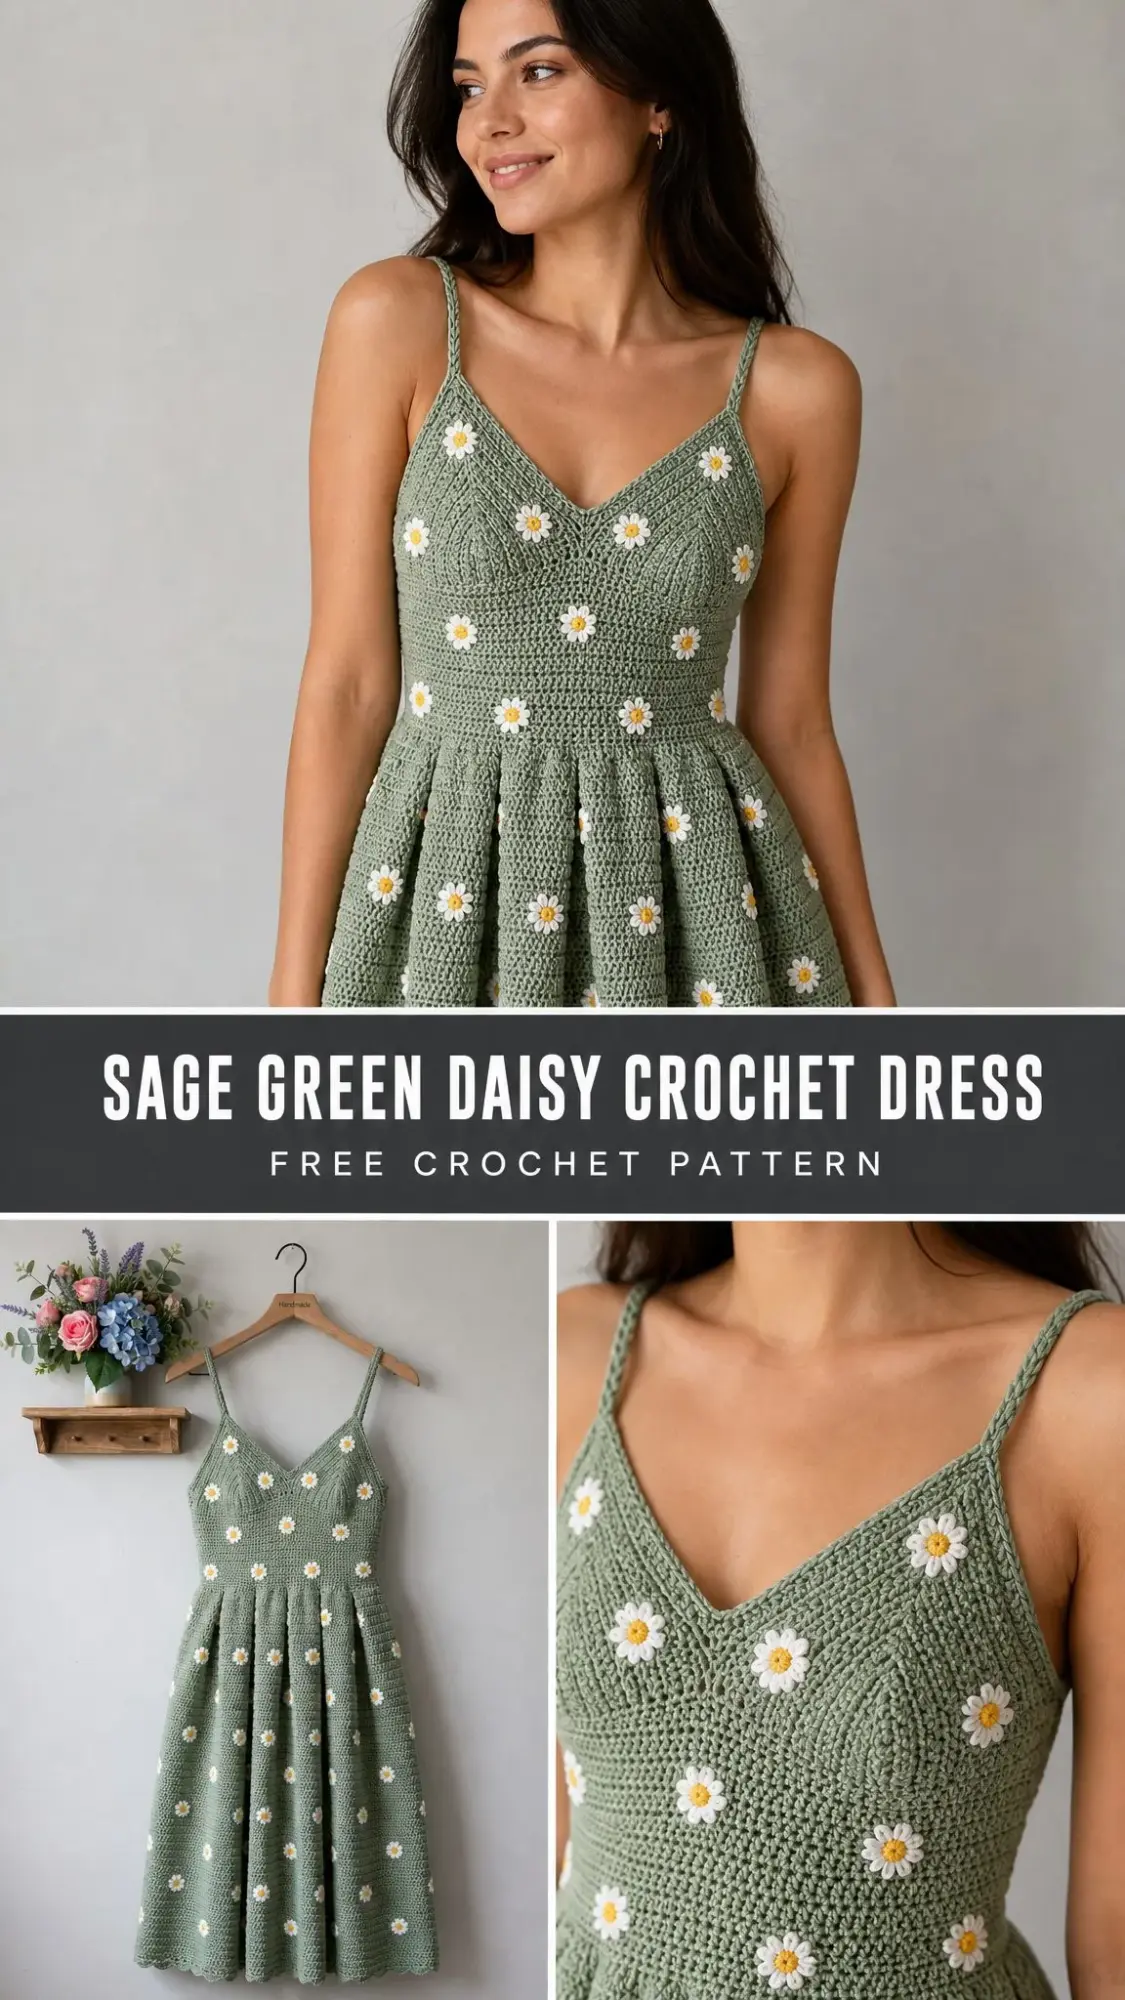
This sage green daisy crochet dress breaks down into manageable sections. You are not crocheting one massive piece. You are making a bodice front, a bodice back, two skirt panels, some straps, and a bunch of adorable daisy appliques. Each piece is worked flat, which means no tricky in-the-round shaping for the main body. Think of it as building blocks rather than one overwhelming project.
Whether you have made fitted garments before or this is your first wearable project beyond a scarf, I have written every detail you need. The pattern walks you through bust dart shaping, V-neck decreases, A-line skirt increases, and pleating at the waist. By the end, you will have a stunning handmade midi dress covered in sweet little daisies, and you will wonder why you ever thought it was beyond your skill level.
Why This Crochet Dress Pattern Works
This dress caught my attention because of how thoughtfully it is constructed. The bodice uses a simple single crochet (sc) fabric that creates structure without stiffness. The skirt uses back loop only (BLO) stitches, which creates those beautiful horizontal ridges you can see in the finished piece while adding natural drape. The daisy appliques are small, quick projects on their own, perfect for using up white and yellow scraps.
The sage green color is absolutely perfect for spring and summer. It reads fresh and feminine without being overly sweet. The scattered daisies add a vintage cottage feel that works whether you are dressing up for a garden party or keeping things casual.
Construction order at a glance:
1. Bodice front (worked flat, bottom to top)
2. Bodice back (worked flat, bottom to top)
3. Waist band strip
4. Skirt front and back panels (worked flat)
5. Assembly and pleating at waist
6. Spaghetti straps
7. Daisy appliques (worked in rounds)
8. Scallop hem edging
9. Finishing and blocking
Skill Level
This pattern is rated intermediate to advanced. You should feel comfortable with working flat in single crochet, reading stitch counts row by row, shaping a fitted bodice with decreases, seaming garment pieces together, creating and attaching appliques, and adding decorative edging. If you have completed at least one fitted garment top or dress before, you will succeed with this pattern.
Time Estimate
Plan for approximately 80 to 120 hours total, depending on your working speed. The bodice takes roughly 15 to 20 hours, the skirt 30 to 40 hours, assembly and pleating 8 to 10 hours, and the daisy appliques (you will make around 45 to 55 of them) another 20 to 30 hours. This is a labor of love, but every hour is worth it when you slip that finished dress over your head.
Finished Measurements
The pattern is written for a women’s size Small/Medium. Here are your finished measurements:
Size Customization Tips
To go up one full size (Medium/Large, approximately 36 to 38 in bust): Add 8 stitches to the starting foundation chain of both the bodice front and bodice back (4 stitches per side). Add 12 stitches to the skirt starting chain. Adjust waist band length accordingly.
To go down one full size (XS, approximately 30 to 32 in bust): Remove 8 stitches from the starting foundation chain of both bodice pieces. Remove 12 stitches from the skirt starting chain.
For a longer skirt: Add rows to the skirt section. Each 2 rows adds approximately 0.5 in / 1.3 cm in length at gauge.
For a shorter dress: Work the skirt section to your desired length, ending with the scallop edging.
All stitch count adjustments must maintain divisibility by the stitch repeat unit (multiples of 2 for the mesh body, multiples of 6 for the scallop edging).
Materials Needed
Yarn
Main Color (MC): Sage green, approximately 1,800 to 2,200 yards / 1,645 to 2,012 meters of DK weight (light worsted / #3) 100% cotton or cotton-blend yarn.
Color A (CA): White, approximately 200 yards / 183 meters of the same weight for daisy petals.
Color B (CB): Yellow, approximately 50 yards / 46 meters of the same weight or slightly lighter for daisy centers.
Recommended Yarn Options
Option 1: Lion Brand 24/7 Cotton in Sage and White/Yellow. 100% mercerized cotton, 186 yards per 3.5 oz / 100 g skein. Excellent stitch definition, machine washable, widely available. You will need approximately 10 to 12 skeins of MC, 2 skeins of CA, and 1 skein of CB.
Option 2: Paintbox Yarns Cotton DK in Spearmint Green and Paper White/Daffodil Yellow. 100% cotton, 137 yards per 1.75 oz / 50 g ball. Great color accuracy for sage, affordable, accessible internationally. You will need approximately 14 to 16 balls of MC, 2 to 3 balls of CA, and 1 ball of CB.
Option 3: Drops Safran in Sage and White/Yellow. 100% Egyptian cotton, 175 yards per 1.75 oz / 50 g ball. Slightly lighter hand for warm-weather wearability. You will need approximately 12 to 14 balls of MC, 2 balls of CA, and 1 ball of CB.
Substitution note: Any smooth DK weight cotton or cotton-blend yarn with matching gauge will work. Avoid highly textured, fuzzy, or hairy yarns as they will obscure the daisy appliques and stitch definition.
Hooks
Notions
Gauge
Bodice gauge (E-4 / 3.5 mm hook, single crochet):
20 stitches x 24 rows = 4 in / 10 cm in single crochet, blocked.
Skirt gauge (F-5 / 3.75 mm hook, single crochet mesh):
18 stitches x 20 rows = 4 in / 10 cm in single crochet worked in back loops only (BLO), blocked.
Daisy applique gauge: Each finished daisy measures approximately 1.25 in / 3.2 cm in diameter.
Gauge is critical for this garment. A difference of even one stitch per 4 inches will alter the bust measurement by over an inch across the full width. Swatch, block, and re-swatch if needed before beginning.
Abbreviations
Special Stitches and Techniques
V-Neck Decrease
At the beginning of a right-side row at the neckline edge: ch 1, sc2tog over the first 2 sts, sc to end. (1 stitch decreased at neckline edge.)
At the end of a right-side row at the neckline edge: sc to last 2 sts, sc2tog over last 2 sts. (1 stitch decreased at neckline edge.)
This decrease is worked on every right-side (RS) row of V-neck shaping.
Single Crochet Mesh
In this pattern, the mesh is a tight single crochet fabric worked in BLO to create texture and a slight openwork appearance without becoming too sheer. The mesh appearance comes from the BLO ridges. Instructions will specify BLO rows.
Scallop Edging
Worked in the round on the right side.
Step 1: Join MC with sl st at any point along the hem edge.
Step 2: (Sk 2 sts, 5 dc in next st, sk 2 sts, sl st in next st) repeat around.
Each scallop uses 6 sts (2 skipped + 1 center + 2 skipped + 1 sl st base). At the end of the round, sl st to first sl st. Fasten off.
The total hem stitch count must be divisible by 6 for this edging to work out evenly.
Daisy Applique
Center: With CB (yellow), make a magic ring.
Round 1: Ch 1, 6 sc into ring, sl st to first sc to join. (6 sc) Fasten off CB, leaving a 6 in tail.
Petals: Join CA (white) with sl st to any sc of Round 1.
Round 2: (Ch 4, sl st into 2nd ch from hook, sc in next ch, hdc in last ch, sl st into same st of Round 1, sl st into next st of Round 1) 6 times. (6 petals)
Fasten off CA, leaving a 12 in tail for sewing.
Finished daisy: approximately 1.25 in / 3.2 cm in diameter.
Make 50 daisies total (45 to 55 is acceptable depending on placement density preference).
Waist Band Row
Ch 1, hdc in each st across, turn. This creates a denser horizontal ridge that defines the waist seam visually.
Pattern Notes Before You Begin
1. The bodice front and bodice back are each worked flat (not in the round) from the lower edge of the bust upward to the shoulder straps. They are then seamed at the sides.
2. The skirt front and skirt back are each worked flat from the waist edge downward to the hem. The skirt is pleated at the waist before seaming to the bodice.
3. All turning chains count as 0 stitches throughout (the ch 1 turning chain does not count as a stitch). Always insert your hook into the first stitch of the row.
4. The right side of the fabric is the side facing you on Row 1.
5. Place stitch markers at each side seam point of the bodice, at the V-neck split point, and at the beginning of each shaping section.
6. When working BLO rows in the skirt, insert your hook under the back loop only of each stitch.
7. Do not cut yarn between sections unless instructed.
8. Blocking is essential for this garment. The cotton fabric will relax significantly with wet blocking. Block all pieces before assembling.
9. The dress does not have a zipper. It is designed to stretch slightly on a body due to the natural give of the cotton crochet mesh.
10. The straps are crocheted separately and seamed to the bodice after all other assembly is complete. Strap length is easily adjusted.
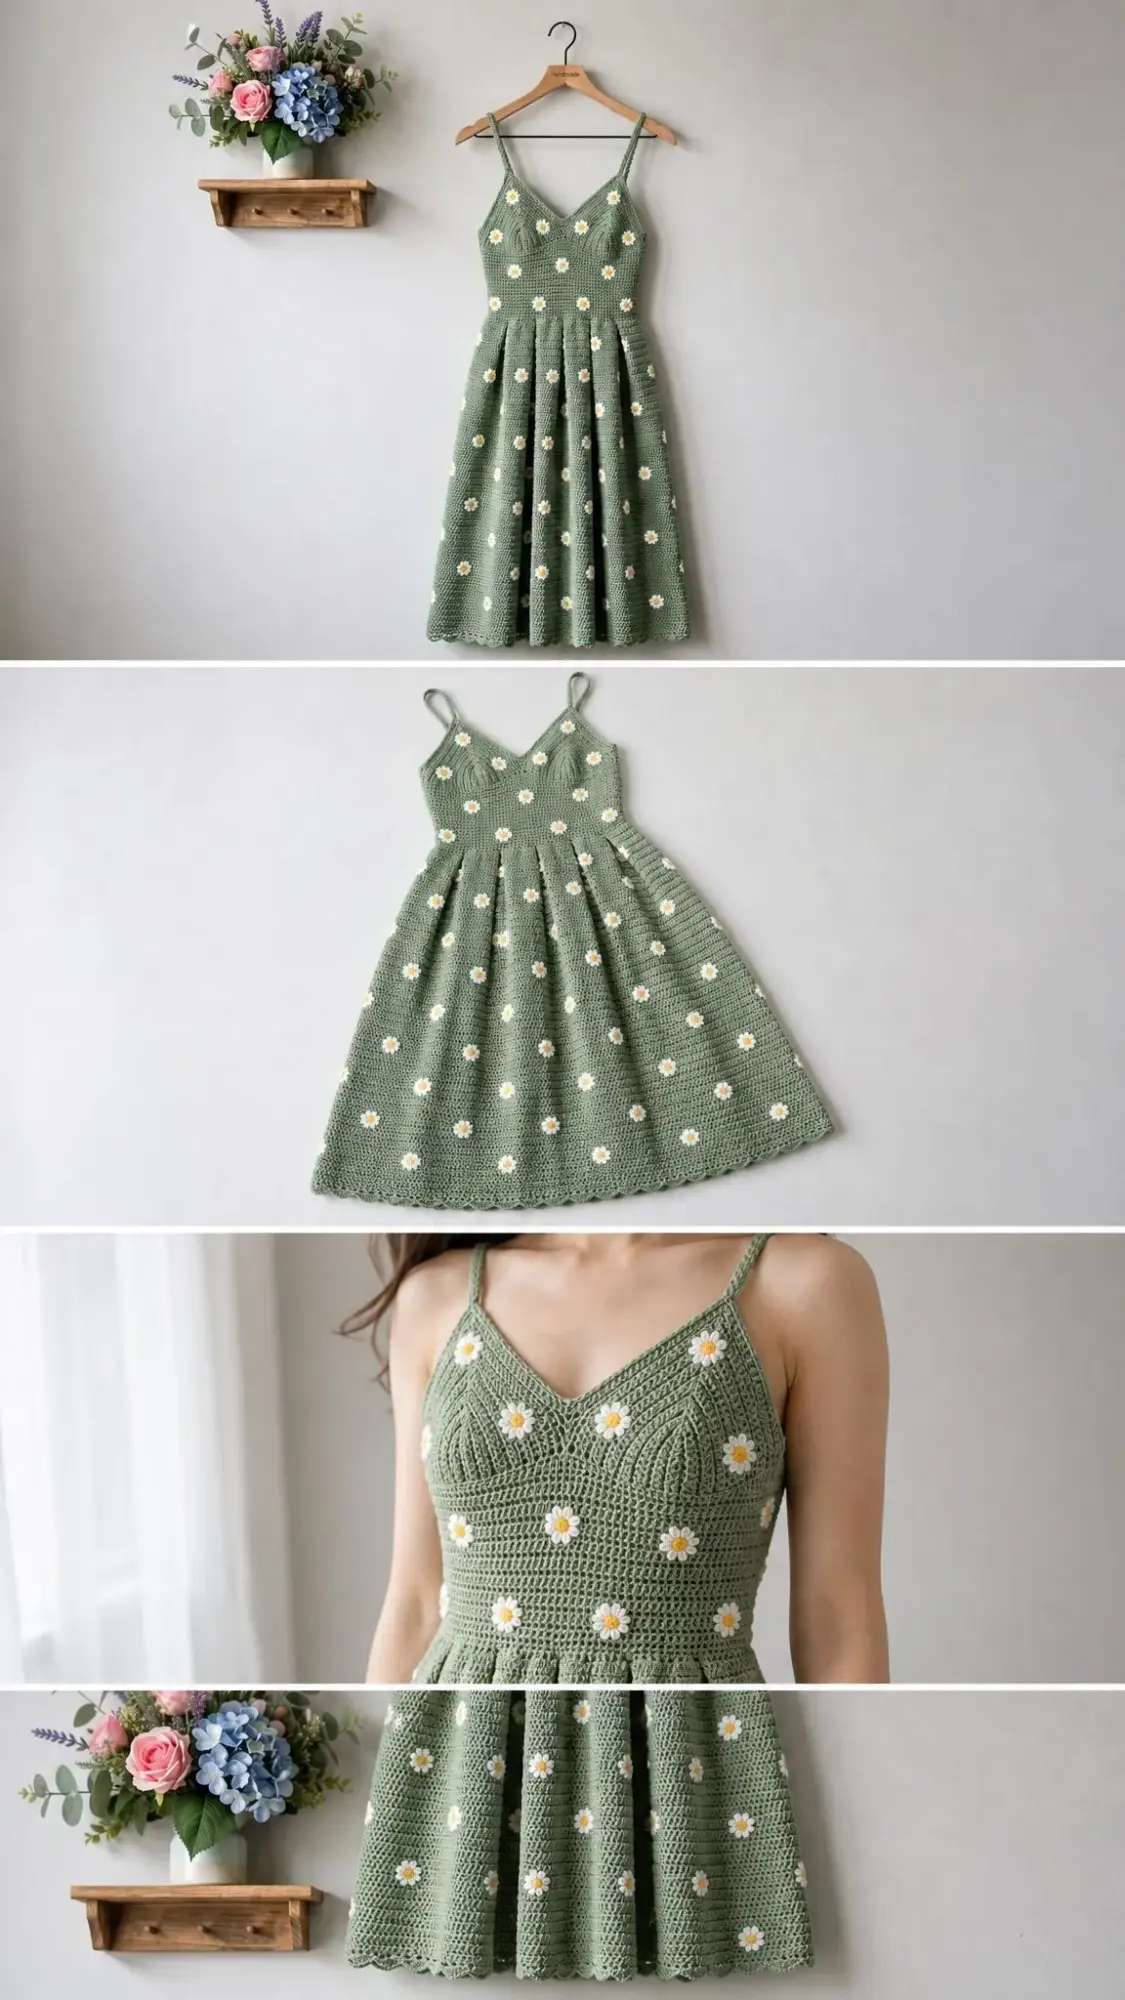
Crochet Dress Pattern Instructions
Bodice Front
The bodice front is worked flat in single crochet from the underarm edge upward through the bust and V-neck shaping.
Foundation: With MC and E-4 / 3.5 mm hook, ch 87.
Row 1 (RS): Sc in 2nd ch from hook and in each ch across, turn. (86 sc)
Rows 2 to 10: Ch 1, sc in each st across, turn. (86 sc each row)
Checkpoint: After Row 10, your bodice front should measure approximately 1.75 in / 4.4 cm tall from the foundation chain.
Row 11 (Waist Band Row): Ch 1, hdc in each st across, turn. (86 hdc)
Rows 12 to 14: Ch 1, sc in each st across, turn. (86 sc each row)
Bust Dart Shaping (Rows 15 to 20)
Row 15 (RS): Ch 1, sc in first 20 sts, sc2tog, sc in next 42 sts, sc2tog, sc in last 20 sts, turn. (84 sc)
Row 16 (WS): Ch 1, sc in each st across, turn. (84 sc)
Row 17 (RS): Ch 1, sc in first 19 sts, sc2tog, sc in next 42 sts, sc2tog, sc in last 19 sts, turn. (82 sc)
Row 18 (WS): Ch 1, sc in each st across, turn. (82 sc)
Row 19 (RS): Ch 1, sc in first 18 sts, sc2tog, sc in next 42 sts, sc2tog, sc in last 18 sts, turn. (80 sc)
Row 20 (WS): Ch 1, sc in each st across, turn. (80 sc)
Checkpoint: After Row 20, your bodice front should measure approximately 3.5 in / 9 cm tall.
V-Neck Shaping (Row 21)
At Row 21, you will split the work at center to shape the left and right bodice front separately.
Row 21 (RS): Ch 1, sc in first 40 sts. Place the remaining 40 sts on a stitch holder or length of scrap yarn. Turn. (40 sc, right front bodice)
Right Front Bodice
The neckline edge is at left when RS faces you, which is the center of the garment.
Row 22 (WS): Ch 1, sc in each st across, turn. (40 sc)
Row 23 (RS, neckline decrease): Ch 1, sc in first 38 sts, sc2tog over last 2 sts, turn. (39 sc)
Row 24 (WS): Ch 1, sc in each st across, turn. (39 sc)
Row 25 (RS, neckline decrease): Ch 1, sc in first 37 sts, sc2tog over last 2 sts, turn. (38 sc)
Row 26 (WS): Ch 1, sc in each st across, turn. (38 sc)
Row 27 (RS, neckline decrease): Ch 1, sc in first 36 sts, sc2tog over last 2 sts, turn. (37 sc)
Row 28 (WS): Ch 1, sc in each st across, turn. (37 sc)
Row 29 (RS, neckline decrease): Ch 1, sc in first 35 sts, sc2tog over last 2 sts, turn. (36 sc)
Row 30 (WS): Ch 1, sc in each st across, turn. (36 sc)
Row 31 (RS, neckline decrease): Ch 1, sc in first 34 sts, sc2tog over last 2 sts, turn. (35 sc)
Row 32 (WS): Ch 1, sc in each st across, turn. (35 sc)
Row 33 (RS, neckline decrease): Ch 1, sc in first 33 sts, sc2tog over last 2 sts, turn. (34 sc)
Row 34 (WS): Ch 1, sc in each st across, turn. (34 sc)
Row 35 (RS, neckline decrease): Ch 1, sc in first 32 sts, sc2tog over last 2 sts, turn. (33 sc)
Row 36 (WS): Ch 1, sc in each st across, turn. (33 sc)
Row 37 (RS, neckline decrease): Ch 1, sc in first 31 sts, sc2tog over last 2 sts, turn. (32 sc)
Row 38 (WS): Ch 1, sc in each st across, turn. (32 sc)
Row 39 (RS, neckline decrease): Ch 1, sc in first 30 sts, sc2tog over last 2 sts, turn. (31 sc)
Row 40 (WS): Ch 1, sc in each st across, turn. (31 sc)
Row 41 (RS): Ch 1, sc in each st across, turn. (31 sc, no decrease, shoulder plateau begins)
Row 42 (WS): Ch 1, sc in each st across, turn. (31 sc)
Fasten off, leaving a 16 in / 40 cm tail for seaming.
Left Front Bodice
Return to held sts. With RS facing, join MC with sl st to the first held st at center front. The neckline edge is now at your right when RS faces you.
Row 22 (WS): Ch 1, sc in each st across, turn. (40 sc)
Row 23 (RS, neckline decrease): Ch 1, sc2tog over first 2 sts, sc in remaining 38 sts, turn. (39 sc)
Row 24 (WS): Ch 1, sc in each st across, turn. (39 sc)
Row 25 (RS, neckline decrease): Ch 1, sc2tog over first 2 sts, sc in remaining 37 sts, turn. (38 sc)
Row 26 (WS): Ch 1, sc in each st across, turn. (38 sc)
Row 27 (RS, neckline decrease): Ch 1, sc2tog over first 2 sts, sc in remaining 36 sts, turn. (37 sc)
Row 28 (WS): Ch 1, sc in each st across, turn. (37 sc)
Row 29 (RS, neckline decrease): Ch 1, sc2tog over first 2 sts, sc in remaining 35 sts, turn. (36 sc)
Row 30 (WS): Ch 1, sc in each st across, turn. (36 sc)
Row 31 (RS, neckline decrease): Ch 1, sc2tog over first 2 sts, sc in remaining 34 sts, turn. (35 sc)
Row 32 (WS): Ch 1, sc in each st across, turn. (35 sc)
Row 33 (RS, neckline decrease): Ch 1, sc2tog over first 2 sts, sc in remaining 33 sts, turn. (34 sc)
Row 34 (WS): Ch 1, sc in each st across, turn. (34 sc)
Row 35 (RS, neckline decrease): Ch 1, sc2tog over first 2 sts, sc in remaining 32 sts, turn. (33 sc)
Row 36 (WS): Ch 1, sc in each st across, turn. (33 sc)
Row 37 (RS, neckline decrease): Ch 1, sc2tog over first 2 sts, sc in remaining 31 sts, turn. (32 sc)
Row 38 (WS): Ch 1, sc in each st across, turn. (32 sc)
Row 39 (RS, neckline decrease): Ch 1, sc2tog over first 2 sts, sc in remaining 30 sts, turn. (31 sc)
Row 40 (WS): Ch 1, sc in each st across, turn. (31 sc)
Row 41 (RS): Ch 1, sc in each st across, turn. (31 sc)
Row 42 (WS): Ch 1, sc in each st across, turn. (31 sc)
Fasten off, leaving a 16 in / 40 cm tail for seaming.
Checkpoint: The bodice front (from foundation chain through Row 42) should measure approximately 7.5 in / 19 cm tall. The shoulder strap attachment points (top edges) each measure approximately 6.25 in / 16 cm wide.
Bodice Back
The bodice back mirrors the bodice front but has a higher neckline (no V-neck shaping; the back stays full-width until the shoulder strap attachment level).
Foundation: With MC and E-4 / 3.5 mm hook, ch 87.
Row 1 (RS): Sc in 2nd ch from hook and in each ch across, turn. (86 sc)
Rows 2 to 10: Ch 1, sc in each st across, turn. (86 sc each row)
Row 11 (Waist Band Row): Ch 1, hdc in each st across, turn. (86 hdc)
Rows 12 to 14: Ch 1, sc in each st across, turn. (86 sc each row)
Bust Shaping (Rows 15 to 20)
Row 15 (RS): Ch 1, sc in first 20 sts, sc2tog, sc in next 42 sts, sc2tog, sc in last 20 sts, turn. (84 sc)
Row 16 (WS): Ch 1, sc in each st across, turn. (84 sc)
Row 17 (RS): Ch 1, sc in first 19 sts, sc2tog, sc in next 42 sts, sc2tog, sc in last 19 sts, turn. (82 sc)
Row 18 (WS): Ch 1, sc in each st across, turn. (82 sc)
Row 19 (RS): Ch 1, sc in first 18 sts, sc2tog, sc in next 42 sts, sc2tog, sc in last 18 sts, turn. (80 sc)
Row 20 (WS): Ch 1, sc in each st across, turn. (80 sc)
Rows 21 to 36: Ch 1, sc in each st across, turn. (80 sc each row)
Back Neckline Shaping (Rows 37 to 42)
The back has a shallow scoop rather than a deep V.
Row 37 (RS): Ch 1, sc in first 30 sts, turn. (30 sc, right back shoulder)
Row 38 (WS): Ch 1, sc in each st across, turn. (30 sc)
Row 39 (RS): Ch 1, sc in first 28 sts, sc2tog, turn. (29 sc)
Row 40 (WS): Ch 1, sc in each st across, turn. (29 sc)
Row 41 (RS): Ch 1, sc in first 27 sts, sc2tog, turn. (28 sc)
Row 42 (WS): Ch 1, sc in each st across, turn. (28 sc)
Fasten off, leaving a 16 in / 40 cm tail for seaming.
Right back shoulder strap attachment edge: 28 sts wide.
Left back shoulder: Count 20 sts from the right edge of Row 36. Skip these center 20 sts (this forms the back neckline opening, leave these on a stitch holder). Rejoin MC with sl st to the 21st st from the right edge.
Row 37 (RS): Ch 1, sc in each of remaining 30 sts, turn. (30 sc)
Row 38 (WS): Ch 1, sc in each st across, turn. (30 sc)
Row 39 (RS): Ch 1, sc2tog, sc in remaining 28 sts, turn. (29 sc)
Row 40 (WS): Ch 1, sc in each st across, turn. (29 sc)
Row 41 (RS): Ch 1, sc2tog, sc in remaining 27 sts, turn. (28 sc)
Row 42 (WS): Ch 1, sc in each st across, turn. (28 sc)
Fasten off, leaving a 16 in / 40 cm tail for seaming.
Checkpoint: Both bodice pieces (front and back) should be approximately 7.5 in / 19 cm tall. The side edges of front and back should both measure 42 rows of sc, matching each other for seaming.
Skirt Front
The skirt front is worked flat from the waist downward with regular increases to create A-line volume.
Foundation: With MC and F-5 / 3.75 mm hook, ch 63.
Row 1 (RS): Sc in 2nd ch from hook and in each ch across, turn. (62 sc)
The skirt uses BLO single crochet for texture. Increases are worked every 6th row on each side AND two interior increase points to build the A-line flare.
Row 2 (WS): Ch 1, sc BLO in each st across, turn. (62 sc)
Rows 3 to 6: Ch 1, sc BLO in each st across, turn. (62 sc each row)
Row 7 (RS, increase row): Ch 1, 2 sc BLO in first st, sc BLO in next 19 sts, 2 sc BLO in next st, sc BLO in next 20 sts, 2 sc BLO in next st, sc BLO in next 19 sts, 2 sc BLO in last st, turn. (66 sc)
Rows 8 to 12: Ch 1, sc BLO in each st across, turn. (66 sc each row)
Row 13 (RS, increase row): Ch 1, 2 sc BLO in first st, sc BLO in next 21 sts, 2 sc BLO in next st, sc BLO in next 20 sts, 2 sc BLO in next st, sc BLO in next 21 sts, 2 sc BLO in last st, turn. (70 sc)
Rows 14 to 18: Ch 1, sc BLO in each st across, turn. (70 sc each row)
Row 19 (RS, increase row): Ch 1, 2 sc BLO in first st, sc BLO in next 23 sts, 2 sc BLO in next st, sc BLO in next 20 sts, 2 sc BLO in next st, sc BLO in next 23 sts, 2 sc BLO in last st, turn. (74 sc)
Rows 20 to 24: Ch 1, sc BLO in each st across, turn. (74 sc each row)
Row 25 (RS, increase row): Ch 1, 2 sc BLO in first st, sc BLO in next 25 sts, 2 sc BLO in next st, sc BLO in next 20 sts, 2 sc BLO in next st, sc BLO in next 25 sts, 2 sc BLO in last st, turn. (78 sc)
Continue in established BLO single crochet pattern, working increase rows every 6th row (adding 4 stitches per increase row) until the skirt measures 34 in / 86 cm from the foundation chain, or your desired length.
Ensure your final stitch count is divisible by 6 for the scallop edging. Fasten off.
Skirt Back
Work the same as the Skirt Front.
Assembly and Finishing
1. Block all pieces before assembly. Wet block or steam block according to your yarn’s care instructions. Pin pieces to measurements and allow to dry completely.
2. Seam bodice sides. Using mattress stitch or whip stitch, join the bodice front to the bodice back along both side seams.
3. Seam skirt sides. Join the skirt front to the skirt back along both side seams.
4. Pleat the skirt at waist. Pin the top edge of the skirt to the bottom edge of the bodice, creating evenly spaced pleats to distribute the extra fabric. The image shows soft box pleats. Pin and adjust until the skirt waist matches the bodice waist measurement. Whip stitch in place.
5. Add spaghetti straps. With MC and E-4 / 3.5 mm hook, ch 60 (or your desired length plus seaming allowance). Sl st in each ch across for reinforcement. Fasten off. Make 2. Sew straps securely to the front bodice at the shoulder edge and to the back bodice at corresponding points.
6. Make and attach daisy appliques. Work 50 daisies as described in the Special Stitches section. Using the 12 in tails, sew daisies evenly across the bodice and skirt. The reference image shows scattered placement with roughly 2 to 3 in between daisies.
7. Add scallop hem edging. Join MC at any point along the hem. Work the scallop edging as described in the Special Stitches section. Fasten off and weave in ends.
8. Final blocking. Give the finished dress a final light steam or spray blocking to even out the stitches
You Might Also Like
- Ocean Blue Highland Cow Amigurumi Free Crochet Pattern
- Lavender Heart Granny Square Baby Blanket Free Crochet Pattern
- Pink Strawberry Couple Amigurumi Free Crochet Pattern
- Ocean Wave Hexagon Throw Free Crochet Pattern