Pastel Rainbow Granny Square Bucket Bag Free Crochet Pattern
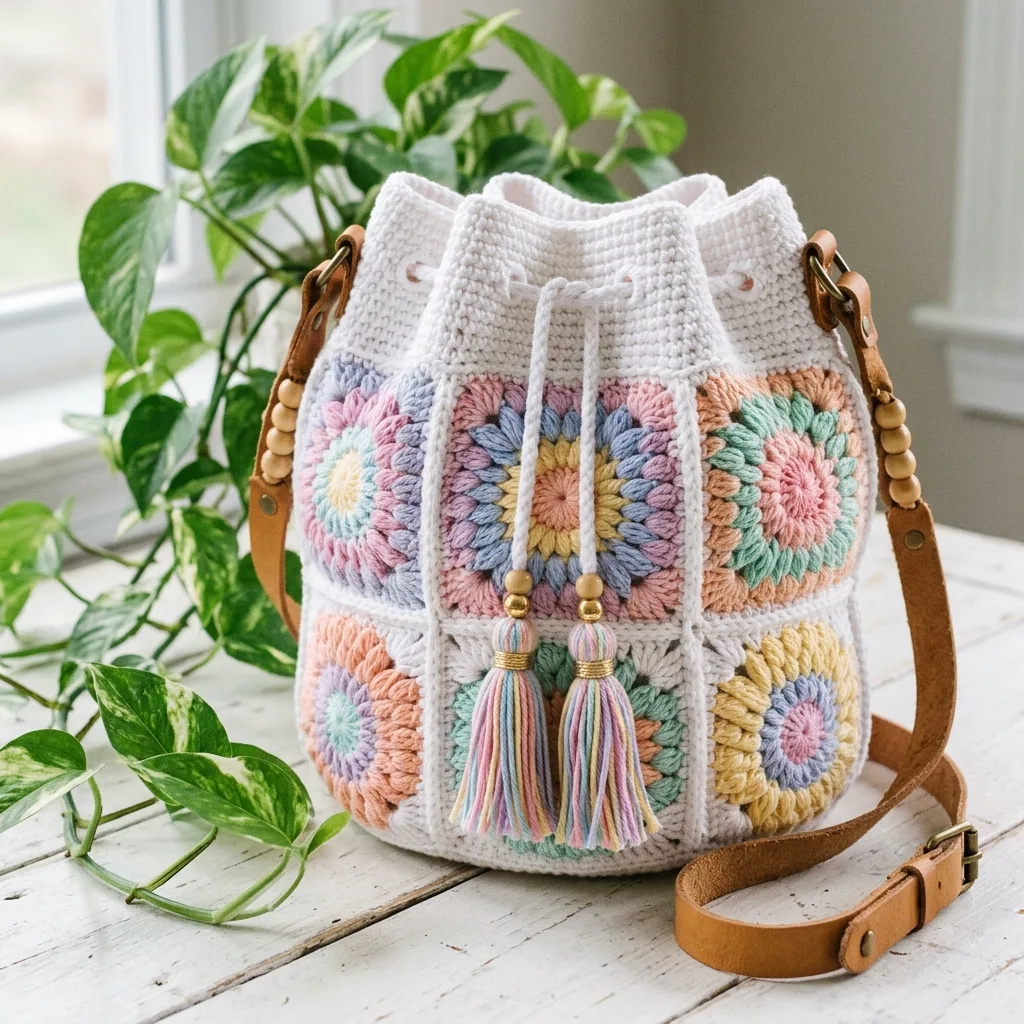
This little bucket bag has been living in my head for months, and I am thrilled to finally share it with you. I wanted to create something that combined classic granny square construction with a fresh, modern silhouette. The goal was a bag that felt cheerful without being overwhelming, structured enough to hold your essentials but soft enough to gather closed with a simple drawstring.
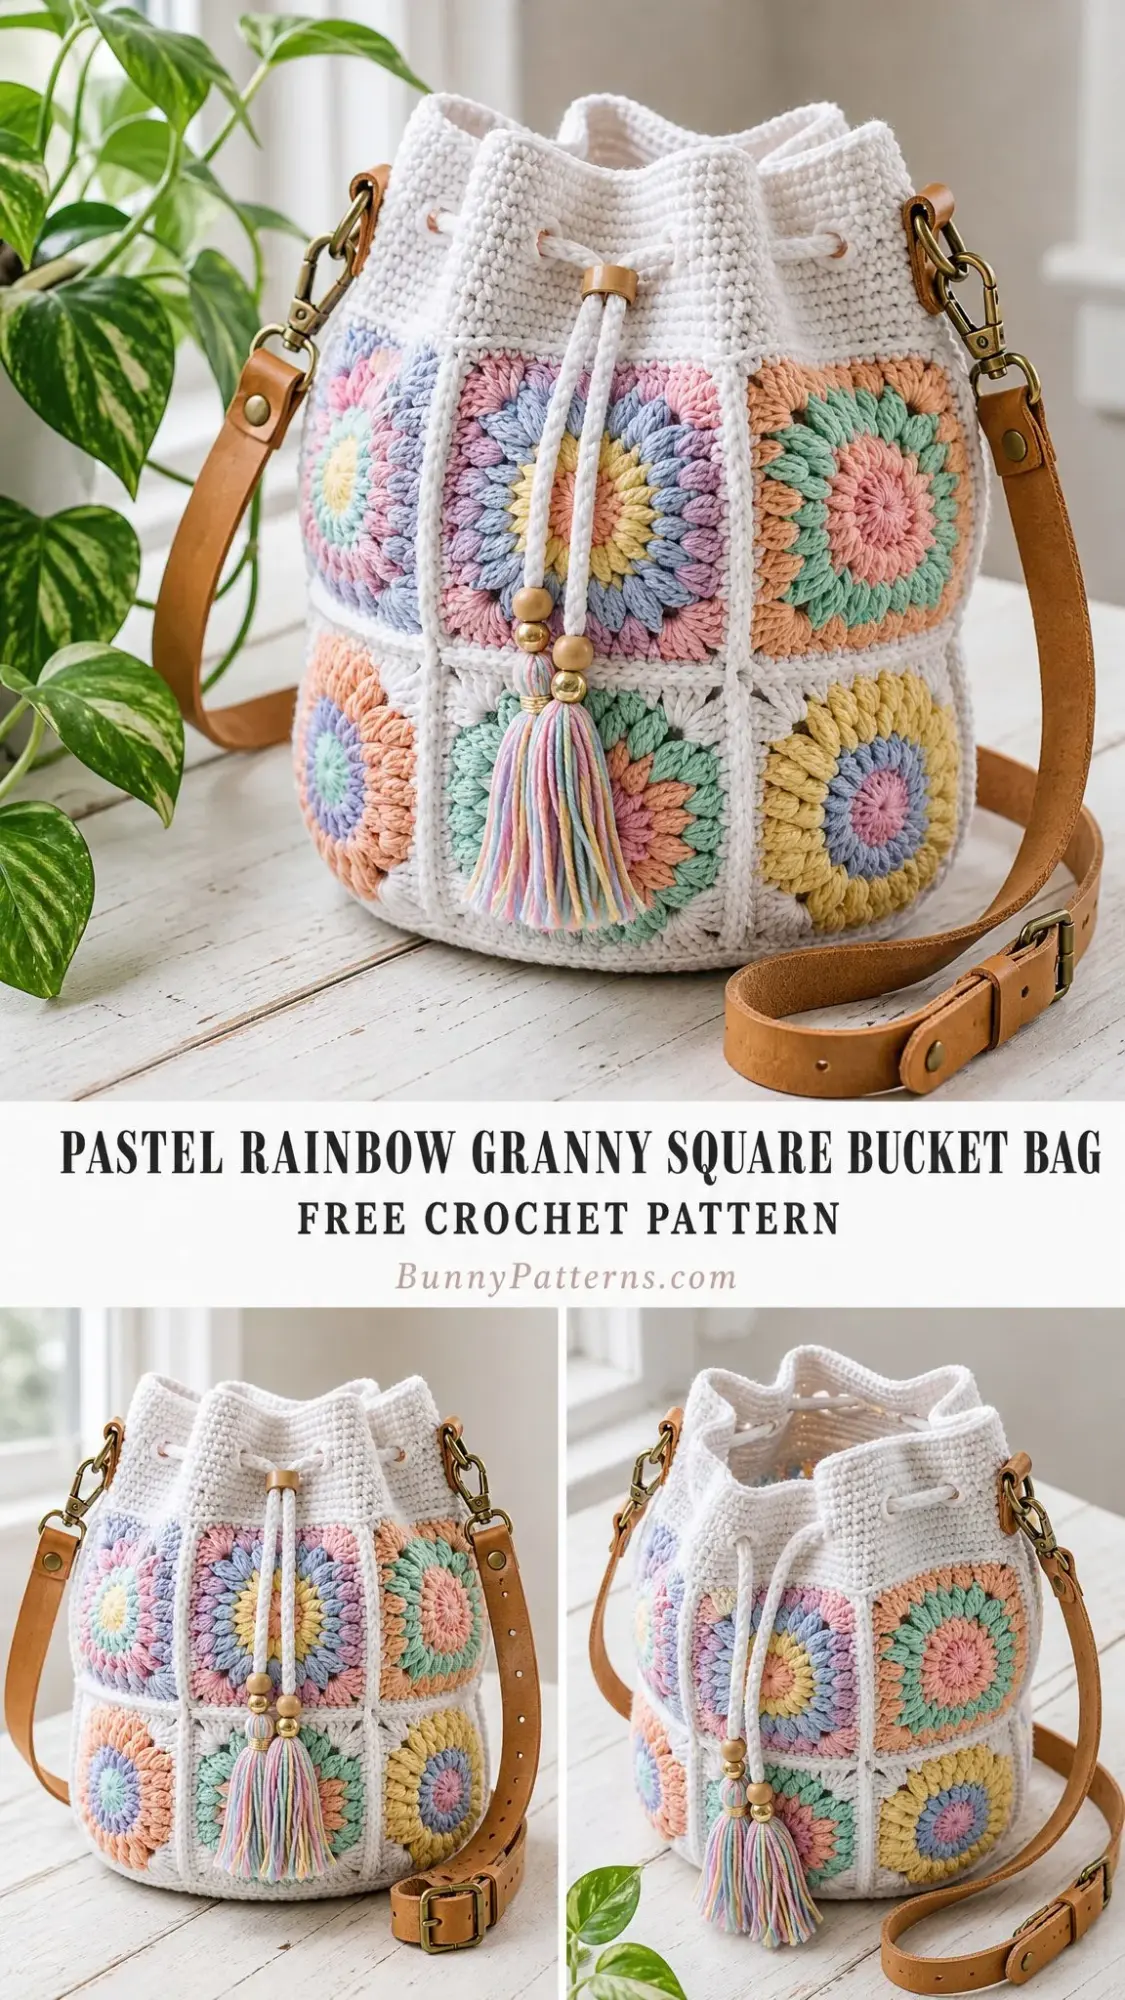
The sunburst motif at the center of each square gives the whole piece that scattered rainbow charm I was going for. Twelve squares in soft sherbet pastels, framed in crisp white, joined into a tube, and finished with a leather strap and candy-striped tassels.
I am SO pleased with how it turned out. If you can work a flat circle and a basic granny square, you can absolutely build this bag. Let me walk you through every step.
About This Pastel Rainbow Bucket Bag
This crossbody bucket bag measures approximately 7.5 inches wide and 11 inches tall to the neck, with a body circumference of about 24 inches. The construction is straightforward: you will make 12 sunburst granny squares, join them into a tube, attach a flat circular base, then work a drawstring neck to finish.
The beauty of this project lies in mixing and matching your pastel colors so no two neighboring squares look the same. That scattered, joyful rainbow effect is the whole charm of the design.
Skill level: Confident beginner to easy intermediate. If you have made granny squares before and feel comfortable working in the round, you are ready for this project.
Time to complete: About 10 to 14 hours, depending on your pace and how much you enjoy the meditative rhythm of making motifs.
Materials You Will Need
Before you start, gather these supplies:
Yarn:
Great yarn options include Paintbox Cotton Aran, Lily Sugar’n Cream, or Scheepjes Cotton 8 held doubled. Any smooth cotton yarn in worsted weight will work beautifully.
Hook:
Notions:
Gauge
One blocked sunburst square should measure 4 inches (10 cm) square.
For the base worked in single crochet (sc), you should get 14 stitches and 16 rows in a 4 inch (10 cm) square.
Gauge is not critical for fit here, but keeping your squares a consistent size will make joining much easier and keep the body of your bag nice and even.
Abbreviations
Here are all the abbreviations used in this pattern, written in US crochet terms:
UK crocheters: Remember that US single crochet equals UK double crochet, and US double crochet equals UK treble. Convert as you go.
Special Stitches
Puff Stitch (puff): This creates a plump, textured bump that forms the petals of your sunburst flower. Here is how to work it:
Yarn over, insert your hook into the stitch, yarn over and pull up a loop to the height of a double crochet. Repeat this sequence 2 more times in the same stitch. You will have 7 loops on your hook. Yarn over and draw through all 7 loops at once, then chain 1 to close the puff.
Magic Ring: This is an adjustable loop that you cinch closed after your first round, giving you a tidy center with no hole. If you are not comfortable with magic rings, you can chain 4 and join with a slip stitch to form a ring instead.
Pattern Notes Before You Begin
Part 1: Sunburst Square (Make 12)
You will make 12 of these gorgeous sunburst motifs. Each one uses three pastel rounds framed in white.
For each square, choose:
Round 1 (Color A): Work into a magic ring. Chain 3, which counts as your first double crochet (dc). Work 11 dc into the ring. Pull the ring closed and join with a slip stitch (sl st) to the top of the starting chain-3. Fasten off Color A. (12 dc)
Round 2 (Color B): Join Color B in any stitch. Chain 3, which counts as dc. Work 1 dc in the same stitch. Work 2 dc in each stitch around. Join with a sl st to the top of the chain-3. Fasten off Color B. (24 dc)
Round 3 (Color C): Join Color C in any stitch. Work a puff stitch in the next stitch, chain 1, skip the next stitch. Repeat this sequence 12 times around the entire round. Join with a sl st to the top of the first puff. Fasten off Color C. (12 puffs and 12 chain-1 spaces)
Round 4 (White): Join White in any chain-1 space. Chain 1.
To create a corner: work 2 dc, chain 2, 2 dc all in the next space.
Then work 1 dc in each of the next 8 stitches. You are working 1 dc into each puff and 1 dc into each chain-1 space.
Repeat from the corner instructions 4 times total around the square. Join with a sl st to the first dc. Fasten off White, leaving a long tail for seaming later. (48 dc and 4 corner spaces, which works out to 12 dc per side)
Helpful tip: Round 4 transforms your circle into a square. Keep those 4 corners evenly spaced so your sides lay flat.
Make 11 more squares, mixing up your pastel combinations. Block all 12 squares to 4 inches (10 cm) before moving on.
Part 2: Joining the Squares
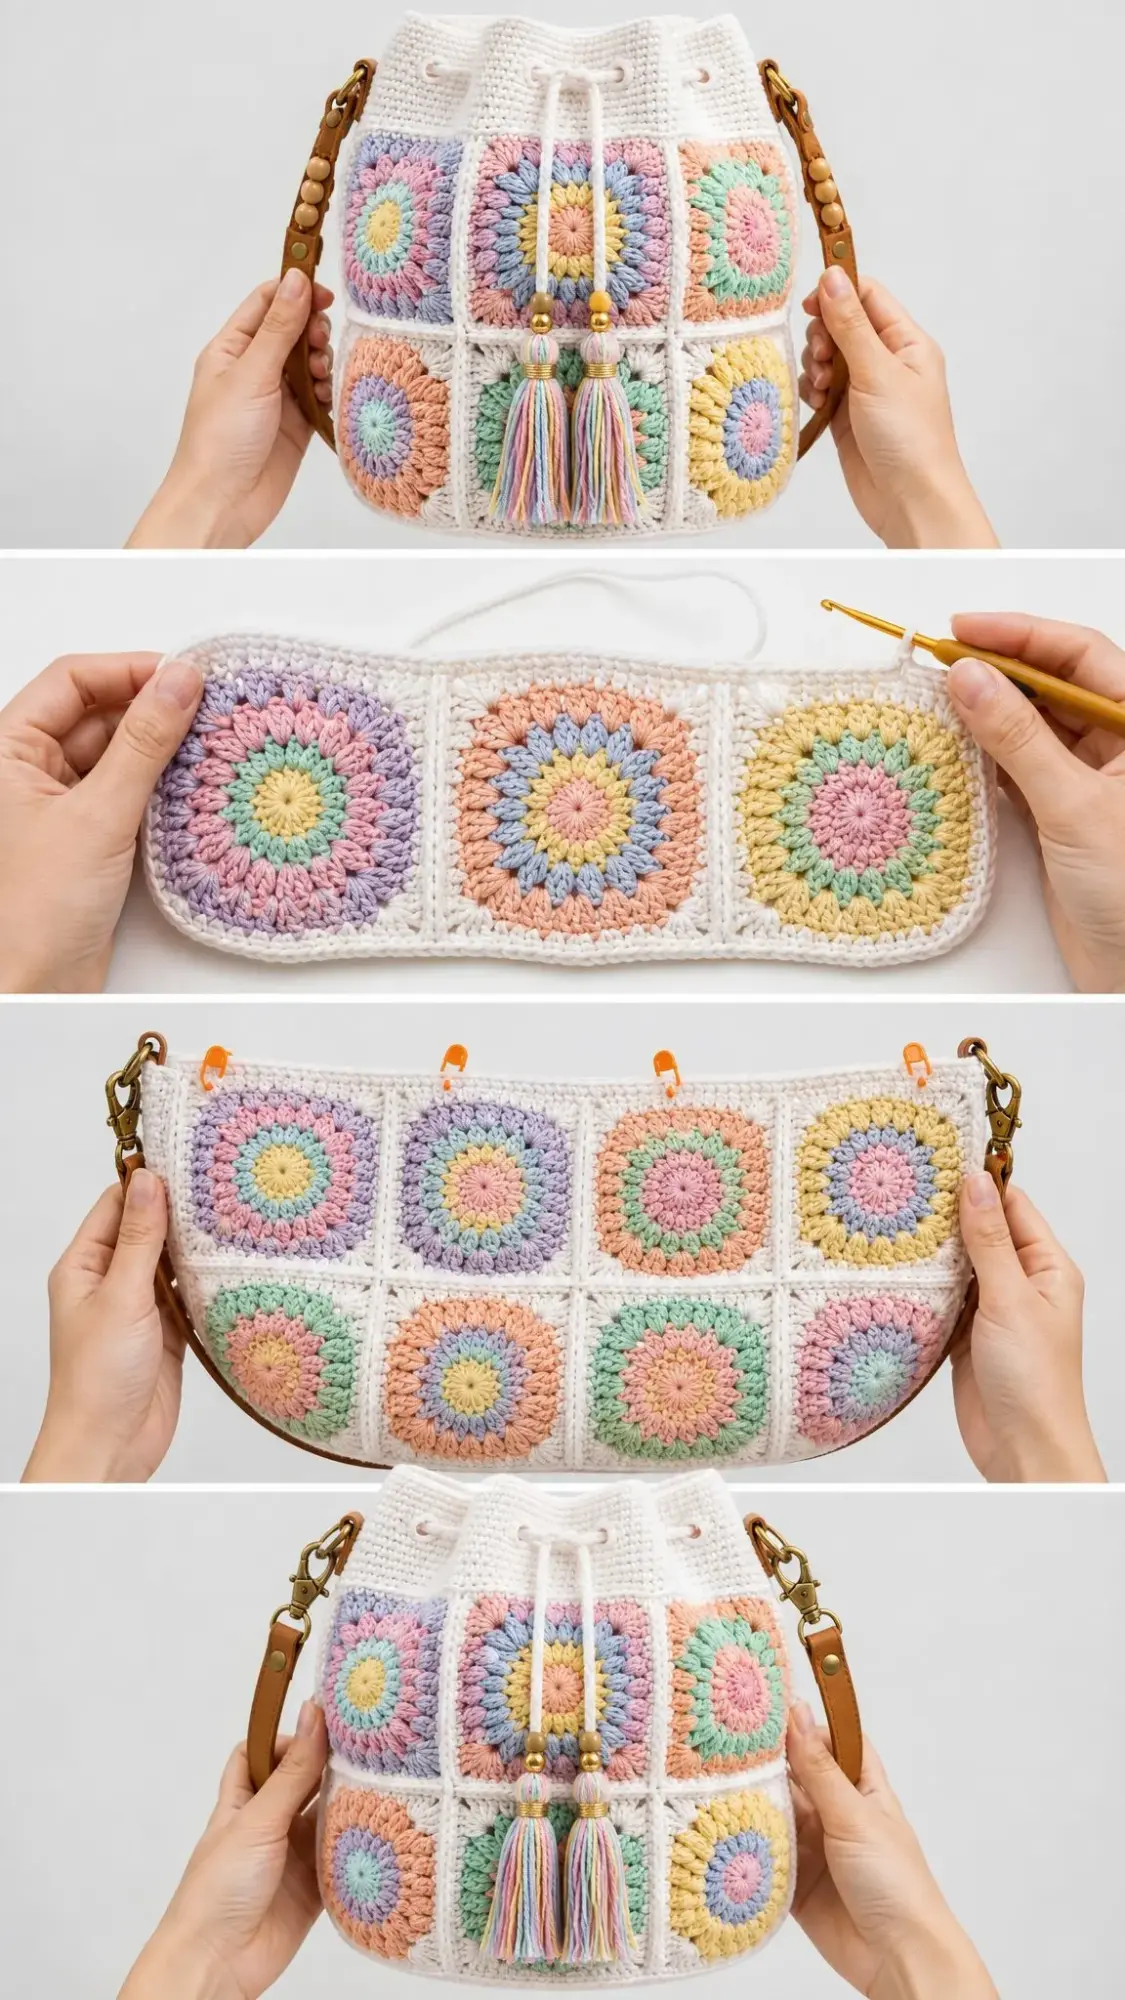
Arrange your 12 blocked squares in a panel that is 6 squares wide and 2 squares tall. Shuffle the colors around so neighboring squares have different color combinations.
Using White yarn and your tapestry needle, whip stitch the squares together through the back loops. You can also use a single crochet join on the wrong side if you prefer.
First, join the squares into two rows of 6. Then join those two long rows together.
Finally, join the two short ends of the panel together to form a tube. Your tube now has 6 squares around, with a 72-stitch opening at both the top and bottom. (72 stitches on each edge)
Part 2 Continued: The Base (White Flat Circle)
The base is a simple flat circle worked in single crochet.
Round 1: Work into a magic ring. Work 6 sc into the ring. Join with a sl st. (6 sc)
Round 2: Work 2 sc in each stitch around. Join. (12 sc)
Round 3: Sc in the next stitch, 2 sc in the next stitch. Repeat around. (18 sc)
Round 4: Sc in the next 2 stitches, 2 sc in the next stitch. Repeat around. (24 sc)
Rounds 5 through 12: Continue increasing 6 sc evenly each round. Add one more plain stitch between your increases each round. Keep going until you reach 72 sc. Round 12 should have (72 sc).
With right sides together, use single crochet or whip stitch to attach the base to the bottom edge of your tube. (72 stitches joined)
Part 3: Drawstring Neck (White)
Now you will work the drawstring neck onto the top edge of the tube. You have 72 stitches to work into, and you will keep the right side facing throughout.
Round 1: Join White in any stitch along the top edge. Work 1 sc in each stitch around. Join with a sl st. (72 sc)
Rounds 2 and 3: Sc in each stitch around. Join. (72 sc)
Round 4: Sc in the next 10 stitches, sc2tog. Repeat 6 times around. Join. (66 sc)
Round 5: Sc in the next 9 stitches, sc2tog. Repeat 6 times around. Join. (60 sc)
Rounds 6 and 7: Sc in each stitch around. Join. (60 sc)
Round 8 (Eyelet Round): Sc in the next 4 stitches, chain 1, skip the next stitch. Repeat 12 times around. Join. (48 sc and 12 chain-1 eyelets)
This eyelet round is where your drawstring will thread through. Keep the 12 eyelets evenly spaced for a neat gather.
Round 9: Sc in each stitch and in each chain-1 space around. Join. (60 sc)
Rounds 10 and 11: Sc in each stitch around. Fasten off after Round 11 and weave in your ends. (60 sc)
Finishing: Tassels, Strap, and Final Touches
Drawstring: Using White yarn, make a chain approximately 28 inches (71 cm) long. Single crochet in the 2nd chain from the hook and in each chain across to create a sturdy cord. Fasten off.
Weave the cord in and out through the Round 8 eyelets, starting and ending at the front center of the bag.
Tassels (make 2): Wrap variegated pastel yarn about 30 times around a 4 inch (10 cm) piece of cardboard. Tie the top bundle securely. Cut through the bottom fold. Wrap and knot a “neck” about half an inch (1 cm) down from the top. Trim the ends level.
Thread a wooden bead onto each end of the drawstring, then tie a tassel below each bead.
Strap: Sew two small D-rings or yarn loops to opposite sides of the neck at the seam lines. Clip your adjustable leather strap to the rings. If you like the beaded look shown in the photos, thread wooden beads onto the strap before clipping.
Final Touches: Weave in all remaining ends. Lightly steam or wet-block the whole bag so the squares sit flat and the neck stands softly upright.
Care Instructions
Resizing Tips
Want a bigger bag? Add a third row of squares (6 across by 3 tall) for a taller body. Add extra increase rounds to your base until it spans the new opening.
Want a wider bag? Work 8 squares around instead of 6. Continue the base to 96 sc (16 increase rounds) to match.
Want a roomier neck? Skip the decreases in Rounds 4 and 5. Keep all 72 stitches and adjust the eyelet round accordingly.
Different gauge? A smaller hook will tighten your squares for a firmer bag. Chunkier cotton yarn makes a quick oversized version.
Whenever you change the square count around the body, keep it even and divisible by 6 so the base, neck, and eyelets still line up properly.
You Did It!
I hope you love making this pastel rainbow granny square bucket bag as much as I loved designing it. There is something so satisfying about watching those colorful sunburst squares come together into a functional, beautiful accessory.
Thank you so much for choosing this pattern. I would absolutely love to see your finished bags. Tag me on Instagram or share a photo in our Facebook group. Seeing your creations is the best part of sharing patterns.
If you found this crochet pattern helpful, please save it to your Pinterest boards so you can find it easily when you are ready to start. And if you make this bag, drop a comment below. I would love to hear which pastel combinations you chose and how your bag turned out!
You Might Also Like
- Lavender Purple Dreamy Peplum Crochet Top Pattern
- Lavender Sunflower Drawstring Backpack Free Crochet Pattern
- Pastel Rainbow Kitty Tote Bag Free Crochet Pattern
- Sage Green Summer Tote with Cream Tassels Free Crochet Pattern