Sunset Ombre Granny Square Poncho Free Crochet Pattern
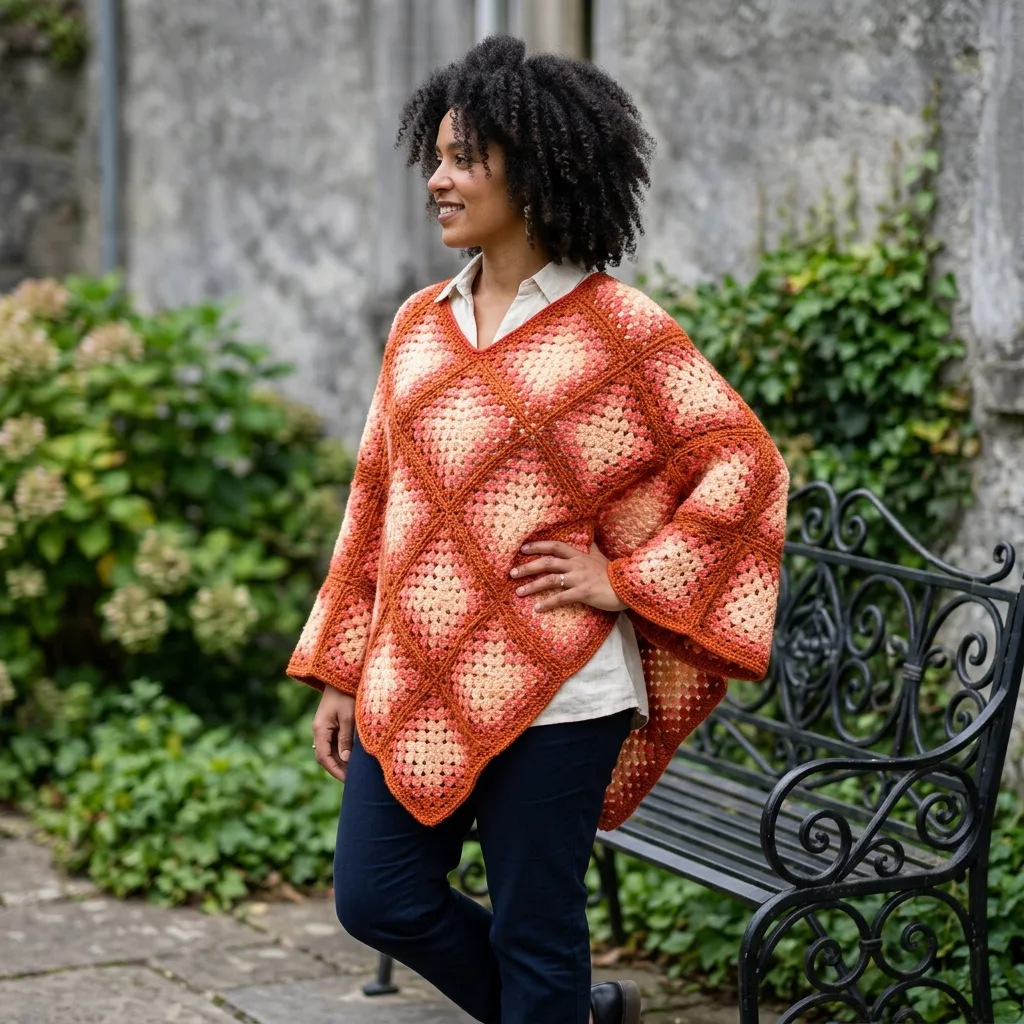
I pulled this pattern out of my project folder the other day and smiled. I originally called it “Sunset Ombre” because the warm gradient yarn reminded me of those evenings when the sky turns peach, coral, and rust all at once. I designed it for my sister, who wanted something cozy but not bulky, something she could throw on over a button-down and still look put together. The granny squares gave it that classic handmade charm, and the diagonal layout made it feel a little more modern. Every time I see someone wearing theirs, I think of those sunset colors and that first poncho I made for her.
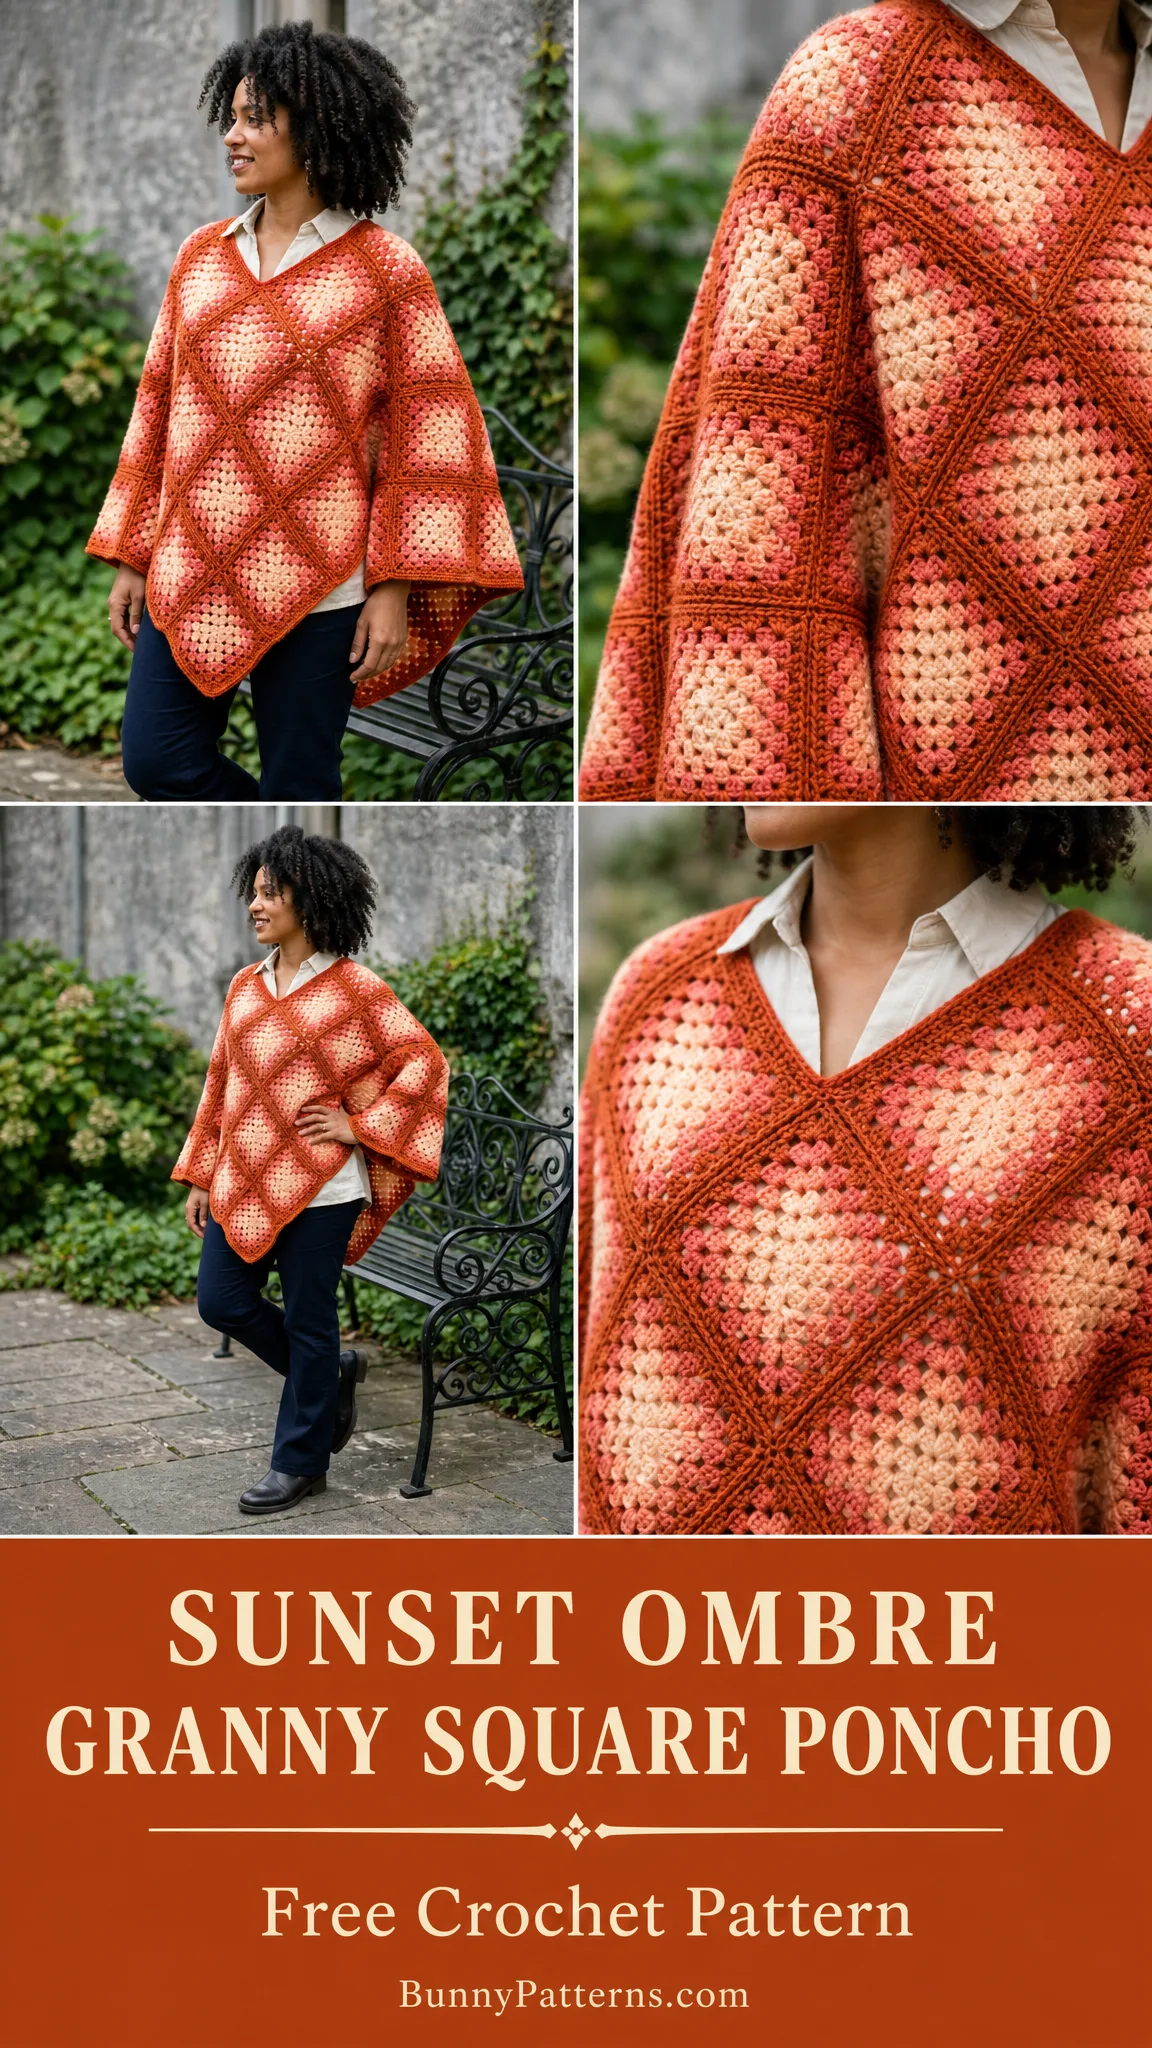
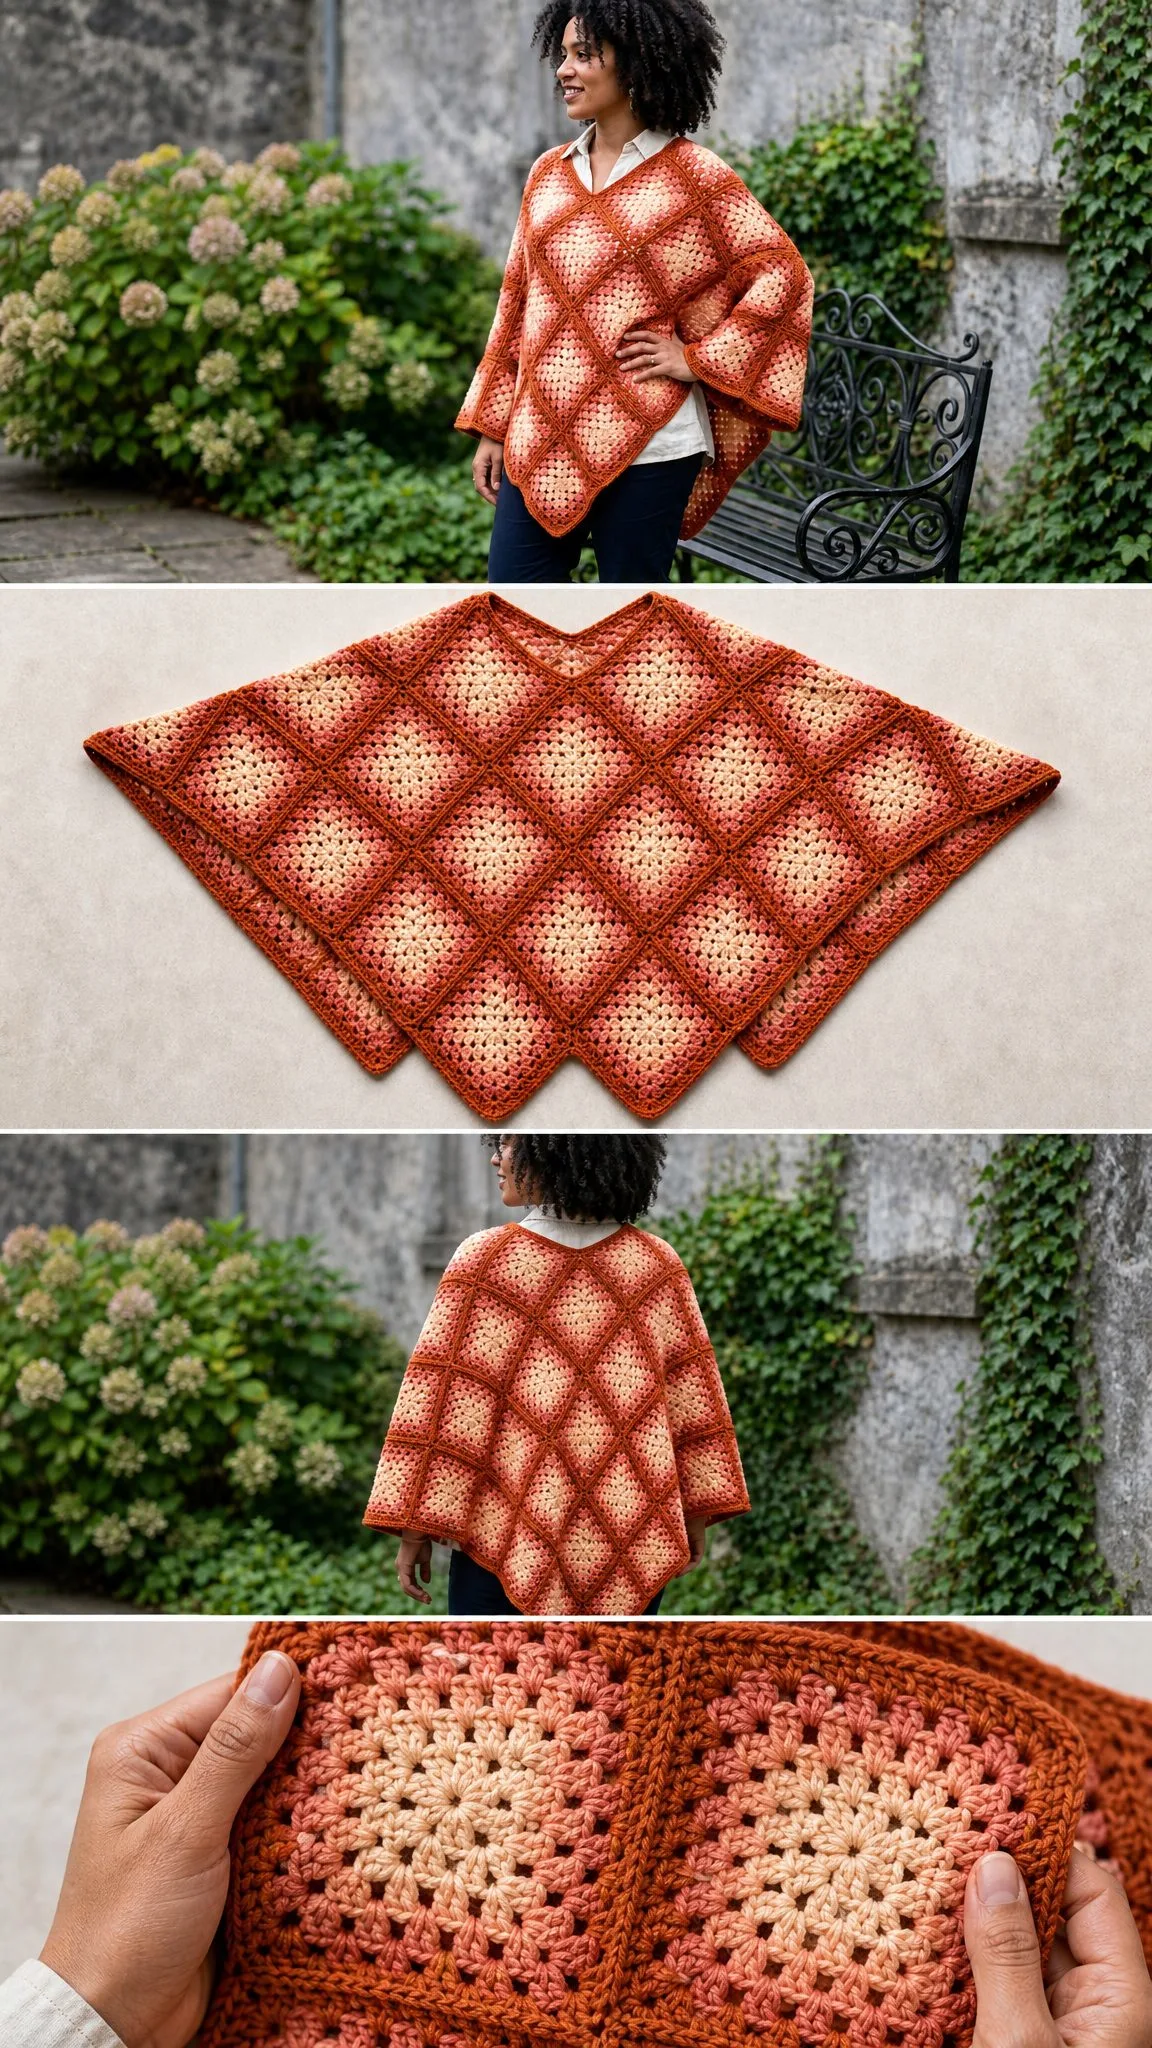
This Sunset Ombre Granny Square Poncho crochet pattern is built from individually crocheted granny squares arranged on point into two diamond panels. The panels join at the shoulders and sides, then get finished with simple edgings around the neck, hem, and armholes. The ombre yarn does all the colorwork for you, so you get that beautiful sunset glow without any complicated color changes.
If you have made a basic granny square before, you can absolutely make this poncho. And if granny squares still feel a little intimidating, do not worry. I will walk you through every step.
Skill Level and Time Commitment
This pattern falls into the adventurous beginner to intermediate range. You should be comfortable with granny clusters, joining motifs, and working edgings into motif edges. If you have never joined granny squares before, this project is a great way to learn. The joins are straightforward, and the pattern includes a clear assembly map so you always know where each square goes.
Expect to spend about 18 to 24 hours on this project, including blocking and joining. That sounds like a lot, but most of it is relaxing repetitive work. Once you get into the rhythm of the granny rounds, each square works up quickly. I like to make a few squares each evening while watching something on TV.
Finished Measurements
The finished poncho fits one relaxed adult size:
The relaxed fit means it drapes nicely over most body types. If you want to adjust the length, I will share some customization tips later in the pattern.
Materials You Will Need
Gather these supplies before you start:
Yarn: You will need 1,250 to 1,400 yards (1,143 to 1,280 meters) of worsted or light worsted weight ombre yarn. Choose soft acrylic, wool blend, or cotton/acrylic with good drape. The drape matters here because you want the poncho to hang softly, not stand stiff.
Some yarn suggestions that work beautifully:
If you substitute a different yarn, choose one that blocks to a 7 inch (18 cm) square after 7 rounds. Thinner yarn? Go up a hook size or add one motif round. Thicker yarn? Go down a hook size or make fewer motifs for a smaller poncho.
Hook: US H/8 (5.0 mm) crochet hook, or the size needed to match gauge.
Notions: Locking stitch markers, tapestry needle, scissors, rust-proof pins, blocking mats, and a tape measure.
Gauge
Getting gauge right matters for this pattern because it affects the final size of your poncho.
Blocked motif gauge: One finished 7-round square equals 7 inches by 7 inches (18 by 18 cm).
Granny fabric gauge: 4 double crochet (dc) clusters and 4 rounds equals 4 inches (10 cm) after blocking.
Here is my advice: swatch one full motif, block it, and measure before you make all 32 squares. If your square comes out smaller, go up a hook size. If it comes out larger, go down a hook size. Adjusting now saves headaches later.
Checkpoint: After Round 7, each motif should measure 7 inches (18 cm) square. A full 4-motif-wide diamond panel should measure about 39 inches (99 cm) point to point after joining.
Abbreviations and Special Stitches
This pattern uses US crochet terms. If you typically use UK terms, remember that US double crochet equals UK treble crochet.
| Abbreviation | Meaning |
|---|---|
| ch | chain |
| dc | double crochet |
| hdc | half double crochet |
| sc | single crochet |
| sl st | slip stitch |
| sp | space |
| st(s) | stitch(es) |
| RS / WS | right side / wrong side |
| rep | repeat |
| ch-sp | chain space |
Special Stitches Explained
Granny Cluster: Work 3 dc into the indicated ch-sp. Keep your stitches relaxed so the square blocks flat. This is the basic building block of every granny square. You are simply putting three double crochets into one space, which creates that iconic clustered look.
Corner Group: Work 3 dc, ch 2, 3 dc into the same corner ch-2 sp. This is how you turn the corner on each round. The chain 2 in the middle creates the corner space for the next round.
Flat Slip-Stitch Join: Hold two motif edges with RS facing up. Insert your hook through the back loop of the next stitch or chain-space edge on the first motif AND the matching back loop on the second motif. Yarn over, pull through both layers and the loop on your hook. Keep your joins loose so the fabric stays flexible.
Shell Border: Skip 1 st, 5 dc in next st, skip 1 st, sl st in next st. Repeat around. Each shell uses 4 stitches. This creates a pretty scalloped edge.
Left-handed note: Work motif rounds counterclockwise if that feels natural for you. Join and assembly will mirror the diagrams. Just keep the same RS/WS orientation and place the front point at center front.
Full Granny Square Motif Instructions
Make 32 full motifs total. Begin each round with ch 3, which counts as 1 dc. Join each round with a sl st to the top of the beginning ch-3. Fasten off after Round 7 unless you are joining as you go.
Round 1
Ch 4, join with sl st to form a ring. Ch 3 (counts as 1 dc), 2 dc in ring, ch 2. 3 dc in ring, ch 2. Repeat from 3 more times. Join with sl st to top of beginning ch-3.
Stitch count: 12 dc and 4 corner ch-2 spaces.
Round 2
Sl st to the first corner ch-2 sp. Ch 3, 2 dc, ch 2, 3 dc in the same corner (this is your first corner group). Ch 1. Work a corner group (3 dc, ch 2, 3 dc) in the next corner ch-2 sp, ch 1. Repeat from around. Join.
Stitch count: 24 dc and 4 side ch-1 spaces.
Round 3
Sl st to the corner ch-2 sp. Work a corner group, ch 1. 3 dc in the next side ch-1 sp, ch 1. Work a corner group in the next corner, ch 1. Repeat from around. Join.
Stitch count: 36 dc and 8 side ch-1 spaces.
Round 4
Work a corner group in each corner. Work 3 dc in each side ch-1 sp with ch 1 between clusters. Join.
Stitch count: 48 dc and 12 side ch-1 spaces.
Round 5
Repeat Round 4.
Stitch count: 60 dc and 16 side ch-1 spaces.
Round 6
Repeat Round 4.
Stitch count: 72 dc and 20 side ch-1 spaces.
Round 7
Repeat Round 4. Fasten off, leaving a 12 inch (30 cm) tail for joining if desired.
Stitch count: 84 dc and 24 side ch-1 spaces.
Blocking checkpoint: Pin each motif square with crisp corners. Let them dry fully before assembly so the diagonal grid hangs cleanly.
Assembly Map
You will make two matching diamond panels: one for the front and one for the back. Each panel uses 16 motifs arranged in rows from top point to bottom point.
| Panel Row | Number of Motifs | Placement |
|---|---|---|
| 1 | 1 | Top point of panel |
| 2 | 2 | Join below Row 1, centered |
| 3 | 3 | Join below Row 2 |
| 4 | 4 | Widest row across shoulder/body |
| 5 | 3 | Join below Row 4 |
| 6 | 2 | Join below Row 5 |
| 7 | 1 | Lower center point |
Orientation tip: All motifs are placed as diamonds (rotated 45 degrees so one corner points up). Keep the darkest join lines running diagonally to create that beautiful lattice effect you see in the photos.
Joining the Poncho
Step 1: Join Each Panel
Using the flat slip-stitch join or mattress stitch, join all touching motif edges in the 1-2-3-4-3-2-1 layout. Each joined motif edge contains 7 clusters. Match corner to corner and cluster to cluster for a neat seam.
Step 2: Shoulder Seams
Place the front and back panels with wrong sides together and top points aligned. Join the upper left sloping shoulder for 2 full motif edges. Repeat for the upper right sloping shoulder. Leave the center V open for the neckline.
Step 3: Side Seams
On each side, leave the top 1 full motif edge open for the armhole. Join the next 2 full motif edges down the side. Leave the lower points open for drape.
Step 4: Weave Ends
Weave every yarn end through at least 2 inches (5 cm) of matching-color stitches, changing direction once for security.
Fit checkpoint: After shoulder and side seams, the neck opening measures about 22 inches (56 cm) around. Each armhole measures about 14 inches (36 cm) around. The poncho measures about 26 inches (66 cm) from shoulder to front point.
Join Counts Summary
| Join Area | Edges Joined | Result |
|---|---|---|
| Front panel | 24 motif edges within panel | 16 motifs become one diamond panel |
| Back panel | 24 motif edges within panel | 16 motifs become one diamond panel |
| Shoulders | 4 motif edges total | Stable shoulder line with V neck open |
| Sides | 4 motif edges total | Armholes remain open and sides drape |
Edgings
Neck Edging
With RS facing, join yarn at the back neck.
Round 1: Work 104 sc evenly around the neckline, placing 3 sc at the front V point and 3 sc at the back V point. Join. (104 sts)
Round 2: Ch 1, sc in each sc around. Join. (104 sts)
Round 3: Work reverse sc or sl st loosely in each st around. Join and fasten off. (104 sts)
Hem Edging
With RS facing, join yarn at a side point.
Round 1: Work 18 sc along each exposed motif edge around the outer hem. Join. (288 sc)
Round 2: Ch 2, hdc in each st around. Join. (288 hdc)
Round 3: Work shell border around. Join and fasten off. (72 shells)
Armhole Edging
Join yarn at the underarm.
Round 1: Work 18 sc along each of the 4 exposed motif edges around the armhole. Join. (72 sc)
Round 2: Hdc in each st around. Join. (72 hdc)
Round 3: Work shell border around. Join and fasten off. (18 shells)
Repeat for the second armhole.
Customization Options
For a longer poncho: Make each panel with rows of 1, 2, 3, 4, 4, 3, 2, 1 motifs. This adds 8 motifs total and requires 280 to 340 extra yards (256 to 311 meters) of yarn.
For a shorter capelet: Use 6-round motifs blocked to 6 inches (15 cm) and reduce each edging pickup to 16 sc per exposed motif edge.
For a wider neckline: Leave one additional half edge unjoined at each shoulder. Work the neck edging to the same even stitch count by spacing the sc a little farther apart.
Finishing and Blocking
Wet-block or steam-block lightly after assembly. Shape the front and back points, smooth the shoulder line, and open the granny spaces with your fingers. Do not stretch the neck edge. It should sit softly without rippling.
Care Instructions
Wash according to your yarn label. For acrylic, machine wash cool in a mesh bag and tumble dry low or lay flat. For wool blends, hand wash cool and dry flat. Store your poncho folded rather than on a hanger to protect the shoulder line.
Troubleshooting Common Issues
Motifs cup or ripple: Check your corner ch-2 spaces and side ch-1 spaces. Block one motif. If it still ripples, change your hook size by 0.5 mm.
Panel twists: Re-block your motifs and join with RS facing the same way. Match corner to corner before joining the full edge.
Neck pulls tight: Undo neck edging Round 1 and add 4 to 8 sc evenly, keeping an even stitch count for the next rounds.
Hem flares too much: Use sl st instead of shell border, or skip the hdc round for a lighter edge.
Color pooling: Begin motifs at different points in the yarn cake so the light and rust centers vary naturally.
Final Thoughts on This Sunset Ombre Granny Square Poncho Pattern
I hope you love making this poncho as much as I loved designing it. There is something so satisfying about watching those granny squares stack up and then seeing them come together into a wearable piece. The ombre yarn does so much of the work for you, and the finished poncho looks far more complicated than it actually is.
Thank you so much for choosing this pattern. I truly appreciate you being here. If you make one, I would absolutely love to see it! Tag me on Instagram or share a photo in my Facebook group. Nothing makes my day like seeing your finished projects.
If you want to come back to this Sunset Ombre Granny Square Poncho crochet pattern later, go ahead and save it to your Pinterest boards now. And please drop a comment below if you make one. I love hearing which yarn colors you choose and how your poncho turns out!
You Might Also Like
- Dusty Rose Ribbed Ankle Socks Free Crochet Pattern
- Coral Peach Tie Front Crochet Cardigan Free Pattern
- Sunset Peach Woven Crochet Clutch Free Pattern
- Mustard Yellow Duck Toilet Paper Cozy Free Crochet Pattern