Lavender Dreams Candy Bolster Pillow Free Crochet Pattern
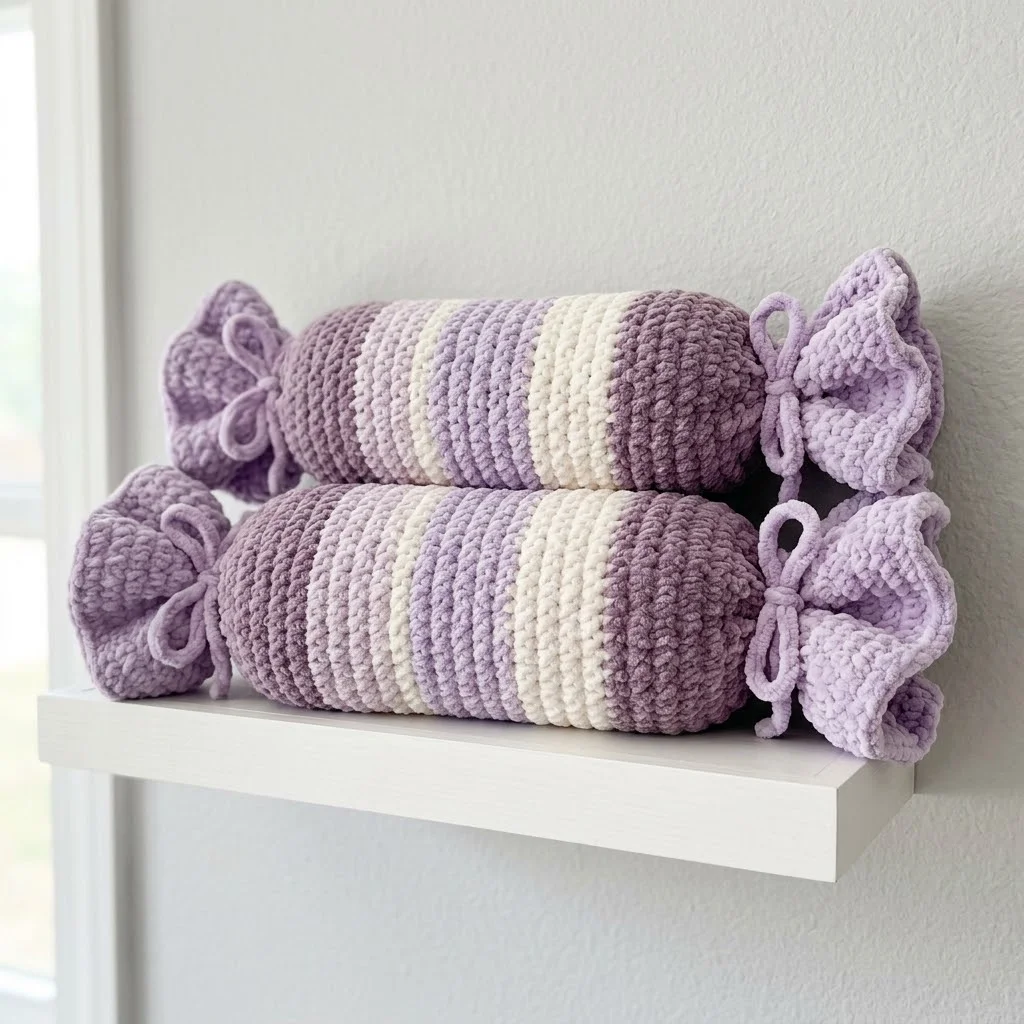
I call this one the Lavender Dreams pillow, and it has quite the story. A few years ago, I sketched this candy wrapper shape in a little notebook during a road trip. My daughter had just unwrapped a piece of saltwater taffy, and I thought, “That would make the cutest pillow.” The notebook sat in a drawer until last month when I finally pulled it out and brought this design to life. The result? These chunky, squishy bolster pillows that look like oversized wrapped candies. They make me smile every single time I walk past them.
Why You’ll Love This Candy Bolster Pillow Crochet Pattern
This crochet bolster pillow pattern combines whimsy with function in the best way. The candy wrapper ends give it instant personality, while the chunky yarn makes it incredibly soft and huggable. You can finish one of these in a weekend, and the construction is much simpler than it looks.
The striped body is worked flat in rows, then seamed into a tube. The ruffled candy wrapper ends are worked separately and gathered with a simple drawstring. No complicated shaping. No confusing increases. Just basic stitches repeated in a satisfying rhythm.
What makes this pattern beginner friendly:
If you can crochet a rectangle, you can absolutely make this pillow. The candy ends look fancy, but they’re just gathered rectangles. I promise.
Finished Dimensions
Each completed Lavender Dreams Candy Bolster Pillow measures approximately:
These measurements assume you match the gauge below. Your pillow may vary slightly depending on your tension and the specific yarn you choose.
Materials Needed
Yarn:
You’ll need roughly one full skein of Color A and about half a skein of Color B for one pillow. I recommend buying a little extra if this is your first time working with chenille yarn, as it can be tricky to unravel mistakes.
Hook:
Notions:
Gauge
10 single crochet stitches and 12 rows = 4 inches in single crochet fabric
Gauge matters here because it affects the final size and how much stuffing you’ll need. Take a few minutes to check your gauge before starting. If your stitches are too tight, go up a hook size. Too loose? Go down a hook size.
Abbreviations and Stitch Definitions
Let me break down every stitch and term you’ll encounter in this pattern:
Ch = Chain. This is the foundation stitch. Wrap yarn over your hook, pull through the loop on your hook. That’s one chain.
Sc = Single crochet. Insert your hook into the stitch, yarn over and pull up a loop (two loops on hook), yarn over and pull through both loops. This creates a short, dense stitch.
St(s) = Stitch(es). Refers to individual stitch units.
Sl st = Slip stitch. Insert hook into stitch, yarn over, pull through both the stitch and the loop on your hook in one motion. Used for joining and creating invisible seams.
Rep = Repeat. Do the action again.
RS = Right side. The front or public-facing side of your work.
WS = Wrong side. The back or inside of your work.
Pattern Notes Before You Begin
About chenille yarn: This yarn is gloriously soft but can be slippery. Work slowly and count your stitches often. If you need to unravel, do it carefully to avoid the yarn splitting into fuzzy segments.
Color changes: When switching colors, complete the last stitch of the old color until you have two loops on your hook, then yarn over with the new color to finish the stitch. This creates cleaner color transitions.
Tension tip: Try to maintain consistent tension throughout. Chenille yarn shows uneven stitches more than other yarns. Don’t stress about perfection though. Once stuffed, minor inconsistencies disappear.
Working into chains: When you work into your foundation chain, insert your hook under the top two loops of each chain. This creates a neat edge.
Crochet Pattern Instructions
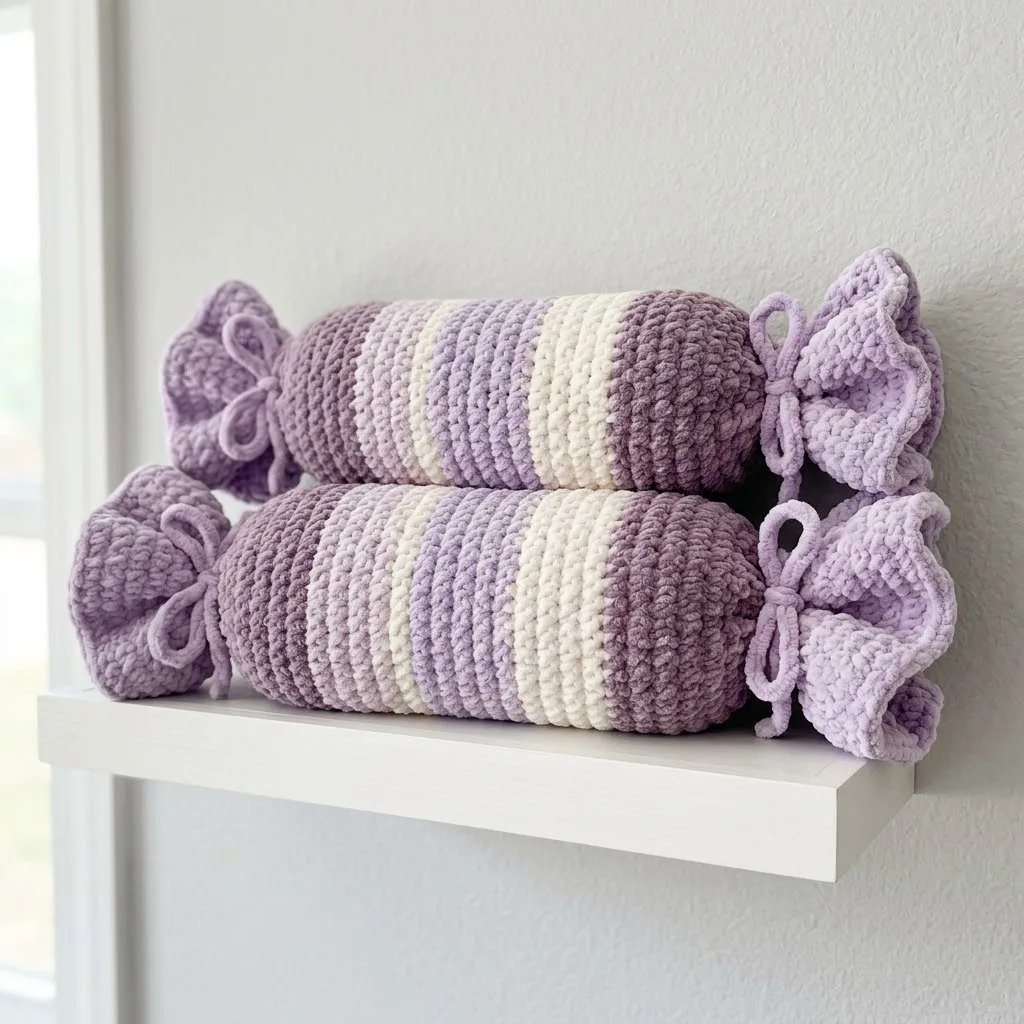
Part 1: The Pillow Body
The main body is worked flat in rows, then seamed into a tube shape.
With Color A, ch 37.
Row 1 (RS): Sc in 2nd ch from hook and in each ch across. (36 sts)
Row 2: Ch 1, turn. Sc in each st across. (36 sts)
Rows 3-8: Rep Row 2. (36 sts each row)
You now have 8 rows of Color A completed.
Color Change to Color B:
Row 9: Ch 1, turn. Sc in each st across, switching to Color B on the last stitch. (36 sts)
Rows 10-16: With Color B, ch 1, turn. Sc in each st across. (36 sts each row)
You now have 8 rows of Color B.
Color Change to Color A:
Row 17: Ch 1, turn. Sc in each st across, switching to Color A on the last stitch. (36 sts)
Rows 18-24: With Color A, ch 1, turn. Sc in each st across. (36 sts each row)
Another 8 rows of Color A completed.
Color Change to Color B:
Row 25: Ch 1, turn. Sc in each st across, switching to Color B on the last stitch. (36 sts)
Rows 26-32: With Color B, ch 1, turn. Sc in each st across. (36 sts each row)
8 rows of Color B completed.
Color Change to Color A:
Row 33: Ch 1, turn. Sc in each st across, switching to Color A on the last stitch. (36 sts)
Rows 34-40: With Color A, ch 1, turn. Sc in each st across. (36 sts each row)
Fasten off Color A. Leave a long tail of approximately 24 inches for seaming.
Your completed body piece should show the following stripe pattern from bottom to top:
Total: 40 rows
Part 2: Seaming the Body into a Tube
Lay your rectangle flat with the right side facing up. Fold the piece in half lengthwise, bringing the two long edges together. The right side should be on the inside for now.
Using your tapestry needle and the long tail, whip stitch the two long edges together. Work through both loops of each stitch on both edges. Keep your stitches even and not too tight.
When you reach the end, secure your yarn but don’t cut it yet. Turn the tube right side out. The seam should now be on the inside, and your beautiful stripes should face outward.
Part 3: Candy Wrapper End Ruffles (Make 2)
These ruffled ends create the signature candy wrapper look. Each one is worked flat, then gathered.
With Color A, ch 61.
Row 1 (RS): Sc in 2nd ch from hook and in each ch across. (60 sts)
Row 2: Ch 1, turn. Sc in each st across. (60 sts)
Rows 3-10: Rep Row 2. (60 sts each row)
Fasten off. Leave a tail of approximately 30 inches.
You should have a rectangle that measures roughly 24 inches long and 3.5 inches wide.
Repeat to make a second ruffle piece.
Part 4: Attaching the Ruffle to the Body
This is where the magic happens. Don’t worry if it feels awkward at first. The gathering hides any imperfections.
Step 1: Take one ruffle piece. With the right side facing out, roll it into a tube shape so the two short ends meet. Use the long tail to whip stitch these short ends together, creating a fabric ring.
Step 2: Slide one end of the pillow body tube inside this ruffle ring. The edge of the body should sit about 1 inch inside the ruffle.
Step 3: Using the same tail, stitch the inner edge of the ruffle to the body edge. Work all the way around, attaching the ruffle securely.
Step 4: Before closing the other end, stuff your pillow firmly with polyester fiberfill. Really pack it in there. The pillow should feel plump and round, not floppy. Use more stuffing than you think you need.
Step 5: Attach the second ruffle to the remaining open end using the same method.
Part 5: Creating the Candy Twist Gather
This is the finishing detail that makes each end look like wrapped candy.
Make a drawstring (make 2):
With Color A, ch 80. Fasten off.
You can also cut a strand of yarn approximately 30 inches long if you prefer not to chain.
To gather the ruffle:
Weave the drawstring chain (or yarn strand) through the ruffle fabric about 1.5 inches from where it connects to the body. Go in and out through the stitches, working all the way around the circumference.
Pull both ends of the drawstring firmly to cinch the ruffle into the gathered candy wrapper shape. The fabric will bunch and ruffle naturally. Tie a secure bow with the drawstring ends.
Repeat on the other end.
Part 6: Finishing Touches
Weave in any remaining yarn tails using your tapestry needle. Hide them inside the pillow body where possible.
Fluff and arrange your candy wrapper ends. Gently pull and shape the ruffles so they fan out nicely. The chenille yarn is forgiving and will hold whatever shape you give it.
Customization Ideas for Your Bolster Pillow
Different color combinations:
Size adjustments:
Alternative yarns:
You can substitute any super bulky weight yarn. Just check your gauge. Cotton blend chenille will be heavier and less squishy. Acrylic chenille works beautifully and is machine washable, which matters if this pillow will see heavy use.
Care Instructions
This bolster pillow is best spot cleaned when needed. If you must machine wash, use a delicate cycle with cold water and place the pillow inside a large pillowcase or mesh laundry bag. Reshape while damp and air dry completely.
Do not put chenille items in the dryer. The heat can damage the fibers and cause shedding.
Troubleshooting Common Issues
My stripe edges look messy: This happens when color changes aren’t carried through properly. Remember to complete the last stitch of each color section with the new color.
My pillow looks lumpy: You probably need more stuffing. Take out the last ruffle, add more fiberfill, and reattach. A well-stuffed pillow has a smooth, rounded surface.
The ruffles won’t stay gathered: Make sure you tie the drawstring tightly with a double knot before adding the bow. You can also add a tiny dot of fabric glue inside the knot for extra security.
My stitch count keeps changing: This is common with chenille yarn because the stitches can be hard to see. Count after every row until you feel confident, and use stitch markers at the beginning and end of rows.
I hope you absolutely love making this Lavender Dreams Candy Bolster Pillow. It’s one of those projects that looks impressive on a shelf but secretly takes very little effort. The chenille yarn does most of the heavy lifting in the cute department.
Thank you so much for choosing this pattern for your next crochet project. I genuinely appreciate you being here. If you make this pillow, I would love to see it! Tag me on Instagram or share a photo in my Facebook group. Seeing your creations brings me so much joy.
If this pattern made you smile, save it to your Pinterest boards so you can find it easily later. And please drop a comment below if you make one. I read every single comment and love hearing about your yarn choices, color combinations, and who you’re gifting these sweet pillows to. Happy crocheting, friend!
You Might Also Like
- Coral Poppy Baby Dress Free Crochet Pattern
- Snuggly Nursery Snake Amigurumi Free Crochet Pattern
- Coral Sunset Ruffled Baby Romper Free Crochet Pattern
- Lavender Dream Ankle Socks Free Crochet Pattern