Coral Peach Tie Front Crochet Cardigan Free Pattern
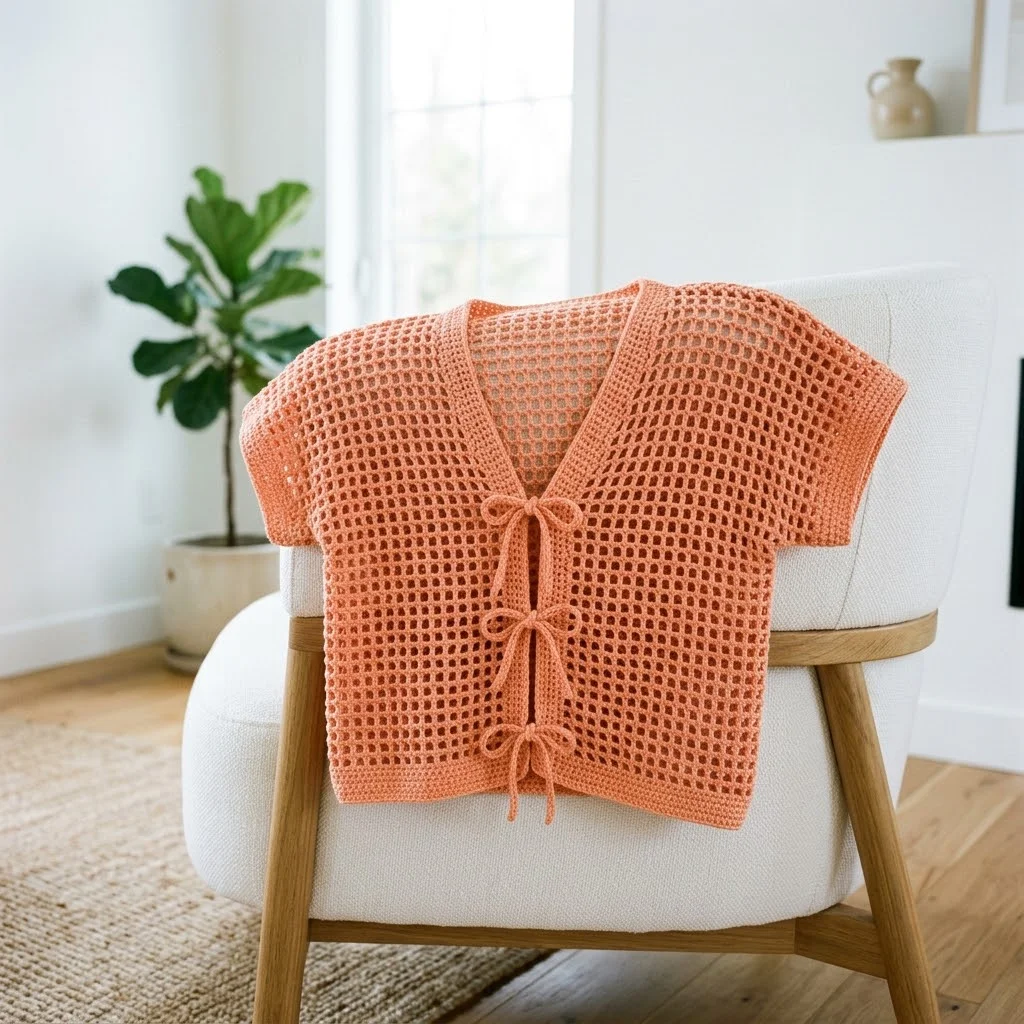
I call this one the Sunset Shores Cardigan, and it has a story. About two years ago, I sketched this design in a little notebook during a beach vacation. I wanted something breezy and feminine, something that would work over a swimsuit or a simple tank top. The notebook got buried under life for a while, but when I found it again last month, I knew it was finally time to bring this one to life. The coral peach color reminds me of that vacation sunset, and those little tie bows at the front still make me smile every time I look at it.
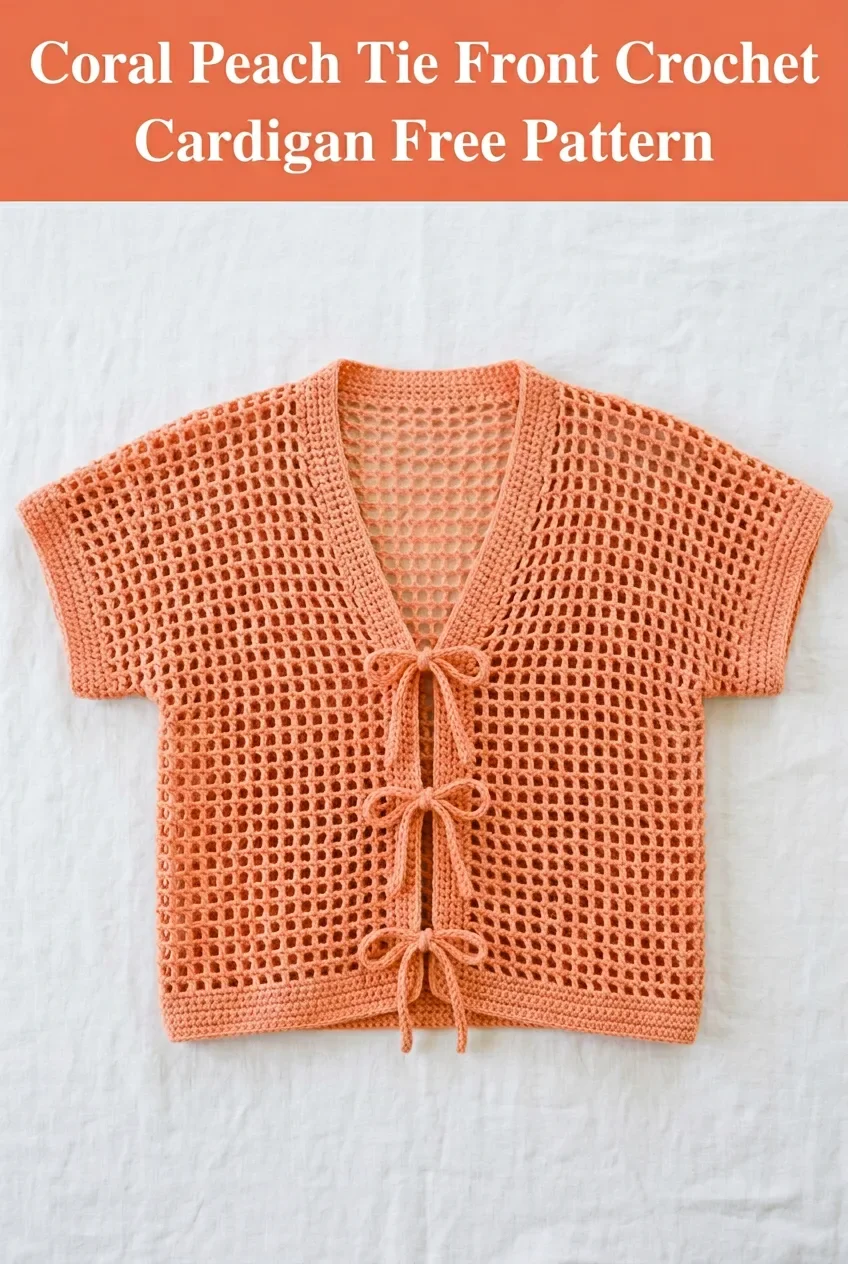
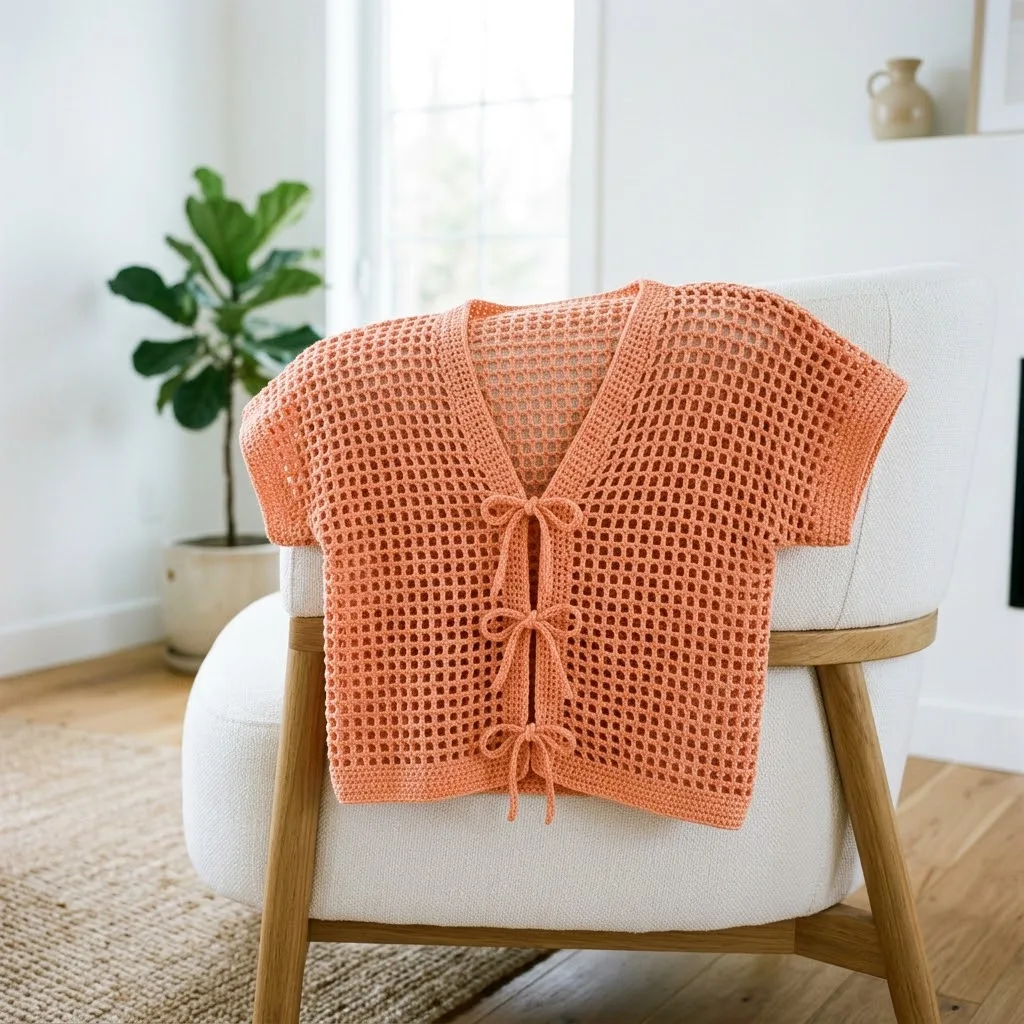
This crochet cardigan pattern uses a simple mesh stitch that creates an airy, open fabric perfect for warm weather layering. If you have been wanting to try garment construction but feel intimidated by complicated shaping, this is your perfect starting point. The boxy silhouette means minimal shaping, and the tie front closure adds a sweet, adjustable detail that flatters many body types.
Why You Will Love This Crochet Cardigan Pattern
This tie front cardigan hits all the marks for a satisfying summer project. The mesh stitch works up quickly once you get the rhythm, and the construction is straightforward. You will make two front panels, one back panel, and two sleeves, then seam them together. No complicated armhole shaping. No picking up stitches. Just simple rectangles and a bit of assembly.
The V-neckline adds an elegant touch without requiring any tricky decreases. You will shape it naturally by working the two front panels separately and leaving an opening at the center. The tie closures give you control over the fit, and honestly, they are just adorable.
Skill Level
Intermediate beginner. If you can chain, single crochet, and double crochet with confidence, you can absolutely make this cardigan. The mesh stitch might look fancy, but it is really just a two-row repeat that becomes second nature after a few rows.
Materials Needed
Yarn: Approximately 800 to 1200 yards of DK weight yarn (weight category 3), depending on your chosen size. The coral peach color shown is gorgeous, but this pattern works beautifully in any solid color that shows off the mesh texture. Cotton or cotton blend yarn works best for drape and breathability.
Hook: 4.0mm (G/6) crochet hook, or size needed to obtain gauge
Notions:
Gauge
16 stitches and 10 rows = 4 inches in mesh stitch pattern
Gauge matters for garments. Take time to make a small swatch before starting. If your swatch is too small, go up a hook size. If it is too large, go down a hook size.
Finished Measurements
This pattern is written for size Medium with a finished bust measurement of approximately 40 inches and length of 20 inches from shoulder to hem. The boxy fit includes 4 to 6 inches of positive ease.
To adjust sizing: Add or subtract chain stitches in multiples of 3 for the starting chain. Each repeat of 3 chains adds approximately 0.75 inches to the width.
Abbreviations and Stitch Definitions
Before we dive in, let me walk you through every stitch and term you will see in this pattern.
Ch = Chain. Wrap yarn over hook, pull through loop on hook. This creates the foundation for your work.
Sl st = Slip stitch. Insert hook, yarn over, pull through both the stitch and the loop on your hook in one motion. Used for joining and moving across stitches.
Sc = Single crochet. Insert hook into stitch, yarn over, pull up a loop (2 loops on hook), yarn over, pull through both loops.
Dc = Double crochet. Yarn over, insert hook into stitch, yarn over, pull up a loop (3 loops on hook), yarn over, pull through 2 loops, yarn over, pull through remaining 2 loops.
Ch-1 sp = Chain one space. The small opening created by a chain stitch in the previous row.
Rep = Repeat
St(s) = Stitch(es)
RS = Right side (the side facing out when worn)
WS = Wrong side
The Mesh Stitch Pattern
This is the beautiful open stitch that creates the signature look of this cardigan. Here is how it works:
Foundation: Chain a multiple of 3, plus 2
Row 1 (RS): Dc in 4th ch from hook, *ch 1, skip 1 ch, dc in next ch*, repeat from * to * across. Turn.
Row 2: Ch 3 (counts as dc), *dc in ch-1 sp, ch 1*, repeat from * to * across, dc in top of turning chain. Turn.
Repeat Row 2 for the mesh pattern.
The magic happens in that ch-1 space. You are creating little windows of open fabric that let air flow through while still providing coverage. Do not worry if your first few rows look a bit wonky. The pattern really shows itself after about 6 rows.
Pattern Instructions
Back Panel
Ch 83 (or adjust for your size in multiples of 3, plus 2)
Row 1 (RS): Dc in 4th ch from hook, *ch 1, skip 1 ch, dc in next ch*, repeat from * to * across. Turn. (54 dc, 53 ch-1 spaces)
Rows 2 through 50: Ch 3 (counts as dc), *dc in ch-1 sp, ch 1*, repeat from * to * across, dc in top of turning chain. Turn.
Your back panel should measure approximately 20 inches wide and 20 inches long. Fasten off and weave in ends.
Right Front Panel
Ch 44
Row 1 (RS): Dc in 4th ch from hook, *ch 1, skip 1 ch, dc in next ch*, repeat from * to * across. Turn. (28 dc, 27 ch-1 spaces)
Rows 2 through 50: Ch 3 (counts as dc), *dc in ch-1 sp, ch 1*, repeat from * to * across, dc in top of turning chain. Turn.
Fasten off. This panel should measure approximately 10.5 inches wide and 20 inches long.
Left Front Panel
Work exactly as the Right Front Panel.
Sleeves (Make 2)
The sleeves are simple rectangles that attach at the shoulder line.
Ch 68
Row 1 (RS): Dc in 4th ch from hook, *ch 1, skip 1 ch, dc in next ch*, repeat from * to * across. Turn. (44 dc, 43 ch-1 spaces)
Rows 2 through 20: Ch 3 (counts as dc), *dc in ch-1 sp, ch 1*, repeat from * to * across, dc in top of turning chain. Turn.
Fasten off. Each sleeve should measure approximately 16 inches wide and 8 inches long.
Assembly
Now comes the satisfying part. Putting it all together.
Step 1: Join Shoulder Seams
Lay the back panel flat with the right side facing up. Place the right front panel on top, right sides together, aligning the top corners. Using your yarn needle and a length of yarn, whip stitch the shoulder seam for approximately 5 inches from the outer edge. Leave the center open for the neckline.
Repeat with the left front panel on the other shoulder.
Step 2: Attach Sleeves
Find the center of one sleeve’s long edge. Match this center point to the shoulder seam. Pin in place. Whip stitch the sleeve to the body, attaching it evenly to both the front and back panels. The sleeve should span about 8 inches on each side of the shoulder seam.
Repeat with the second sleeve.
Step 3: Side and Underarm Seams
Fold the cardigan so front and back panels align at the sides. Starting at the bottom hem, whip stitch up the side seam. Continue up and along the underarm of the sleeve to the sleeve edge.
Repeat on the other side.
Border and Neckline (Optional)
The mesh edge creates a naturally finished look, but you can add a single crochet border for a more polished appearance.
Join yarn at the bottom corner of the right front panel. Sc evenly up the front edge, around the neckline, and down the left front edge. Work 3 sc in each corner to keep the fabric flat. Fasten off.
Tie Closures
These sweet little bows are simpler than they look.
Make 4 ties (2 pairs)
Ch 80. Sl st in 2nd ch from hook and in each ch across. Fasten off.
You will have 4 thin cords approximately 12 inches long each.
Attaching the ties:
Position your cardigan flat with the front panels meeting at center. Decide where you want your ties. The cardigan shown has two sets of ties, one at the bust line and one at the natural waist.
Thread your yarn needle with matching yarn. Attach one tie to the inside edge of the right front panel at your chosen height. Attach its partner directly across on the left front panel. Repeat for the second set.
When worn, you will tie these in simple bows to close the front of the cardigan.
Helpful Tips for Success
Counting stitches: In mesh stitch, it can be tricky to count. Each dc counts as one stitch. The ch-1 spaces are not stitches, but they are part of your pattern. If you lose your place, count the dc posts along the top of your row.
Tension consistency: The mesh looks best when your tension stays even throughout. If you tend to crochet tighter when tired, take breaks to keep your work consistent.
Blocking: Wet blocking this cardigan will open up the mesh beautifully and even out any inconsistencies. Soak the finished piece in cool water, gently squeeze out excess water (no wringing), and lay flat to dry.
Yarn substitution: If you want a denser fabric, use worsted weight yarn with a 5.0mm hook. For an even lacier look, try fingering weight with a 3.5mm hook. Always make a new gauge swatch when substituting.
Customization Ideas
Add length: Simply work more rows on the body panels before fastening off.
Longer sleeves: Add rows to the sleeve panels for three-quarter or full-length sleeves.
Different closure: Skip the ties and add buttons, or leave it open as a layering piece.
Color blocking: Work each panel in a different color for a modern look.
Striping: Change colors every few rows for a fun striped effect.
Styling Your Coral Peach Tie Front Crochet Cardigan
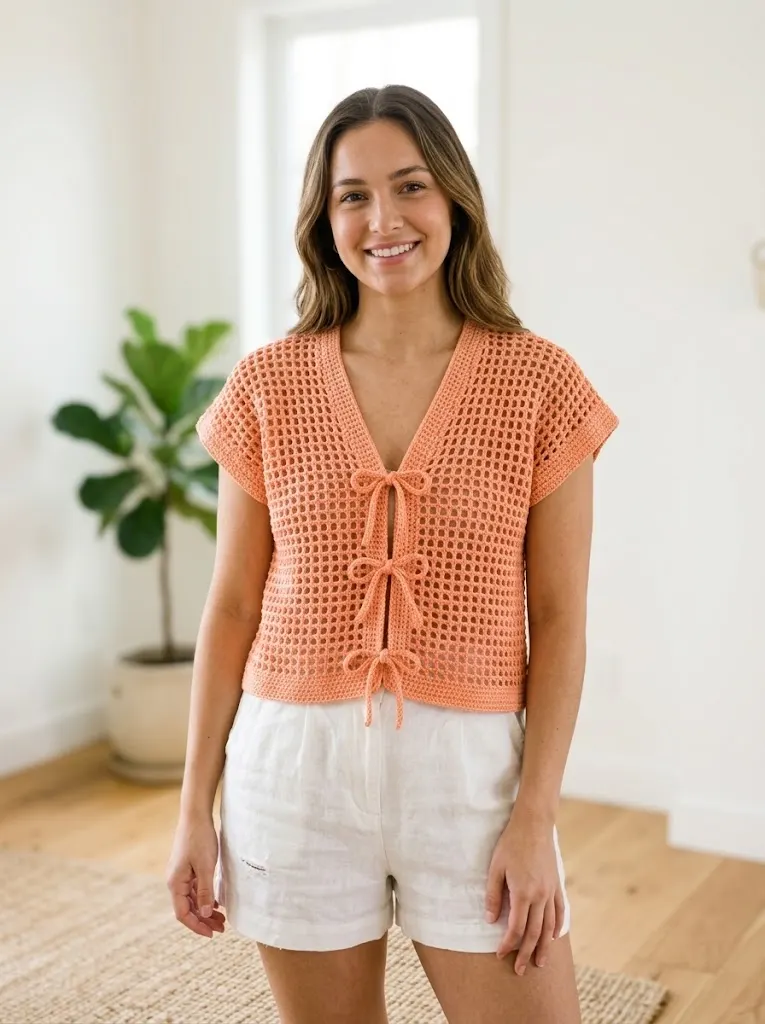
This cardigan is incredibly versatile. Wear it over a bikini top at the beach. Layer it over a simple white tee for brunch. Pair it with a sundress for a feminine summer evening look. The coral peach color complements denim beautifully and looks stunning against both warm and cool skin tones.
The boxy fit makes it forgiving and comfortable, while the tie front gives you the option to define your waist or let it hang loose. It transitions easily from casual daytime to relaxed evening wear.
I really hope you love making this Sunset Shores Cardigan as much as I loved designing it. There is something so satisfying about finishing a wearable project, especially one with a story behind it. If you make this crochet cardigan pattern, I would absolutely love to see it. Tag me on Instagram or share a photo in our Facebook group.
Save this coral peach tie front crochet cardigan pattern to your Pinterest boards so you can find it when you are ready to start. And please drop a comment below if you give it a try. I love hearing how your projects turn out and seeing the colors you choose.
You Might Also Like
- Warm Autumn Terracotta Shoulder Bag Free Crochet Pattern
- Coral Sunset Ruffled Baby Romper Free Crochet Pattern
- Ocean Blue Daisy Granny Square Blanket Free Crochet Pattern
- Terracotta Rust Textured Clutch Bag Free Crochet Pattern