Stormy Gray Neutral Granny Square Blanket Free Crochet Pattern
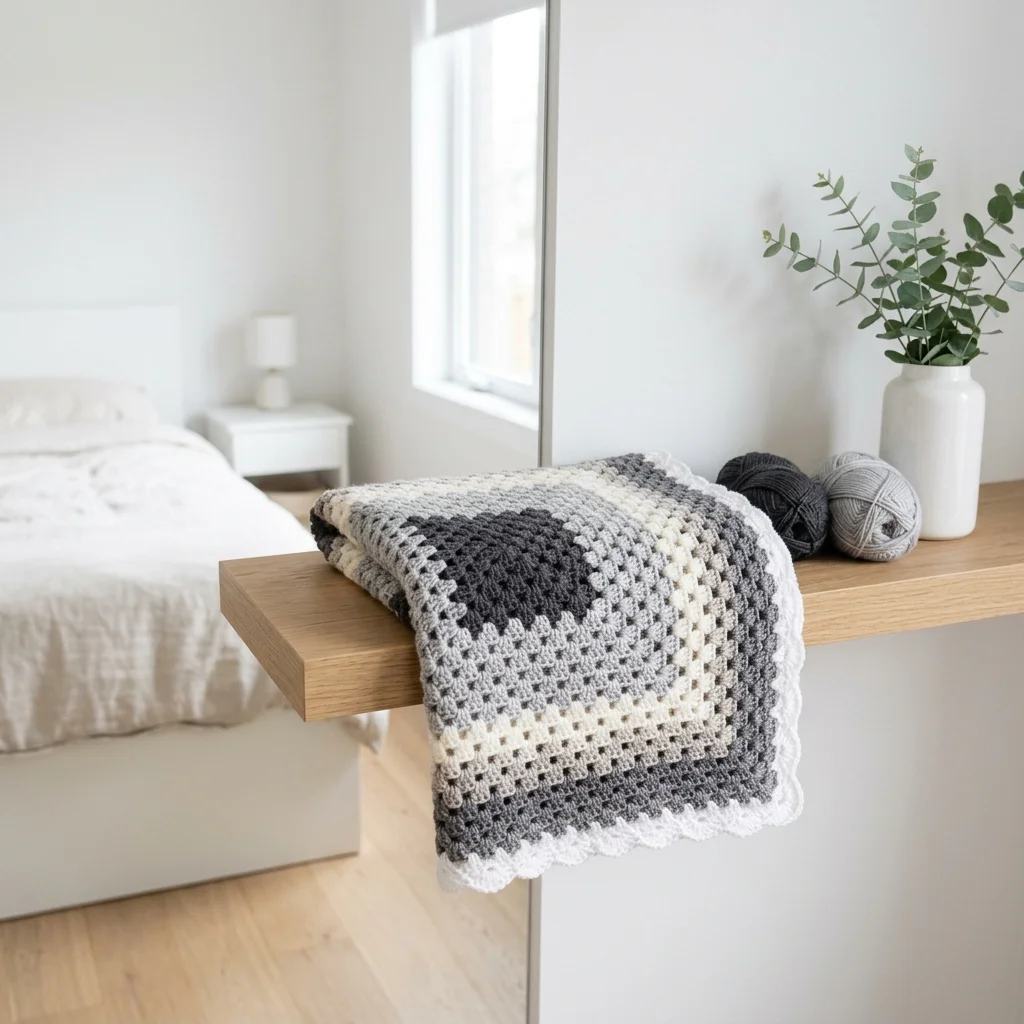
I wanted to create a blanket that felt modern but still had that classic granny square charm we all know and love. My goals were simple: keep the stitch work traditional, let the colors do the heavy lifting, and design something that would look stunning in any room. The gradient effect from dark charcoal through soft grays to cream was exactly the moody, sophisticated vibe I was going for. I am SO pleased with how this turned out! The simplicity of the granny stitch combined with this carefully planned color palette creates something that looks far more complex than it actually is.

This crochet pattern is perfect for beginners who want to practice the classic granny square technique while creating a full-sized blanket. If you have been nervous about tackling a large project, this is your sign to go for it. The repetitive stitch pattern becomes almost meditative once you get going.
Why This Granny Square Blanket Works So Well
The beauty of this neutral granny square blanket lies in its versatility. The stormy gray color scheme transitions seamlessly from a dark charcoal center through medium gray, light gray, cream, and back again. This creates visual interest without overwhelming a space. You could drape this over a minimalist Scandinavian sofa or layer it on a rustic farmhouse bed, and it would look completely at home in either setting.
The granny stitch construction means this blanket works up faster than you might expect. Because you are working clusters of double crochet stitches with chain spaces between them, you cover ground quickly while still creating that gorgeous textured look.
Skill Level
Beginner to Intermediate
If you can chain, double crochet, and work in the round, you can absolutely make this blanket. The only technique that might be new is joining colors seamlessly, and I will walk you through that step by step.
Finished Dimensions
Approximately 45 inches by 45 inches (114 cm by 114 cm)
This creates a generous lap blanket or a cozy throw. You can easily adjust the size by adding or removing rounds.
Materials Needed
Yarn:
I recommend using a worsted weight yarn (weight category 4) for this project. Look for a soft acrylic or acrylic blend that has good stitch definition. The yarn visible in the photos appears to be a smooth, classic worsted weight with a slight sheen, which helps those granny clusters really pop.
Hook:
Notions:
Gauge
4 granny clusters and 4 rows = 4 inches in granny stitch pattern
Gauge is not critical for a blanket, but checking it will help you estimate if your finished size will match the pattern or if you need to adjust your hook size.
Abbreviations and Stitch Definitions
Before we dive into the crochet tutorial, let me break down every stitch and abbreviation you will encounter:
Ch = Chain: Wrap yarn over hook, pull through the loop on your hook. This creates one chain stitch.
Sl st = Slip stitch: Insert hook into stitch, yarn over, pull through both the stitch and the loop on your hook in one motion. Used for joining rounds.
Dc = Double crochet: Yarn over, insert hook into stitch, yarn over and pull up a loop (3 loops on hook), yarn over and pull through 2 loops (2 loops remain), yarn over and pull through remaining 2 loops. One double crochet complete.
Sp = Space: The gap created by chain stitches in the previous round.
Granny Cluster = A group of 3 double crochet stitches worked into the same space or stitch. This is the building block of the entire blanket.
Corner = In granny square construction, corners are created by working 2 granny clusters with a ch 2 space between them, all into the same corner space.
Understanding Granny Square Construction
If you are new to granny squares, here is what you need to know. The classic granny square is worked from the center outward in continuous rounds. Each round adds more clusters and increases the overall size. The magic happens in the corners, where you work extra stitches to create that characteristic square shape.
Do not worry if your first few rounds look a bit wonky or like they are curling. This is completely normal. As you add more rounds, the piece will flatten out and the square shape will become more defined.
Step By Step Crochet Pattern Instructions
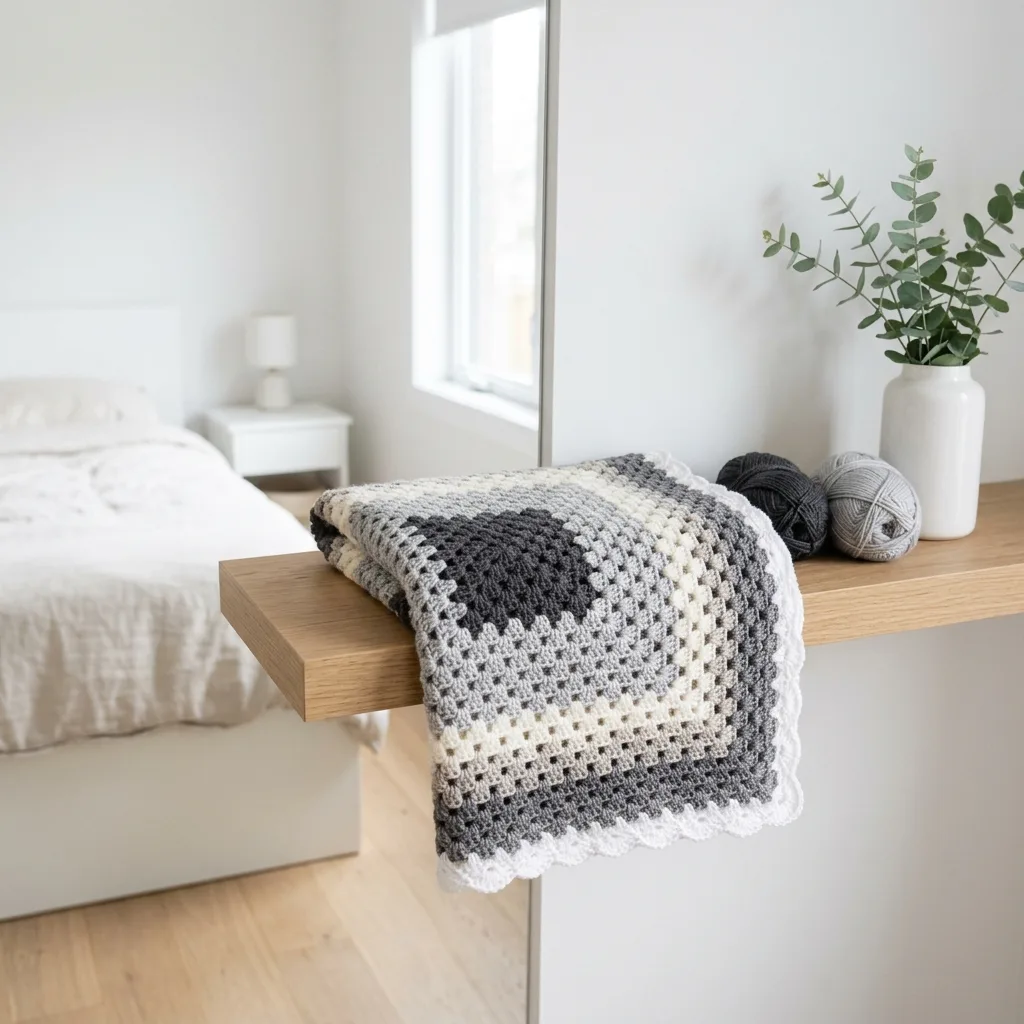
Starting the Center (Color A, Dark Charcoal)
Magic Ring Setup:
Create a magic ring. If you are not comfortable with magic rings, you can chain 4 and slip stitch to the first chain to form a ring instead. Both methods work perfectly.
Round 1:
Ch 3 (counts as first dc), work 2 dc into the ring, ch 2, *3 dc into the ring, ch 2* repeat 3 more times. Sl st to the top of the beginning ch 3 to join. (4 granny clusters, 4 ch-2 corner spaces)
Pull your magic ring closed if you used one.
Round 2:
Sl st across the top of the next 2 dc to reach the corner space. Ch 3 (counts as first dc), 2 dc in same corner sp, ch 2, 3 dc in same corner sp (first corner made), ch 1, *in next corner sp work (3 dc, ch 2, 3 dc), ch 1* repeat around remaining 3 corners. Sl st to top of beginning ch 3 to join. (8 granny clusters, 4 ch-2 corner spaces, 4 ch-1 side spaces)
Round 3:
Sl st to corner sp. Ch 3, 2 dc in same sp, ch 2, 3 dc in same sp (corner made), ch 1, 3 dc in next ch-1 sp, ch 1, *corner in next corner sp, ch 1, 3 dc in next ch-1 sp, ch 1* repeat around. Sl st to join. (12 granny clusters total)
Rounds 4 through 8:
Continue in the established pattern. Each round, work a corner (3 dc, ch 2, 3 dc) in each corner space, and work a granny cluster (3 dc) in each ch-1 space along the sides. Always ch 1 between clusters.
By the end of Round 8, you will have 7 clusters along each side, plus 4 corners. (32 clusters total, 36 sts per side including corner clusters)
Fasten off Color A.
Adding the Gradient (Colors B, C, and D)
Color B (Medium Gray), Rounds 9 through 14:
Join Color B with a sl st in any corner space. Work 6 rounds following the same granny pattern. Each round adds one more cluster to each side.
By the end of Round 14, you will have 13 clusters per side plus corners. Fasten off Color B.
Color C (Light Gray), Rounds 15 through 20:
Join Color C and work 6 more rounds. By the end of Round 20, you will have 19 clusters per side. Fasten off Color C.
Color D (Cream), Rounds 21 through 26:
Join Color D and work 6 more rounds. By the end of Round 26, you will have 25 clusters per side. Fasten off Color D.
Creating the Reverse Gradient
Now we work back through the colors to create that beautiful mirrored effect.
Color C (Light Gray), Rounds 27 through 30:
Join Color C and work 4 rounds. (29 clusters per side at end)
Color B (Medium Gray), Rounds 31 through 34:
Join Color B and work 4 rounds. (33 clusters per side at end)
Color A (Dark Charcoal), Rounds 35 through 38:
Join Color A and work 4 rounds. (37 clusters per side at end)
Fasten off Color A.
The Finishing Border (Color E, White)
The delicate scalloped border adds a soft, finished edge to the blanket.
Border Round 1:
Join Color E in any corner sp. Ch 1, work 3 sc in corner sp, *sc in each dc and each ch-1 sp across to next corner, 3 sc in corner sp* repeat around all 4 sides. Sl st to first sc to join.
Border Round 2 (Scallop Edge):
Ch 1, sc in same st, *skip 2 sts, 5 dc in next st (shell made), skip 2 sts, sc in next st* repeat around, adjusting at corners as needed to keep the pattern flowing smoothly. Sl st to first sc to join.
Fasten off and weave in all ends.
Tips for Color Changes
When changing colors, I recommend joining the new color in a corner space. This keeps your color joins neat and makes them less visible. To join, simply insert your hook into the corner space, yarn over with the new color, and pull through. Then begin your chain 3 as usual.
For the cleanest look, weave in your ends as you go rather than leaving them all for the end. Trust me, weaving in dozens of ends at once is nobody’s idea of a good time.
Blocking Your Finished Blanket
Blocking is optional for this blanket, but it does help even out your stitches and make the corners nice and crisp. Wet block by soaking the blanket in cool water, gently squeezing out excess moisture (do not wring), and laying it flat on a blocking mat or clean towels. Pin the corners and edges, then let it dry completely.

Customization Ideas
This beginner friendly crochet pattern is incredibly adaptable. Try a rainbow gradient, an ombre effect in a single color family, or scrappy random stripes to use up your stash. The construction method stays exactly the same.
You can also adjust the size by adding or subtracting rounds. Each round adds approximately 1 inch to the overall dimensions.
Thank you so much for choosing this pattern for your next cozy project. I genuinely hope you love making this stormy gray neutral granny square blanket as much as I loved designing it. If you make one, I would absolutely love to see it! Tag me on Instagram or share a photo in our Facebook group.
If this crochet pattern is calling your name, go ahead and save it to your Pinterest boards so you can find it whenever you are ready to cast on. And please drop a comment below when you finish yours. I read every single one, and seeing your creations honestly makes my whole day!
You Might Also Like
- Dusty Rose Floral Lace Bucket Bag Free Crochet Pattern
- Terracotta Desert Shell Purse Free Crochet Pattern
- Blush Pink Tiered Baby Romper Free Crochet Pattern
- Rainbow Pastel Snake Plushie Free Crochet Pattern