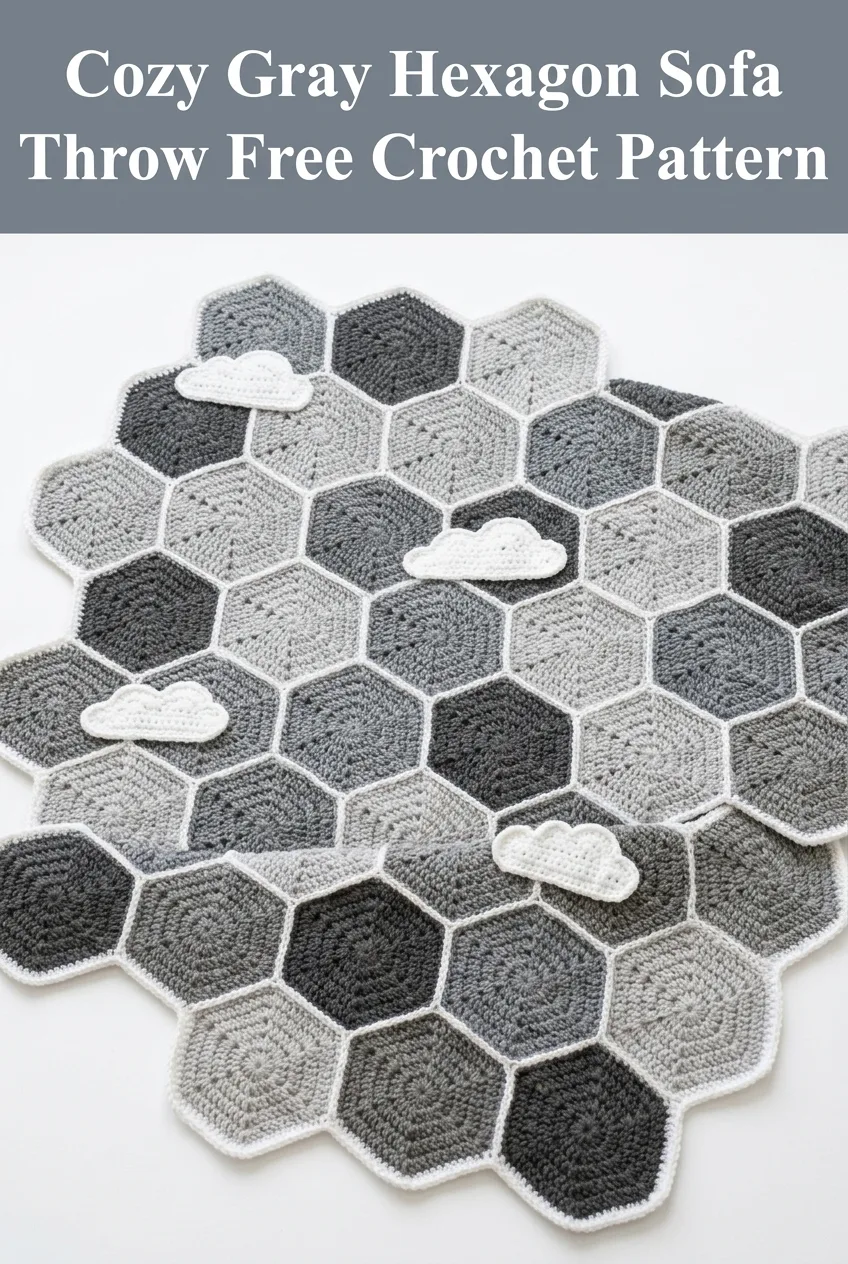
Cozy Gray Hexagon Sofa Throw Free Crochet Pattern
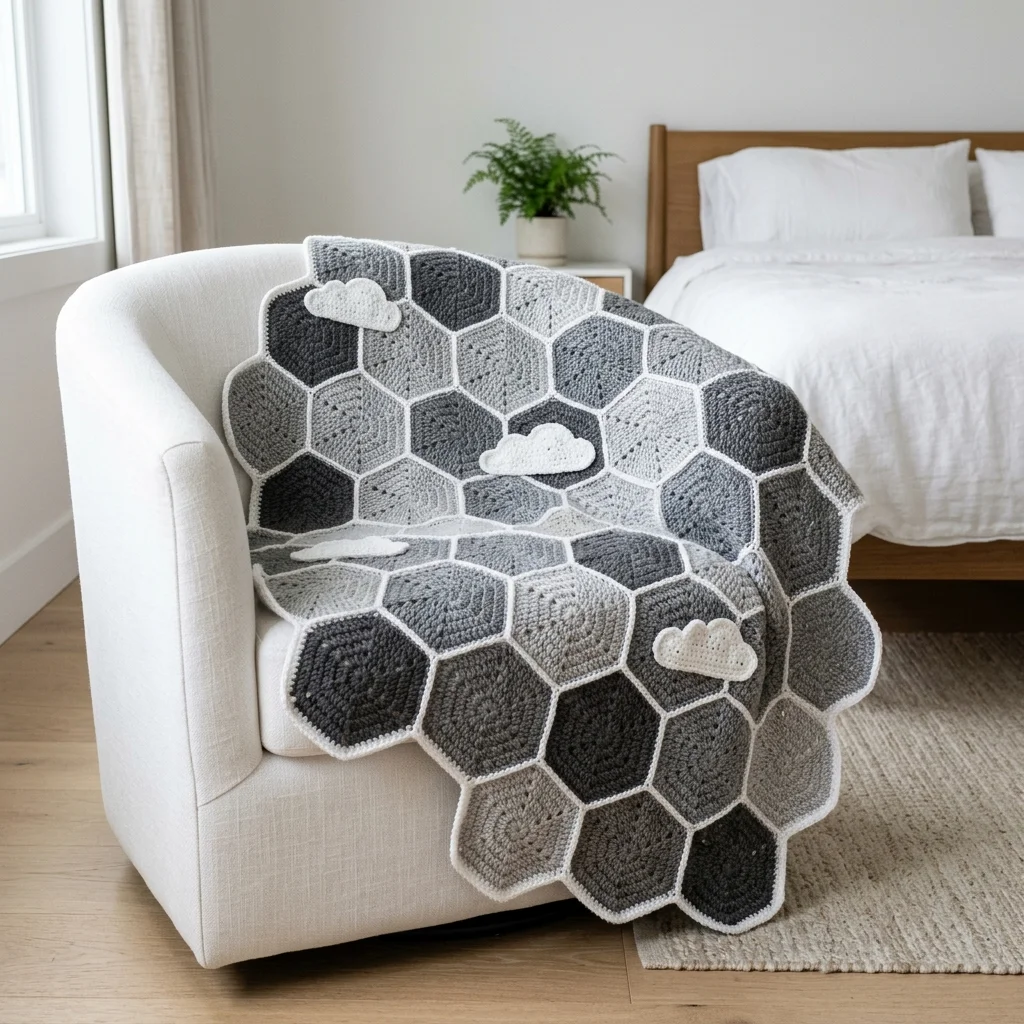
Go dig through your yarn stash right now. I know you have those beautiful gray skeins you’ve been saving for “the right project.” This is that project. This hexagon throw combines multiple shades of gray with crisp white borders to create a stunning modern blanket that looks far more complicated than it actually is. The construction uses simple join-as-you-go hexagons, which means minimal seaming at the end. And those adorable little cloud appliqués? They take about ten minutes each and add the most whimsical touch. I’ll be honest with you. If you can crochet in the round and count to six, you can absolutely make this throw. It’s repetitive in the best way, perfect for binge-watching your favorite shows while your hands stay busy.
Why You’ll Love This Hexagon Throw Crochet Pattern
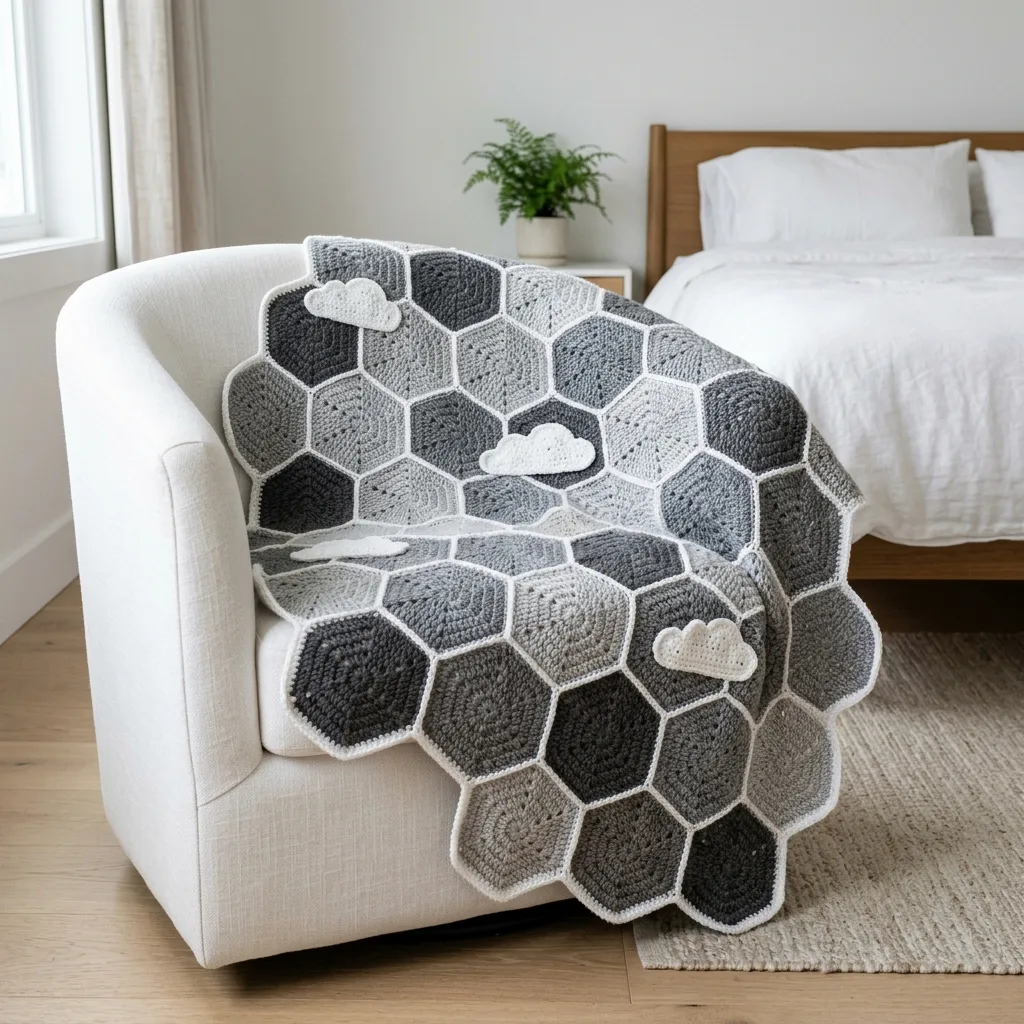
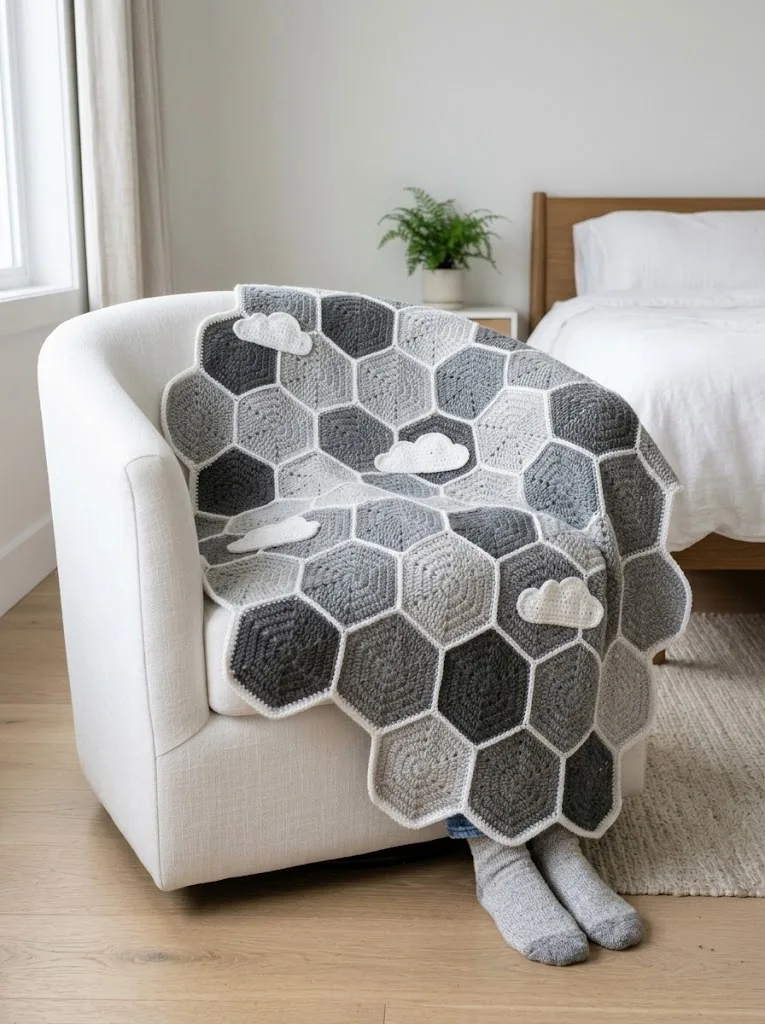
This cozy gray hexagon sofa throw works up beautifully as a statement piece for any living space. The gradient effect you see comes from randomly mixing light gray, medium gray, and charcoal hexagons. No complicated color planning required. Just grab whatever shade feels right for each motif.
What makes this pattern special:
Skill Level
Confident Beginner to Intermediate
If you’ve made granny squares or any hexagon motif before, you’ll find this very approachable. If hexagons are new to you, don’t worry. I’ll walk you through every round with clear stitch counts.
Finished Dimensions
Approximately 45 inches wide by 55 inches long (throw size)
Each hexagon measures roughly 5 inches from flat edge to flat edge after blocking.
The throw shown uses approximately 63 full hexagons plus 14 half hexagons for straight edges.
Materials Needed
Yarn:
I recommend a soft acrylic or acrylic blend for easy washing. Something like Lion Brand Vanna’s Choice or Caron Simply Soft works beautifully.
Hook:
Notions:
Gauge
One completed hexagon should measure 5 inches across from flat edge to flat edge using recommended hook size.
Gauge matters here because it affects your final blanket size. If your hexagons are too small, go up a hook size. Too large? Go down a hook size.
Abbreviations and Stitch Definitions
Let me walk you through every stitch abbreviation you’ll encounter in this crochet tutorial. Even if you’re experienced, a quick refresher never hurts.
ch = chain: Yarn over, pull through the loop on your hook. This creates the foundation for most crochet work.
sl st = slip stitch: Insert hook into stitch, yarn over, pull through both the stitch and the loop on your hook in one motion. Used for joining rounds.
sc = single crochet: Insert hook into stitch, yarn over and pull up a loop (2 loops on hook), yarn over and pull through both loops.
hdc = half double crochet: Yarn over, insert hook into stitch, yarn over and pull up a loop (3 loops on hook), yarn over and pull through all 3 loops at once.
dc = double crochet: Yarn over, insert hook into stitch, yarn over and pull up a loop (3 loops on hook), yarn over and pull through 2 loops (2 loops remain), yarn over and pull through remaining 2 loops.
2dc = two double crochet stitches worked into the same stitch (an increase)
magic ring = adjustable starting ring: Creates a tight center with no hole. If magic rings intimidate you, chain 4 and slip stitch to form a ring instead.
Pattern Notes Before You Begin
1. Work in joined rounds. Each round ends with a slip stitch to join, then you’ll chain up to begin the next round.
2. The turning chain counts as a stitch in this pattern unless otherwise noted.
3. Color placement is random. Don’t overthink it. The beauty of this throw comes from the organic mix of light, medium, and dark hexagons.
4. All hexagons get white borders. This unifies the design and makes joining easier.
5. You can join as you go or sew together at the end. I’ll explain both methods.
How to Crochet the Hexagon Motif
Round 1 (Center)
Using any gray color (A, B, or C), create a magic ring.
Ch 3 (counts as first dc throughout), work 11 dc into the magic ring. Sl st to top of ch-3 to join.
Pull magic ring closed tightly.
(12 dc)
Round 2 (First Increase Round)
Ch 3 (counts as dc), dc in same st as join (this creates your first increase).
Work 2dc in each st around. Sl st to top of ch-3 to join.
(24 dc)
Round 3 (Shaping the Hexagon)
This is where we create the six sides. Pay attention to the pattern of increases.
Ch 3 (counts as dc), dc in same st.
*Dc in next 3 sts, 2dc in next st.* Repeat from * to * four more times. Dc in next 3 sts. Sl st to top of ch-3 to join.
(30 dc: 6 increase points with 4 stitches between each)
Round 4 (Continuing the Shape)
Ch 3, dc in same st.
*Dc in next 4 sts, 2dc in next st.* Repeat from * to * four more times. Dc in next 4 sts. Sl st to top of ch-3 to join.
(36 dc)
Round 5 (Final Gray Round)
Ch 3, dc in same st.
*Dc in next 5 sts, 2dc in next st.* Repeat from * to * four more times. Dc in next 5 sts. Sl st to top of ch-3 to join.
(42 dc)
Fasten off your gray yarn. Leave a 6-inch tail for weaving in later.
Round 6 (White Border)
Join Color D (white) with a sl st to any corner increase from Round 5.
Ch 1, work 2 sc in same st (this marks your corner).
*Sc in next 6 sts, 2 sc in next st (corner).* Repeat from * to * around until you reach the beginning. Sl st to first sc to join.
(48 sc: 8 stitches per side including corners)
Fasten off white. Leave tail for joining or weaving.
You’ve completed one hexagon! Make approximately 63 of these in a random mix of grays.
Half Hexagon Pattern (For Straight Edges)
To create straight edges on your throw, you’ll need half hexagons. These fill in the gaps along the top and bottom.
Row 1
Using any gray, ch 4.
Work 6 dc into the 4th chain from hook. Turn.
(7 dc including turning chain)
Row 2
Ch 3, dc in same st. Dc in next 5 sts, 2dc in last st. Turn.
(9 dc)
Row 3
Ch 3, dc in same st. Dc in next 7 sts, 2dc in last st. Turn.
(11 dc)
Row 4
Ch 3, dc in same st. Dc in next 9 sts, 2dc in last st. Turn.
(13 dc)
Row 5
Ch 3, dc in same st. Dc in next 11 sts, 2dc in last st. Do not turn.
(15 dc)
Border
Ch 1, work sc evenly around the entire half hexagon, placing 2 sc at each corner point. Sl st to join.
Fasten off.
Make approximately 14 half hexagons for top and bottom edges.
Cloud Appliqué Pattern (Optional)
These sweet little clouds add such a playful touch to the finished throw. They’re completely optional but take only minutes to make.
Small Bumps (Make 3 per cloud)
Using white yarn and magic ring:
Bump 1 (left): Ch 2, work 6 hdc into ring, sl st to join. Fasten off, leaving long tail.
Bump 2 (center, slightly larger): Ch 2, work 8 hdc into ring, sl st to join. Fasten off, leaving long tail.
Bump 3 (right): Ch 2, work 6 hdc into ring, sl st to join. Fasten off, leaving long tail.
Assembly
Use your yarn needle to sew the three bumps together side by side, with the larger bump in the center. Stitch them to overlap slightly so they form one cohesive cloud shape.
Sew completed clouds onto random hexagons throughout your throw. I placed 4 clouds on the throw shown, but you can add as many or as few as you like.
Joining Your Hexagons
You have two options here. Choose whichever feels more comfortable.
Option 1: Whip Stitch Join (Beginner Friendly)
Lay out all your hexagons in your desired arrangement before sewing anything. Take a photo so you remember the layout.
Thread your yarn needle with white yarn. Hold two hexagons with right sides facing. Whip stitch through the back loops only along the edge where they meet. This creates a flat, nearly invisible seam.
Continue joining hexagons in rows, then join the rows together.
Option 2: Single Crochet Join
Hold two hexagons with wrong sides facing. Working through both layers, sc along the joining edge. This creates a visible ridge on the right side, which some crafters love as a design element.
Layout and Assembly
For the throw size shown:
Arrange hexagons in approximately 9 rows of 7 hexagons each. Offset alternating rows to create the honeycomb effect (row 2 shifts over by half a hexagon, row 3 aligns with row 1, and so on).
Fill in the zigzag edges with half hexagons for straight top and bottom borders.
Final Border (Optional)
Once all hexagons are joined, you may add one final round of single crochet in white around the entire perimeter. This creates a polished finished edge.
Join white to any corner, ch 1, and sc evenly around, placing 3 sc in each corner point. Sl st to join. Fasten off.
Finishing Your Hexagon Throw
Weave in all those ends. I know, I know. It’s tedious. But it makes such a difference in the finished look. Weave each tail through several stitches on the wrong side, then trim close to the work.
Blocking is optional but recommended. Lay your throw flat on blocking mats, gently steam with an iron held above the surface, and allow to dry completely. This evens out your stitches and helps the hexagons lay flat.
Care Instructions
Machine wash cold on gentle cycle. Tumble dry low or lay flat to dry. Acrylic yarns handle washing beautifully and actually soften with each wash.
Customization Ideas
Different sizes: Add or remove hexagon rows to create a baby blanket, twin bed throw, or even a massive king-size blanket.
Color variations: Try soft pastels for a nursery, bold jewel tones for a statement piece, or rainbow brights for a fun kids’ room blanket.
Skip the clouds: The throw looks equally stunning without the appliqués for a more minimalist modern aesthetic.
Add other appliqués: Stars, moons, hearts, or flowers would all work beautifully with this hexagon base.
Troubleshooting Common Issues
Hexagons curling? Your tension might be too tight. Try going up a hook size or consciously loosening your grip.
Hexagons not laying flat? Check your stitch counts. Missing even one increase can cause puckering.
Uneven edges after joining? Blocking helps tremendously. Steam and pin, then let dry completely.
Running out of one gray shade? No problem. The random distribution means slight color variations add character rather than looking like mistakes.
Step by Step Crochet Tutorial Tips
When learning how to crochet hexagons, the most important thing is maintaining consistent tension throughout each round. Your first few hexagons might look a little different from your last ones as you settle into a rhythm. That’s completely normal and won’t be noticeable in the finished throw.
This beginner friendly crochet pattern works up faster than you might expect. Once you’ve memorized the hexagon rounds (which happens around hexagon number 5 or 6), you can make them almost on autopilot.
I really hope you love making this cozy gray hexagon sofa throw as much as I loved designing it. There’s something so satisfying about watching a pile of individual hexagons transform into a gorgeous finished blanket. Thank you for trusting me with your crafting time. That means everything.
If you make this throw, I would absolutely love to see it! Tag me on Instagram or share a photo in our Facebook group. Seeing your finished projects genuinely makes my whole day.
Don’t forget to save this pattern to your Pinterest boards so you can find it easily when you’re ready to start. And if you have any questions or want to share your progress, drop a comment below. I read every single one and I’m always here to help!
You Might Also Like
- Sky Blue Dragon Amigurumi Plush Free Crochet Pattern
- Mustard Yellow Boho Tote with Brown Leather Tassels Pattern
- Blush Pink Tiered Baby Romper Free Crochet Pattern
- Ocean Blue Highland Cow Amigurumi Free Crochet Pattern