Ocean Blue Ripple Moon Clutch with Gold Tassel Free Crochet Pattern
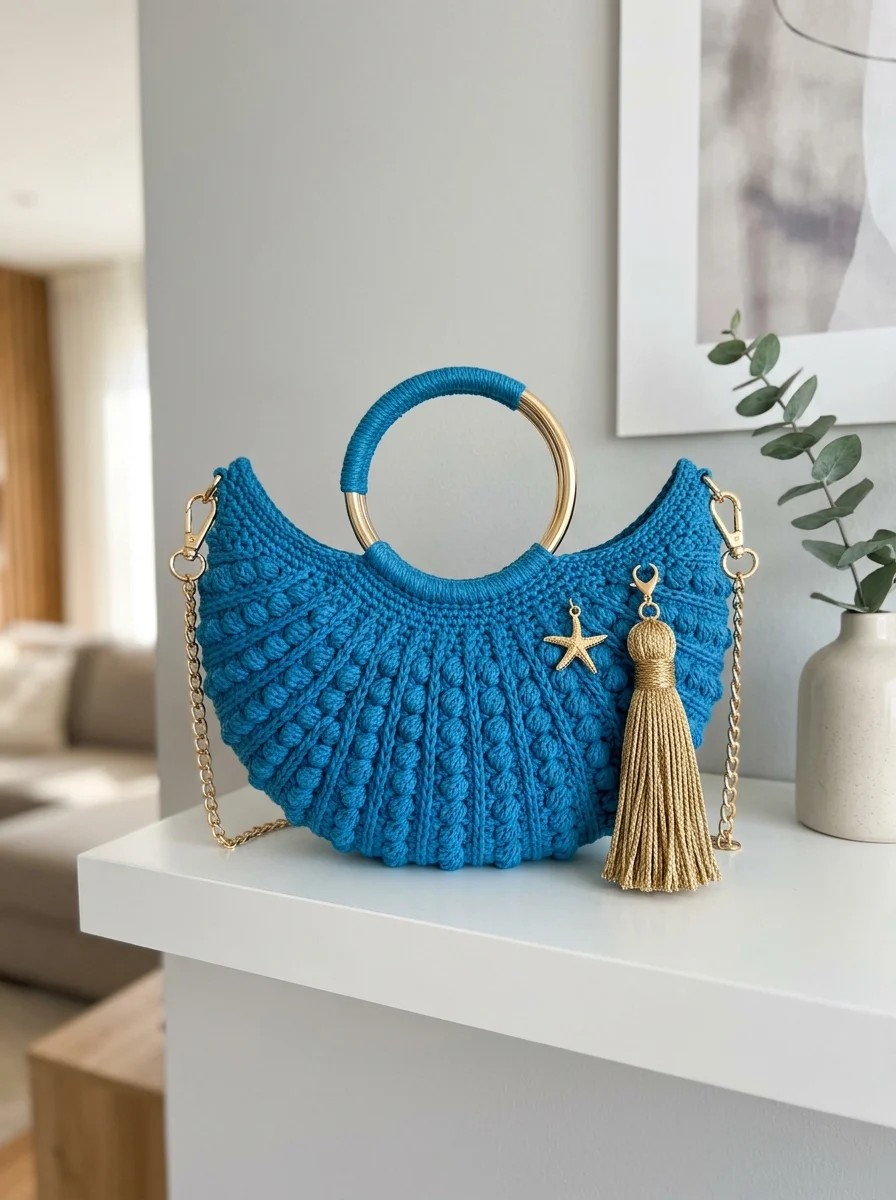
This stunning crescent-shaped bag might look like something from a boutique window, but I promise you can make it yourself. The Ocean Blue Ripple Moon Clutch features gorgeous bobble stitch texture, elegant gold hardware, and that beautiful curved shape that reminds me of a seashell catching the light. If you can crochet a basic bobble and work in rows, you have everything you need for this project.
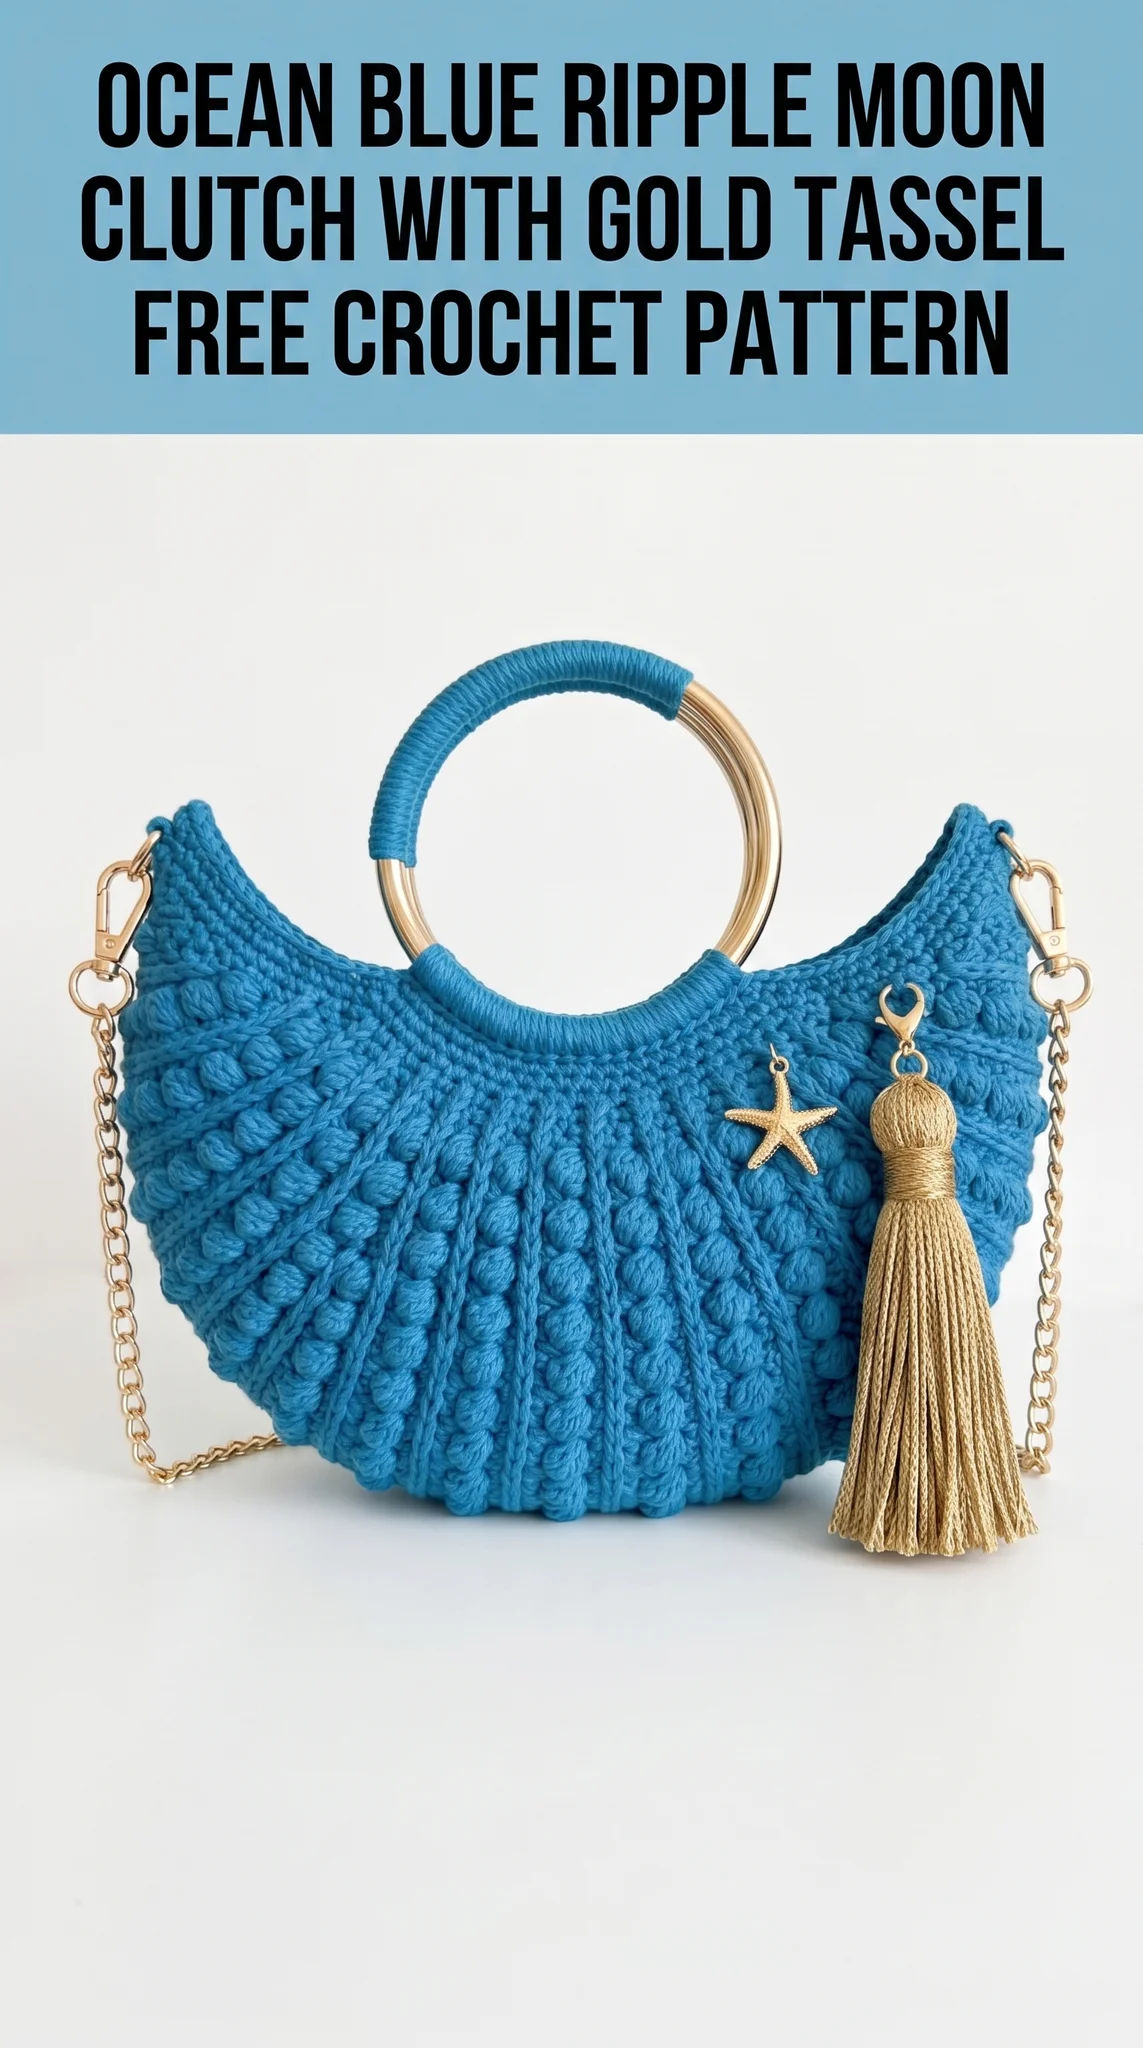
I designed this crochet pattern to look impressive while using techniques most intermediate crocheters already know. The construction is simpler than it appears. You will work two identical panels, join them together, and add the hardware. That is genuinely it. The magic comes from the strategic bobble placement and the shaping that creates those lovely radiating lines.
Let me walk you through every single step.
Why This Crochet Clutch Pattern Works So Well
The crescent moon shape makes this bag incredibly practical. It nestles against your body naturally whether you carry it by the ring handle or use the chain strap. The curved bottom means items settle securely without that annoying shifting you get with rectangular bags.
The bobble stitch texture does double duty here. It creates visual interest with those raised dots running in vertical lines, and it also adds structure. Bobbles make the fabric thicker and sturdier, perfect for a bag that needs to hold its shape.
I chose a medium worsted weight yarn for this project. The yarn appears to be a smooth, tightly plied cotton or cotton blend based on the stitch definition and slight sheen. Cotton works beautifully for bags because it does not stretch out over time the way acrylic can.
Materials You Will Need
Yarn:
Hook:
Hardware and Notions:
Finished Dimensions
Gauge
18 stitches and 14 rows = 4 inches in single crochet
Gauge is important for this pattern because the bag needs to fit the ring handle properly. Please check your gauge before starting.
Abbreviations and Stitch Definitions
ch = chain: yarn over, pull through loop on hook
sl st = slip stitch: insert hook, yarn over, pull through stitch and loop on hook in one motion
sc = single crochet: insert hook, yarn over, pull up loop, yarn over, pull through both loops (2 loops become 1)
hdc = half double crochet: yarn over, insert hook, yarn over, pull up loop, yarn over, pull through all 3 loops
dc = double crochet: yarn over, insert hook, yarn over, pull up loop, yarn over, pull through 2 loops, yarn over, pull through remaining 2 loops
bob = bobble stitch: work 5 double crochets into the same stitch but stop each one before the final yarn over, leaving 6 loops on your hook, then yarn over and pull through all 6 loops at once. This creates a rounded bump that pops to the front of your work.
inc = increase: work 2 stitches into the same stitch
dec = decrease: work 2 stitches together as one
Special Technique: The Bobble Stitch
The bobble is the star of this crochet tutorial, so let me break it down completely.
Start with your hook in the stitch where you want the bobble. Yarn over, insert hook, yarn over, pull up a loop. You have 3 loops on your hook. Yarn over and pull through 2 loops. You now have 2 loops on your hook. This is an incomplete double crochet.
Repeat this process four more times into the same stitch. After five incomplete double crochets, you will have 6 loops on your hook. Yarn over one final time and pull through all 6 loops.
Important: Bobbles naturally push to the back of your work. When working this bag, the bobbles will pop toward you on wrong side rows and away from you on right side rows. This is normal and creates the consistent texture on the outside of your finished clutch.
Step by Step Crochet Pattern: Front Panel
You will make two identical panels. The shaping creates the crescent moon silhouette through increases at the edges and strategic placement of bobbles along radiating lines.
Foundation Row:
Ch 7.
Row 1 (Right Side):
Sc in 2nd ch from hook and in each ch across. (6 sts)
Row 2:
Ch 1, turn. 2 sc in first st (increase made), sc in each st to last st, 2 sc in last st. (8 sts)
Row 3:
Ch 1, turn. 2 sc in first st, sc in next 2 sts, bob in next st, sc in next 2 sts, 2 sc in last st. (10 sts, 1 bobble)
Row 4:
Ch 1, turn. 2 sc in first st, sc in each st to last st, 2 sc in last st. (12 sts)
Row 5:
Ch 1, turn. 2 sc in first st, sc in next 2 sts, bob in next st, sc in next 4 sts, bob in next st, sc in next 2 sts, 2 sc in last st. (14 sts, 2 bobbles)
Rows 6 through 24:
Continue in this established pattern. Every even row, work increases at both edges with single crochet between. Every odd row, work increases at both edges and place bobbles every 4th stitch along the row, maintaining the vertical line pattern.
By Row 24, you should have approximately 54 stitches.
Rows 25 through 28: Upper Shaping
Begin decreasing to create the curved top edge.
Row 25:
Ch 1, turn. Sc2tog over first 2 sts, continue in pattern with bobbles, sc2tog over last 2 sts. (52 sts)
Row 26:
Ch 1, turn. Sc2tog, sc across to last 2 sts, sc2tog. (50 sts)
Row 27:
Ch 1, turn. Sc2tog, work in pattern, sc2tog. (48 sts)
Row 28:
Ch 1, turn. Sc in each st across. (48 sts)
Row 29: Handle Opening Setup
Ch 1, turn. Sc in first 18 sts. Ch 12, skip 12 sts (this creates the opening for your ring handle). Sc in remaining 18 sts. (36 sc, 12 ch)
Row 30:
Ch 1, turn. Sc in each sc and each ch across. (48 sts)
Rows 31 and 32:
Ch 1, turn. Sc in each st across. (48 sts)
Fasten off and weave in ends.
Step by Step Crochet Pattern: Back Panel
Repeat Rows 1 through 32 exactly as written for the front panel. You now have two identical crescent-shaped pieces with matching handle openings.
Joining the Panels
Place both panels together with wrong sides facing inward and bobbles facing outward on both sides.
Starting at one upper corner near the handle opening, join yarn with a slip stitch. Work single crochet evenly around the entire curved edge, going through both layers to join them. Work approximately 3 sc for every 2 row ends along the sides and 1 sc in each stitch along the bottom curve.
When you reach the handle opening area, stop joining and work around each opening separately to create a clean finished edge. Then continue joining down the other side.
Fasten off and weave in all ends thoroughly.
Attaching the Ring Handle
Thread a long length of matching yarn onto your tapestry needle. Position the gold metal ring so approximately half of it shows above the bag.
Working from inside the bag, use whip stitches to secure the ring to the fabric around the handle opening. Space your stitches closely together for security.
Handle Wrapping:
To create that elegant wrapped section visible in the design, cut a 3-yard length of yarn. Starting at one edge where the ring meets the bag, wrap the yarn tightly around the ring, covering approximately one quarter of the visible ring. Secure the ends by threading them through existing stitches inside the bag.
Adding Hardware
The D-rings attach at the upper corners where the curve meets the edge. Fold a small crochet tab over each D-ring and stitch it securely to the inside of the bag at each corner.
Crochet Tab (make 2):
Ch 8. Sc in 2nd ch from hook and each ch across. (7 sts)
Fasten off, leaving a long tail for sewing.
Thread the tab through the D-ring, fold in half, and whip stitch to the inside corner of your bag.
Clip the chain strap to both D-rings. Add your decorative tassel and starfish charm to the ring handle or D-ring.
Optional Lining
For a polished finish and added durability, line your clutch with fabric. Trace your finished panel onto fabric, adding half an inch seam allowance. Cut two pieces. Sew them together along the curved edge, leaving the top open. Insert the fabric lining into the bag with wrong sides together. Hand stitch the lining to the inside edge of the handle opening.
Tips for Success with This Crochet Tutorial
Blocking matters. Before joining your panels, wet block them to ensure they match in size and the bobbles pop nicely.
Count your stitches. Especially in the increase rows. One missed increase throws off the symmetry.
Practice your bobbles first. Make a small swatch to get comfortable with the tension before committing to the full panel.
The chain strap is adjustable. Choose your preferred length or buy a longer chain and remove links as needed.
You Did It
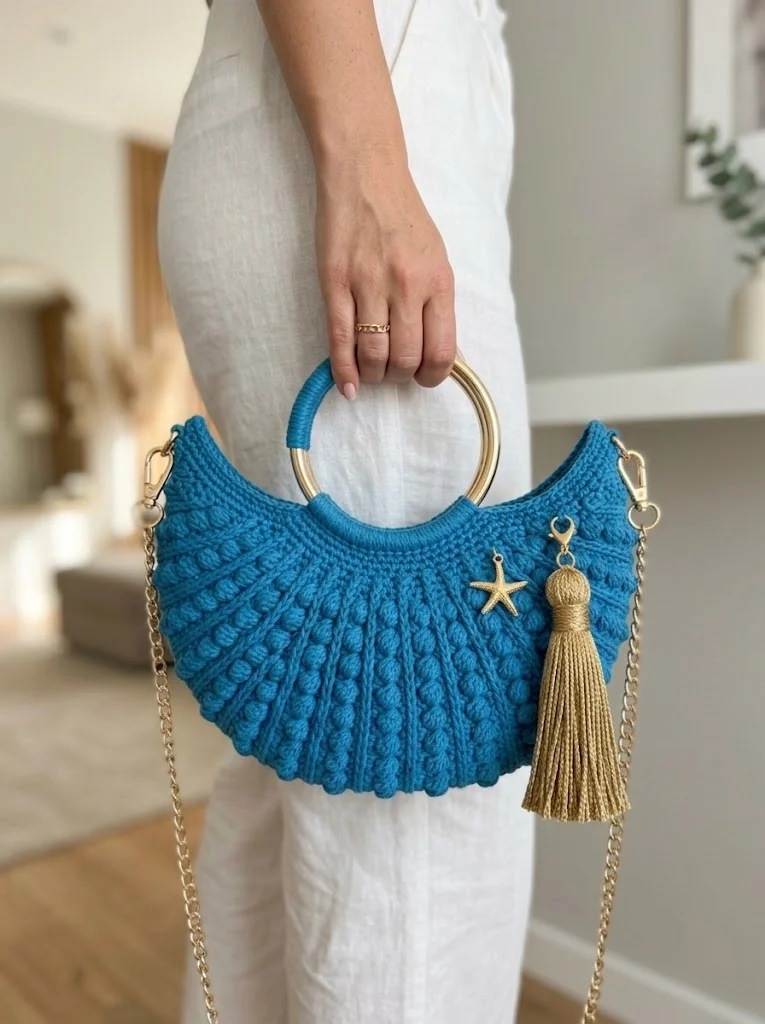
Congratulations on completing your Ocean Blue Ripple Moon Clutch. This bag is going to turn heads, and you made it with your own hands. That feeling never gets old for me, and I hope it feels just as good for you.
Thank you so much for trusting me with your crafting time. It genuinely means the world when someone chooses to make one of my patterns.
I would absolutely love to see your finished clutch. Tag me on Instagram or share in my Facebook group. Seeing your versions in different colors and with your own hardware choices is my favorite part of this whole thing.
Happy crocheting, friend.