Ocean Blue Ombre Drawstring Bucket Bag Free Crochet Pattern
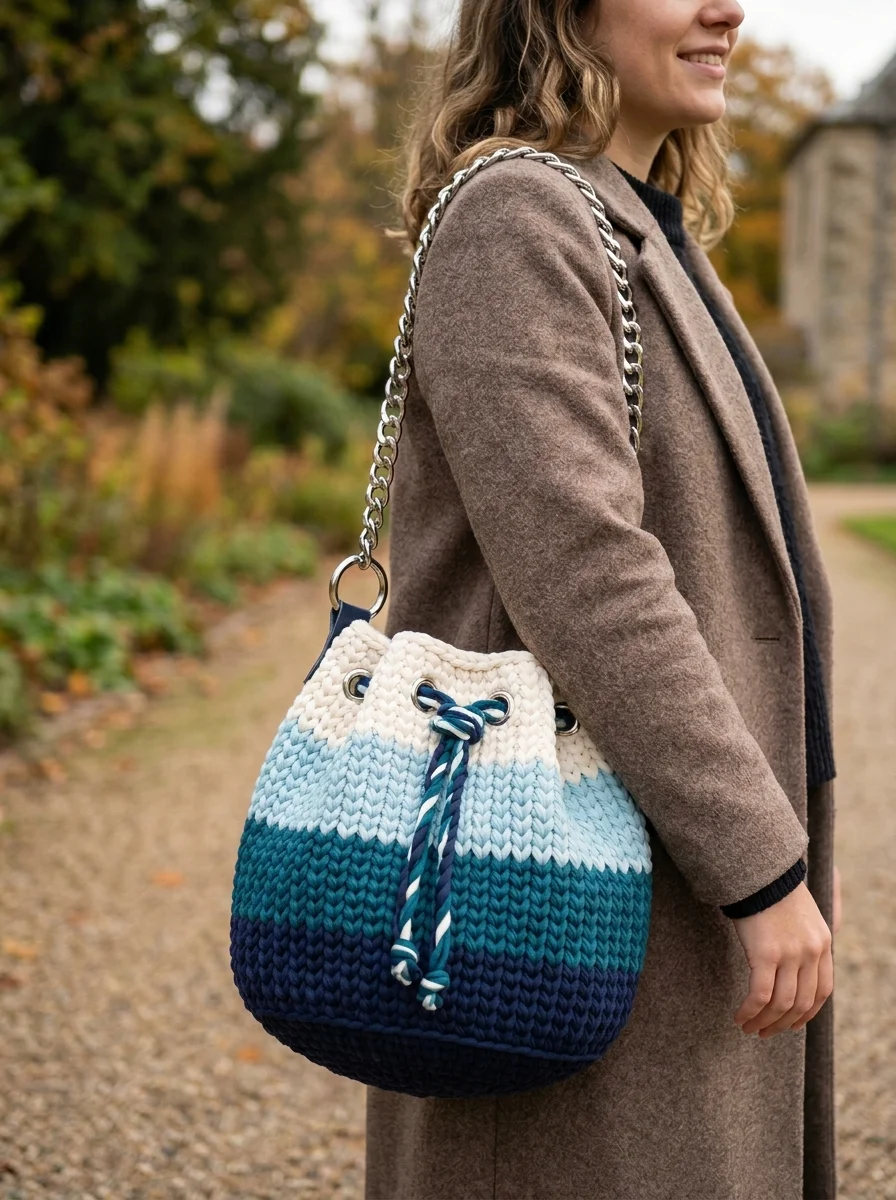
This stunning crochet bucket bag is about to become your new favorite accessory. The gorgeous ombre effect moves from deep navy through teal and light blue to creamy white, creating a bag that looks far more complicated than it actually is. If you can crochet in the round and know the waistcoat stitch, you can absolutely make this bag. And if you have never tried the waistcoat stitch before? I will walk you through it step by step.
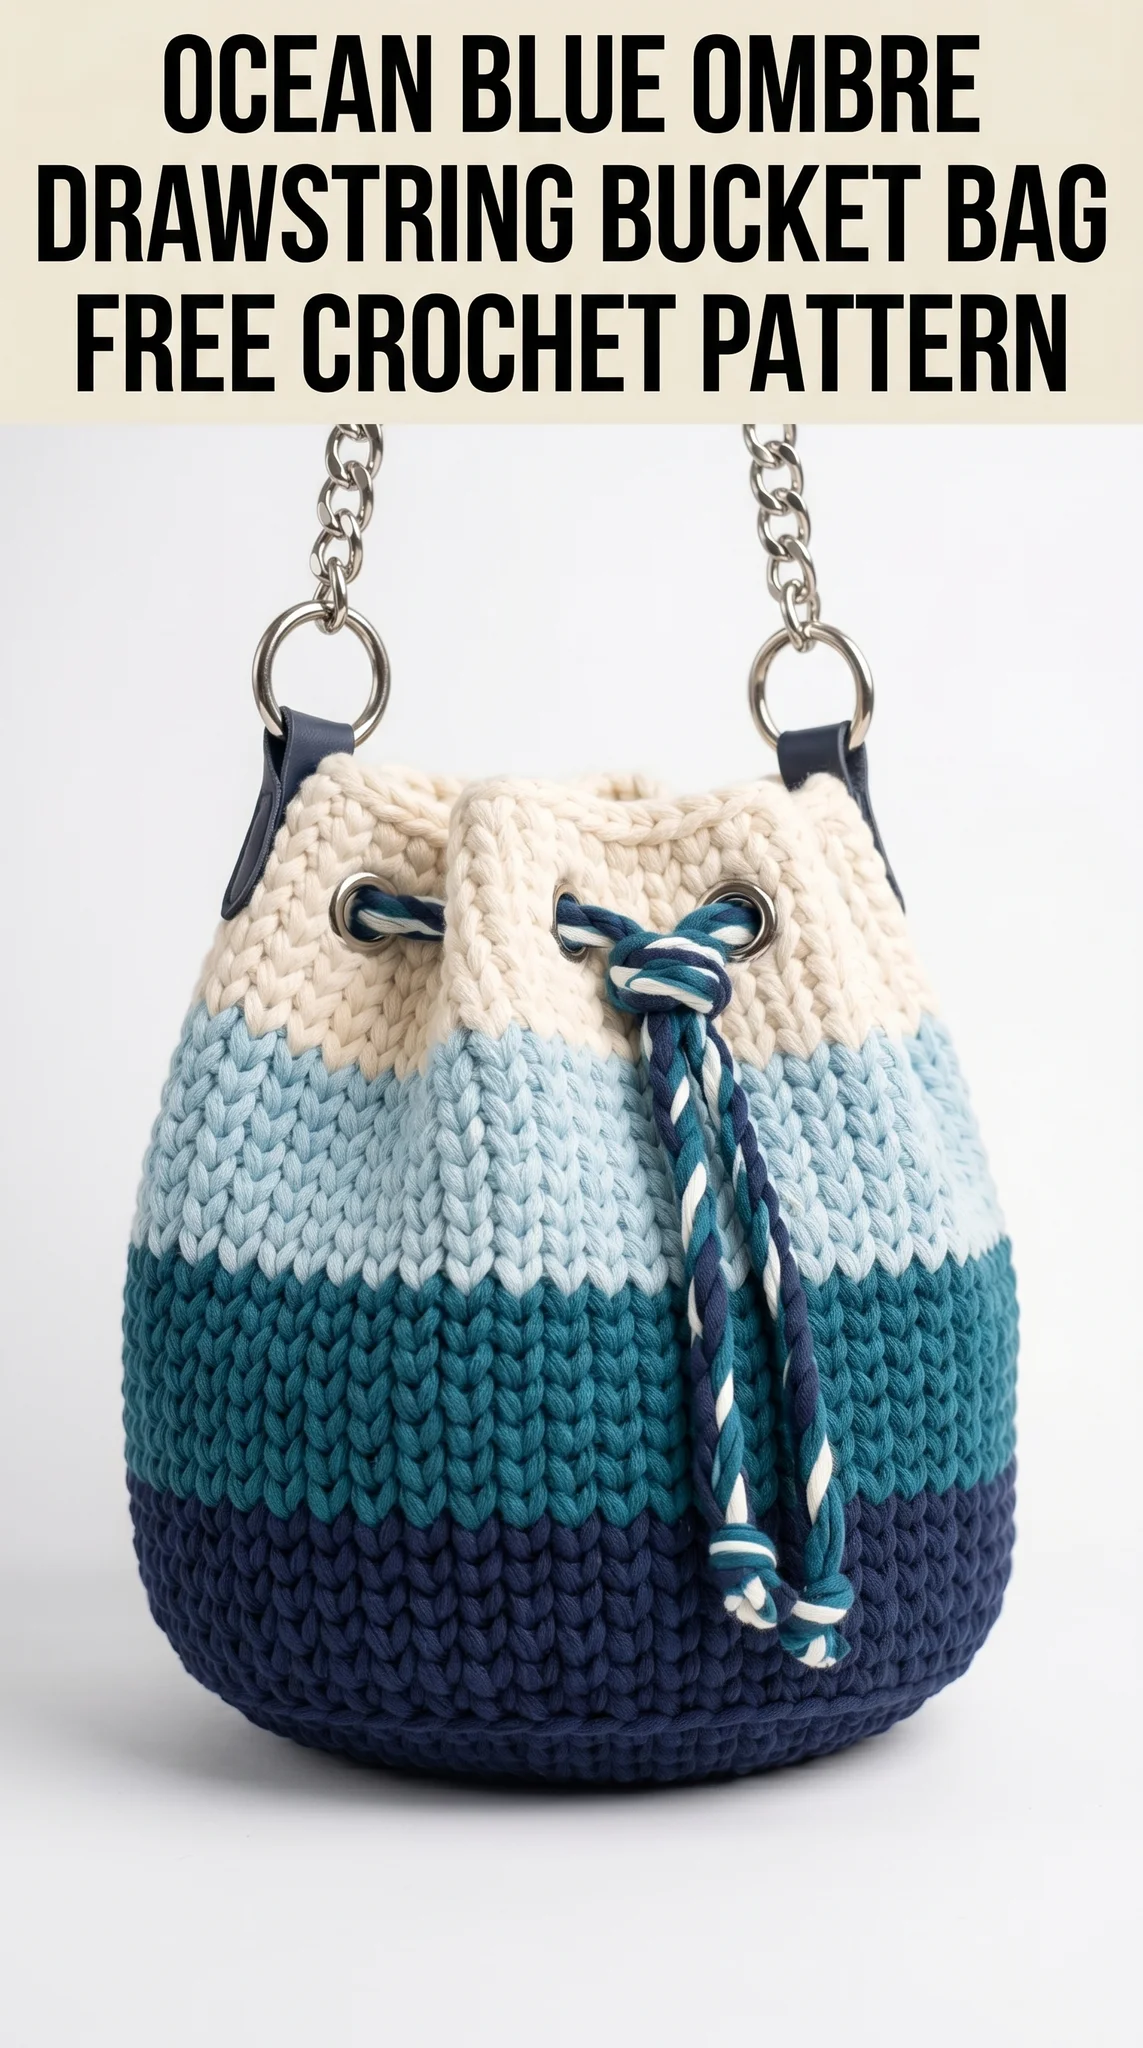
The waistcoat stitch (also called the knit stitch in crochet) gives this bag that beautiful knitted V appearance you see in the photo. It creates a dense, sturdy fabric that is perfect for bags because it holds its shape beautifully and nothing falls through the stitches. Combined with chunky cotton yarn and some stylish hardware, this bucket bag pattern creates a professional looking accessory you will be proud to carry everywhere.
Let me show you exactly how to make this Ocean Blue Ombre Drawstring Bucket Bag from start to finish.
What Makes This Crochet Bucket Bag Pattern Special
The first thing you notice about this bag is that knitted look. Most people assume this is knitted when they see it, which always makes me smile. That distinctive V texture comes from working into the center of each stitch rather than under the top loops. It is a simple adjustment that completely transforms the look of basic single crochet.
The color blocking is another standout feature. Four distinct color bands create that ombre gradient from dark to light. You could easily customize this with any color palette you love. Think sunset oranges and pinks, forest greens, or even a rainbow progression.
The hardware elevates this bag from homemade to boutique quality. Silver grommets, a chain strap, and leather tab connectors give it that polished, designer feel. Do not worry if hardware intimidates you. I will explain exactly how to install everything.
Materials Needed for Your Crochet Bucket Bag
Yarn:
I recommend Hoooked Ribbon XL, Yarn and Colors Urban, or similar chunky cotton yarn. The tube construction gives great stitch definition for the waistcoat stitch.
Hook:
Hardware and Notions:
Finished Dimensions:
Skill Level and Techniques Used
This crochet pattern is intermediate level. You should be comfortable with:
The waistcoat stitch might be new to you, but it is simply a variation of single crochet. I will explain it thoroughly below.
Abbreviations and Stitch Definitions
ch = chain: Wrap yarn over hook, pull through loop on hook.
sc = single crochet: Insert hook, yarn over, pull up loop (2 loops on hook), yarn over, pull through both loops.
ws = waistcoat stitch: This is a single crochet worked into the center V of the stitch below, rather than under the top two loops. Insert your hook between the two vertical bars that form the V shape in the middle of the stitch. Complete as a normal single crochet. This creates that knitted appearance.
inc = increase: Work 2 stitches into the same stitch.
sl st = slip stitch: Insert hook, yarn over, pull through stitch and loop on hook in one motion.
st(s) = stitch(es)
rnd = round
Understanding the Waistcoat Stitch (Knit Stitch)
Before we begin, let me explain this stitch more thoroughly because it is the key to this entire bag.
When you look at a completed single crochet stitch from the front, you see two things: the top loops (that horizontal V on top) and a vertical V shape in the body of the stitch. Most crochet goes under those top loops. For the waistcoat stitch, you ignore the top loops completely and instead push your hook directly into the center of that vertical V.
It feels a bit strange at first. Your hook goes straight into the stitch rather than sliding under loops. The fabric is denser and tighter, which is exactly what we want for a bag.
Tip: Work slightly looser than usual. The waistcoat stitch naturally tightens up the fabric. If you are a tight crocheter, consider going up a hook size.
Crochet Bucket Bag Pattern Instructions
Base of the Bag
The base is worked in continuous rounds. Use a stitch marker to track your round beginnings.
With Color A (navy):
Rnd 1: Create a magic ring. Work 6 sc into the ring. Pull tight. (6 sts)
Rnd 2: Inc in each st around. (12 sts)
Rnd 3: *Sc 1, inc* repeat around. (18 sts)
Rnd 4: *Sc 2, inc* repeat around. (24 sts)
Rnd 5: *Sc 3, inc* repeat around. (30 sts)
Rnd 6: *Sc 4, inc* repeat around. (36 sts)
Rnd 7: *Sc 5, inc* repeat around. (42 sts)
Rnd 8: *Sc 6, inc* repeat around. (48 sts)
Rnd 9: *Sc 7, inc* repeat around. (54 sts)
Rnd 10: *Sc 8, inc* repeat around. (60 sts)
Rnd 11: *Sc 9, inc* repeat around. (66 sts)
Rnd 12: *Sc 10, inc* repeat around. (72 sts)
Your base should measure approximately 18cm (7 inches) across. If your base is smaller, add another increase round. If larger, stop one round earlier.
Body of the Bag — Waistcoat Stitch Section
Now we switch to the waistcoat stitch and work straight up without increasing. This is where your bag takes shape.
Still with Color A (navy):
Rnd 13: Working in waistcoat stitch only from this point forward, ws in each st around. Do not increase. (72 sts)
Rnds 14-20: Ws in each st around. (72 sts) — 7 rounds total in navy
At the end of Rnd 20, change to Color B (teal). To change colors cleanly, complete the last stitch of the round with your new color. Pull the new yarn through for the final yarn over.
Color B (teal):
Rnds 21-27: Ws in each st around. (72 sts) — 7 rounds total in teal
Change to Color C (light blue) at end of Rnd 27.
Color C (light blue):
Rnds 28-34: Ws in each st around. (72 sts) — 7 rounds total in light blue
Change to Color D (cream) at end of Rnd 34.
Color D (cream):
Rnds 35-44: Ws in each st around. (72 sts) — 10 rounds total in cream
The cream section is slightly taller because this is where the drawstring closure and grommets will go.
Rnd 45: Sl st in each st around to create a finished edge. Fasten off and weave in all ends securely.
Creating the Drawstring Cord
For the twisted cord drawstring, you will need approximately 2 meters each of Color A (navy) and Color D (cream).
Step 1: Cut two lengths of each color, each about 2 meters long. You will have 4 strands total.
Step 2: Hold all 4 strands together and tie a knot at each end.
Step 3: Secure one end (close it in a drawer or have someone hold it). Twist the strands clockwise until they are very tightly wound and start to kink.
Step 4: Fold the twisted cord in half, keeping tension. The cord will naturally twist back on itself, creating a neat twisted rope.
Step 5: Tie knots at both ends to secure. Trim any uneven ends.
Your finished cord should be approximately 90cm long. This gives enough length to thread through the grommets with decorative tails hanging.
Installing the Hardware
Grommets
Placement: Position 6 grommets evenly around the cream section, approximately 3 rounds down from the top edge. This means between Rnds 41 and 42.
Spacing: With 72 stitches in your round, place a grommet every 12 stitches for even spacing.
Installation:
1. Mark your grommet positions with pins or scrap yarn.
2. Using sharp scissors, carefully cut small holes at each marking. Cut just large enough for the grommet barrel.
3. Insert the grommet from the right side of the bag.
4. Place the washer on the inside.
5. Use your grommet setting tool to secure. Apply firm pressure to crimp the grommet closed.
Tip: Practice on a swatch first if you have never installed grommets. Once you cut the hole, there is no going back.
Leather Tabs and Chain Strap
The leather connector tabs attach at the top edge of the bag, one on each side.
Step 1: Position one tab on each side of the bag opening, directly opposite each other.
Step 2: The tabs typically have holes for rivets or screws. Push them through the crochet fabric and secure according to your hardware instructions.
Step 3: Attach your D-rings or O-rings to the tabs.
Step 4: Connect your chain strap to both rings.
If you cannot find leather tabs, you can crochet small straps instead. Chain 15, sc in each chain across, fold in half around your ring, and sew to the bag.
Threading the Drawstring
Weave your twisted cord in and out through the grommets. Start at the front of the bag, go out through one grommet, in through the next, and continue all the way around. Both cord ends should exit at the front.
Pull the cord to cinch the bag closed. The decorative twisted tails hang at the front as shown in the photo. You can add beads or tassels to the cord ends for extra flair.
Finishing Touches and Care Tips
Weave in all ends on the wrong side of your work. For bags, I recommend weaving ends through at least 3 inches of stitches and doubling back for security.
Block if needed. Wet blocking can help even out your stitches. Soak the bag in cool water, squeeze out excess (do not wring), and stuff with plastic bags to shape while drying.
Caring for your bag: Spot clean with mild soap and cool water. If the bag needs a full wash, hand wash gently and reshape while drying. Remove hardware if possible before washing.
Customization Ideas for This Crochet Tutorial
The beauty of this step by step crochet pattern is how easily you can make it your own:
Troubleshooting Common Issues
Bag is too floppy: This usually means your tension is too loose. Try a smaller hook or add a fabric lining for structure.
Waistcoat stitch looks uneven: This gets better with practice. Your first few rounds might look a bit wonky, but the stitches even out as you go.
Color changes show a jog: In continuous rounds, color changes create a small step or jog. This is normal and barely visible in chunky yarn. For a cleaner transition, you can work a jogless join technique.
Grommets are crooked: Measure twice, cut once. Use a fabric marker to plan placement before cutting any holes.

Wrapping Up Your Ocean Blue Ombre Bucket Bag
You did it. You now have everything you need to create this beautiful Ocean Blue Ombre Drawstring Bucket Bag crochet pattern from start to finish. The waistcoat stitch gives you that gorgeous knitted texture, the color gradient makes a statement, and the chain strap hardware takes it from craft project to designer accessory.
This beginner friendly bucket bag pattern works up faster than you might expect thanks to the chunky yarn. I made mine over a weekend, and that included multiple coffee breaks and some Netflix binging.
Thank you so much for choosing this pattern. I genuinely hope you love making this bag as much as I loved designing it. When you finish yours, I would absolutely love to see it. Tag me on Instagram or share in my Facebook group. Seeing your creations is honestly the best part of my job.
Happy crocheting, friend. You have got this.